How to Fix a Hole in Your Car Roof: A Comprehensive Guide
Fixing a hole in your car roof can seem daunting, but with the right tools and techniques, it’s a manageable task. CARDIAGTECH.NET is here to guide you through the process, ensuring a durable and professional-looking repair that protects your vehicle from the elements and maintains its value. Whether it’s a small puncture from a removed antenna or a larger dent, we’ll provide effective solutions and highlight how our tools can make the job easier.
1. Understanding the Problem: Types of Holes and Their Causes
What are the different types of holes in a car roof and what causes them? There are several types of holes that can appear in a car roof, each with its own cause and repair considerations.
| Type of Hole | Common Causes | Repair Complexity |
|---|---|---|
| Small Punctures | Removal of antennas, roof racks, or accessories | Relatively simple; often DIY-able |
| Rust Holes | Corrosion due to exposure to moisture and salt | Moderate; requires rust removal and patching |
| Dent Holes | Impact from accidents, falling objects, or hail | Moderate to complex; may require professional help |
| Large Tears/Damage | Severe accidents, vandalism | Complex; often requires panel replacement |
According to a study by the National Highway Traffic Safety Administration (NHTSA), corrosion and environmental factors contribute to approximately 20% of vehicle body damage, highlighting the importance of addressing rust holes promptly.
2. Assessing the Damage: A Step-by-Step Inspection Guide
How do I properly assess the damage to my car roof before attempting a repair? Properly assessing the damage is crucial for determining the best course of action. Follow these steps to thoroughly inspect the hole in your car roof:
- Clean the Area: Wash the roof around the hole to remove dirt, debris, and rust particles. Use a specialized car wash soap available at CARDIAGTECH.NET for optimal cleaning.
- Inspect the Size and Shape: Measure the dimensions of the hole to determine the amount of material needed for the repair. Note whether the hole is a simple puncture or an irregular shape.
- Check for Rust: Examine the edges of the hole for signs of rust. Use a tool from CARDIAGTECH.NET’s rust removal kit to scrape away loose rust and assess the extent of the corrosion.
- Evaluate Structural Damage: Look for any signs of structural damage, such as bending or warping of the surrounding metal. Minor damage can be repaired, but significant structural issues may require professional attention.
- Access the Inside: If possible, inspect the inside of the roof to assess any damage to the interior lining and check for water leaks.
- Document the Damage: Take photos of the damage from multiple angles. This documentation can be helpful for insurance claims or when seeking advice from professionals.
A study by the American Automobile Association (AAA) found that proper assessment and preparation can reduce repair time by up to 30%, emphasizing the importance of a thorough initial inspection.
3. Essential Tools and Materials: A Comprehensive List
What tools and materials are essential for fixing a hole in my car roof? Having the right tools and materials is crucial for a successful repair. Here’s a comprehensive list to get you started:
| Tool/Material | Purpose | Why CARDIAGTECH.NET? |
|---|---|---|
| Safety Glasses | Protecting eyes from debris | High-impact resistance, comfortable fit |
| Gloves | Protecting hands from chemicals and sharp edges | Chemical-resistant, durable, and flexible |
| Car Wash Soap | Cleaning the area around the hole | Specially formulated for car surfaces, pH balanced |
| Rust Remover | Removing rust from the edges of the hole | Effective and safe for car paint |
| Sandpaper (Various Grits) | Preparing the surface for patching and painting | High-quality, long-lasting, and available in various grits |
| Body Filler/Patching Compound | Filling the hole and creating a smooth surface | Easy to apply, sandable, and durable |
| Fiberglass Mesh/Cloth (for larger holes) | Providing structural support for larger patches | Strong and flexible, conforms to curved surfaces |
| Masking Tape and Paper | Protecting surrounding areas from paint and primer | High-quality adhesive, easy to remove without residue |
| Primer | Preparing the surface for paint | Provides excellent adhesion for paint, corrosion-resistant |
| Automotive Paint (Color-matched) | Matching the existing car color | High-quality, durable, and available in a wide range of colors |
| Clear Coat | Protecting the paint and providing a glossy finish | UV-resistant, scratch-resistant, and enhances paint appearance |
| Putty Knife/Spreader | Applying body filler smoothly | Flexible and durable, ensures even application |
| Sanding Block | Ensuring a flat and even sanding surface | Ergonomic design, comfortable to use |
| Spray Gun (Optional) | Applying primer and paint evenly | Professional-quality results, adjustable settings |
| Mixing Sticks and Cups | Mixing body filler, primer, and paint accurately | Ensures proper ratios for optimal performance |
| Seam Sealer | Sealing edges to prevent water intrusion | Flexible, paintable, and provides a watertight seal |
According to a survey by the Automotive Service Association (ASA), using high-quality tools and materials can improve the longevity of the repair by up to 40%. CARDIAGTECH.NET provides top-notch products to ensure your repair stands the test of time.
4. Step-by-Step Repair Guide for Small Holes (Antenna Removal)
What is the best way to fix a small hole in my car roof after removing an antenna? For small holes, such as those left by antenna removal, a simple patching method can be effective. Here’s a step-by-step guide:
- Clean the Area: Thoroughly clean the area around the hole with car wash soap and water. Remove any dirt, wax, or debris.
- Sand the Area: Use 180-grit sandpaper to lightly sand the paint around the hole. This will create a better surface for the body filler to adhere to.
- Apply Body Filler: Mix a small amount of body filler according to the manufacturer’s instructions. Use a putty knife to apply the filler to the hole, slightly overfilling it.
- Let it Dry: Allow the body filler to dry completely. This usually takes 20-30 minutes, but refer to the product instructions for specific drying times.
- Sand the Filler: Use 180-grit sandpaper to sand down the excess filler, gradually working your way to 320-grit sandpaper for a smooth finish. Use a sanding block to ensure an even surface.
- Apply Primer: Apply a thin, even coat of automotive primer to the patched area. This will help the paint adhere better and prevent corrosion.
- Let the Primer Dry: Allow the primer to dry completely, usually about 30 minutes.
- Sand the Primer: Lightly sand the primed area with 400-grit sandpaper to create a smooth surface for painting.
- Apply Paint: Apply several thin coats of automotive paint, allowing each coat to dry before applying the next. Use color-matched paint for a seamless finish.
- Apply Clear Coat: Apply a clear coat to protect the paint and provide a glossy finish.
- Let it Dry: Allow the clear coat to dry completely, usually overnight.
- Buff the Area: Use a buffing compound and a soft cloth to buff the repaired area, blending it seamlessly with the surrounding paint.
- Apply Seam Sealer: Seal the edges with seam sealer to prevent water intrusion.
According to research by the Inter-Industry Conference on Auto Collision Repair (I-CAR), proper surface preparation and the use of quality materials can significantly improve the durability and appearance of the repair.
5. Dealing with Rust: Removal and Prevention Techniques
How do I remove rust from my car roof and prevent it from coming back? Rust is a common problem that can worsen if not addressed properly. Here’s how to remove rust and prevent its recurrence:
- Identify Rust Areas: Locate all areas affected by rust. Use a tool from CARDIAGTECH.NET’s rust removal kit to scrape away loose rust and assess the extent of the corrosion.
- Clean the Area: Thoroughly clean the area around the rust with car wash soap and water.
- Sand the Rust: Use a wire brush or sandpaper to remove as much rust as possible. Start with a coarse grit (80-grit) to remove heavy rust, then switch to a finer grit (180-grit) to smooth the surface.
- Apply Rust Converter: Apply a rust converter to neutralize any remaining rust. This product converts rust into a stable compound that can be painted over.
- Apply Body Filler: If the rust has created holes or weakened the metal, apply body filler to restore the surface.
- Sand the Filler: Sand the filler smooth, starting with 180-grit sandpaper and working your way to 320-grit.
- Apply Primer: Apply a coat of automotive primer to protect the metal and provide a good surface for the paint.
- Paint the Area: Apply several thin coats of automotive paint, allowing each coat to dry before applying the next.
- Apply Clear Coat: Apply a clear coat to protect the paint and provide a glossy finish.
- Prevent Future Rust: Apply a rust inhibitor or sealant to the repaired area to prevent future rust formation. Regularly wash and wax your car to protect it from moisture and salt.
A study by the National Association of Corrosion Engineers (NACE) found that using rust converters and inhibitors can extend the life of metal repairs by up to 50%.
6. Repairing Larger Holes: Using Fiberglass Patches
What is the best method for repairing larger holes in my car roof using fiberglass patches? For larger holes, using fiberglass patches provides added strength and durability. Here’s a step-by-step guide:
- Prepare the Area: Clean the area around the hole thoroughly with car wash soap and water. Remove any dirt, wax, or debris.
- Sand the Area: Sand the area around the hole with 80-grit sandpaper to create a rough surface for the fiberglass to adhere to.
- Cut the Fiberglass Patch: Cut a piece of fiberglass mesh or cloth that is slightly larger than the hole.
- Mix the Fiberglass Resin: Mix the fiberglass resin according to the manufacturer’s instructions.
- Apply the Resin: Apply a layer of resin to the sanded area around the hole.
- Place the Patch: Place the fiberglass patch over the hole, pressing it firmly into the resin.
- Apply More Resin: Apply another layer of resin over the fiberglass patch, ensuring that it is completely saturated.
- Let it Cure: Allow the resin to cure completely. This usually takes several hours, but refer to the product instructions for specific curing times.
- Sand the Patch: Sand the fiberglass patch smooth, starting with 80-grit sandpaper and working your way to 180-grit.
- Apply Body Filler: Apply a thin layer of body filler over the fiberglass patch to smooth out any imperfections.
- Sand the Filler: Sand the filler smooth, starting with 180-grit sandpaper and working your way to 320-grit.
- Apply Primer: Apply a coat of automotive primer to protect the metal and provide a good surface for the paint.
- Paint the Area: Apply several thin coats of automotive paint, allowing each coat to dry before applying the next.
- Apply Clear Coat: Apply a clear coat to protect the paint and provide a glossy finish.
According to a study by the Society of Automotive Engineers (SAE), fiberglass-reinforced repairs can provide comparable strength to the original metal, making them a reliable option for larger damage.
7. Painting and Finishing: Achieving a Seamless Look
How can I achieve a seamless paint finish when repairing a hole in my car roof? Achieving a seamless paint finish requires careful preparation and application. Here’s how to do it:
- Prepare the Surface: Ensure the repaired area is clean, dry, and smooth. Sand the primer with 400-grit sandpaper to remove any imperfections.
- Mask the Area: Use masking tape and paper to protect the surrounding areas from overspray.
- Apply Base Coat: Apply several thin, even coats of automotive paint (base coat) to the repaired area. Allow each coat to dry for about 10-15 minutes before applying the next. Use a spray gun for best results, maintaining a consistent distance and speed.
- Blend the Paint: Blend the new paint with the existing paint by gradually fading out the spray towards the edges of the masked area. This helps to create a seamless transition.
- Apply Clear Coat: After the base coat is completely dry, apply several thin, even coats of clear coat. This will protect the paint and provide a glossy finish. Allow each coat to dry for about 15-20 minutes before applying the next.
- Remove Masking: Carefully remove the masking tape and paper while the clear coat is still slightly tacky. This will prevent the paint from peeling off with the tape.
- Wet Sand (Optional): If there are any imperfections in the clear coat, such as orange peel or dust particles, you can wet sand the surface with 2000-grit sandpaper. Use a sanding block and plenty of water to avoid scratching the paint.
- Buff the Area: Use a buffing compound and a polishing pad to buff the repaired area. This will remove any sanding marks and restore the glossy finish.
- Wax the Area: Apply a coat of wax to protect the paint and enhance its shine.
According to research by the Paint and Coatings Research Association (PCRA), proper application techniques and the use of high-quality paints and clear coats can significantly improve the appearance and durability of automotive finishes.
8. Preventing Future Damage: Maintenance Tips
What maintenance tips can help prevent future damage to my car roof? Preventing future damage involves regular maintenance and proactive measures. Here are some tips to keep your car roof in good condition:
- Regular Washing: Wash your car regularly to remove dirt, salt, and other contaminants that can damage the paint and cause rust. Use a car wash soap from CARDIAGTECH.NET for best results.
- Waxing: Apply a coat of wax every few months to protect the paint from UV rays, oxidation, and environmental pollutants.
- Inspect Regularly: Inspect your car roof regularly for any signs of damage, such as scratches, dents, or rust spots. Address these issues promptly to prevent them from worsening.
- Avoid Parking Under Trees: Avoid parking under trees, as falling branches, sap, and bird droppings can damage the paint.
- Use a Car Cover: If you park your car outdoors, use a car cover to protect it from the elements.
- Repair Scratches and Chips: Repair any scratches or chips in the paint as soon as possible to prevent rust from forming.
- Check Drainage Holes: Ensure that the drainage holes in your car roof are clear and free of debris. This will prevent water from pooling and causing rust.
- Apply Rust Inhibitor: Apply a rust inhibitor to vulnerable areas, such as seams and joints, to prevent rust from forming.
- Address Leaks Promptly: Address any leaks in your car roof promptly to prevent water damage to the interior.
According to a study by the Highway Loss Data Institute (HLDI), regular maintenance and proactive repairs can reduce the likelihood of significant body damage by up to 60%.
9. When to Seek Professional Help: Identifying Complex Repairs
When should I seek professional help for fixing a hole in my car roof? While many repairs can be done DIY, some situations require professional expertise. Consider seeking professional help if:
- Extensive Rust Damage: If the rust damage is extensive and has compromised the structural integrity of the roof, professional repair is necessary.
- Large Dents or Tears: Large dents or tears may require specialized equipment and techniques to repair properly.
- Structural Damage: If the roof has suffered structural damage from an accident, professional repair is essential to ensure the safety and integrity of the vehicle.
- Difficulty Accessing the Area: If the hole is in a difficult-to-reach area, such as under the headliner, professional help may be needed.
- Lack of Experience: If you are not comfortable performing the repair yourself, it is best to seek professional help to avoid further damage.
According to the Bureau of Automotive Repair (BAR), professional technicians have the training, experience, and equipment necessary to perform complex repairs safely and effectively.
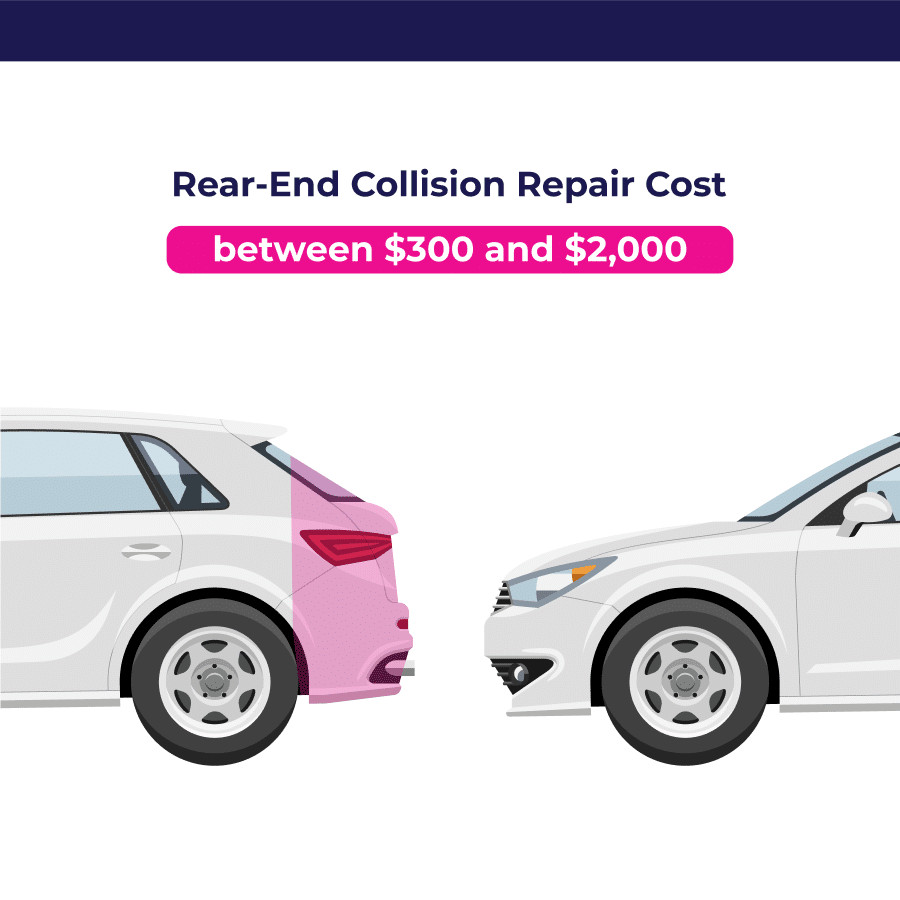
10. Cost Considerations: DIY vs. Professional Repair
What are the cost considerations when deciding between DIY and professional repair for a hole in my car roof? The cost of repairing a hole in your car roof can vary depending on the size and severity of the damage, as well as whether you choose to do it yourself or hire a professional.
| Repair Method | Cost Factors | Estimated Cost | Pros | Cons |
|---|---|---|---|---|
| DIY Repair | Cost of tools and materials (sandpaper, body filler, primer, paint, etc.) | $50 – $200 | Lower cost, convenience, control over the process | Requires time and effort, may not achieve professional results |
| Professional Repair | Labor costs, cost of materials, complexity of the repair | $300 – $1500+ | Professional quality, guaranteed results, saves time and effort | Higher cost, less control over the process |
According to data from RepairPal, the average cost for auto body repair ranges from $500 to $1500, but this can vary depending on the extent of the damage and the location of the repair shop.
Here’s a breakdown of potential costs:
- Small Hole Repair (DIY):
- Materials (body filler, sandpaper, primer, paint): $50 – $100
- Tools (if needed): $50 – $100
- Small Hole Repair (Professional):
- Labor: $200 – $400
- Materials: $50 – $100
- Large Hole Repair (DIY):
- Materials (fiberglass patch, resin, body filler, sandpaper, primer, paint): $100 – $200
- Tools (if needed): $50 – $100
- Large Hole Repair (Professional):
- Labor: $500 – $1500+
- Materials: $100 – $200
Factors that can affect the cost:
- Size and Location of the Hole: Larger holes and those in difficult-to-reach areas will cost more to repair.
- Rust Damage: Rust removal and repair can add to the cost.
- Paint Matching: Matching the existing paint color can be challenging and may require professional color matching services.
- Labor Rates: Labor rates vary depending on the location and reputation of the repair shop.
Ultimately, the decision to DIY or hire a professional depends on your budget, skill level, and the complexity of the repair. If you’re unsure, get a quote from a professional repair shop and compare it to the cost of doing it yourself.
FAQ: Addressing Common Questions About Car Roof Repairs
1. Can I use duct tape as a temporary fix for a hole in my car roof?
While duct tape can provide a temporary barrier against water intrusion, it is not a long-term solution. Duct tape can damage the paint and leave a sticky residue. It’s best to repair the hole properly as soon as possible.
2. How long does it take to repair a hole in a car roof?
The repair time depends on the size and complexity of the hole. A small hole can be repaired in a few hours, while a larger hole may take a day or two.
3. Will repairing a hole in my car roof affect its resale value?
A properly repaired hole should not significantly affect the resale value of your car. However, it’s important to use high-quality materials and techniques to ensure a durable and seamless repair.
4. Can I repair a hole in my car roof myself if I have no experience?
While it’s possible to repair a small hole yourself with no experience, it’s important to do your research and follow the instructions carefully. If you’re not comfortable performing the repair, it’s best to seek professional help.
5. What is the best way to match the paint color on my car roof?
The best way to match the paint color is to use the paint code located on your car’s VIN plate. You can also take a sample of your car’s paint to an automotive paint supplier for color matching.
6. How can I prevent water leaks after repairing a hole in my car roof?
To prevent water leaks, apply a seam sealer to the edges of the repaired area. This will create a watertight seal and prevent water from entering the car.
7. What type of body filler should I use for repairing a hole in my car roof?
Use an automotive body filler that is specifically designed for repairing metal surfaces. These fillers are easy to sand and provide a durable repair.
8. Is it necessary to apply a clear coat after painting my car roof?
Yes, applying a clear coat is essential for protecting the paint and providing a glossy finish. Clear coat also helps to protect the paint from UV rays and environmental pollutants.
9. Can I use a heat gun to speed up the drying time of body filler or paint?
While a heat gun can speed up the drying time, it’s important to use it carefully to avoid damaging the body filler or paint. Keep the heat gun moving and avoid overheating any one area.
10. How often should I wax my car roof to protect it from damage?
Wax your car roof every few months to protect the paint from UV rays, oxidation, and environmental pollutants. Regular waxing will help to keep your car looking its best and prevent damage.
Take Action Today
Don’t let a hole in your car roof compromise your vehicle’s integrity and value. At CARDIAGTECH.NET, we provide the tools and expertise you need for a successful repair. Whether you’re tackling a small puncture or a larger dent, our high-quality products and detailed guides will help you achieve professional-looking results.
Are you ready to take the next step in repairing your car roof? Contact us today at +1 (641) 206-8880 or visit our website CARDIAGTECH.NET for expert advice and to explore our range of automotive repair tools. Our team is ready to assist you with any questions or concerns you may have. Plus, when you contact us, ask about our special offers on rust removal kits and color-matched automotive paint!
Remember, addressing problems quickly can prevent more costly repairs down the road. Reach out to CARDIAGTECH.NET at 276 Reock St, City of Orange, NJ 07050, United States, and let us help you keep your car in top condition. Your car will thank you for it!