How To Fix Interior Rattles In Car: A Comprehensive Guide
Interior rattles in a car can be incredibly annoying, turning a pleasant drive into a frustrating experience. This comprehensive guide from CARDIAGTECH.NET provides expert techniques and professional tools to effectively diagnose and eliminate those irritating car interior noises, ensuring a smooth and quiet ride. Learn practical solutions, advanced diagnostic methods, and how CARDIAGTECH.NET can help you achieve a rattle-free driving experience.
1. Understanding the Causes of Interior Car Rattles
Interior rattles can stem from various sources within your vehicle’s cabin. Identifying the root cause is the first step toward effectively addressing these noises. Here’s a breakdown of common culprits:
- Loose Trim Pieces: Plastic trim, dashboard components, and door panels can loosen over time due to wear and tear, temperature fluctuations, or poor initial installation.
- Worn Fasteners: Screws, clips, and bolts that hold interior parts together can become loose or break, leading to movement and subsequent rattles.
- Cable and Wire Clatter: Cables and wiring harnesses behind the dashboard or under seats can vibrate against hard surfaces, producing irritating sounds.
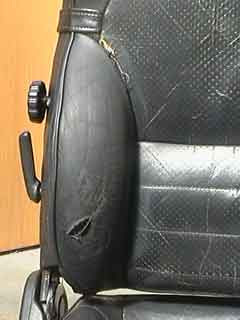
- Seat Mechanisms: Seat frames, springs, and adjustment levers can develop play, causing squeaks or rattles, especially when the vehicle is in motion.
- Glove Box and Center Console: Items stored in these compartments can shift and rattle if not properly secured. The doors or hinges themselves may also loosen.
- Headliner Issues: A sagging or detached headliner can create vibrations and noises, particularly around the edges or where it contacts the roof.
- Weather Stripping: Deteriorated or improperly installed weather stripping around doors and windows can cause air leaks and rattles.
- Aftermarket Installations: Poorly installed aftermarket accessories like stereos or alarms can introduce new rattle sources.
- Suspension Components: While technically not interior, vibrations from worn suspension parts can transmit into the cabin and amplify rattles.
Understanding these potential causes is crucial for systematically diagnosing and fixing interior rattles.
2. Essential Tools for Diagnosing Interior Rattles
To effectively diagnose and fix interior rattles, having the right tools is essential. Here’s a list of tools from CARDIAGTECH.NET that will help you pinpoint and eliminate those annoying noises:
-
Mechanic’s Stethoscope:
- A mechanic’s stethoscope allows you to listen closely to specific areas of the car’s interior while driving. This tool amplifies sounds, making it easier to identify the exact location of the rattle.
-
Trim Removal Tools:
- Plastic trim removal tools are designed to safely pry off interior panels without damaging the plastic or paint. These tools come in various shapes and sizes to accommodate different types of trim.
-
Inspection Mirror:
- An inspection mirror helps you see into tight spaces and behind panels without having to disassemble everything. This is particularly useful for checking wiring and fasteners.
-
Flashlight or Headlamp:
- Proper lighting is crucial for spotting loose components or wear marks. A bright flashlight or headlamp allows you to thoroughly inspect dark areas of the car’s interior.
-
Screwdriver Set:
- A set of screwdrivers, including Phillips head and flathead types, is necessary for tightening or removing screws that hold interior panels and components in place.
-
Socket Set:
- A socket set is useful for tightening or removing bolts that secure seats, consoles, and other larger interior parts.
-
Torque Wrench:
- When reassembling interior components, a torque wrench ensures that bolts are tightened to the manufacturer’s specifications, preventing over-tightening or under-tightening.
-
Sound Deadening Material:
- Dynamat or similar sound deadening materials can be applied to the back of interior panels to reduce vibrations and absorb noise.
-
Foam Padding or Tape:
- Foam padding or tape can be used to cushion contact points between panels and other components, preventing rattles.
-
Zip Ties or Velcro Straps:
- These can be used to secure loose wires or cables, preventing them from vibrating against other surfaces.
-
Lubricants:
- Silicone-based lubricants can be applied to hinges, latches, and other moving parts to eliminate squeaks and rattles.
-
Gloves:
- Wearing gloves protects your hands from dirt, grease, and sharp edges while working on the car’s interior.
-
Masking Tape:
- Masking tape can be used to temporarily secure components or mark areas that need attention.
-
Camera:
- Taking photos before and during disassembly can help you remember how everything goes back together.
Equipping yourself with these tools from CARDIAGTECH.NET will make the process of diagnosing and fixing interior rattles much more efficient and effective.
3. Step-by-Step Guide to Locating Interior Rattles
Finding the source of interior rattles can be challenging, but with a systematic approach, you can identify and address the problem effectively. Here’s a step-by-step guide:
3.1. Prepare the Vehicle
- Remove Loose Items: Start by removing all loose items from the car, including those in the glove box, center console, door pockets, and trunk.
- Secure Items: Ensure any remaining items are properly secured to prevent them from contributing to the noise.
3.2. Test Drive with a Purpose
- Enlist a Helper: Having a passenger can be invaluable. They can listen and pinpoint the noise while you focus on driving.
- Drive on Different Surfaces: Drive on smooth roads, bumpy roads, and over speed bumps to see if the rattle changes or worsens under specific conditions.
- Vary Speed and RPM: Experiment with different speeds and engine RPMs to see if the rattle is related to vehicle speed or engine vibrations.
3.3. Listen and Pinpoint
- Isolate the Area: Try to determine the general area where the rattle is coming from (e.g., dashboard, door, rear seats).
- Use a Mechanic’s Stethoscope: If you have a mechanic’s stethoscope, use it to listen closely to different areas of the interior while driving. This can help you narrow down the exact location of the rattle.
3.4. Inspect the Interior
- Check Trim Pieces: Press on different trim pieces to see if you can replicate the rattle. Pay close attention to areas where plastic meets plastic or plastic meets metal.
- Examine Fasteners: Look for loose or missing screws, clips, and bolts. Use a screwdriver or socket set to tighten any loose fasteners.
- Inspect Wiring: Check for loose wiring or cables that could be vibrating against other surfaces. Secure them with zip ties or Velcro straps.
- Check Seats: Wiggle the seats to see if they are loose or if the seat frame is rattling. Inspect the seat adjustment mechanisms for play.
- Glove Box and Console: Open and close the glove box and center console to check for loose hinges or latches. Also, ensure that the doors fit snugly.
- Headliner: Gently push on the headliner to check for sagging or loose areas.
- Weather Stripping: Inspect the weather stripping around the doors and windows for damage or improper installation.
3.5. Replicate the Rattle
- Stationary Test: With the car parked, try to replicate the rattle by tapping or shaking different interior components.
- Engine Revving: Rev the engine to see if engine vibrations are causing the rattle.
- Door Slamming: Slam the doors to check for loose panels or components.
3.6. Document Your Findings
- Take Notes: Keep a detailed record of where you suspect the rattle is coming from and what conditions make it worse.
- Take Photos: Use a camera to document loose or damaged components. This can be helpful when you start making repairs.
By following these steps, you can systematically identify the source of interior rattles and take appropriate action to fix them.
4. DIY Techniques to Fix Common Interior Rattles
Once you’ve identified the source of the rattle, you can use various DIY techniques to eliminate it. Here are some common solutions:
4.1. Tightening Loose Fasteners
- Identify Loose Screws/Bolts: Inspect the area around the rattle for loose screws, bolts, or clips.
- Tighten Fasteners: Use the appropriate screwdriver or socket to tighten the loose fasteners. Be careful not to overtighten, which could strip the threads or break the plastic.
- Replace Damaged Fasteners: If any fasteners are damaged, replace them with new ones of the same size and type.
4.2. Cushioning Contact Points
- Apply Foam Padding: Cut small pieces of foam padding and place them between contacting surfaces to cushion them and prevent rattles.
- Use Felt Tape: Apply felt tape to the edges of trim pieces or panels that are rubbing against each other.
- Secure Wiring: Use zip ties or Velcro straps to secure loose wiring and prevent it from vibrating against other surfaces.
4.3. Sound Deadening
- Apply Sound Deadening Material: Cut Dynamat or similar sound deadening material to fit the back of interior panels. This will reduce vibrations and absorb noise.
- Ensure Proper Coverage: Make sure the sound deadening material is properly adhered to the panel for maximum effectiveness.
4.4. Lubricating Moving Parts
- Apply Silicone Lubricant: Use a silicone-based lubricant to lubricate hinges, latches, and other moving parts that may be causing squeaks or rattles.
- Target Lubrication: Apply the lubricant sparingly and wipe away any excess to prevent attracting dust and dirt.
4.5. Replacing Worn Components
- Weather Stripping: If the weather stripping around the doors or windows is damaged, replace it with new weather stripping.
- Clips and Fasteners: Replace any broken or missing clips and fasteners to ensure that interior panels are securely attached.
4.6. Adjusting Latches and Hinges
- Loosen the Latch/Hinge: Use a screwdriver or socket to loosen the latch or hinge that is causing the rattle.
- Adjust the Position: Adjust the position of the latch or hinge until it fits snugly and does not rattle.
- Tighten the Fasteners: Tighten the fasteners securely, but be careful not to overtighten.
4.7. Securing Items in Storage Compartments
- Use Organizers: Use organizers or dividers in the glove box and center console to prevent items from shifting and rattling.
- Line with Foam: Line the bottom of storage compartments with foam padding to cushion items and reduce noise.
By using these DIY techniques, you can often eliminate common interior rattles and enjoy a quieter, more comfortable ride.
5. Advanced Diagnostic Techniques for Persistent Rattles
Sometimes, simple DIY fixes aren’t enough to eliminate persistent interior rattles. In such cases, advanced diagnostic techniques may be necessary. Here are some methods to try:
5.1. Chassis Ears
- Description: Chassis ears are electronic devices with multiple microphones that can be attached to different locations on the vehicle. These microphones transmit sound to a central receiver, allowing you to listen to each location individually while driving.
- Application: Place the microphones in various areas of the interior, such as behind the dashboard, inside door panels, or under the seats. Drive the car and switch between the microphones to pinpoint the exact location of the rattle.
5.2. Smoke Machine
- Description: A smoke machine is typically used to find vacuum leaks, but it can also be helpful for locating air leaks that cause rattles.
- Application: Seal off the car’s interior and introduce smoke into the cabin. Look for areas where smoke is escaping, indicating a potential source of rattles due to loose seals or gaps.
5.3. Thermal Imaging Camera
- Description: A thermal imaging camera can detect temperature differences, which can help identify areas where air is leaking into the cabin.
- Application: Use the camera to scan the interior, paying close attention to door seals, window seals, and other areas where air leaks are common.
5.4. Real-Time Vibration Analysis
- Description: This technique involves using accelerometers to measure vibrations at different points in the car. The data is then analyzed to identify the frequencies and amplitudes of the vibrations, which can help pinpoint the source of the rattle.
- Application: Attach accelerometers to various interior components and drive the car. The data collected can be used to create a vibration map, highlighting the areas where the rattle is most prominent.
5.5. Professional Diagnostic Tools
- Description: Professional diagnostic tools, such as those used by mechanics at CARDIAGTECH.NET, can provide more in-depth analysis of the car’s systems and components.
- Application: These tools can be used to check for loose connections, faulty sensors, or other issues that may be contributing to the rattle.
5.6. Detailed Disassembly and Inspection
- Description: In some cases, it may be necessary to disassemble parts of the interior to get a closer look at potential rattle sources.
- Application: Remove door panels, dashboard components, or seats to inspect for loose fasteners, damaged parts, or other issues that may be causing the rattle.
When using these advanced diagnostic techniques, it’s important to proceed carefully and take detailed notes to avoid causing further damage to the car’s interior.
6. Preventing Future Interior Rattles
Preventing interior rattles involves proactive maintenance and careful attention to detail. Here are some tips to keep your car’s interior quiet and rattle-free:
6.1. Regular Maintenance
- Tighten Fasteners: Periodically check and tighten any loose screws, bolts, or clips.
- Inspect Trim Pieces: Regularly inspect interior trim pieces for signs of wear or looseness.
- Check Wiring: Ensure that wiring and cables are securely fastened to prevent vibrations.
6.2. Careful Driving Habits
- Avoid Rough Roads: Whenever possible, avoid driving on rough or bumpy roads that can contribute to rattles.
- Smooth Acceleration and Braking: Practice smooth acceleration and braking to minimize stress on interior components.
6.3. Proper Storage
- Secure Items: Always secure loose items in the glove box, center console, and trunk to prevent them from rattling.
- Use Organizers: Use organizers or dividers to keep items in place and prevent them from shifting.
6.4. Quality Repairs
- Use Quality Parts: When replacing interior components, use high-quality parts that are designed to fit properly and withstand wear and tear.
- Professional Installation: Have repairs performed by qualified technicians who are experienced in working with car interiors.
6.5. Climate Control
- Avoid Extreme Temperatures: Park your car in the shade or in a garage to avoid exposing the interior to extreme temperatures, which can cause plastic and other materials to expand and contract, leading to rattles.
- Use Sunshades: Use sunshades to protect the dashboard and other interior surfaces from direct sunlight.
6.6. Regular Cleaning
- Clean Interior Surfaces: Regularly clean interior surfaces to remove dust and dirt, which can contribute to rattles.
- Vacuum Interior: Vacuum the interior to remove loose debris that may be causing noise.
6.7. Protect Upholstery
- Use Seat Covers: Use seat covers to protect the upholstery from wear and tear, which can lead to squeaks and rattles.
- Condition Leather: Regularly condition leather seats to keep them supple and prevent them from drying out and cracking.
6.8. Inspect Suspension
- Maintain Suspension: Keep the suspension components in good condition to minimize vibrations that can transmit into the cabin.
- Replace Worn Parts: Replace worn shocks, struts, and other suspension parts as needed.
By following these preventive measures, you can minimize the likelihood of interior rattles and maintain a quiet, comfortable driving experience.
7. Why Choose CARDIAGTECH.NET for Your Automotive Needs
At CARDIAGTECH.NET, we understand the frustration that interior rattles can cause. That’s why we offer a wide range of high-quality tools and equipment to help you diagnose and fix these issues effectively. Here’s why you should choose CARDIAGTECH.NET for your automotive needs:
7.1. Comprehensive Selection of Tools
- Diagnostic Tools: From mechanic’s stethoscopes to chassis ears, we have the tools you need to pinpoint the exact location of rattles.
- Repair Tools: Our selection of trim removal tools, screwdrivers, socket sets, and torque wrenches will help you tighten loose fasteners and make necessary repairs.
- Sound Deadening Materials: We offer a variety of sound deadening materials, including Dynamat, to reduce vibrations and absorb noise.
- Lubricants and Adhesives: We carry silicone-based lubricants, foam padding, and felt tape to cushion contact points and eliminate squeaks.
7.2. High-Quality Products
- Trusted Brands: We source our products from trusted brands known for their quality and durability.
- Professional-Grade Equipment: Our tools are designed for professional use, ensuring reliable performance and long-lasting value.
- Satisfaction Guarantee: We stand behind our products with a satisfaction guarantee. If you’re not happy with your purchase, we’ll make it right.
7.3. Expert Advice and Support
- Knowledgeable Staff: Our team of automotive experts can provide advice and support to help you choose the right tools for your needs.
- Technical Resources: We offer a variety of technical resources, including how-to guides and videos, to assist you with your repairs.
- Customer Service: Our customer service team is available to answer your questions and resolve any issues you may have.
7.4. Competitive Prices
- Affordable Tools: We offer competitive prices on all of our tools and equipment, making it easy to get the quality products you need without breaking the bank.
- Special Offers: Take advantage of our special offers and discounts to save even more on your purchase.
7.5. Convenient Shopping Experience
- Online Store: Shop our online store from the comfort of your own home.
- Fast Shipping: We offer fast shipping to get your tools to you quickly.
- Easy Returns: Our easy return policy makes it simple to return or exchange products if needed.
Choosing CARDIAGTECH.NET means you’re investing in quality tools, expert advice, and a hassle-free shopping experience. Let us help you eliminate those annoying interior rattles and enjoy a quieter, more comfortable ride.
8. Success Stories: Real-World Examples of Fixing Rattles
Here are a few success stories from customers who have used CARDIAGTECH.NET tools and techniques to fix interior rattles in their cars:
8.1. The Case of the Dashboard Rattle
- Problem: A customer named John had a persistent rattle coming from his dashboard. He had tried tightening a few screws, but the rattle persisted.
- Solution: John purchased a mechanic’s stethoscope and a set of trim removal tools from CARDIAGTECH.NET. Using the stethoscope, he was able to pinpoint the rattle to a loose wiring harness behind the dashboard. He used the trim removal tools to carefully remove the dashboard panel and secured the wiring harness with zip ties.
- Result: The rattle was completely eliminated, and John was thrilled with the quiet ride.
8.2. The Mystery of the Squeaky Seat
- Problem: Sarah noticed a squeaking noise coming from her driver’s seat every time she accelerated or braked.
- Solution: Sarah bought a silicone lubricant and a socket set from CARDIAGTECH.NET. She used the socket set to remove the seat and applied the silicone lubricant to the seat frame and adjustment mechanisms.
- Result: The squeaking noise disappeared, and Sarah enjoyed a more comfortable and quiet driving experience.
8.3. The Saga of the Rattling Door Panel
- Problem: Michael had a rattling door panel in his car that was driving him crazy. He suspected that some of the clips were broken.
- Solution: Michael ordered a set of replacement clips and trim removal tools from CARDIAGTECH.NET. He carefully removed the door panel, replaced the broken clips, and applied foam padding to the back of the panel to reduce vibrations.
- Result: The rattling door panel was fixed, and Michael was able to enjoy a peaceful ride.
8.4. Solving a Headliner Vibration
- Problem: Emily experienced a vibration coming from her car’s headliner, especially on bumpy roads.
- Solution: Emily purchased sound deadening material from CARDIAGTECH.NET. She carefully removed the headliner, applied the sound deadening material to the back, and reinstalled it.
- Result: The vibration was significantly reduced, and Emily was happy with the improved sound quality in her car.
8.5. The Case of the Glove Box Noise
- Problem: David had a rattling noise coming from his glove box, which he found distracting.
- Solution: David bought some foam padding and organizers from CARDIAGTECH.NET. He lined the glove box with foam padding and used organizers to keep items from shifting around.
- Result: The rattling noise was eliminated, and David appreciated the organized glove box.
These success stories demonstrate how using the right tools and techniques from CARDIAGTECH.NET can help you effectively diagnose and fix interior rattles in your car.
9. Get Expert Assistance from CARDIAGTECH.NET
If you’re struggling to diagnose or fix interior rattles in your car, don’t hesitate to reach out to the experts at CARDIAGTECH.NET. Our team of experienced professionals can provide the assistance you need to get the job done right.
9.1. Contact Us
- Address: 276 Reock St, City of Orange, NJ 07050, United States
- WhatsApp: +1 (641) 206-8880
- Website: CARDIAGTECH.NET
9.2. How We Can Help
- Diagnostic Advice: We can provide guidance on how to diagnose interior rattles and identify potential sources.
- Tool Recommendations: We can recommend the best tools and equipment for your specific needs.
- Repair Tips: We can offer tips and techniques for fixing common interior rattles.
- Product Support: We can answer your questions about our products and provide technical support.
- Professional Referrals: If you need professional assistance, we can refer you to qualified mechanics in your area.
9.3. Why Seek Expert Assistance
- Save Time and Money: Getting expert assistance can help you avoid wasting time and money on incorrect diagnoses and ineffective repairs.
- Ensure Proper Repairs: Our team can help you ensure that repairs are performed correctly to prevent future problems.
- Access Specialized Tools: We have access to specialized tools and equipment that may not be available to the average DIYer.
- Gain Peace of Mind: Knowing that you have expert assistance can give you peace of mind and confidence in your repairs.
Don’t let interior rattles ruin your driving experience. Contact CARDIAGTECH.NET today for expert assistance and high-quality automotive tools and equipment. We are committed to helping you keep your car running smoothly and quietly.
10. Frequently Asked Questions (FAQs) About Interior Car Rattles
Here are some frequently asked questions about interior car rattles, along with detailed answers to help you understand and address these issues effectively:
1. What are the most common causes of interior car rattles?
Interior car rattles can be caused by loose trim pieces, worn fasteners, cable and wire clatter, seat mechanisms, glove box and center console issues, headliner problems, deteriorated weather stripping, and poorly installed aftermarket accessories.
2. How can I locate the source of an interior car rattle?
Start by removing loose items from the car and test driving on different surfaces. Listen carefully to isolate the area, and use a mechanic’s stethoscope if possible. Inspect trim pieces, fasteners, wiring, seats, and other components. Replicate the rattle while stationary and document your findings.
3. What tools do I need to fix interior car rattles?
Essential tools include a mechanic’s stethoscope, trim removal tools, inspection mirror, flashlight, screwdriver set, socket set, torque wrench, sound deadening material, foam padding, zip ties, lubricants, gloves, masking tape, and a camera.
4. How do I tighten loose fasteners in my car’s interior?
Identify the loose screws, bolts, or clips and use the appropriate screwdriver or socket to tighten them. Be careful not to overtighten, which could strip the threads or break the plastic. Replace any damaged fasteners with new ones of the same size and type.
5. How can I use sound deadening material to reduce rattles?
Cut Dynamat or similar sound deadening material to fit the back of interior panels. Ensure the material is properly adhered to the panel for maximum effectiveness in reducing vibrations and absorbing noise.
6. What type of lubricant should I use for squeaky interior parts?
Use a silicone-based lubricant for hinges, latches, and other moving parts. Apply the lubricant sparingly and wipe away any excess to prevent attracting dust and dirt.
7. How do I prevent future interior car rattles?
Regularly maintain your car by tightening fasteners, inspecting trim pieces, and checking wiring. Practice careful driving habits, secure loose items, use organizers, perform quality repairs, control climate, clean interior surfaces, protect upholstery, and maintain suspension.
8. What are chassis ears and how can they help diagnose rattles?
Chassis ears are electronic devices with multiple microphones that can be attached to different locations on the vehicle. These microphones transmit sound to a central receiver, allowing you to listen to each location individually while driving and pinpoint the rattle’s source.
9. Can a smoke machine help find interior rattles?
Yes, a smoke machine can help locate air leaks that cause rattles. Seal off the car’s interior and introduce smoke into the cabin. Look for areas where smoke is escaping, indicating potential sources of rattles due to loose seals or gaps.
10. When should I seek professional assistance for interior car rattles?
If you’re struggling to diagnose or fix persistent rattles, if you lack the necessary tools, or if you’re uncomfortable working on your car’s interior, seek expert assistance from a trusted mechanic or CARDIAGTECH.NET for guidance and support.
By understanding these FAQs and implementing the recommended solutions, you can effectively address interior car rattles and enjoy a quieter, more comfortable driving experience. Remember, CARDIAGTECH.NET is here to provide you with the tools, expertise, and support you need to keep your car in top condition.