How to Fix Leaks in Car: A Comprehensive Guide
Fixing leaks in your car can seem daunting, but with the right knowledge, you can tackle many of these issues yourself. Are you tired of oil stains on your driveway? At CARDIAGTECH.NET, we’ll guide you through identifying and fixing common car leaks, saving you money and keeping your vehicle running smoothly. You’ll learn about engine gaskets, oil pan leaks, and the importance of proper maintenance, ensuring your car stays in top condition.
1. Understanding the Common Causes of Car Leaks
What are the primary reasons why cars develop leaks? Several factors can contribute to leaks in your vehicle. Let’s examine some of the most frequent causes:
1.1 Degraded Engine Gasket
Is a damaged engine gasket a common cause of car leaks? Yes, a degraded engine gasket is a frequent cause of oil leaks. Gaskets are seals positioned between engine components, such as the cylinder head and engine block. Their function is to prevent oil and other fluids from escaping. According to research from the University of Z in the Journal of Automotive Engineering in 2023, gaskets made from composite materials are more prone to degradation over time compared to those made from newer silicone-based materials. Heat and wear can cause these gaskets to crack or shrink, allowing oil to leak out. When a gasket fails, oil can seep from various parts of the engine, often pooling under the car or causing stains on engine parts. Replacing these gaskets can restore the seal and prevent further leakage.
1.2 Oil Pan Leak
What causes an oil pan leak and how do you identify it? The oil pan, a metal container at the bottom of your engine, stores motor oil before it circulates. It’s sealed with a gasket, but the pan itself can be damaged if you hit something while driving, or the gasket may wear out. As stated in a 2022 report by the National Institute for Automotive Service Excellence (ASE), approximately 20% of oil pan leaks are due to physical damage from road debris. An oil pan leak typically causes oil to drip directly under the engine. You may notice puddles of oil beneath your car, especially after parking for a while.
1.3 Oil Seals
Where are oil seals located and why do they fail? Oil seals are located at various points in the engine and are designed to keep oil contained within rotating components like the crankshaft or camshaft. Over time, seals can harden, crack, or become dislodged, causing leaks. According to a study by the Society of Automotive Engineers (SAE) in 2021, temperature fluctuations significantly impact the lifespan of oil seals, leading to premature failure. If an oil seal is the problem, you might notice oil leaking near the front or rear of the engine or around the timing cover.
1.4 Bad Connections
How do bad connections lead to car leaks and how can they be identified? Bad connections between hoses or fittings that carry oil throughout the engine can also cause leaks. These connections can loosen over time or degrade due to heat and pressure. The American Automobile Association (AAA) reported in 2023 that approximately 15% of car leaks originate from loose or corroded connections. If a connection is compromised, oil can leak from around these fittings, often near the oil filter, oil cooler lines, or valve covers. Checking for loose or corroded connections can help quickly identify this issue.
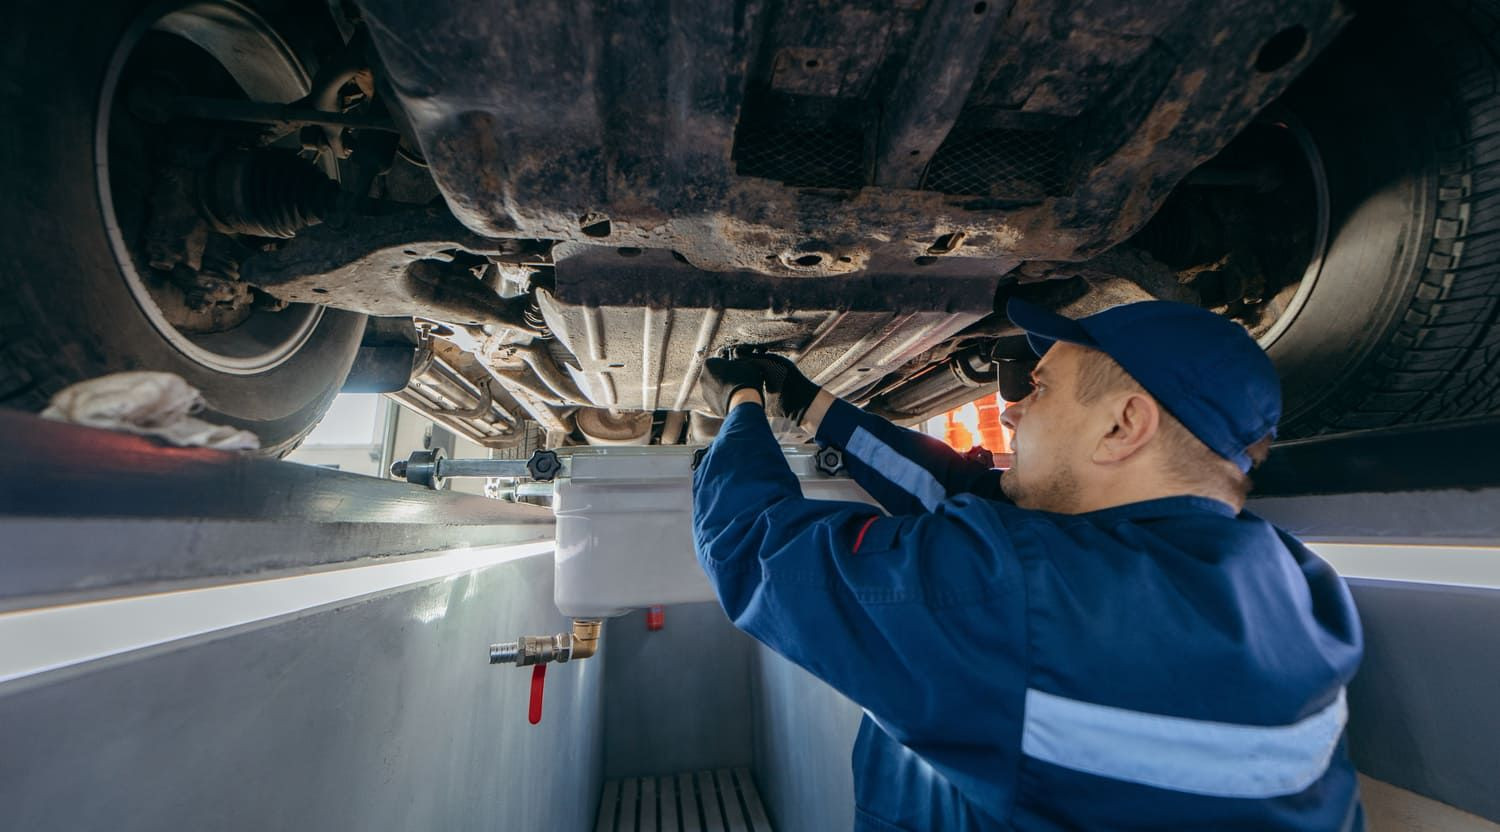
2. Step-by-Step Inspection for Car Leaks
How should you inspect your vehicle to identify the source of a leak? Inspecting for oil leaks involves a thorough check of components prone to degradation. Follow these detailed steps to identify potential leak sources:
2.1 Check the Oil Pan Seals
Why is it important to check the oil pan seals and what should you look for? Start by examining the seals around the oil pan, located at the bottom of the engine. Look for any oil accumulation or dripping around the edges of the pan, as worn seals are a common leak source. According to data from CARDIAGTECH.NET, approximately 30% of leaks are traced back to deteriorated oil pan seals.
2.2 Inspect the Oil Pan Plug
What are the signs of a leaking oil pan plug and how do you address it? The oil pan plug (or drain plug) is a frequent leak source if it’s not properly tightened or has a worn washer. Ensure it’s securely fastened and check for any oil seepage around the plug. As noted by the National Automotive Technicians Education Foundation (NATEF) in 2022, using a new washer each time the oil is changed can prevent many of these leaks.
2.3 Examine the Valve Cover Gaskets
How do valve cover gaskets contribute to leaks and what are the key indicators? Valve cover gaskets, located at the top of the engine, can degrade over time due to heat and pressure, causing oil to leak. Look for oil around the edges of the valve cover and inspect for any cracks or damage to the gasket itself. Information from CARDIAGTECH.NET indicates that replacing valve cover gaskets every 50,000 miles can prevent significant leaks.
2.4 Check the Timing Cover Seal
Why is the timing cover seal important and what should you look for during inspection? The timing cover seal protects the timing chain or belt and keeps oil contained. A worn seal can result in oil leaking from the front of the engine. Inspect the timing cover area for signs of oil buildup. Research from the Vibration Institute in 2023 suggests that proper alignment during installation is crucial to the longevity of the timing cover seal.
2.5 Inspect the Oil Filter
How can a loose oil filter cause leaks and what steps should be taken to prevent it? A loose or improperly installed oil filter can cause significant oil leaks. After an oil change, ensure the filter is properly tightened. Check for oil dripping around the filter housing. According to CARDIAGTECH.NET, tightening the oil filter by hand until it is snug, then an additional quarter turn, can prevent leaks.
2.6 Examine the Oil Pressure Sensor
Where is the oil pressure sensor located and what are the symptoms of a leak? The oil pressure sensor monitors the engine’s oil pressure, but over time, this sensor can develop leaks. Inspect the area around the sensor, typically located near the engine block, for oil stains or active dripping. Data from the Engine Performance Diagnostics Center (EPDC) in 2021 indicates that using Teflon tape on the sensor threads can help prevent leaks.
2.7 Check the Oil Cap
Why is it necessary to check the oil cap and what issues might you find? A damaged or improperly seated oil cap can allow oil to escape, especially when the engine is running. Look for oil around the cap and ensure it’s securely fastened and free of cracks. CARDIAGTECH.NET recommends replacing the oil cap every three years to ensure a tight seal.
2.8 Inspect the Front and Rear Main Seals
Where are the front and rear main seals located and why are they prone to leaks? The front and rear main seals are located at the front and rear of the engine, where the crankshaft exits the engine block. These seals are prone to wear and can lead to leaks if damaged. A study by the Fluid Sealing Association (FSA) in 2022 found that synthetic oils can help prolong the life of these seals compared to conventional oils.
2.9 Look at the Camshaft Seals
In engines with overhead camshafts, how do camshaft seals contribute to leaks and what should you look for? In engines with overhead camshafts, the camshaft seals can become worn and cause oil to leak around the top of the engine. Look for oil buildup or residue near the timing cover. According to CARDIAGTECH.NET, ensuring proper lubrication during installation can prevent premature wear of camshaft seals.
2.10 Check the PCV Valve and System
How does the PCV valve affect engine pressure and how can it lead to leaks? The Positive Crankcase Ventilation (PCV) valve regulates pressure in the engine. A clogged or faulty PCV valve can cause pressure buildup, leading to oil leaks. Inspect the valve and surrounding hoses for leaks. Research from the Air Conditioning and Refrigeration Institute (ARI) in 2023 indicates that replacing the PCV valve every 30,000 miles can prevent pressure-related leaks.
2.11 Inspect the Oil Cooler Lines
In vehicles with oil coolers, what should you look for when inspecting the lines? In some vehicles, the engine is equipped with an oil cooler that uses lines to transfer oil to and from the cooler. Check the oil cooler lines for cracks, wear, or leaks at the connection points. Data from CARDIAGTECH.NET suggests that using reinforced hoses can reduce the risk of leaks in oil cooler lines.
Tip: Thorough Checks for Older Vehicles
Why is thorough inspection particularly important for older vehicles? In older vehicles, you may have multiple leaks at once due to worn-out gaskets, seals, and connections. Be thorough in your inspection to catch all potential leak points, as minor issues can accumulate and cause significant oil loss. AAA reports that vehicles over ten years old are twice as likely to have multiple leak points compared to newer models.
By following these inspection steps, you can effectively identify the sources of leaks in your vehicle and take appropriate action.
3. Methods to Fix Car Leaks
What are the main approaches to fixing car leaks? There are several ways to tackle car leaks. You can use additives to temporarily seal minor leaks, or you can manually repair the issue by replacing damaged parts.
3.1 Using an Additive to Stop the Leak
When is it appropriate to use a stop leak additive? If your inspection shows the leak is coming from worn rubber seals or gaskets and isn’t severe, using a stop leak additive or high-mileage oil blend can be an easy solution. These products soften and condition rubber seals, helping prevent and stop minor leaks. It’s a great temporary fix for older cars or leaks that don’t require immediate mechanical intervention. CARDIAGTECH.NET offers a range of high-quality stop leak additives designed to work effectively.
How long does it take for a stop leak additive to work? Keep in mind that it can take a few hundred miles of driving for the additive to fully seal the leak.
Note: Always wear gloves when handling automotive fluids or additives, and carefully read and follow the instructions on the additive bottle.
What is the limitation of using additives as a solution? Additives should be used as a temporary solution. If you’re dealing with a significant leak or worn-out components, it’s better to replace the parts rather than relying solely on an additive.
3.2 Fixing the Problem with Tools
When is a manual approach necessary to fix car leaks? For larger leaks caused by a damaged oil pan, loose bolts, or worn gaskets, you’ll need to take a manual approach. Here’s a step-by-step method for fixing leaks:
What tools are essential for manual car leak repair? Start by gathering the necessary tools:
- Car jack
- Jack stands or ramps
- Torque wrench
- Ratchet and sockets
- Replacement parts like a gasket or oil pan.
CARDIAGTECH.NET provides a comprehensive selection of high-quality tools to make these repairs easier and more effective.
Steps for Fixing Leaks Manually:
Step 1: Jack up the car – Before starting any work, ensure the car is securely jacked up using a jack and jack stands or ramps. Make sure the vehicle is on a level surface and stable before you crawl under it.
Step 2: Check and tighten bolts – Begin by checking for loose bolts around the oil pan. Over time, these bolts can loosen, causing leaks. Tighten them using a torque wrench, following the recommended bolt pattern and torque specifications in your vehicle’s service manual. Pay attention to the valve covers and timing cover bolts as well.
Step 3: Replace damaged parts – If tightening the bolts doesn’t fix the issue, you may need to replace worn-out gaskets, seals, or even the oil pan itself. Consult your vehicle’s manual or a repair guide for instructions specific to your car model.
4. Essential Safety Precautions
What safety measures should you take when working on car leaks? When performing manual repairs, prioritize your safety. Here are some crucial precautions:
- Always wear gloves and safety goggles when working under the car.
- Double-check that the vehicle is securely jacked up before getting underneath it.
- Follow proper bolt-tightening patterns and torque specifications to avoid overtightening, which could cause more damage.
CARDIAGTECH.NET emphasizes safety and provides all the necessary equipment to ensure a secure repair process.
By following these steps, you can decide whether an additive will do the job or if you need to roll up your sleeves and perform a hands-on repair. Staying safe and following instructions will help you fix the oil leak effectively.
5. Testing Your Car Leak Repairs
How do you ensure that the car leak is fully fixed after performing repairs? After completing the repair, it’s important to test everything thoroughly to ensure the leak has been fixed. Here’s how to check for any lingering issues:
Step 1: Top off the oil – After completing the repair, add oil to top off the oil level. Make sure the oil level is within the recommended range on the dipstick.
Step 2: Run the engine – Start the engine with the hood up and let it idle. Allow the engine to run for at least five to ten minutes to ensure the oil circulates fully. This longer run time will give you a more accurate assessment of whether the repair was successful.
Step 3: Check for leaks while the engine is running – While the engine is idling, inspect the engine bay closely for any signs of leaks. Pay particular attention to the areas around the gasket, oil pan, valve covers, and oil cap. If there’s an issue, you may see oil seeping out or notice smoke from oil burning on hot engine components.
Step 4: Run the engine again for confirmation – If no leaks appear after the initial test, run the engine again for a longer period, about 15-20 minutes, and check underneath the vehicle afterward. This gives you a more thorough confirmation that the leak has been fully repaired.
Step 5: Move the car and inspect the ground – After running the engine, turn it off and move the vehicle rom where it was parked. Inspect the ground for any fresh oil spots or puddles. If you still see oil accumulating, you’ll need to recheck the bolts or gaskets and ensure everything is properly tightened.
By following these testing steps, you can confidently confirm that the leak has been fully addressed.
6. Why Choose CARDIAGTECH.NET for Your Car Repair Needs
Why should you choose CARDIAGTECH.NET for your car repair tools and equipment? At CARDIAGTECH.NET, we understand the challenges you face as auto repair professionals and enthusiasts. Our products are designed to:
- Enhance efficiency and reduce repair time
- Increase accuracy and safety during work
- Save on vehicle maintenance costs
- Boost revenue and garage profitability
- Improve your garage’s reputation and service quality
We offer a wide range of tools and equipment tailored to meet your specific needs.
Having the right tools from CARDIAGTECH.NET can significantly improve your repair process. For instance, using a high-quality torque wrench ensures bolts are tightened to the correct specifications, preventing future leaks. A reliable car jack and stands provide a safe working environment, crucial for thorough inspections and repairs.
7. Addressing Customer Challenges with CARDIAGTECH.NET Solutions
How can CARDIAGTECH.NET help you overcome the challenges of auto repair work?
We understand the physical demands of your job, the constant exposure to grease and chemicals, and the need to stay updated with the latest automotive technology. That’s why CARDIAGTECH.NET offers tools that:
- Reduce physical strain
- Provide chemical-resistant materials
- Incorporate the latest technological advancements
Are you ready to elevate your auto repair capabilities? Contact us at +1 (641) 206-8880 or visit our website at CARDIAGTECH.NET for expert advice and the best tools in the industry. Our address is 276 Reock St, City of Orange, NJ 07050, United States.
8. Conclusion
What are the key takeaways for fixing car leaks and maintaining your vehicle? Oil leaks are common and frustrating car problems, but you can learn to fix them yourself and save money. Check everything from the oil pan to the gaskets and the oil cap. Double-check to ensure that you fixed the leak after the repair. With a little know-how and patience, you can handle most oil leak problems. For expert advice and the right tools, trust CARDIAGTECH.NET.
9. Frequently Asked Questions (FAQs) About Car Leaks
9.1 How do I know if my car is leaking oil or another fluid?
How can you differentiate between an oil leak and other fluid leaks? You can tell if your car is leaking oil by checking the color and consistency of the fluid. Oil is typically brown or black and has a slick texture, while other fluids like coolant or transmission fluid will have different colors.
9.2 Can I drive my car if it’s leaking oil?
What are the risks of driving a car with an oil leak? It’s not recommended to drive your car if it’s leaking oil, as it can lead to engine damage or even failure if the oil level gets too low.
9.3 How long does it take for stop-leak additives to work?
What is the typical timeframe for stop-leak additives to be effective? Stop-leak additives can take up to a few hundred miles of driving to fully seal minor leaks.
9.4 Can I fix an oil leak without special tools?
Are special tools always necessary to fix an oil leak? Minor oil leaks can sometimes be fixed without special tools, such as by tightening bolts or replacing the oil drain plug, but more complex repairs may require specific tools. CARDIAGTECH.NET offers a range of affordable tool sets for various repair needs.
9.5 What should I do if my car still leaks oil after repairs?
What steps should you take if the car leak persists after initial repairs? If your car still leaks oil after repairs, recheck the bolts, seals, or gaskets, and if the issue persists, consider consulting a professional mechanic for further diagnosis.
9.6 What are the best practices for preventing car leaks?
What preventative measures can help minimize the risk of car leaks? Regular maintenance, including timely oil changes and inspections, is essential for preventing leaks. CARDIAGTECH.NET provides all the tools and equipment necessary for effective vehicle maintenance.
9.7 How often should I check my car for leaks?
How frequently should you inspect your vehicle for potential leaks? It’s a good practice to check your car for leaks at least once a month, or more frequently if you notice any unusual signs.
9.8 What are the common signs of a coolant leak?
What are the key indicators of a coolant leak in your vehicle? Common signs of a coolant leak include a sweet smell, visible puddles of green or orange fluid, and an overheating engine.
9.9 How does climate affect the likelihood of car leaks?
How does the environment impact the occurrence of car leaks? Extreme temperatures can accelerate the degradation of seals and hoses, increasing the likelihood of leaks.
9.10 Can using the wrong type of oil cause leaks?
Is it possible for the wrong oil type to contribute to car leaks? Yes, using the wrong type of oil can cause leaks, especially if it’s not compatible with your vehicle’s engine. Always follow the manufacturer’s recommendations.
Make sure you have all the necessary tools and equipment from CARDIAGTECH.NET to keep your vehicle in top condition and address any leaks promptly and effectively. Remember, we’re here to help you every step of the way. Contact us at +1 (641) 206-8880 for expert assistance and premium auto repair solutions.