How To Fix A Loose Car Window: A Pro’s Guide
Is your car window loose, making it difficult to roll up or down? At CARDIAGTECH.NET, we understand the frustration this can cause. Fortunately, fixing a loose car window is often a manageable task with the right tools and guidance. This guide will provide you with step-by-step instructions and expert tips to restore your window’s functionality, ensuring smooth operation and a secure seal against the elements. Let’s explore the process of car window repair, fixing car window off track, and addressing car window regulator issues.
Table of Contents
- Understanding the Problem: Why Car Windows Come Loose
- Essential Tools and Materials for the Job
- Step-by-Step Guide to Fixing a Loose Car Window
- 3.1. Preparation: Protecting Your Workspace and Yourself
- 3.2. Step 1: Removing the Door Panel
- 3.3. Step 2: Diagnosing the Cause of the Loose Window
- 3.4. Step 3: Preparing the Window Track and Glass
- 3.5. Step 4: Applying the Adhesive
- 3.6. Step 5: Reassembling the Door Panel
- Troubleshooting Common Issues
- 4.1. Window Still Loose After Repair
- 4.2. Difficulty Rolling the Window Up or Down
- 4.3. The Window is Crooked
- Preventive Maintenance: Keeping Your Car Windows Secure
- When to Call a Professional
- The Benefits of Using Quality Automotive Tools
- CARDIAGTECH.NET: Your Partner in Automotive Repair
- Customer Success Stories
- FAQ: Frequently Asked Questions
- Conclusion: Enjoy Smooth, Secure Car Windows
1. Understanding the Problem: Why Car Windows Come Loose
Car windows can become loose for several reasons, with the most common culprits being wear and tear, adhesive failure, and mechanical issues. Over time, the adhesive that holds the glass to the window regulator can deteriorate, causing the window to detach and become misaligned. According to a study by the National Highway Traffic Safety Administration (NHTSA), faulty window regulators can contribute to safety hazards, highlighting the importance of proper window maintenance [^1^].
Another contributing factor is the age of the vehicle. Classic cars, in particular, are prone to window issues due to the aging of materials. Temperature fluctuations, moisture, and general use can all accelerate the degradation of the adhesive. Additionally, mechanical components such as the window regulator or the tracks that guide the window can wear out or break, leading to a loose or malfunctioning window.
- Wear and Tear: Over time, the constant motion of raising and lowering the window can strain the components, leading to loosening and eventual failure.
- Adhesive Failure: The adhesive that secures the window to the regulator and track can dry out, crack, or lose its bonding strength due to age, temperature changes, and exposure to the elements.
- Mechanical Issues: The window regulator, which is responsible for moving the window up and down, can break or malfunction. The tracks that guide the window can also become bent, misaligned, or damaged.
Understanding the root cause of the problem is the first step in effectively fixing a loose car window.
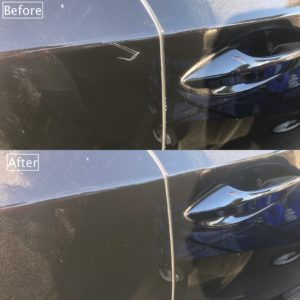
Loose Car Window
Alt text: A damaged car window requiring repair, showing signs of looseness and misalignment.
2. Essential Tools and Materials for the Job
Before you begin, gather all the necessary tools and materials. Having everything on hand will streamline the repair process and prevent unnecessary delays. Here’s a comprehensive list:
| Tool/Material | Description | Why You Need It |
|---|---|---|
| Phillips-Head Screwdriver | For removing screws from the door panel and other components. | Essential for disassembling the door panel and accessing the window mechanism. |
| Flat-Head Screwdriver | For prying off trim pieces and removing C-clips. | Helps in carefully removing delicate trim and clips without causing damage. |
| Socket Set | For removing bolts and nuts. | Useful for accessing the window regulator and other components. |
| Panel Removal Tool Set | Prevents damage to the door panel when removing clips. | Designed to safely remove door panel clips without breaking them or damaging the panel. |
| Automotive Adhesive | A strong adhesive specifically designed for automotive applications. | Securely bonds the window to the track and regulator. |
| Glass Cleaner | For cleaning the window and track. | Ensures a clean surface for proper adhesive bonding. |
| Shop Towels | For wiping away excess adhesive and cleaning surfaces. | Keeps the work area clean and tidy. |
| Gloves | Protects your hands from chemicals and sharp edges. | Ensures safety and prevents skin irritation. |
| Safety Glasses | Protects your eyes from debris and splashes. | Essential for eye protection during the repair process. |
| Binder Clips or Clothespins | For holding the plastic liner out of the way. | Keeps the liner secure and prevents it from interfering with the repair. |
| Heavy Grease | For lubricating the window mechanism. | Ensures smooth operation and prevents future issues. |
| Wobble Wedge (Rubber Wedge) | To hold the glass in place while you work on the track | Provides support and prevents the window from slipping during the repair process. |
| Heat Gun or Hair Dryer | For softening old adhesive. | Helps to loosen and remove stubborn adhesive residue. |
| Multimeter | For testing electrical connections (if dealing with power windows). | Ensures that electrical components are functioning correctly. |
| Wire Brush | For cleaning rust and debris from metal surfaces. | Helps to prepare surfaces for better adhesion and prevents corrosion. |
| Penetrating Oil | To loosen rusted bolts and nuts. | Makes disassembly easier and prevents damage to fasteners. |
Having these tools and materials readily available will ensure a smoother and more efficient repair process.
3. Step-by-Step Guide to Fixing a Loose Car Window
3.1. Preparation: Protecting Your Workspace and Yourself
Before diving into the repair, take the necessary precautions to protect yourself and your vehicle. Park your car on a level surface and engage the parking brake. Disconnect the negative terminal of the battery to prevent any electrical mishaps. Cover the surrounding area with a drop cloth or old towels to protect the car’s interior from scratches and spills. Put on your safety glasses and gloves to protect your eyes and hands.
3.2. Step 1: Removing the Door Panel
The first step in fixing a loose car window is to remove the door panel. The process may vary slightly depending on the make and model of your vehicle, but the general steps are as follows:
-
Locate and remove screws: Use a Phillips-head screwdriver to remove any screws that secure the door panel. These are often found around the armrest, door handle, and along the bottom edge of the panel.
-
Remove the armrest: In many older cars, the armrest is attached with screws. Remove these screws and carefully detach the armrest. The door handle might be part of this assembly, so you may need to maneuver it to remove the armrest completely.
-
Remove the window crank: If your car has manual windows, you’ll need to remove the window crank. Look for a C-clip that holds the crank onto the winding mechanism. Use a flat-head screwdriver to gently pry the C-clip away from the crank. Be careful not to scratch the crank or the door panel.
-
Remove the speaker: If there’s a speaker in the door, remove the speaker cover and unscrew the speaker from the door. Disconnecting the wires on the backside can be awkward while handling the door panel, so removing the speaker now can prevent damage. Mark the terminals on the back of the speaker to remember which is positive and which is negative.
-
Detach the spring clips: Once all screws and components are removed, begin detaching the spring clips that hold the edge of the panel to the door. Start at a bottom corner of the panel and take your time to avoid damaging the clips or the panel. Use a panel removal tool for best results.
-
Lift and remove the panel: After removing all the clips, slowly lift up on the door panel while pulling it away from the door itself. Place the panel in a safe place until you’re ready to reattach it.
3.3. Step 2: Diagnosing the Cause of the Loose Window
With the door panel removed, you can now inspect the window mechanism to determine the cause of the problem. Behind the panel, you may find a plastic liner or foam insulator attached to the door shell. Gently pull back the liner and use a binder clip or clothespin to hold it out of the way.
-
Inspect the window track: Reattach the window crank to the winding mechanism (without fully securing it with the C-clip). Slowly wind the window up and watch the bottom of the glass to see if it’s properly attached to the track.
-
Identify the issue: If the glass comes loose from the track as you roll it up and down, the adhesive between the glass and the track has likely failed. If the glass remains attached to the track, you may have a different issue, such as a broken track or a malfunctioning window regulator.
-
Grease the winding mechanisms: Since the door panel is off, take advantage of the easy access and reapply grease to the moving parts and joints in the window mechanism. This can prevent future issues and save you the time of having to remove the door panel again. Look for any small signs of rust in screw holes and add a small dab of grease to those as well.
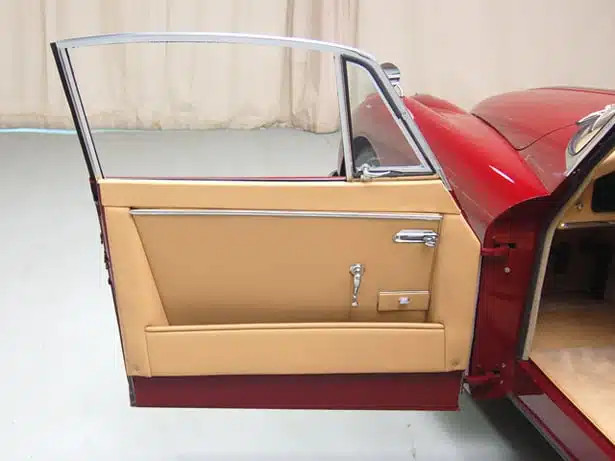
Alt text: Close-up of a car window mechanism, highlighting the track, regulator, and other key components.
3.4. Step 3: Preparing the Window Track and Glass
Before applying new adhesive, it’s crucial to prepare the surfaces for a strong bond.
-
Clean the track: Use a wire brush and glass cleaner to remove any loose dirt, grime, or old adhesive from the window track. A clean surface ensures better adhesion.
-
Clean the glass: Clean the area of the window that will be in contact with the adhesive. Use glass cleaner and a shop towel to remove any dirt, grease, or residue.
-
Dry the surfaces: Make sure both the track and the glass are completely dry before proceeding.
3.5. Step 4: Applying the Adhesive
This step may require an extra set of hands to hold the glass in place while you work on the track. If you’re working alone, you can use a small rubber wedge, like the Wobble Wedge, to help hold the window up.
-
Apply adhesive to the track: Apply a bead of automotive adhesive along the inside of the track. Fill it up about halfway to avoid it spilling over when the glass goes back in the track.
-
Place the window back in the track: Holding the window level and low enough to be seen inside the door, guide the track upward with the crank until it seats itself around the glass. Apply firm pressure to the track for a few minutes while the window is settling into the track and adhesive.
-
Wipe away excess adhesive: If adhesive spills out, use a shop towel to wipe it up as soon as possible.
-
Secure the window: Roll the window up to make sure that it fits into the door and rain gaskets properly. If it is not, try to make the necessary adjustments to get a tight fit. Once it is fitting snug, be sure it is rolled all the way up and leave it there.
-
Allow to dry: The adhesive needs a few hours to dry, but it should be left alone for at least 24 hours to ensure it is set.
3.6. Step 5: Reassembling the Door Panel
If satisfied with your window work, you now need to put the panel back on in the reverse order of how it came off.
-
Clean the door panel: Clean up the door panel, removing any grease or adhesive.
-
Reattach the spring clips: Align the door panel with the door and reattach the spring clips by pressing them firmly into place.
-
Reinstall the speaker: If you removed the speaker, reconnect the wires (matching the positive and negative terminals) and screw the speaker back into place.
-
Reinstall the window crank: If your car has manual windows, reinstall the window crank and secure it with the C-clip.
-
Reinstall the armrest: Reattach the armrest with the screws you removed earlier.
-
Reinstall any remaining screws: Replace any remaining screws that secure the door panel.
-
Test the window: After reassembling the door panel, test the window to ensure it rolls up and down smoothly.
4. Troubleshooting Common Issues
Even with careful attention to detail, you may encounter some common issues during or after the repair process. Here are some troubleshooting tips:
4.1. Window Still Loose After Repair
- Insufficient adhesive: Ensure you’ve applied enough adhesive to create a strong bond between the glass and the track.
- Improper cleaning: Make sure the track and glass were thoroughly cleaned before applying the adhesive.
- Adhesive quality: Use a high-quality automotive adhesive specifically designed for this purpose.
- Drying time: Allow the adhesive to dry completely for at least 24 hours before using the window.
4.2. Difficulty Rolling the Window Up or Down
- Binding: Check for any obstructions or binding in the window mechanism.
- Lubrication: Apply grease to the moving parts of the window regulator and track.
- Misalignment: Ensure the window is properly aligned in the track.
- Regulator issues: If the window is still difficult to roll up or down, the window regulator may be faulty and need replacement.
4.3. The Window is Crooked
- Improper seating: Ensure the window is properly seated in the track.
- Track alignment: Check the track for any bends or misalignments.
- Regulator adjustment: Some window regulators have adjustment screws that can be used to fine-tune the window’s position.
If these troubleshooting steps don’t resolve the issue, it may be time to consult a professional.
5. Preventive Maintenance: Keeping Your Car Windows Secure
Preventive maintenance can help extend the life of your car windows and prevent future issues. Here are some tips:
- Regular cleaning: Keep the window tracks clean and free of debris.
- Lubrication: Periodically lubricate the window mechanism to ensure smooth operation.
- Avoid slamming: Avoid slamming the car door, as this can put stress on the window components.
- Check for wear: Regularly inspect the window tracks and regulator for signs of wear or damage.
- Address issues promptly: If you notice any issues with your car windows, address them promptly to prevent them from escalating.
6. When to Call a Professional
While fixing a loose car window is often a DIY-friendly task, there are situations where it’s best to call a professional. If you’re not comfortable working on your car or if you encounter any of the following issues, seek professional help:
- Broken window regulator: Replacing a window regulator can be complex and may require specialized tools.
- Damaged window glass: If the window glass is cracked or broken, it needs to be replaced by a professional.
- Electrical issues: If you’re dealing with power windows and suspect an electrical problem, it’s best to consult an automotive electrician.
- Lack of experience: If you’re unsure about any part of the repair process, it’s better to be safe and seek professional assistance.
7. The Benefits of Using Quality Automotive Tools
Investing in quality automotive tools can make a significant difference in the success and longevity of your car window repair. High-quality tools are more durable, reliable, and precise, which can help you avoid damaging your vehicle and ensure a professional-quality repair.
- Durability: Quality tools are made from stronger materials and are designed to withstand the rigors of automotive repair.
- Reliability: Reliable tools perform consistently and accurately, reducing the risk of errors and mishaps.
- Precision: Precision tools allow you to work with greater accuracy and control, resulting in a better repair.
- Safety: Quality tools are designed with safety in mind, reducing the risk of injury.
At CARDIAGTECH.NET, we offer a wide range of high-quality automotive tools to help you tackle any repair job with confidence.
8. CARDIAGTECH.NET: Your Partner in Automotive Repair
At CARDIAGTECH.NET, we are committed to providing our customers with the highest quality automotive tools and equipment. We understand the challenges faced by automotive technicians and DIY enthusiasts, and we strive to offer solutions that enhance efficiency, accuracy, and safety.
Whether you’re a seasoned professional or just starting out, CARDIAGTECH.NET is your trusted partner in automotive repair. We offer a wide range of products, including:
- Diagnostic tools: Code readers, scan tools, and multimeters.
- Hand tools: Screwdrivers, wrenches, sockets, and pliers.
- Power tools: Drills, impact wrenches, and grinders.
- Specialty tools: Panel removal tools, window crank removers, and adhesive applicators.
We also offer expert advice and support to help you choose the right tools for your specific needs.
Contact us today to learn more about our products and services:
- Address: 276 Reock St, City of Orange, NJ 07050, United States
- WhatsApp: +1 (641) 206-8880
- Website: CARDIAGTECH.NET
Don’t let a loose car window frustrate you any longer. Contact CARDIAGTECH.NET today and let our experts guide you towards the best tools and solutions for your repair needs. We’re here to help you get the job done right, the first time.
9. Customer Success Stories
Here are a few stories from satisfied CARDIAGTECH.NET customers who have successfully fixed their loose car windows using our tools and guidance:
- John D., Los Angeles, CA: “I was struggling with a loose car window for months, and I couldn’t find a reliable solution. Then I discovered CARDIAGTECH.NET. Their panel removal tools and automotive adhesive made the repair process a breeze. My window is now secure and working perfectly.”
- Maria S., Houston, TX: “As a DIY enthusiast, I always try to fix my car issues myself. CARDIAGTECH.NET provided me with the right tools and expert advice to tackle my loose car window. I saved a lot of money by doing it myself, and I’m very happy with the results.”
- David L., Miami, FL: “I’m a professional automotive technician, and I rely on CARDIAGTECH.NET for high-quality tools. Their products are durable, reliable, and precise, which helps me provide the best service to my customers. I highly recommend CARDIAGTECH.NET to any automotive professional.”
These success stories highlight the effectiveness of our tools and the value of our expert guidance.
10. FAQ: Frequently Asked Questions
Here are some frequently asked questions about fixing loose car windows:
Q1: How much does it cost to fix a loose car window?
- The cost to fix a loose car window can vary depending on the cause of the problem and whether you do it yourself or hire a professional. DIY repairs can cost as little as $20-$50 for adhesive and basic tools. Professional repairs can range from $100 to $500 or more, depending on the extent of the damage.
Q2: Can I use any type of adhesive to fix my car window?
- No, it’s important to use a high-quality automotive adhesive specifically designed for bonding glass to metal or plastic. Regular adhesives may not be strong enough or may damage the window or track.
Q3: How long does it take for the adhesive to dry?
- Most automotive adhesives require at least 24 hours to dry completely. Check the adhesive manufacturer’s instructions for specific drying times.
Q4: Can I drive my car while the adhesive is drying?
- It’s best to avoid driving your car while the adhesive is drying to prevent any vibrations or movements that could affect the bond.
Q5: What if my power window doesn’t work after the repair?
- Check the electrical connections to the window regulator. If the connections are secure, the window regulator may be faulty and need replacement.
Q6: How do I prevent my car windows from becoming loose again?
- Regular cleaning, lubrication, and avoiding slamming the car door can help prevent your car windows from becoming loose again.
Q7: Can I replace the window regulator myself?
- Replacing a window regulator can be a complex task, especially for power windows. If you’re not comfortable working on your car, it’s best to seek professional assistance.
Q8: What are the signs of a faulty window regulator?
- Signs of a faulty window regulator include slow or erratic window movement, unusual noises when operating the window, and the window falling down inside the door.
Q9: How do I choose the right automotive adhesive?
- Look for an adhesive that is specifically designed for automotive applications and is compatible with glass, metal, and plastic. Read customer reviews and ratings to get an idea of the adhesive’s performance and reliability.
Q10: Where can I find high-quality automotive tools and adhesives?
- CARDIAGTECH.NET offers a wide range of high-quality automotive tools and adhesives to help you tackle any repair job with confidence. Visit our website or contact us today to learn more.
11. Conclusion: Enjoy Smooth, Secure Car Windows
Fixing a loose car window can seem daunting, but with the right tools, guidance, and a little patience, it’s a manageable task. By following the steps outlined in this guide, you can restore your window’s functionality and enjoy smooth, secure operation.
Remember, at CARDIAGTECH.NET, we’re here to support you every step of the way. From providing high-quality tools and equipment to offering expert advice and support, we’re committed to helping you achieve success in all your automotive repair endeavors.
Don’t let a loose car window compromise your safety and comfort. Take action today and restore your window to its proper working condition. Contact CARDIAGTECH.NET to explore our range of automotive tools and equipment and experience the difference that quality makes.