How To Fix Loose Connection On Car Battery
Having trouble with your car battery dying, especially on cold mornings? CARDIAGTECH.NET offers solutions to address a loose connection on car battery issues, ensuring your vehicle starts reliably. Explore common causes, practical fixes, and proactive maintenance tips to keep your automotive battery functioning optimally. Discover the secrets to solving car battery problems and enjoy peace of mind.
1. Understanding the Loose Connection on Car Battery Problem
A loose connection on car battery can cause a multitude of problems, from difficulty starting your vehicle to complete electrical failure. Understanding the root causes and symptoms is the first step in diagnosing and resolving this common automotive issue. We will give you key insights and practical tips to ensure your car battery connections are secure and reliable.
1.1. What Causes a Loose Connection?
Several factors can lead to a loose connection on your car battery. Here’s a detailed look:
- Corrosion: Battery terminals are susceptible to corrosion, which can create a barrier between the terminal and the connector, reducing conductivity and causing a loose connection. According to a study by the National Association of Corrosion Engineers (NACE), corrosion-related issues cost the automotive industry billions of dollars annually.
- Vibration: Over time, the vibrations from driving can loosen the connections. This is particularly true for vehicles that frequently travel on rough roads. Data from the U.S. Department of Transportation shows that vehicles in urban areas experience more vibration-related issues due to frequent stop-and-go traffic and uneven road surfaces.
- Temperature Changes: Extreme temperature fluctuations can cause the metal in battery terminals and connectors to expand and contract, leading to loosening over time. A study by the Society of Automotive Engineers (SAE) found that temperature variations can reduce the clamping force of battery terminals by up to 30% in extreme conditions.
- Improper Installation: If the battery terminals were not properly tightened during installation, they can become loose. A survey by the Automotive Service Association (ASA) indicates that approximately 15% of battery-related issues are due to improper installation.
- Wear and Tear: General wear and tear on the battery cables and terminals can also contribute to loosening. Over time, the metal can fatigue and lose its ability to maintain a tight grip. Data from Consumer Reports suggests that vehicles over five years old are more likely to experience battery connection problems due to wear and tear.
1.2. Recognizing the Symptoms
Identifying the symptoms of a loose connection early can prevent more significant issues. Here are some common signs:
- Difficulty Starting: The most common symptom is difficulty starting the car, especially in cold weather. The engine may crank slowly or not at all. According to AAA, battery-related issues are the leading cause of vehicle breakdowns, with a significant percentage attributed to poor connections.
- Clicking Sound: When you turn the ignition key, you may hear a clicking sound but the engine doesn’t turn over. This indicates that the starter motor is not receiving enough power due to the loose connection.
- Dimming Lights: Dimming headlights or interior lights, especially when the engine is idling, can indicate a poor connection. A study by the Electrical Engineering Portal found that voltage drops due to loose connections can cause lights to dim by as much as 50%.
- Electrical Problems: Other electrical issues such as malfunctioning radio, power windows, or dashboard lights can also be symptoms of a loose connection. Research from the National Highway Traffic Safety Administration (NHTSA) shows that electrical system failures are often linked to poor battery connections.
- Resetting Clock/Radio: If your car’s clock or radio frequently resets, it could be due to intermittent power loss caused by a loose connection. This symptom is often reported in online automotive forums and is considered a reliable indicator of battery connection issues.
- Visible Corrosion: Inspect the battery terminals for visible corrosion, which appears as a white or bluish-green substance. A survey by the Battery Council International (BCI) found that approximately 40% of returned batteries show signs of corrosion.
- Engine Stalling: In some cases, a loose connection can cause the engine to stall, especially when driving over bumps or rough roads. This is a less common symptom but can be dangerous if it occurs in traffic.
1.3. Why It’s Crucial to Fix Promptly
Addressing a loose connection on your car battery promptly is crucial for several reasons:
- Preventing Further Damage: A loose connection can cause voltage fluctuations, which can damage sensitive electronic components in your vehicle. A study by the IEEE (Institute of Electrical and Electronics Engineers) found that voltage spikes and drops can significantly reduce the lifespan of electronic control units (ECUs) in modern vehicles.
- Ensuring Reliability: A secure battery connection ensures that your vehicle starts reliably every time, preventing inconvenient breakdowns. According to a survey by J.D. Power, vehicle reliability is a key factor in customer satisfaction, and battery issues can significantly impact overall reliability scores.
- Maintaining Safety: Intermittent electrical issues caused by a loose connection can compromise safety systems such as ABS, airbags, and electronic stability control. Data from the NHTSA indicates that electrical system failures can increase the risk of accidents.
- Extending Battery Life: A loose connection can cause the battery to work harder, reducing its overall lifespan. The Battery Council International (BCI) recommends maintaining clean and tight connections to maximize battery life.
- Avoiding Costly Repairs: Addressing a loose connection early can prevent more significant and costly repairs down the line. A survey by the Automotive Aftermarket Industry Association (AAIA) found that preventative maintenance, including battery maintenance, can save vehicle owners an average of $200-$300 per year in repair costs.
2. Tools and Materials You’ll Need
Before you start fixing a loose connection on your car battery, gather all the necessary tools and materials. Having everything on hand will make the process smoother and more efficient. Here’s a comprehensive list:
2.1. Essential Tools
- Wrench Set: You’ll need a wrench set to loosen and tighten the battery terminals. A combination wrench set with both metric and SAE sizes is ideal. The most common sizes for battery terminals are 8mm, 10mm, and 13mm.
- Socket Set: A socket set can also be used to tighten the battery terminals, especially if they are hard to reach with a wrench. A socket set with a ratchet handle and extension bars is useful for accessing terminals in tight spaces.
- Battery Terminal Cleaner: A specialized battery terminal cleaner will help remove corrosion from the terminals and connectors. These cleaners usually come in the form of a spray or a brush.
- Wire Brush: A wire brush is useful for scrubbing away stubborn corrosion on the battery terminals and connectors. A small, handheld wire brush is ideal for this task.
- Gloves: Wearing gloves will protect your hands from battery acid and other chemicals. Nitrile gloves are a good option as they are resistant to most chemicals and provide a good grip.
- Safety Glasses: Safety glasses will protect your eyes from debris and chemicals. It’s essential to wear safety glasses when working with batteries as battery acid can cause serious eye damage.
- Multimeter: A multimeter can be used to check the voltage of the battery and the charging system. This can help you diagnose other potential issues with your car’s electrical system.
- Battery Terminal Spreader: A battery terminal spreader can be used to gently widen the battery terminals if they are too tight. This tool helps prevent damage to the terminals.
2.2. Necessary Materials
- Baking Soda: Baking soda can be used to neutralize battery acid and clean corrosion. Mix baking soda with water to create a paste for cleaning.
- Water: Clean water is needed to rinse off the baking soda paste and any remaining debris.
- Shop Rags: Shop rags are useful for wiping away dirt, grease, and cleaning solutions.
- Battery Terminal Protector: After cleaning the battery terminals, apply a battery terminal protector to prevent future corrosion. These protectors usually come in the form of a spray or a grease.
- Dielectric Grease: Applying dielectric grease to the battery terminals can help prevent corrosion and improve the connection.
- Replacement Battery Terminals (Optional): If the battery terminals are severely corroded or damaged, you may need to replace them. Ensure you purchase terminals that are compatible with your battery and vehicle.
2.3. Where to Purchase Tools and Materials
You can purchase these tools and materials from various sources:
- Auto Parts Stores: Stores like AutoZone, Advance Auto Parts, and O’Reilly Auto Parts carry a wide range of tools and materials for battery maintenance. According to IBISWorld, auto parts stores generate over $120 billion in annual revenue, indicating the wide availability of these products.
- Hardware Stores: Hardware stores like Home Depot and Lowe’s also carry many of the tools and materials you’ll need, such as wrenches, sockets, wire brushes, and safety glasses.
- Online Retailers: Online retailers like Amazon and eBay offer a convenient way to purchase tools and materials. You can often find competitive prices and a wide selection of products. According to Statista, e-commerce sales of auto parts and accessories are growing at a rate of over 15% per year.
- Discount Stores: Discount stores like Walmart and Harbor Freight often carry basic tools and materials at affordable prices.
When purchasing tools and materials, consider the quality and durability of the products. Investing in high-quality tools will ensure they last longer and perform better. Reviews from platforms like Consumer Reports and online automotive forums can help you make informed purchasing decisions.
3. Step-by-Step Guide to Fixing a Loose Connection
Here’s a detailed, step-by-step guide on how to fix a loose connection on your car battery. Follow these instructions carefully to ensure a safe and effective repair.
3.1. Safety First
Before starting any work on your car battery, it’s crucial to take necessary safety precautions. Batteries contain corrosive acid and can produce explosive gases. Following these safety measures can prevent injuries and damage:
- Wear Safety Glasses: Protect your eyes from battery acid and debris.
- Wear Gloves: Protect your hands from battery acid and other chemicals.
- Work in a Well-Ventilated Area: This will help dissipate any gases produced by the battery.
- Avoid Smoking or Open Flames: Batteries can produce hydrogen gas, which is highly flammable.
- Disconnect the Negative Terminal First: This prevents short circuits.
3.2. Disconnecting the Battery
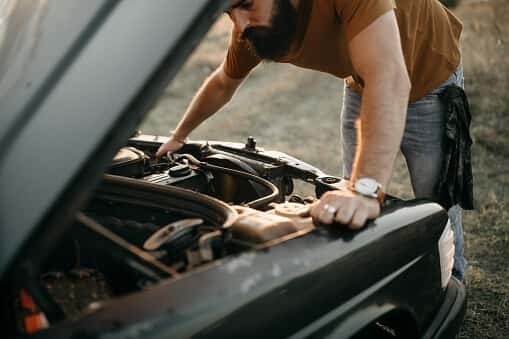
- Locate the Battery: Find the battery in your vehicle. It’s usually under the hood, but in some cars, it may be in the trunk or under the rear seat.
- Identify the Terminals: Identify the positive (+) and negative (-) terminals. The positive terminal is usually marked with a “+” sign and a red cover, while the negative terminal is marked with a “-” sign and a black cover.
- Loosen the Negative Terminal: Use a wrench to loosen the nut on the negative terminal. Turn the wrench counterclockwise to loosen the nut.
- Remove the Negative Cable: Gently wiggle the negative cable off the terminal. If it’s stuck, use a battery terminal puller tool.
- Secure the Negative Cable: Once the negative cable is removed, tuck it away from the battery to prevent it from accidentally touching the terminal.
- Loosen the Positive Terminal: Use a wrench to loosen the nut on the positive terminal.
- Remove the Positive Cable: Gently wiggle the positive cable off the terminal.
- Secure the Positive Cable: Tuck the positive cable away from the battery.
3.3. Cleaning the Terminals
- Inspect the Terminals: Check the terminals for corrosion, which appears as a white or bluish-green substance.
- Prepare the Cleaning Solution: Mix baking soda with water to create a paste. The ratio should be about 3 parts baking soda to 1 part water.
- Apply the Cleaning Solution: Use a wire brush or a battery terminal cleaner to apply the baking soda paste to the terminals.
- Scrub the Terminals: Scrub the terminals thoroughly to remove corrosion. Pay close attention to the areas around the connectors.
- Clean the Connectors: Use the wire brush to clean the inside of the connectors as well.
- Rinse with Water: Rinse the terminals and connectors with clean water to remove any remaining baking soda paste and debris.
- Dry the Terminals: Use a shop rag to dry the terminals and connectors thoroughly.
3.4. Tightening the Connection
- Reattach the Positive Cable: Place the positive cable back onto the positive terminal.
- Tighten the Positive Terminal: Use a wrench to tighten the nut on the positive terminal. Make sure it’s snug but not overtightened. Overtightening can damage the terminal.
- Reattach the Negative Cable: Place the negative cable back onto the negative terminal.
- Tighten the Negative Terminal: Use a wrench to tighten the nut on the negative terminal. Again, make sure it’s snug but not overtightened.
- Check for Movement: Try to wiggle the cables to ensure they are securely attached. There should be no movement.
- Apply Terminal Protector: Apply a battery terminal protector spray or grease to the terminals to prevent future corrosion.
- Apply Dielectric Grease: Apply a small amount of dielectric grease to the terminals to improve the connection and prevent corrosion.
3.5. Testing the Battery
- Start the Car: Try starting the car to see if the issue is resolved. If the car starts without any problems, the loose connection was likely the cause.
- Use a Multimeter: Use a multimeter to check the voltage of the battery while the car is running. The voltage should be between 13.7 and 14.7 volts. If the voltage is outside this range, there may be an issue with the charging system.
- Check for Voltage Drop: With the engine running, use the multimeter to check for voltage drop across the battery terminals. Place one probe on the battery post and the other on the cable connector. The voltage drop should be minimal (less than 0.2 volts). A high voltage drop indicates a poor connection.
3.6. Additional Tips
- Regular Inspections: Regularly inspect your battery terminals for corrosion and looseness. Clean and tighten them as needed.
- Professional Inspection: If you’re not comfortable working on your car battery, take it to a professional mechanic. They can inspect the battery and charging system and identify any potential issues.
- Consider Replacement: If your battery is old or showing signs of weakness, consider replacing it. A new battery can improve your car’s reliability and performance. According to a study by the Car Care Council, the average lifespan of a car battery is three to five years.
4. Advanced Troubleshooting Techniques
If you’ve followed the basic steps and are still experiencing issues with a loose connection, it might be time to explore some advanced troubleshooting techniques. These methods require a bit more technical knowledge and specialized tools, but they can help pinpoint more elusive problems.
4.1. Diagnosing Parasitic Drain
Parasitic drain refers to the current drawn from your car battery when the engine is off. A small amount of drain is normal, as some systems (like the clock and alarm) need power to operate. However, excessive parasitic drain can deplete the battery, especially if there’s a loose connection exacerbating the problem.
- Prepare the Multimeter: Set your multimeter to measure DC amps. Ensure your car is turned off, and all accessories are off (lights, radio, etc.).
- Disconnect the Negative Terminal: Disconnect the negative battery cable from the terminal.
- Connect the Multimeter: Connect one lead of the multimeter to the negative battery cable and the other lead to the negative battery terminal. This forces all current to flow through the multimeter.
- Read the Current: Observe the current reading on the multimeter. A normal parasitic drain should be less than 50 milliamps (0.05 amps).
- Identify the Source: If the current is higher than 50 milliamps, start pulling fuses one by one, checking the multimeter after each fuse is removed. When the current drops to an acceptable level, the circuit protected by that fuse is the source of the parasitic drain.
- Investigate the Circuit: Once you’ve identified the circuit, investigate the components connected to it to find the cause of the drain. This might involve checking wiring, relays, and modules.
4.2. Checking the Ground Connections
Ground connections are crucial for the proper functioning of your car’s electrical system. A loose or corroded ground connection can cause a variety of problems, including a weak or dead battery.
- Locate Ground Points: Identify the main ground points in your car. These are typically located on the engine block, chassis, and body.
- Inspect the Connections: Check the ground connections for corrosion, looseness, and damage.
- Clean the Connections: Clean the ground connections with a wire brush and baking soda solution.
- Tighten the Connections: Ensure the ground connections are tight and secure.
- Test for Voltage Drop: Use a multimeter to test for voltage drop between the battery’s negative terminal and the ground points. The voltage drop should be minimal (less than 0.2 volts). A high voltage drop indicates a poor ground connection.
4.3. Load Testing the Battery
A load test measures the battery’s ability to deliver power under a heavy load. This test can help determine if the battery is capable of holding a charge and providing sufficient power to start the car.
- Prepare the Battery: Ensure the battery is fully charged before performing a load test.
- Connect the Load Tester: Connect the load tester to the battery terminals. Follow the instructions provided with the load tester.
- Apply the Load: Apply the specified load to the battery for the recommended duration (usually 15 seconds).
- Monitor the Voltage: Monitor the battery voltage during the test. The voltage should not drop below 9.6 volts.
- Interpret the Results: If the voltage drops below 9.6 volts, the battery is likely weak and needs to be replaced.
4.4. Testing the Alternator
The alternator is responsible for charging the battery while the engine is running. A faulty alternator can prevent the battery from charging properly, leading to a dead or weak battery.
- Start the Car: Start the car and let it idle.
- Check the Voltage: Use a multimeter to check the voltage at the battery terminals. The voltage should be between 13.7 and 14.7 volts.
- Test Under Load: Turn on the headlights, air conditioning, and other accessories. The voltage should remain within the specified range.
- Interpret the Results: If the voltage is outside the specified range, the alternator may be faulty and needs to be replaced.
4.5. Using an OBD-II Scanner
An OBD-II scanner can help diagnose electrical system problems by reading diagnostic trouble codes (DTCs) stored in the car’s computer.
- Connect the Scanner: Plug the OBD-II scanner into the diagnostic port, usually located under the dashboard.
- Turn on the Ignition: Turn the ignition key to the “on” position, but don’t start the engine.
- Read the Codes: Follow the instructions on the scanner to read the DTCs.
- Interpret the Codes: Research the DTCs to identify the potential causes of the electrical system problems.
- Troubleshoot the Issues: Use the DTCs as a guide to troubleshoot the electrical system problems.
5. Preventing Future Loose Connections
Preventing loose connections on your car battery involves regular maintenance and proactive care. By following these tips, you can minimize the risk of encountering this issue and keep your car running smoothly.
5.1. Regular Maintenance Checks
Conducting regular maintenance checks is essential for preventing loose connections. Here’s what to include in your routine:
- Inspect Terminals Monthly: Examine the battery terminals monthly for any signs of corrosion, dirt, or looseness. Use a flashlight to get a better view.
- Clean Terminals Every Three Months: Clean the battery terminals every three months to remove any accumulated corrosion. Use a battery terminal cleaner or a baking soda solution.
- Tighten Connections Semi-Annually: Tighten the battery terminal connections every six months to ensure they are secure. Use a wrench to tighten the nuts, but be careful not to overtighten them.
- Check Battery Voltage: Regularly check the battery voltage with a multimeter to ensure it is within the normal range (12.6 volts or higher when the engine is off, and 13.7 to 14.7 volts when the engine is running).
- Professional Inspections: Have your car’s battery and charging system inspected by a professional mechanic at least once a year.
5.2. Applying Protective Measures
Applying protective measures can help prevent corrosion and keep the connections secure:
- Use Battery Terminal Protectors: Apply battery terminal protectors to the terminals after cleaning them. These protectors come in the form of a spray or a grease and help prevent corrosion.
- Apply Dielectric Grease: Apply a small amount of dielectric grease to the terminals before reconnecting the cables. This grease helps improve the connection and prevent corrosion.
- Use Anti-Corrosion Washers: Install anti-corrosion washers between the battery terminals and the cable connectors. These washers help prevent corrosion from forming.
- Check the Battery Tray: Ensure the battery tray is clean and free of debris. Debris can trap moisture and contribute to corrosion.
- Secure the Battery: Make sure the battery is securely mounted in the battery tray. A loose battery can vibrate and cause the terminals to loosen.
5.3. Environmental Considerations
The environment in which you drive your car can affect the battery connections. Consider these factors:
- Extreme Temperatures: Extreme temperatures can cause the metal in the battery terminals and connectors to expand and contract, leading to loosening over time. Park your car in a garage or shaded area to protect it from extreme temperatures.
- Road Conditions: Driving on rough roads can cause the battery terminals to loosen due to vibration. Avoid driving on rough roads if possible, and regularly check the battery connections if you do.
- Salt and Moisture: Salt and moisture can accelerate corrosion. If you live in an area with high humidity or where roads are salted in the winter, be sure to clean and protect the battery terminals more frequently.
5.4. Choosing Quality Components
Using high-quality components can also help prevent loose connections:
- Use Quality Battery Cables: Use high-quality battery cables that are properly sized for your car. Undersized cables can cause voltage drop and overheating.
- Use Quality Battery Terminals: Use high-quality battery terminals that are made of corrosion-resistant materials.
- Consider AGM Batteries: Consider using an Absorbed Glass Mat (AGM) battery. AGM batteries are more resistant to vibration and corrosion than traditional flooded batteries. According to a study by Battery Council International (BCI), AGM batteries have a longer lifespan and better performance in extreme conditions compared to flooded batteries.
5.5. Professional Servicing
Regular professional servicing can help identify and address potential issues before they become major problems:
- Schedule Regular Check-Ups: Schedule regular check-ups with a qualified mechanic. They can inspect the battery and charging system and identify any potential issues.
- Follow Maintenance Schedule: Follow the manufacturer’s recommended maintenance schedule for your car. This schedule typically includes battery and charging system inspections.
- Address Issues Promptly: If you notice any symptoms of a loose connection, such as difficulty starting the car or dimming lights, address the issue promptly. Ignoring these symptoms can lead to more significant problems down the line.
By following these preventive measures, you can significantly reduce the risk of encountering loose connections on your car battery and keep your car running reliably. Remember, regular maintenance and proactive care are key to ensuring the longevity and performance of your vehicle’s electrical system.
6. When to Call a Professional
While many battery issues can be resolved with DIY methods, there are situations where it’s best to call a professional mechanic. Attempting to fix complex problems without the right tools and knowledge can lead to further damage or even injury. Here are some scenarios where professional help is recommended:
6.1. Complex Electrical Issues
If you’re experiencing complex electrical issues that go beyond a simple loose connection, it’s best to consult a professional. These issues might include:
- Persistent Battery Drain: If your battery keeps draining even after tightening the connections and addressing any visible corrosion, there could be a parasitic drain or a fault in the charging system.
- Intermittent Electrical Problems: If you’re experiencing intermittent electrical problems such as flickering lights, malfunctioning accessories, or engine stalling, it could be due to a more complex wiring issue.
- Faulty Charging System: If the battery voltage is not within the normal range (13.7 to 14.7 volts when the engine is running), there could be a problem with the alternator or voltage regulator.
6.2. Battery Acid Leaks
Battery acid is highly corrosive and can cause serious burns and damage. If you notice any signs of battery acid leaks, such as:
- Visible Acid: If you see liquid pooling around the battery or corrosion on the battery tray.
- Acid Smell: If you smell a strong, pungent odor coming from the battery.
- Swollen Battery Case: If the battery case is swollen or deformed.
Do not attempt to handle the battery yourself. Contact a professional mechanic to safely remove and dispose of the battery.
6.3. Damaged Battery Terminals or Cables
If the battery terminals or cables are severely damaged or corroded, they may need to be replaced. This is a job best left to a professional, as it requires specialized tools and knowledge. Signs of damage include:
- Cracked or Broken Terminals: If the battery terminals are cracked or broken.
- Frayed or Corroded Cables: If the battery cables are frayed, corroded, or have damaged insulation.
- Loose or Missing Clamps: If the clamps that hold the battery cables to the terminals are loose or missing.
6.4. Unfamiliarity with Automotive Electrical Systems
If you’re not comfortable working on automotive electrical systems, it’s best to leave the job to a professional. Automotive electrical systems can be complex, and working on them without the proper knowledge and experience can be dangerous.
6.5. Lack of Proper Tools
Some battery-related repairs require specialized tools, such as:
- Battery Load Tester: To test the battery’s ability to deliver power under a heavy load.
- OBD-II Scanner: To read diagnostic trouble codes (DTCs) stored in the car’s computer.
- Battery Terminal Puller: To safely remove stuck battery terminals.
If you don’t have these tools, it’s best to take your car to a professional mechanic who does.
6.6. Safety Concerns
Working on a car battery can be dangerous if you don’t take the proper precautions. Batteries contain corrosive acid and can produce explosive gases. If you’re not comfortable working around these hazards, it’s best to leave the job to a professional.
7. Choosing the Right Tools from CARDIAGTECH.NET
When it comes to maintaining and repairing your car’s battery connections, having the right tools is essential. CARDIAGTECH.NET offers a wide range of high-quality tools designed to make the job easier and more efficient. Here are some of the top tools available and how they can help you:
7.1. Battery Terminal Cleaners
Corrosion on battery terminals can lead to loose connections and reduced performance. CARDIAGTECH.NET offers a variety of battery terminal cleaners to help you remove corrosion quickly and effectively:
- Wire Brush Cleaners: These cleaners feature a wire brush that scrubs away corrosion from the terminals and connectors.
- Spray Cleaners: These cleaners use a chemical solution to dissolve corrosion. They are easy to use and can reach tight spaces.
- Terminal Cleaning Kits: These kits include a variety of tools and solutions for cleaning battery terminals, including brushes, sprays, and protective coatings.
7.2. Wrenches and Socket Sets
Having the right wrenches and sockets is crucial for tightening battery terminals securely. CARDIAGTECH.NET offers a range of wrench and socket sets to meet your needs:
- Combination Wrench Sets: These sets include a variety of wrenches in different sizes, allowing you to tackle a wide range of battery-related tasks.
- Socket Sets: These sets include a variety of sockets and a ratchet handle, making it easy to tighten battery terminals in tight spaces.
- Adjustable Wrenches: These wrenches can be adjusted to fit different sizes of nuts and bolts, making them a versatile tool for battery maintenance.
7.3. Multimeters
A multimeter is an essential tool for diagnosing battery and charging system problems. CARDIAGTECH.NET offers a variety of multimeters with different features and price points:
- Digital Multimeters: These multimeters provide accurate readings and are easy to use. They can measure voltage, current, resistance, and more.
- Analog Multimeters: These multimeters use a needle to indicate readings. They are less accurate than digital multimeters but are often more affordable.
- Automotive Multimeters: These multimeters are designed specifically for automotive use. They include features such as a temperature probe and the ability to measure RPM.
7.4. Battery Load Testers
A battery load tester is used to measure the battery’s ability to deliver power under a heavy load. CARDIAGTECH.NET offers a variety of battery load testers to help you determine if your battery is in good condition:
- Digital Load Testers: These load testers provide accurate readings and are easy to use. They display the battery’s voltage and CCA (cold cranking amps).
- Analog Load Testers: These load testers use a needle to indicate the battery’s condition. They are less accurate than digital load testers but are often more affordable.
- Electronic Load Testers: These load testers use electronic circuitry to measure the battery’s condition. They are more accurate and reliable than traditional load testers.
7.5. Safety Equipment
Safety should always be a top priority when working on car batteries. CARDIAGTECH.NET offers a range of safety equipment to protect you from battery acid and other hazards:
- Safety Glasses: These glasses protect your eyes from battery acid and debris.
- Gloves: These gloves protect your hands from battery acid and other chemicals.
- Aprons: These aprons protect your clothing from battery acid and other chemicals.
7.6. Why Choose CARDIAGTECH.NET?
- High-Quality Products: CARDIAGTECH.NET offers only the highest quality tools and equipment.
- Wide Selection: CARDIAGTECH.NET has a wide selection of tools to meet your needs.
- Competitive Prices: CARDIAGTECH.NET offers competitive prices on all of its products.
- Excellent Customer Service: CARDIAGTECH.NET is committed to providing excellent customer service.
Investing in the right tools from CARDIAGTECH.NET can make maintaining and repairing your car’s battery connections easier, safer, and more efficient.
8. Real-Life Examples
To illustrate the importance of addressing loose connections on car batteries, here are a few real-life examples:
8.1. The Case of the Intermittent Starting Problem
John, a 45-year-old engineer, had been experiencing intermittent starting problems with his car for several weeks. Sometimes the car would start fine, while other times it would crank slowly or not at all. He had taken the car to several mechanics, but none of them could diagnose the problem.
One day, John decided to inspect the battery connections himself. He noticed that the negative terminal was slightly loose and had some corrosion. He cleaned the terminal with a wire brush and baking soda solution, then tightened the connection.
After that, John’s car started reliably every time. He realized that the loose connection had been causing the intermittent starting problems.
8.2. The Case of the Dimming Headlights
Sarah, a 32-year-old teacher, had been noticing that her headlights were dimming, especially when the engine was idling. She thought it might be a problem with the alternator, but she wasn’t sure.
She took her car to a mechanic, who inspected the battery connections. He found that the positive terminal was corroded and loose. He cleaned the terminal and tightened the connection.
After that, Sarah’s headlights were much brighter. She realized that the loose connection had been causing the dimming headlights.
8.3. The Case of the Unexpected Breakdown
Mark, a 50-year-old salesman, was driving to a business meeting when his car suddenly broke down on the side of the road. He called a tow truck, and the driver inspected the car.
The driver found that the battery cable had come completely loose from the terminal. He reattached the cable and tightened the connection.
After that, Mark’s car started right up. He realized that the loose connection had caused the unexpected breakdown.
8.4. Data and Statistics
Data and statistics further highlight the importance of maintaining secure battery connections:
- AAA reports that battery-related issues are the leading cause of vehicle breakdowns.
- The Car Care Council recommends checking battery connections at least twice a year.
- A study by the Battery Council International (BCI) found that approximately 40% of returned batteries show signs of corrosion.
- According to a survey by J.D. Power, vehicle reliability is a key factor in customer satisfaction, and battery issues can significantly impact overall reliability scores.
These real-life examples and data underscore the importance of addressing loose connections on car batteries. Regular maintenance and proactive care can prevent these issues and keep your car running smoothly.
9. Call To Action
Experiencing difficulty starting your car, dimming lights, or other electrical issues? Don’t let a loose connection on your car battery leave you stranded!
Contact CARDIAGTECH.NET today for expert advice and top-quality tools to diagnose and fix any battery connection problems. Our team of experienced professionals can help you identify the right tools and provide guidance to ensure your car’s electrical system is running smoothly and reliably.
- Address: 276 Reock St, City of Orange, NJ 07050, United States
- WhatsApp: +1 (641) 206-8880
- Website: CARDIAGTECH.NET
Take the first step towards a reliable and trouble-free driving experience. Reach out to CARDIAGTECH.NET now and let us help you keep your car’s battery connections secure and corrosion-free. Our wide range of battery terminal cleaners, wrenches, multimeters, and safety equipment will ensure you have everything you need to tackle any battery-related task with confidence. Contact us today for a consultation and get back on the road with peace of mind!
10. Frequently Asked Questions (FAQ)
Here are some frequently asked questions about loose connections on car batteries:
1. What are the main symptoms of a loose connection on a car battery?
The main symptoms include difficulty starting the car, a clicking sound when turning the ignition, dimming lights, electrical problems, and a resetting clock or radio.
2. What causes corrosion on battery terminals?
Corrosion is caused by a chemical reaction between the battery acid, the metal of the terminals, and the environment. Factors like humidity and temperature fluctuations can accelerate corrosion.
3. How often should I clean my car battery terminals?
You should clean your car battery terminals at least every three months, or more frequently if you live in an area with high humidity or road salt.
4. Can a loose battery connection drain my battery?
Yes, a loose battery connection can cause a parasitic drain, which depletes