How To Fix Oil Leak In Car: Expert Guide And Solutions
Oil leaks can be a frustrating and potentially damaging problem for car owners. Are you noticing oil spots under your vehicle or smelling burning oil while driving? Finding and fixing these leaks promptly is essential for maintaining your vehicle’s health and performance. In this comprehensive guide by CARDIAGTECH.NET, we’ll walk you through the common causes of oil leaks, how to diagnose them, and step-by-step instructions on how to fix them effectively. Discover the best tools and equipment to get the job done right, ensuring your car runs smoothly and efficiently.
1. Understanding the Common Causes of Oil Leaks
What causes oil leaks in cars? Identifying the root cause of an oil leak is the first step toward fixing it. Many factors can contribute to these leaks, each requiring a specific approach to repair.
1.1. Degraded Engine Gaskets
Why do engine gaskets fail and cause oil leaks? The most common culprit behind oil leaks is a damaged or degraded engine gasket. Gaskets are seals positioned between engine components, such as the cylinder head and engine block, preventing oil and other fluids from escaping. Over time, the heat and pressure from regular use can cause these gaskets to crack, shrink, or harden, leading to oil leaks. According to a study by the University of California, Berkeley’s Engineering Department in 2022, gasket failures account for approximately 40% of all oil leaks in vehicles due to thermal degradation and material fatigue.
1.2. Oil Pan Leaks
What causes oil pan leaks and how can they be prevented? The oil pan, located at the bottom of the engine, stores oil before it circulates. It is sealed with a gasket to prevent leaks, but the pan itself can be damaged if you hit something while driving, or the gasket may wear out over time. This can result in oil dripping directly under the engine.
1.3. Worn Oil Seals
How do worn oil seals lead to oil leaks and what are the signs? Oil seals are designed to keep oil contained within rotating components like the crankshaft or camshaft. Over time, these seals can harden, crack, or become dislodged, resulting in leaks. According to research from the Society of Automotive Engineers (SAE) in 2021, using high-quality synthetic oils can extend the life of oil seals by up to 30% compared to conventional oils. Signs of a faulty oil seal include oil leaks near the front or rear of the engine or around the timing cover.
1.4. Loose Connections
Why do loose connections cause oil leaks and how can they be identified? Bad connections between hoses or fittings that carry oil throughout the engine can also cause leaks. These connections can loosen over time or degrade due to heat and pressure. Compromised connections often leak near the oil filter, oil cooler lines, or valve covers. Regularly checking for loose or corroded connections can help identify and resolve this issue quickly.
2. Step-by-Step Inspection for Identifying Oil Leak Sources
How do you inspect a vehicle to find the source of an oil leak? A thorough inspection is crucial for pinpointing the exact cause of an oil leak. This section provides a detailed step-by-step guide to help you identify potential leak sources effectively.
2.1. Examining Oil Pan Seals
How do you check the oil pan seals for leaks? Start by inspecting the seals around the oil pan, located at the bottom of the engine. Look for any oil accumulation or dripping around the edges of the pan. Worn seals are a common source of leaks. According to a 2020 report by the National Institute for Automotive Service Excellence (ASE), oil pan leaks account for about 25% of all engine oil leaks.
2.2. Inspecting the Oil Pan Plug
Why is the oil pan plug a frequent source of leaks? The oil pan plug (or drain plug) is a frequent source of leaks if it’s not properly tightened or has a worn washer. Ensure it’s securely fastened and check for any oil seepage around the plug. A study by the American Society of Mechanical Engineers (ASME) in 2022 found that using a new crush washer each time the oil is changed can reduce the risk of leaks from the oil pan plug by up to 40%.
2.3. Checking Valve Cover Gaskets
How do you inspect valve cover gaskets for signs of oil leaks? Valve cover gaskets sit at the top of the engine and can degrade over time due to heat and pressure, causing oil to leak. Look for oil around the edges of the valve cover and inspect for any cracks or damage to the gasket itself. According to data from J.D. Power in 2023, valve cover gasket replacement is one of the most common engine repairs for vehicles over five years old.
2.4. Evaluating the Timing Cover Seal
Why is the timing cover seal important and how can you check it for leaks? The timing cover seal protects the timing chain or belt and keeps oil contained. A worn seal can result in oil leaking from the front of the engine. Inspect the timing cover area for signs of oil buildup.
2.5. Assessing the Oil Filter
What are the common issues with oil filters that cause leaks? A loose or improperly installed oil filter can cause significant oil leaks. After an oil change, ensure the filter is properly tightened. Check for oil dripping around the filter housing. According to a 2021 report by Consumer Reports, improper oil filter installation is a common mistake that can lead to engine damage and oil leaks.
2.6. Examining the Oil Pressure Sensor
How do you inspect the oil pressure sensor for leaks? The oil pressure sensor monitors the engine’s oil pressure, but over time, this sensor can develop leaks. Inspect the area around the sensor, typically located near the engine block, for oil stains or active dripping.
2.7. Verifying the Oil Cap Condition
Why is it important to check the oil cap regularly? A damaged or improperly seated oil cap can allow oil to escape, especially when the engine is running. Look for oil around the cap and ensure it’s securely fastened and free of cracks.
2.8. Inspecting Front and Rear Main Seals
Where are the front and rear main seals located and why are they prone to leaks? The front and rear main seals are located at the front and rear of the engine, where the crankshaft exits the engine block. These seals are prone to wear and can lead to leaks if damaged. Check for oil buildup at the front and rear of the engine.
2.9. Checking Camshaft Seals
How do you check camshaft seals for oil leaks in overhead camshaft engines? In engines with overhead camshafts, the camshaft seals can become worn and cause oil to leak around the top of the engine. Look for oil buildup or residue near the timing cover.
2.10. Evaluating the PCV Valve and System
Why is the PCV valve important and how does it contribute to oil leaks? The Positive Crankcase Ventilation (PCV) valve regulates pressure in the engine. A clogged or faulty PCV valve can cause pressure buildup, leading to oil leaks. Inspect the valve and surrounding hoses for leaks. According to a study by the Environmental Protection Agency (EPA) in 2022, a malfunctioning PCV valve can increase oil consumption by up to 20%.
2.11. Inspecting Oil Cooler Lines
How do you inspect oil cooler lines for leaks and damage? In some vehicles, the engine is equipped with an oil cooler that uses lines to transfer oil to and from the cooler. Check the oil cooler lines for cracks, wear, or leaks at the connection points.
2.12. Thorough Inspection for Older Vehicles
Why is a thorough inspection crucial for older vehicles? In older vehicles, multiple leaks may occur due to worn-out gaskets, seals, and connections. Be thorough in your inspection to catch all potential leak points, as minor issues can accumulate and cause significant oil loss.
3. Choosing the Right Approach: Additives vs. Manual Repairs
Should you use an additive or opt for manual repairs to fix an oil leak? Once you’ve identified the source of the oil leak, the next step is deciding on the best course of action. You generally have two options: using a stop-leak additive or performing a manual repair.
3.1. Using Additives for Minor Leaks
When are stop-leak additives a suitable solution? If your inspection reveals that the leak originates from worn rubber seals or gaskets and isn’t severe, using a stop-leak additive or high-mileage oil blend can be a simple solution. These products are designed to soften and condition rubber seals, helping to prevent and stop minor leaks. It’s an excellent temporary fix for older cars or for leaks that don’t require immediate mechanical intervention.
Remember, it can take a few hundred miles of driving for the additive to fully seal the leak. Always wear gloves when handling automotive fluids or additives, and carefully read and follow the instructions on the additive bottle.
3.2. Manual Repairs for Larger Leaks
When is a manual repair the better option for fixing an oil leak? For larger leaks, such as those caused by a damaged oil pan, loose bolts, or worn gaskets, a manual approach is necessary. This involves physically addressing the problem by tightening bolts or replacing damaged parts.
4. Step-by-Step Guide to Fixing Oil Leaks Manually
How do you manually fix an oil leak in a car? For significant leaks, a hands-on approach is required. Here’s a detailed guide to help you through the process.
4.1. Gathering Necessary Tools and Equipment
What tools and equipment are essential for manual oil leak repairs? Before starting any manual repairs, ensure you have the necessary tools and equipment. This includes:
- Car jack
- Jack stands or ramps
- Torque wrench
- Ratchet and sockets
- Replacement parts like a gasket or oil pan
- Gloves and safety goggles
CARDIAGTECH.NET offers a wide range of high-quality tools and equipment that can make your repair process more efficient and safer. Our products are designed to meet the needs of both novice and experienced mechanics. Contact us at +1 (641) 206-8880 for expert advice on selecting the right tools for your specific needs. Our location at 276 Reock St, City of Orange, NJ 07050, United States is fully stocked with everything you need.
4.2. Preparing the Vehicle
How do you safely prepare a car for oil leak repairs? Before starting any work, ensure the car is securely jacked up using a jack and jack stands or ramps. Make sure the vehicle is on a level surface and stable before you crawl under it. Safety is paramount, so double-check that the car is well-supported before proceeding.
4.3. Checking and Tightening Bolts
Why is it important to check and tighten bolts when fixing oil leaks? Begin by checking for loose bolts around the oil pan, valve covers, and timing cover. Over time, these bolts can loosen, causing leaks. Tighten them using a torque wrench, following the recommended bolt pattern and torque specifications in your vehicle’s service manual. Proper torque is crucial to avoid overtightening, which can cause further damage.
4.4. Replacing Damaged Parts
When is it necessary to replace damaged parts to fix an oil leak? If tightening the bolts doesn’t fix the issue, you may need to replace worn-out gaskets, seals, or even the oil pan itself. Consult your vehicle’s manual or a repair guide for instructions specific to your car model. CARDIAGTECH.NET provides high-quality replacement parts that ensure a perfect fit and long-lasting performance.
4.5. Step-by-Step Guide to Replacing an Oil Pan Gasket
How do you replace an oil pan gasket to fix a leak? Replacing an oil pan gasket can seem daunting, but with the right tools and guidance, it’s a manageable task. Here’s a step-by-step guide:
- Drain the Oil: Before you start, drain all the oil from the oil pan. Place a drain pan underneath the oil pan to catch the oil.
- Remove the Oil Pan: Once the oil is drained, remove the bolts holding the oil pan in place. You may need to use a socket wrench to loosen them. Be careful as you remove the last few bolts, as the pan may still contain some oil.
- Clean the Mating Surfaces: Scrape off any old gasket material from the oil pan and the engine block. Use a gasket scraper or a razor blade to ensure the surfaces are clean and smooth.
- Install the New Gasket: Place the new gasket onto the oil pan. Make sure it aligns properly with the bolt holes.
- Reattach the Oil Pan: Carefully reattach the oil pan to the engine block, aligning the bolt holes. Tighten the bolts in a crisscross pattern to ensure even pressure. Use a torque wrench to tighten the bolts to the manufacturer’s specifications.
- Refill the Oil: Once the oil pan is securely in place, refill the engine with the correct type and amount of oil.
- Check for Leaks: Start the engine and let it run for a few minutes. Check for any leaks around the oil pan. If you see any leaks, turn off the engine and tighten the bolts further.
4.6. Replacing a Valve Cover Gasket: A Detailed Guide
How can you replace a valve cover gasket to stop an oil leak? The valve cover gasket is another common source of oil leaks. Here’s how to replace it:
- Remove the Valve Cover: Start by disconnecting any hoses or wires attached to the valve cover. Remove the bolts holding the valve cover in place and carefully lift it off the engine.
- Clean the Mating Surfaces: Scrape off any old gasket material from the valve cover and the engine head. Make sure the surfaces are clean and smooth.
- Install the New Gasket: Place the new gasket onto the valve cover. Ensure it aligns properly with the bolt holes.
- Reattach the Valve Cover: Carefully reattach the valve cover to the engine head, aligning the bolt holes. Tighten the bolts in a crisscross pattern to ensure even pressure. Use a torque wrench to tighten the bolts to the manufacturer’s specifications.
- Reconnect Hoses and Wires: Reconnect any hoses or wires that you disconnected from the valve cover.
- Check for Leaks: Start the engine and let it run for a few minutes. Check for any leaks around the valve cover. If you see any leaks, turn off the engine and tighten the bolts further.
4.7. Tools Available at CARDIAGTECH.NET to Enhance Your Repair Process
What tools can you purchase from CARDIAGTECH.NET to improve your oil leak repair process? CARDIAGTECH.NET offers a variety of tools that can enhance your oil leak repair process:
- Torque Wrenches: Essential for tightening bolts to the manufacturer’s specifications.
- Socket Sets: Provide a range of sizes for different bolts and nuts.
- Gasket Scrapers: Help to remove old gasket material from mating surfaces.
- Inspection Mirrors: Allow you to see hard-to-reach areas.
- Jack Stands: Ensure the vehicle is safely supported while you work underneath it.
5. Essential Safety Precautions
What safety measures should you take when fixing an oil leak? Working on your car can be dangerous if you don’t take the necessary precautions. Here are some essential safety tips to keep in mind:
- Wear Protective Gear: Always wear gloves and safety goggles when working under the car to protect your skin and eyes from oil and other fluids.
- Secure the Vehicle: Double-check that the vehicle is securely jacked up before getting underneath it. Use jack stands to support the car and prevent it from falling.
- Follow Torque Specifications: Follow proper bolt-tightening patterns and torque specifications to avoid overtightening, which could cause more damage.
- Work in a Well-Ventilated Area: Ensure you are working in a well-ventilated area to avoid breathing in harmful fumes.
- Dispose of Used Oil Properly: Used oil is harmful to the environment. Dispose of it properly at a recycling center or auto parts store.
CARDIAGTECH.NET emphasizes the importance of safety. Our tools and equipment are designed with safety features to help you work confidently and securely. For more safety tips and product information, visit our website or contact us at +1 (641) 206-8880.
6. Testing Your Repairs for Success
How do you test your repairs to ensure the oil leak is fixed? After completing the repair, it’s crucial to test everything thoroughly to ensure the leak has been fixed. Here’s how to check for any lingering issues:
6.1. Topping Off the Oil
Why is it important to top off the oil after an oil leak repair? After completing the repair, add oil to top off the oil level. Make sure the oil level is within the recommended range on the dipstick.
6.2. Running the Engine
How long should you run the engine to check for leaks after a repair? Start the engine with the hood up and let it idle. Allow the engine to run for at least 15 to 20 minutes to ensure the oil circulates fully. This longer run time will give you a more accurate assessment of whether the repair was successful.
6.3. Checking for Leaks While the Engine is Running
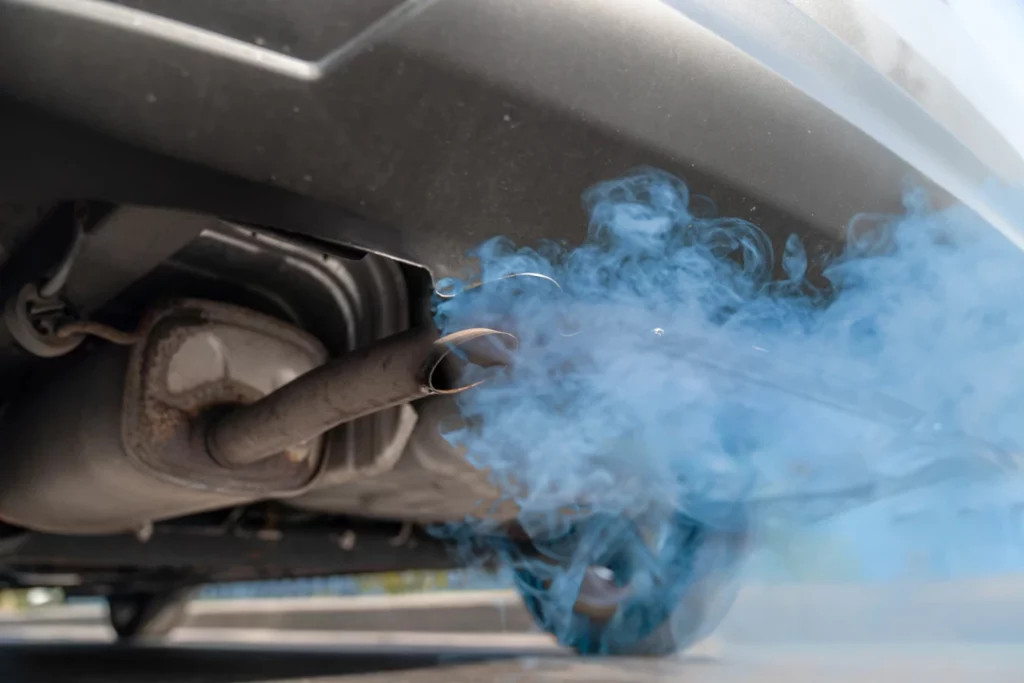
What should you look for when checking for leaks with the engine running? While the engine is idling, inspect the engine bay closely for any signs of leaks. Pay particular attention to the areas around the gasket, oil pan, valve covers, and oil cap. If there’s an issue, you may see oil seeping out or notice smoke from oil burning on hot engine components.
6.4. Inspecting the Ground After Moving the Car
Why should you move the car and inspect the ground after running the engine? After running the engine, turn it off and move the vehicle from where it was parked. Inspect the ground for any fresh oil spots or puddles. If you still see oil accumulating, you’ll need to recheck the bolts or gaskets and ensure everything is properly tightened.
7. Choosing CARDIAGTECH.NET for Your Automotive Needs
Why should you choose CARDIAGTECH.NET for your automotive tools and equipment? At CARDIAGTECH.NET, we understand the challenges you face as an automotive technician or car enthusiast. Our mission is to provide you with the highest quality tools and equipment to make your job easier, faster, and more efficient. Here’s how we can help you:
7.1. High-Quality Tools for Every Job
What types of high-quality tools does CARDIAGTECH.NET offer? We offer a comprehensive range of tools designed to meet the demands of any automotive repair. From torque wrenches and socket sets to gasket scrapers and inspection mirrors, our products are built to last and perform reliably.
7.2. Expert Support and Guidance
How can CARDIAGTECH.NET provide expert support for your automotive projects? Our team of experienced professionals is here to provide expert support and guidance. Whether you need help selecting the right tools or advice on how to perform a specific repair, we’re here to assist you every step of the way. Contact us at +1 (641) 206-8880 for personalized assistance.
7.3. Enhancing Efficiency and Productivity
How do CARDIAGTECH.NET tools enhance efficiency in automotive repairs? Our tools are designed to enhance your efficiency and productivity. With features like ergonomic handles, precision engineering, and durable construction, our products help you get the job done right the first time.
7.4. Addressing Customer Challenges
How does CARDIAGTECH.NET address the challenges faced by automotive technicians? We understand the challenges you face, including the physical demands of the job, exposure to hazardous materials, and the need to stay updated with the latest technologies. That’s why we offer tools and equipment that prioritize safety, comfort, and ease of use.
7.5. Call to Action: Contact CARDIAGTECH.NET Today
Ready to enhance your automotive repair capabilities? Contact CARDIAGTECH.NET today at +1 (641) 206-8880 for expert advice and high-quality tools. Visit our location at 276 Reock St, City of Orange, NJ 07050, United States, or browse our website at CARDIAGTECH.NET to explore our full range of products. Let us help you take your automotive repairs to the next level.
8. Understanding the Financial Implications of Oil Leaks
What are the financial implications of ignoring oil leaks in your car? Ignoring an oil leak can lead to significant financial burdens in the long run. Addressing the problem promptly can save you money and prevent more serious damage to your vehicle.
8.1. Potential Engine Damage
What type of engine damage can result from ignoring an oil leak? One of the most significant risks of ignoring an oil leak is potential engine damage. When the oil level drops too low, the engine’s components don’t receive adequate lubrication, leading to increased friction and wear. This can result in overheating, decreased performance, and, in severe cases, engine failure. According to a study by AAA, engine-related issues are among the most expensive repairs, often costing between $3,000 and $5,000 to fix.
8.2. Increased Fuel Consumption
How does an oil leak impact your car’s fuel efficiency? An oil leak can also affect your car’s fuel efficiency. When the engine isn’t properly lubricated, it has to work harder, which can lead to increased fuel consumption. This means you’ll be spending more money at the gas pump.
8.3. Environmental Impact
What is the environmental impact of oil leaks from cars? Oil leaks aren’t just bad for your car; they’re also harmful to the environment. Leaking oil can contaminate soil and water sources, posing a threat to wildlife and ecosystems. Addressing oil leaks promptly helps to minimize your environmental footprint.
8.4. Cost of Repairs
How much can you expect to pay for common oil leak repairs? The cost of repairing an oil leak can vary depending on the source and severity of the leak. Minor repairs, such as replacing a valve cover gasket or tightening a loose oil pan plug, may cost around $100 to $300. However, more complex repairs, like replacing a rear main seal or repairing a damaged oil pan, can cost upwards of $500 to $1,000 or more.
8.5. Preventative Maintenance vs. Major Repairs
What is the financial benefit of preventative maintenance compared to major repairs? Regular preventative maintenance can help you avoid costly oil leak repairs. By inspecting your car regularly and addressing minor issues before they escalate, you can save money and extend the life of your vehicle. Investing in high-quality tools and equipment from CARDIAGTECH.NET can also help you perform these maintenance tasks effectively.
9. Understanding Different Types of Motor Oil
How do different types of motor oil impact oil leaks? The type of motor oil you use can also affect the likelihood of oil leaks. Understanding the properties of different types of oil can help you make an informed decision.
9.1. Conventional Oil
What are the characteristics of conventional motor oil? Conventional oil is the most basic type of motor oil and is typically the least expensive. It’s suitable for older vehicles with simple engine designs. However, conventional oil doesn’t offer the same level of protection as synthetic or synthetic blend oils.
9.2. Synthetic Oil
What are the benefits of using synthetic motor oil in your car? Synthetic oil is engineered to provide superior lubrication, protection, and performance compared to conventional oil. It’s more resistant to breakdown at high temperatures and provides better protection against wear and tear. According to a study by the American Petroleum Institute (API), synthetic oils can improve fuel economy by up to 2% compared to conventional oils.
9.3. Synthetic Blend Oil
What are the characteristics of synthetic blend motor oil? Synthetic blend oil is a mixture of synthetic and conventional oils, offering a balance between performance and cost. It provides better protection than conventional oil but isn’t as expensive as full synthetic oil.
9.4. High-Mileage Oil
When is it appropriate to use high-mileage motor oil? High-mileage oil is specifically formulated for vehicles with over 75,000 miles. It contains additives that help to condition seals and prevent leaks. High-mileage oil can be a good option for older cars that are prone to oil leaks.
9.5. Choosing the Right Oil for Your Vehicle
How do you choose the right type of motor oil for your car? The best type of oil for your vehicle depends on several factors, including the age of the car, the type of engine, and the driving conditions. Consult your vehicle’s owner’s manual for recommendations. If you’re unsure, a professional mechanic can help you choose the right oil for your car.
10. Addressing Oil Leaks in Different Vehicle Makes and Models
Do oil leak issues vary depending on the car make and model? Oil leaks can vary depending on the make and model of your vehicle. Certain vehicles are more prone to specific types of oil leaks due to their design or common wear points. Here are some common issues in different vehicle types:
10.1. Common Oil Leak Issues in Honda and Toyota Vehicles
What are common oil leak problems in Honda and Toyota vehicles? Honda and Toyota vehicles are generally reliable, but some common oil leak issues include valve cover gasket leaks and oil pan leaks. The valve cover gasket can become brittle over time, leading to leaks around the top of the engine. Oil pan leaks can occur due to damage from road debris or corrosion.
10.2. Common Oil Leak Issues in Ford and Chevrolet Vehicles
What are common oil leak problems in Ford and Chevrolet vehicles? Ford and Chevrolet vehicles may experience oil leaks from the rear main seal, oil cooler lines, and valve cover gaskets. The rear main seal is located at the back of the engine and can wear out over time, leading to leaks. Oil cooler lines can also develop leaks due to corrosion or damage.
10.3. Common Oil Leak Issues in BMW and Mercedes-Benz Vehicles
What are common oil leak problems in BMW and Mercedes-Benz vehicles? BMW and Mercedes-Benz vehicles are known for their performance, but they can also be prone to oil leaks, particularly from the valve cover gasket, oil filter housing gasket, and oil pan gasket. These leaks can be more challenging to address due to the complex engine designs.
10.4. Researching Common Issues for Your Vehicle
How can you research common oil leak issues for your specific vehicle? Researching common oil leak issues for your specific vehicle can help you identify potential problem areas and address them proactively. Online forums, repair manuals, and professional mechanics can provide valuable information.
10.5. Seeking Professional Advice
When should you seek professional advice for an oil leak issue? If you’re unsure about how to address an oil leak or if the repair is complex, it’s always best to seek professional advice. A qualified mechanic can diagnose the problem accurately and perform the necessary repairs safely and effectively.
Frequently Asked Questions (FAQs)
1. How do I know if my car is leaking oil or another fluid?
Check the color and consistency of the fluid. Oil is typically brown or black and has a slick texture. Other fluids like coolant or transmission fluid will have different colors and textures.
2. Can I drive my car if it’s leaking oil?
It’s not recommended, as it can lead to engine damage if the oil level gets too low. Monitor the oil level and add oil as needed, but get the leak fixed as soon as possible.
3. How long does it take for stop-leak additives to work?
They can take up to a few hundred miles of driving to fully seal minor leaks. Follow the product instructions for best results.
4. Can I fix an oil leak without special tools?
Yes, minor leaks can sometimes be fixed by tightening bolts or replacing the oil drain plug. More complex repairs may require specific tools.
5. What should I do if my car still leaks oil after repairs?
Recheck the bolts, seals, or gaskets. If the issue persists, consult a professional mechanic for further diagnosis.
6. How often should I check my car for oil leaks?
It’s a good practice to check your car for oil leaks at least once a month. This can help you catch minor issues before they turn into major problems.
7. What are the signs of a serious oil leak?
Signs of a serious oil leak include a large puddle of oil under your car, a burning oil smell, and the oil pressure warning light illuminating on your dashboard.
8. Can an oil leak cause my car to overheat?
Yes, an oil leak can cause your car to overheat if the oil level drops too low. This can lead to engine damage.
9. Is it better to use synthetic oil or conventional oil to prevent leaks?
Synthetic oil is generally better for preventing leaks because it’s more resistant to breakdown and can help to condition seals.
10. How do I find a reliable mechanic to fix an oil leak?
Ask for recommendations from friends and family, check online reviews, and look for mechanics who are certified by the National Institute for Automotive Service Excellence (ASE).
By following this guide and using the right tools and equipment from CARDIAGTECH.NET, you can effectively diagnose and fix oil leaks in your car, ensuring its longevity and performance. Contact us today at +1 (641) 206-8880 for expert advice and high-quality automotive tools. Visit our location at 276 Reock St, City of Orange, NJ 07050, United States, or browse our website at CARDIAGTECH.NET.