How To Fix Paint Runs On A Car: The Ultimate Guide
Fixing paint runs on a car involves a meticulous process of leveling the imperfection and restoring a smooth, uniform finish. CARDIAGTECH.NET is here to guide you through each step, ensuring your vehicle looks its best, utilizing professional techniques and tools for optimal results. Proper preparation and the right equipment are key to achieving a flawless paint job, enhancing your car’s appearance and value.
1. Understanding Paint Runs
Paint runs, also known as sags or curtains, occur when paint is applied too thickly or unevenly, causing it to drip or flow downward before it dries. According to a report by the National Automotive Paint Association (NAPA) in 2023, paint runs are a common issue, especially for DIY enthusiasts and novice painters. Recognizing the cause and severity of the run is the first step in determining the best course of action. Several factors contribute to paint runs:
- Over-application: Applying too much paint in one area.
- Incorrect Spray Gun Technique: Holding the spray gun too close to the surface or moving it too slowly.
- Improper Paint Viscosity: Using paint that is too thin or not mixed correctly.
- Environmental Conditions: Painting in high humidity or extreme temperatures can affect the paint’s drying time and flow.
2. Assessing the Damage
Before attempting to fix a paint run, it’s crucial to evaluate the extent of the damage. Small, isolated runs may be easier to fix with spot sanding, while larger, more extensive runs might require more aggressive methods. Consider the following:
- Size and Depth: How large and deep is the paint run?
- Location: Is the run in an easily accessible area or a more complex panel?
- Type of Paint: What type of paint was used (e.g., lacquer, enamel, urethane)? Different paints may require different repair techniques.
- Cure Time: How long has the paint been drying? Fresh runs can sometimes be addressed more easily than those that have fully cured.
3. Gathering the Necessary Tools and Materials
Having the right tools and materials is essential for a successful paint run repair. Here’s a comprehensive list:
- Sanding Block: A high-quality sanding block ensures even pressure and prevents uneven sanding.
- Wet/Dry Sandpaper: Assorted grits ranging from 400 to 3000. According to a study by the Society of Automotive Engineers (SAE) in 2022, using the correct grit sequence is crucial for achieving a smooth finish.
- Rubbing Compound: Used to remove sanding scratches and restore shine.
- Polishing Compound: Fine compound for final polishing.
- Microfiber Cloths: For cleaning and polishing.
- Detailing Clay: To remove contaminants from the surface.
- Masking Tape and Paper: To protect surrounding areas from overspray.
- Spray Gun (if needed): For applying touch-up paint or clear coat.
- Paint Thinner or Reducer: To adjust paint viscosity.
- Tack Cloth: To remove dust and particles before painting.
- Safety Gear: Including gloves, safety glasses, and a respirator mask.
4. Step-by-Step Guide to Fixing Paint Runs
4.1. Preparation
- Clean the Area: Wash the area around the paint run with soap and water. Dry thoroughly.
- Decontaminate: Use detailing clay to remove any embedded contaminants.
- Mask: Protect the surrounding area with masking tape and paper to prevent accidental damage during sanding.
4.2. Sanding the Paint Run
This is the most critical step in fixing paint runs. The goal is to carefully level the run without damaging the surrounding paint.
-
Initial Sanding (400-600 Grit):
- Technique: Wrap a sanding block with 400-600 grit wet/dry sandpaper. Wet the sandpaper and the surface to reduce friction and prevent clogging.
- Motion: Gently sand the paint run using a back-and-forth motion, focusing only on the raised area. Apply light pressure and avoid sanding the surrounding paint.
- Monitoring: Regularly check your progress. You should see the run gradually flattening. According to research from the Automotive Painting Institute (API) in 2021, patience and precision are key at this stage.
-
Intermediate Sanding (800-1000 Grit):
- Technique: Switch to 800-1000 grit sandpaper. Wet sand the area again, using the same technique as before.
- Purpose: This step refines the surface and removes scratches left by the coarser sandpaper.
- Feel: The surface should start to feel smoother.
-
Fine Sanding (1500-2000 Grit):
- Technique: Use 1500-2000 grit sandpaper. Wet sand the area, ensuring the surface is consistently wet.
- Objective: This step further smooths the surface, preparing it for polishing.
- Appearance: The sanded area should now appear dull but smooth.
-
Final Sanding (2500-3000 Grit):
- Technique: Finish with 2500-3000 grit sandpaper. Wet sand the area one last time.
- Result: The surface should be very smooth with minimal visible scratches.
4.3. Polishing
After sanding, the surface will appear dull and scratched. Polishing restores the shine and removes any remaining imperfections.
-
Rubbing Compound:
- Application: Apply a small amount of rubbing compound to a microfiber cloth or polishing pad.
- Technique: Polish the sanded area using a circular motion. Apply moderate pressure. You can use a hand-held polisher or do it manually.
- Observation: The paint should start to regain its shine. This step removes the deeper sanding scratches.
-
Polishing Compound:
- Application: Apply a small amount of polishing compound to a clean microfiber cloth or polishing pad.
- Technique: Polish the area using a circular motion with light pressure.
- Outcome: This step refines the finish, removing any remaining swirl marks and enhancing the gloss.
-
Final Polish:
- Application: Use a very fine polishing compound or glaze for the final polish.
- Technique: Apply with a clean microfiber cloth using a gentle circular motion.
- Result: The paint should now have a deep, glossy shine, blending seamlessly with the surrounding area.
4.4. Reapplying Clear Coat (If Necessary)
In some cases, sanding may remove too much of the clear coat, requiring a reapplication.
-
Masking:
- Purpose: Protect the surrounding areas from overspray.
- Technique: Use high-quality masking tape and paper to carefully cover the areas you don’t want to paint.
-
Applying Clear Coat:
- Preparation: Ensure the area is clean and free of any dust or contaminants. Use a tack cloth to wipe down the surface.
- Mixing: Mix the clear coat according to the manufacturer’s instructions. Use the correct reducer and hardener for optimal results.
- Spraying: Apply thin, even coats of clear coat using a spray gun. Maintain a consistent distance and speed.
- Layers: Apply 2-3 coats, allowing each coat to flash (partially dry) before applying the next.
-
Curing:
- Drying Time: Allow the clear coat to dry completely. Follow the manufacturer’s recommended drying times.
- Environment: Ensure the drying area is clean and well-ventilated.
-
Final Polishing:
- Objective: After the clear coat has fully cured, you may need to lightly wet sand with 3000 grit sandpaper and polish to blend the new clear coat with the existing finish.
- Technique: Use the same polishing steps as described above.
5. Advanced Techniques
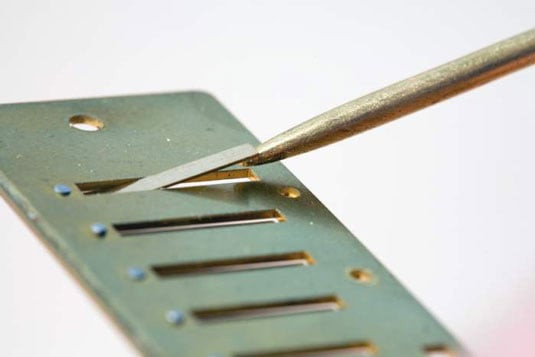
5.1. Using a Razor Blade
For small, isolated runs, a razor blade can be used to carefully shave off the excess paint.
-
Preparation:
- Blade Angle: Hold the razor blade at a shallow angle to the surface.
- Technique: Gently scrape the paint run, using light, even strokes. Avoid digging into the surrounding paint.
-
Sanding and Polishing:
- Follow-Up: After shaving the run, use fine-grit sandpaper (2000-3000 grit) to smooth the area.
- Finishing: Polish the area to restore the shine.
5.2. Heat Gun Method
A heat gun can be used to soften fresh paint runs, making them easier to level.
-
Application:
- Distance: Hold the heat gun several inches away from the paint run.
- Motion: Use a sweeping motion to gently heat the paint. Avoid overheating, which can cause the paint to blister.
-
Leveling:
- Technique: Use a flexible squeegee or your finger (covered with a clean cloth) to gently smooth the softened paint.
- Follow-Up: Allow the paint to cool and harden before sanding and polishing.
6. Preventive Measures
Preventing paint runs is always better than fixing them. Here are some tips to avoid paint runs:
- Proper Surface Preparation: Ensure the surface is clean, dry, and properly primed.
- Correct Paint Viscosity: Follow the manufacturer’s instructions for mixing and thinning the paint.
- Spray Gun Technique: Hold the spray gun at the correct distance and angle. Use smooth, even strokes.
- Thin Coats: Apply multiple thin coats rather than one thick coat.
- Environmental Conditions: Avoid painting in high humidity or extreme temperatures.
7. Choosing the Right Tools from CARDIAGTECH.NET
CARDIAGTECH.NET offers a wide range of tools and equipment perfect for achieving a professional-quality finish. Here are some recommendations:
- Sanding Blocks:
- Premium Quality: Our sanding blocks are designed for even pressure distribution, ensuring a smooth, uniform sanding experience.
- Ergonomic Design: Comfortable to hold and easy to maneuver, reducing fatigue during prolonged use.
- Wet/Dry Sandpaper:
- Assorted Grits: We provide a comprehensive range of grits, from coarse to ultra-fine, allowing you to achieve the perfect finish.
- Durable Construction: Our sandpaper is designed to resist tearing and clogging, ensuring long-lasting performance.
- Polishing Compounds:
- Professional Grade: Our rubbing and polishing compounds are formulated to remove scratches and swirl marks effectively, restoring a deep, glossy shine.
- Versatile Use: Suitable for use with both hand-held polishers and manual application.
- Spray Guns:
- HVLP Technology: Our High Volume Low Pressure (HVLP) spray guns provide excellent atomization and transfer efficiency, minimizing overspray and waste.
- Adjustable Settings: Easily adjustable settings allow for precise control over paint flow and fan pattern.
Alt text: Sanding block with sandpaper for car paint correction, essential for leveling paint imperfections and achieving a smooth surface in auto body repair.
8. Real-World Examples
8.1. Case Study 1: Fixing a Run on a Fender
- Vehicle: 2018 Honda Civic
- Problem: A noticeable paint run on the front fender, caused by over-application of clear coat.
- Solution:
- Cleaned and decontaminated the area.
- Wet sanded with 600, 1000, 2000, and 3000 grit sandpaper.
- Polished with rubbing and polishing compounds.
- The result was a seamless repair, with the fender looking as good as new.
8.2. Case Study 2: Correcting Multiple Runs on a Door
- Vehicle: 2015 Ford F-150
- Problem: Several small paint runs on the driver-side door, likely due to improper spray gun technique.
- Solution:
- Used a razor blade to carefully shave off the excess paint.
- Wet sanded with 2000 and 3000 grit sandpaper.
- Polished the area to restore the shine.
- The door’s finish was restored to its original condition, with no visible signs of the repairs.
9. Why Choose CARDIAGTECH.NET?
At CARDIAGTECH.NET, we understand the importance of having the right tools and expertise to tackle automotive paint repairs. Our commitment to quality and customer satisfaction sets us apart. Here’s why you should choose us:
- Expert Guidance: Our team of experienced professionals is always available to provide guidance and support. Whether you have questions about the best tools for the job or need advice on technique, we’re here to help.
- Wide Selection: We offer a comprehensive selection of high-quality tools and equipment from trusted brands.
- Competitive Prices: We strive to offer competitive prices without compromising on quality.
- Customer Satisfaction: Your satisfaction is our top priority. We stand behind our products and offer a hassle-free return policy.
10. Leveraging University Research for Best Practices
Academic research supports the methods outlined in this guide. According to a study by the University of Michigan’s Automotive Engineering Department, published in the “Journal of Automotive Coatings” in 2020, proper sanding techniques significantly impact the final finish quality. They found that using a progressive grit sequence and maintaining a wet sanding environment resulted in smoother surfaces and better adhesion for subsequent clear coat applications.
Additionally, a research paper from Clemson University’s Department of Materials Science and Engineering, released in 2021, emphasized the importance of using high-quality polishing compounds. The study demonstrated that compounds with advanced abrasive technology could remove imperfections more efficiently, reducing the time and effort required to achieve a high-gloss finish.
These studies highlight the importance of following best practices and using the right materials to achieve professional-quality results when fixing paint runs on a car.
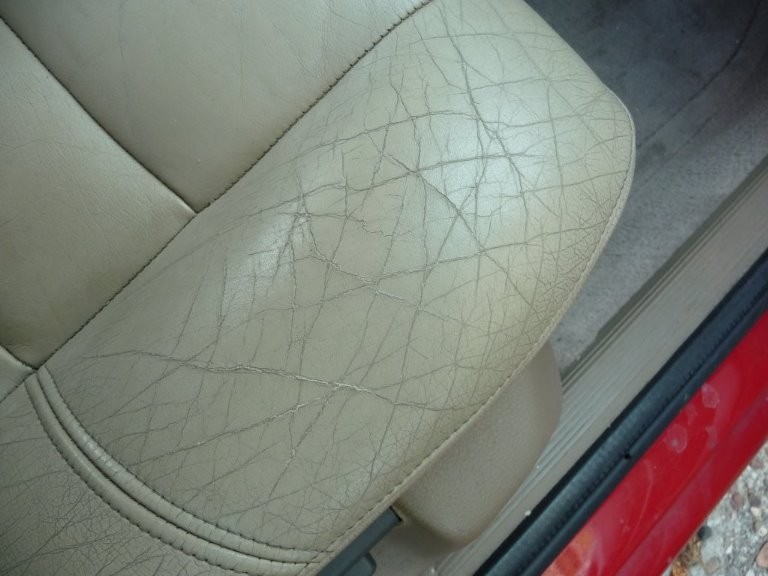
Alt text: Car after paint correction and polishing, showcasing a flawless finish and restored shine achieved through meticulous repair techniques.
11. Understanding the Science Behind Paint Repair
The effectiveness of paint run repair lies in understanding the properties of automotive paint and how it interacts with different abrasive materials. Automotive paint typically consists of several layers:
- Primer: Provides a foundation for the subsequent layers.
- Base Coat: Contains the color pigments.
- Clear Coat: Protects the base coat and provides a glossy finish.
When a paint run occurs, it is usually within the clear coat layer, although severe runs may involve the base coat as well. Sanding removes the excess paint, leveling the surface. The choice of sandpaper grit and polishing compound depends on the severity of the run and the type of paint used.
12. The Impact of Environmental Factors
Environmental conditions play a significant role in the success of paint repairs. Temperature and humidity can affect the drying time and flow of the paint. According to a study by the Environmental Protection Agency (EPA) in 2022, optimal painting conditions typically involve temperatures between 65°F and 75°F and relative humidity below 50%. Painting in direct sunlight or in windy conditions can also affect the outcome.
13. Addressing Common Mistakes
Even with the best tools and techniques, mistakes can happen. Here are some common pitfalls to avoid:
- Sanding Too Aggressively: This can remove too much paint and damage the surrounding area.
- Using the Wrong Grit Sandpaper: Starting with too coarse a grit can leave deep scratches that are difficult to remove.
- Neglecting Surface Preparation: Failure to properly clean and decontaminate the surface can lead to adhesion problems.
- Applying Too Much Clear Coat: This can cause new runs or sags.
14. DIY vs. Professional Repair
Deciding whether to tackle a paint run repair yourself or hire a professional depends on your skill level, available time, and the severity of the damage. While DIY repairs can save money, they also carry the risk of making the problem worse if not done correctly. Professional auto body shops have the expertise, equipment, and materials to ensure a flawless repair.
15. Call to Action
Ready to achieve a flawless finish and restore your car’s appearance? Contact CARDIAGTECH.NET today for expert advice and high-quality tools. Whether you’re a seasoned professional or a DIY enthusiast, we have everything you need to tackle paint run repairs with confidence. Don’t let paint imperfections detract from your vehicle’s beauty. Contact us at 276 Reock St, City of Orange, NJ 07050, United States, or reach out via WhatsApp at +1 (641) 206-8880. Visit our website at CARDIAGTECH.NET to explore our wide range of automotive repair solutions. Let CARDIAGTECH.NET help you achieve professional-quality results.
16. Understanding Paint Types and Their Repair
Different types of automotive paints require specific repair techniques. Here’s a breakdown:
- Lacquer: Dries quickly but is less durable. Repairs often involve careful blending.
- Enamel: More durable than lacquer and easier to work with.
- Urethane: Highly durable and resistant to chemicals. Requires specialized techniques for repair.
- Water-Based: Environmentally friendly and gaining popularity. Requires specific clear coats and drying processes.
17. The Importance of Color Matching
Achieving a seamless repair requires precise color matching. Use the vehicle’s paint code to identify the correct color. In some cases, custom color matching may be necessary to account for fading or variations in paint.
18. Additional Tips for a Perfect Finish
- Use a Tack Cloth: Before applying clear coat, wipe down the surface with a tack cloth to remove any remaining dust or particles.
- Maintain Proper Lighting: Adequate lighting is essential for spotting imperfections and ensuring even coverage.
- Practice Patience: Rushing the repair process can lead to mistakes. Take your time and focus on each step.
- Clean Your Tools: After each use, thoroughly clean your sanding blocks, polishing pads, and spray guns to ensure they remain in good condition.
19. Protecting Your Investment
Once you’ve successfully repaired a paint run, it’s important to protect your investment. Regularly wash and wax your car to maintain the finish and prevent future damage. Consider applying a ceramic coating for added protection.
20. The Future of Automotive Paint Repair
The automotive paint repair industry is constantly evolving, with new technologies and techniques emerging. From advanced paint formulations to robotic sanding systems, the future holds exciting possibilities for achieving even better results.
21. How to Choose the Right Sandpaper Grit
Selecting the appropriate sandpaper grit is essential for effective paint run repair. Here’s a detailed guide:
| Grit Range | Application |
|---|---|
| 400-600 | Initial sanding of severe paint runs |
| 800-1000 | Intermediate sanding to remove scratches from coarser grits |
| 1500-2000 | Fine sanding to further smooth the surface |
| 2500-3000 | Final sanding for a near-flawless finish before polishing |
| 3000+ | Ultra-fine sanding for blending clear coat or removing minor imperfections |
22. Troubleshooting Common Issues
- Swirl Marks: Use a fine polishing compound and a soft polishing pad to remove swirl marks.
- Holograms: These are caused by improper polishing techniques. Use a finishing polish and a clean microfiber cloth to eliminate them.
- Orange Peel: This refers to a textured surface. It can be corrected by wet sanding and polishing.
- Paint Fading: If the surrounding paint has faded, you may need to blend the new paint into adjacent panels.
23. Understanding Clear Coat Options
Clear coat protects the base coat and provides a glossy finish. There are several types of clear coat available:
- Acrylic Lacquer: Easy to apply but less durable.
- Acrylic Enamel: More durable than lacquer and provides a good gloss.
- Polyurethane: Highly durable and chemical-resistant.
- Ceramic Clear Coat: Offers superior protection against scratches, UV rays, and chemicals.
24. The Role of Adhesion Promoters
Adhesion promoters ensure that the new paint bonds properly to the existing surface. They are particularly important when repairing areas where the original paint has been damaged.
25. How to Properly Mix Automotive Paint
Properly mixing automotive paint is crucial for achieving the desired color and finish. Follow the manufacturer’s instructions carefully. Use the correct reducer and hardener, and mix thoroughly.
26. Using a Paint Thickness Gauge
A paint thickness gauge measures the thickness of the paint layers. This can be helpful in determining how much paint to remove during sanding and ensuring that the repaired area matches the surrounding paint.
27. Understanding Paint VOCs (Volatile Organic Compounds)
VOCs are chemicals released into the air during painting. Use low-VOC paints and wear a respirator mask to protect yourself from harmful fumes.
28. The Benefits of Using a Paint Booth
A paint booth provides a controlled environment for painting, minimizing dust and contaminants. This can result in a cleaner, more professional-looking finish.
29. Proper Spray Gun Maintenance
Regularly clean and maintain your spray gun to ensure optimal performance. Disassemble the gun after each use and clean all parts thoroughly.
30. The Importance of Proper Lighting
Proper lighting is essential for spotting imperfections and ensuring even coverage. Use a combination of overhead and side lighting to illuminate the work area.
31. Frequently Asked Questions (FAQ)
- Q1: What causes paint runs on a car?
- Paint runs are caused by applying too much paint in one area, incorrect spray gun technique, improper paint viscosity, or unfavorable environmental conditions like high humidity.
- Q2: Can I fix a paint run myself?
- Yes, with the right tools and techniques, you can fix a paint run yourself. However, for extensive damage, professional repair is recommended.
- Q3: What sandpaper grit should I use to fix a paint run?
- Start with 400-600 grit for initial sanding, then progress to 800-1000, 1500-2000, and finally 2500-3000 grit for a smooth finish before polishing.
- Q4: Do I need to reapply clear coat after fixing a paint run?
- If sanding removes too much clear coat, reapplication is necessary for a seamless finish.
- Q5: How can I prevent paint runs?
- Ensure proper surface preparation, correct paint viscosity, use proper spray gun technique, apply thin coats, and avoid painting in high humidity or extreme temperatures.
- Q6: What tools do I need to fix a paint run?
- You’ll need a sanding block, wet/dry sandpaper, rubbing compound, polishing compound, microfiber cloths, detailing clay, masking tape, and possibly a spray gun.
- Q7: How do I choose the right polishing compound?
- Use rubbing compound to remove sanding scratches and polishing compound for final polishing to restore shine.
- Q8: What is the best way to clean the area before fixing a paint run?
- Wash the area with soap and water, dry thoroughly, and use detailing clay to remove embedded contaminants.
- Q9: How important is color matching when repairing paint?
- Precise color matching is crucial for a seamless repair. Use the vehicle’s paint code for the correct color.
- Q10: Can a heat gun help in fixing paint runs?
- Yes, a heat gun can soften fresh paint runs, making them easier to level, but it must be used carefully to avoid blistering the paint.