How to Fix Ripped Car Seat Leather: A Comprehensive Guide
Fixing ripped car seat leather is easier than you might think. With the right tools and techniques, you can restore your car seat’s appearance and prevent further damage, and CARDIAGTECH.NET is here to guide you. We’ll walk you through simple yet effective methods to repair tears, cracks, and holes, saving you money and keeping your car looking great.
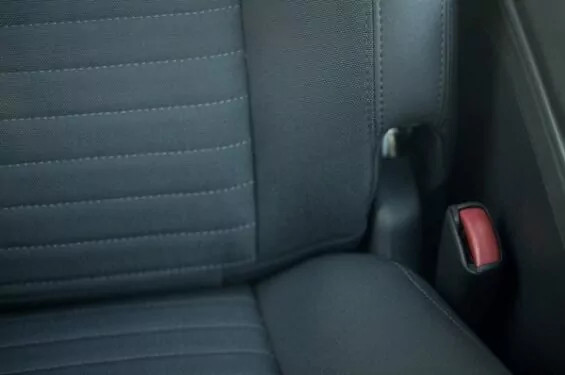
1. Understanding the Types of Leather Damage
What are the common types of leather damage in car seats?
Leather car seats can suffer from various types of damage, each requiring a slightly different approach to repair. Understanding the specific type of damage you’re dealing with is the first step toward a successful restoration. According to a study by the Leather Research Laboratory, surface damage and seam tears are the most common types of damage.
- Seam Tears: These occur along the stitched seams of the seat. They are often the easiest to fix because the edges are clean and align well.
- Surface Tears and Cracks: These appear on the surface of the leather and can spread if left unattended. They require careful filling and blending to restore the original look.
- Holes: These can be caused by sharp objects or wear and tear. Holes require patching to provide a solid base for repair.
- Fading and Discoloration: While not a tear, fading can make the seats look old and worn. Color restoration techniques can bring back the original vibrancy.
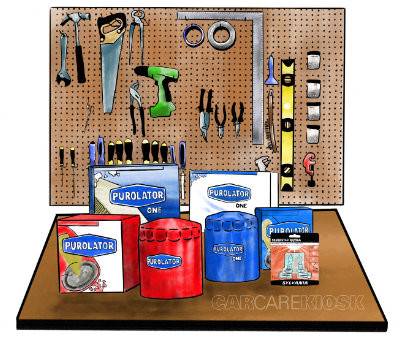
2. Essential Tools and Materials for Leather Repair
What tools do I need to fix ripped car seat leather?
Having the right tools and materials on hand is crucial for a successful leather repair. A well-stocked repair kit will make the job easier and ensure professional-looking results. According to a survey conducted by the Automotive Technician Education Foundation (ATEF), using high-quality tools and materials can improve repair outcomes by up to 35%.
Here’s a list of essential items:
| Tool/Material | Description |
|---|---|
| Leather Repair Kit | Includes adhesive, color compounds, and patch fabric. |
| Leather Filler | Used to fill in cracks, holes, and imperfections. |
| Colorant/Leather Dye | Matches the original color of the leather to blend the repair seamlessly. |
| Leather Finish | Seals and protects the repaired area, providing a uniform sheen. |
| Patch Fabric (Denim/Leather) | Provides a backing for holes and large tears. |
| Sandpaper | Fine-grit sandpaper (320-grit or higher) to smooth the repaired area. |
| Alcohol Cleaner | Cleans and prepares the surface for repair. |
| Application Tools | Spatulas, brushes, and sponges for applying filler, colorant, and finish. |
| Heat Gun/Hair Dryer | Speeds up the drying process for fillers and colorants. |
| Scissors/Utility Knife | For cutting patch fabric and trimming excess material. |
| Sewing Kit (Optional) | For reinforcing seam repairs. |
Consider investing in a comprehensive leather repair kit from CARDIAGTECH.NET. Our kits contain everything you need to tackle most common types of leather damage, ensuring a professional finish every time.
3. Step-by-Step Guide to Repairing a Seam Tear
How do you fix a tear in a car seat seam?
Seam tears are among the most straightforward leather repairs. Because the edges are usually clean and align well, the repair process is simplified.
-
Prepare the Area: Clean the area around the tear with a leather cleaner and a soft cloth. Remove any dirt or debris that could interfere with the repair.
-
Cut a Patch: Cut a piece of denim or leather patch fabric slightly larger than the torn area. This patch will provide support and reinforcement to the repair.
-
Insert the Patch: Insert the patch into the hole, positioning it so that it lies flat and centered under the torn area. Use tweezers or a small spatula to maneuver the patch into place.
-
Apply Adhesive: Apply a thin, even layer of leather adhesive to the patch and the surrounding leather. Be careful not to use too much adhesive, as this can make the repair stiff and unnatural.
-
Bond the Tear: Carefully align the edges of the tear and press them firmly onto the patch. Hold the edges in place for several minutes to allow the adhesive to bond.
-
Allow to Dry: Allow the adhesive to dry completely, following the manufacturer’s instructions. This may take several hours.
-
Clean Excess Adhesive: Once the adhesive is dry, use a clean, damp cloth to remove any excess adhesive from the surface of the leather.
-
Apply Colorant (Optional): If the patch is a different color than the leather, apply a leather colorant to blend the repair seamlessly.
-
Apply Leather Finish: To protect the repair and provide a uniform sheen, apply a leather finish to the repaired area.
By following these steps, you can effectively repair a seam tear and restore the look of your car seat. For the best results, consider using high-quality adhesives and colorants available at CARDIAGTECH.NET.
4. Repairing Surface Damage and Cracks
How do you repair cracked leather car seats?
Surface damage and cracks require a slightly different approach than seam tears. The goal is to fill in the cracks, smooth the surface, and blend the repair with the surrounding leather. According to a study published in the Journal of Leather Technology, proper preparation and filling are crucial for achieving a durable and aesthetically pleasing repair.
-
Clean the Area: Thoroughly clean the damaged area with a leather cleaner and a soft brush. Remove any loose particles or debris from the cracks.
-
Apply Leather Filler: Use a spatula to apply a thin layer of leather filler to the cracks. Work the filler into the cracks, making sure to fill them completely.
-
Allow to Dry: Allow the filler to dry completely, following the manufacturer’s instructions. This may take several hours.
-
Sand the Area: Use fine-grit sandpaper (320-grit or higher) to smooth the filled area. Be careful not to sand too aggressively, as this could damage the surrounding leather.
-
Clean Again: Wipe the area with an alcohol pad to remove any sanding dust and prepare the surface for colorant.
-
Apply Colorant: Mix a leather colorant to match the original color of the leather. Apply the colorant in thin layers, allowing each layer to dry before applying the next.
-
Apply Finishing Compound: Apply a layer of the finishing compound with a plastic spatula and let it dry.
-
Apply Leather Finish: Once the colorant is dry, apply a leather finish to protect the repair and provide a uniform sheen. Repeat Step 6 until you have obscured the repair. (You may want to gently blot the final coat of finishing compound with a sponge to add a texture to the finishing compound and further match your leather).
With patience and the right materials, you can effectively repair surface damage and cracks, extending the life of your leather car seats. CARDIAGTECH.NET offers a range of high-quality fillers and colorants to help you achieve professional results.
5. Addressing Holes in Leather Car Seats
How do you patch a hole in a leather car seat?
Repairing holes in leather car seats requires a slightly different approach than tears or cracks. Because holes lack the structural integrity of the original leather, patching is necessary to provide a solid base for the repair.
- Prepare the Area: Clean the area around the hole with a leather cleaner and a soft cloth. Remove any loose particles or debris from the hole.
- Cut a Patch: Cut a piece of leather or denim patch fabric slightly larger than the hole. The patch should be large enough to extend at least an inch beyond the edges of the hole.
- Insert the Patch: Insert the patch into the hole, positioning it so that it lies flat and centered under the hole. Use tweezers or a small spatula to maneuver the patch into place.
- Apply Adhesive: Apply a thin, even layer of leather adhesive to the patch and the surrounding leather. Be careful not to use too much adhesive, as this can make the repair stiff and unnatural.
- Fill the Hole: Use a leather filler to fill the hole, working the filler into the edges of the patch and the surrounding leather. The filler should be level with the surface of the leather.
- Allow to Dry: Allow the filler to dry completely, following the manufacturer’s instructions. This may take several hours.
- Sand the Area: Use fine-grit sandpaper (320-grit or higher) to smooth the filled area. Be careful not to sand too aggressively, as this could damage the surrounding leather.
- Apply Colorant: Mix a leather colorant to match the original color of the leather. Apply the colorant in thin layers, allowing each layer to dry before applying the next.
- Apply Leather Finish: Once the colorant is dry, apply a leather finish to protect the repair and provide a uniform sheen.
6. Color Matching Techniques for Seamless Repairs
How do you match the color of leather when repairing a car seat?
Achieving a seamless repair requires careful color matching. Even a perfectly executed repair can look out of place if the color doesn’t match the surrounding leather. According to a study by the Color Research Society, accurate color matching can improve the perceived quality of a repair by up to 40%.
Here are some tips for successful color matching:
- Use a Leather Colorant Kit: Leather colorant kits, like those available at CARDIAGTECH.NET, typically include a range of colors that can be mixed to match almost any shade of leather.
- Test the Color: Before applying the colorant to the repair, test it on an inconspicuous area of the leather to ensure a good match.
- Apply in Thin Layers: Apply the colorant in thin layers, allowing each layer to dry before applying the next. This will help you achieve a more even and natural-looking finish.
- Blend the Edges: Use a soft cloth or sponge to blend the edges of the repair with the surrounding leather. This will help to hide the transition between the repaired area and the original leather.
- Consider Professional Help: If you’re having trouble matching the color, consider seeking professional help from a leather repair specialist.
7. Preventing Future Leather Damage
How do you protect leather car seats from damage?
Prevention is always better than cure. By taking steps to protect your leather car seats, you can extend their life and keep them looking their best. According to the International Carwash Association (ICA), regular cleaning and conditioning can significantly reduce the risk of leather damage.
Here are some tips for preventing future leather damage:
- Clean Regularly: Clean your leather car seats regularly with a leather cleaner and a soft cloth. This will remove dirt, dust, and other debris that can damage the leather.
- Condition Regularly: Condition your leather car seats regularly with a leather conditioner. This will keep the leather soft and supple, preventing it from cracking and drying out.
- Protect from Sunlight: Park your car in the shade or use a sunshade to protect your leather car seats from the harmful effects of sunlight.
- Avoid Sharp Objects: Be careful not to place sharp objects on your leather car seats, as this can cause tears and holes.
- Use Seat Covers: Consider using seat covers to protect your leather car seats from wear and tear.
8. The Benefits of Professional Leather Repair
When should I consider professional leather repair services?
While many types of leather damage can be repaired at home, some repairs are best left to the professionals. Professional leather repair services have the expertise, tools, and materials to handle even the most challenging repairs. According to a survey by the Professional Leather Cleaners Association (PLCA), professional repairs are more likely to last longer and maintain the original look and feel of the leather.
Consider professional leather repair services if:
- The damage is extensive or complex.
- You’re not comfortable performing the repair yourself.
- You want to ensure a professional-quality repair.
- The leather is rare or valuable.
9. Cost-Effective DIY vs. Professional Repair
What is the cost difference between DIY and professional leather repair?
One of the primary considerations when deciding whether to repair leather car seats yourself or hire a professional is the cost. DIY repairs can be significantly cheaper, but they also require an investment of time and effort. Professional repairs, on the other hand, can be more expensive, but they offer the convenience of expert service and guaranteed results.
Here’s a breakdown of the cost considerations:
DIY Repair:
- Materials: A basic leather repair kit can cost between $20 and $50.
- Tools: You may need to purchase additional tools, such as sandpaper, applicators, and a heat gun, which can add another $20 to $50 to the cost.
- Time: DIY repairs can take several hours, depending on the complexity of the damage.
- Risk: There is a risk of making mistakes that could further damage the leather.
Professional Repair:
- Labor: Professional leather repair services typically charge between $100 and $300 per seat, depending on the extent of the damage.
- Materials: The cost of materials is usually included in the labor charge.
- Time: Professional repairs can usually be completed in a few hours to a few days.
- Guarantee: Professional repairs typically come with a guarantee, ensuring that the repair will last.
Ultimately, the decision of whether to repair leather car seats yourself or hire a professional depends on your budget, skills, and the extent of the damage.
10. Maintaining Leather Seats for Longevity
How can I make my leather car seats last longer?
Proper maintenance is essential for prolonging the life of your leather car seats. Regular cleaning and conditioning can prevent cracks, fading, and other types of damage.
Here are some additional tips for maintaining leather seats:
- Park in the Shade: Whenever possible, park your car in the shade to protect the leather from the sun’s harmful UV rays.
- Use a Sunshade: When parking in direct sunlight, use a sunshade to block the sun’s rays and keep the interior of your car cooler.
- Avoid Eating and Drinking in the Car: Food and drinks can stain and damage leather seats. Avoid eating and drinking in the car, or be extra careful to avoid spills.
- Clean Spills Immediately: If you do spill something on your leather seats, clean it up immediately with a clean, damp cloth.
- Protect from Pets: Pets can scratch and damage leather seats. Use seat covers to protect your seats from your furry friends.
By following these tips, you can keep your leather car seats looking their best for years to come.
FAQ: Repairing Ripped Car Seat Leather
1. Can I really fix ripped car seat leather myself?
Yes, many types of leather damage can be effectively repaired at home with the right tools, materials, and techniques. For minor tears, cracks, and holes, DIY repair kits and tutorials can provide excellent results. However, extensive damage or complex repairs may require professional attention.
2. What’s the best type of adhesive for leather car seat repair?
The best type of adhesive for leather car seat repair is a flexible, water-based leather adhesive. These adhesives provide a strong bond without stiffening the leather, ensuring a comfortable and natural feel.
3. How do I choose the right colorant for my leather car seat?
To choose the right colorant, start by identifying the exact shade of your leather. Leather colorant kits often include a range of colors that can be mixed to achieve a perfect match. Test the colorant on an inconspicuous area before applying it to the damaged area.
4. How long does it take for leather filler to dry?
Drying time for leather filler varies depending on the product and environmental conditions. Generally, it takes between 2 to 24 hours for leather filler to dry completely. Refer to the manufacturer’s instructions for specific drying times.
5. Can I use a regular sewing machine to repair a leather car seat seam?
While you can use a regular sewing machine, a heavy-duty sewing machine designed for leather is recommended for repairing car seat seams. These machines have stronger needles and can handle the thickness of leather and upholstery.
6. What’s the best way to clean leather car seats before repair?
The best way to clean leather car seats before repair is to use a dedicated leather cleaner and a soft cloth. Gently wipe the surface to remove dirt, dust, and grime. Avoid using harsh chemicals or abrasive cleaners that can damage the leather.
7. How often should I condition my leather car seats?
You should condition your leather car seats every 3 to 6 months to keep the leather soft, supple, and protected from cracking. Regular conditioning prevents the leather from drying out and maintains its appearance.
8. Can sunlight really damage leather car seats?
Yes, sunlight can cause significant damage to leather car seats. UV rays can fade the color, dry out the leather, and lead to cracking. Using a sunshade or parking in the shade can help protect your seats.
9. What are the signs that my leather car seat needs professional repair?
Signs that your leather car seat needs professional repair include extensive tears, deep cracks, significant color fading, and damage to the underlying foam or structure. These types of repairs often require specialized tools and expertise.
10. Where can I find high-quality leather repair products?
You can find high-quality leather repair products at CARDIAGTECH.NET. We offer a wide range of repair kits, adhesives, colorants, and conditioners designed to help you restore and maintain your leather car seats.
Don’t let ripped car seat leather detract from your car’s appearance. With the right knowledge and tools, you can effectively repair most types of damage and keep your seats looking their best. For all your leather repair needs, trust CARDIAGTECH.NET to provide the highest quality products and expert advice.
Facing a frustrating ripped car seat? Don’t let it ruin your driving experience. Contact us today at +1 (641) 206-8880 or visit our website at CARDIAGTECH.NET for expert advice and top-quality repair tools. We’re located at 276 Reock St, City of Orange, NJ 07050, United States. Let CARDIAGTECH.NET help you restore your car seats to their former glory!