How to Fix Rock Chips on Car Hood: A Comprehensive Guide
Fixing rock chips on your car hood is essential to maintain its appearance and prevent further damage. At CARDIAGTECH.NET, we provide expert insights and solutions for automotive repairs. This guide offers comprehensive advice on addressing those unsightly chips and maintaining your vehicle’s pristine condition. We’ll explore the best methods and products available to help you restore your car’s hood to its former glory, ensuring a professional finish. For high-quality tools and expert advice, contact us at Whatsapp: +1 (641) 206-8880. Let’s dive into the world of auto body repair and discover how to effectively tackle rock chips, paint damage, and touch-up paint applications.
1. Understanding the Impact of Rock Chips on Your Car Hood
Rock chips on your car hood can seem minor, but they can lead to significant problems if left unaddressed. Why should you care about these small imperfections?
1.1. The Cascade Effect: From Chip to Corrosion
A rock chip isn’t just a cosmetic issue; it’s a gateway to corrosion. According to a study by the National Association of Corrosion Engineers (NACE), even a tiny breach in the paint can expose the metal underneath to moisture and road salt, accelerating the rusting process.
Think of it like this: The paint on your car is like your skin, protecting the metal underneath. When a rock hits your hood, it’s like getting a cut. If you don’t clean and protect the wound, it can get infected. Similarly, a rock chip allows moisture and salt to reach the metal, leading to rust.
Why is this a problem?
- Structural Integrity: Rust weakens the metal, which can affect the structural integrity of your car over time.
- Aesthetic Appeal: Rust is unsightly and can significantly reduce your car’s resale value.
- Costly Repairs: Addressing rust damage is far more expensive than fixing a simple rock chip.
1.2. The Financial Implications: Resale Value and Repair Costs
Rock chips can impact your car’s resale value. A study by the Kelley Blue Book found that even minor cosmetic damage can reduce a car’s value by hundreds of dollars.
- First Impressions Matter: When potential buyers see a car with numerous rock chips, they might assume the car hasn’t been well-maintained, leading them to offer a lower price.
- Negotiating Power: Buyers often use cosmetic flaws as leverage to negotiate a lower price.
Moreover, delaying repairs can lead to more extensive damage, increasing repair costs.
| Type of Damage | Average Repair Cost |
|---|---|
| Minor Rock Chips | $50 – $150 |
| Moderate Rock Chips | $150 – $300 |
| Severe Rust Damage | $500+ |
| Full Hood Repainting | $300 – $800 |
1.3. Maintaining Your Car’s Appearance: Pride and Satisfaction
Many car owners take pride in their vehicles’ appearance. Rock chips can detract from the overall look of your car, causing dissatisfaction.
- Psychological Impact: A clean and well-maintained car can boost your mood and confidence.
- Personal Image: Your car’s appearance reflects your attention to detail and care.
Consider this: Would you wear a stained shirt to an important meeting? Probably not. Similarly, keeping your car free of rock chips shows that you care about your possessions and take pride in your appearance.
2. Essential Tools and Materials for Fixing Rock Chips
Before you start fixing those rock chips, make sure you have the right tools and materials. Using the correct supplies can make the process smoother and ensure a professional finish.
2.1. Comprehensive List of Necessary Items
Here’s a detailed list of everything you’ll need:
- Cleaning Supplies:
- Car Wash Soap: To thoroughly clean the area.
- Detailing Spray: For final cleaning and shine.
- Microfiber Towels: Soft cloths that won’t scratch the paint.
- Surface Preparation:
- Rubbing Alcohol or Wax and Grease Remover: To remove any wax, oil, or contaminants.
- Clay Bar: To remove embedded contaminants (optional but recommended).
- Repair Materials:
- Touch-Up Paint: Matching your car’s color code.
- Primer (if necessary): For deep chips that expose bare metal.
- Clear Coat: To protect the repaired area and add shine.
- Application Tools:
- Fine-Tipped Applicators: Small brushes or toothpicks for precise application.
- Blending Solution: To smooth out the touch-up paint.
- Diaper Cloth: For applying and blending paint.
- Sanding and Polishing:
- Wet Sandpaper (2000-3000 grit): For leveling the touch-up paint.
- Sanding Block: To ensure even sanding.
- Polishing Compound: To restore shine after sanding.
- Polishing Pads: For use with a polishing machine (optional).
- Safety Gear:
- Gloves: To protect your hands from chemicals.
- Mask: To avoid inhaling fumes.
2.2. Where to Source Quality Supplies: Recommendations and Brands
Choosing the right brands and suppliers can make a significant difference in the quality of your repair. Here are some recommendations:
- Dr. Colorchip: Known for their high-quality touch-up paint kits and easy-to-use system. As mentioned by the Wall Street Journal, it is the best touch-up system on the market.
- AutomotiveTouchup: Offers a wide range of touch-up paints and accessories, with excellent color matching.
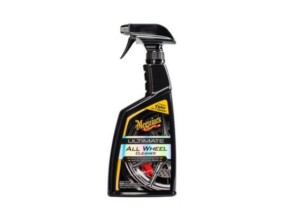
- Meguiar’s: Provides top-notch cleaning, polishing, and waxing products.
- 3M: Renowned for their high-quality sandpaper, masking tape, and other automotive supplies.
- Chemical Guys: Offers a wide array of detailing products, including soaps, waxes, and polishing compounds.
You can find these products at:
- Online Retailers: Amazon, eBay, and specialized automotive detailing websites.
- Local Auto Parts Stores: AutoZone, Advance Auto Parts, and O’Reilly Auto Parts.
- Professional Detailing Supply Stores: These stores often carry higher-quality products and offer expert advice.
2.3. Understanding Paint Codes: Finding the Right Match
Getting the right touch-up paint color is crucial for a seamless repair. Here’s how to find your car’s paint code:
- Check Your Car’s Manual: The paint code is often listed in the owner’s manual.
- Look for a Sticker: The sticker is typically located on the driver’s side door jamb, glove box, or under the hood.
- Use Online Resources: Websites like AutomotiveTouchup offer paint code lookup tools based on your car’s make, model, and year.
Example: A typical paint code might look like “WA8555” or “41U.”
Why is this important?
- Perfect Match: Using the correct paint code ensures the touch-up paint blends seamlessly with your car’s existing paint.
- Avoid Mismatches: Even slight variations in color can be noticeable, making the repair look unprofessional.
3. Step-by-Step Guide to Fixing Rock Chips on Your Car Hood
Now that you have the right tools and materials, let’s dive into the step-by-step process of fixing rock chips on your car hood.
3.1. Preparing the Area: Cleaning and Assessing the Damage
Before you start any repairs, it’s essential to prepare the area properly.
- Wash the Area: Use car wash soap and water to thoroughly clean the hood. Remove any dirt, grime, and debris.
- Dry the Area: Use a clean microfiber towel to dry the hood completely.
- Assess the Damage: Examine the rock chips closely. Determine how deep they are and whether they expose bare metal.
3.2. Applying Touch-Up Paint: Techniques for a Flawless Finish
Applying touch-up paint requires patience and precision. Here’s how to do it right:
- Shake the Paint: Shake the touch-up paint bottle thoroughly for several minutes to ensure the paint is mixed properly.
- Apply Primer (if necessary): If the rock chip exposes bare metal, apply a thin layer of primer to prevent rust. Let it dry completely.
- Apply Touch-Up Paint: Use a fine-tipped applicator to carefully apply the touch-up paint to the rock chip. Apply in thin layers to avoid drips and runs.
- Allow to Dry: Let the paint dry completely between layers. This may take several hours, depending on the paint and environmental conditions.
- Apply Clear Coat: Once the touch-up paint is dry, apply a thin layer of clear coat to protect the paint and add shine.
Pro Tip: Use a toothpick or a fine artist’s brush for precise application. This will help you avoid applying too much paint and creating a blob.
3.3. Blending and Leveling: Achieving a Seamless Look
After applying the touch-up paint, you’ll need to blend and level the area to achieve a seamless look.
- Wet Sanding: Wrap a piece of 2000-3000 grit wet sandpaper around a sanding block. Wet the sandpaper and the area around the rock chip with water. Gently sand the touch-up paint until it’s level with the surrounding paint.
- Polishing: Apply a small amount of polishing compound to a polishing pad. Use a polishing machine (or a microfiber towel) to polish the area until the sanding marks are removed and the paint is smooth and shiny.
- Waxing: Apply a coat of wax to protect the repaired area and add extra shine.
3.4. Dealing with Deep Chips and Rust: Advanced Techniques
If you’re dealing with deep chips or rust, you’ll need to take some extra steps.
- Remove Rust: Use a wire brush or sandpaper to remove any rust from the rock chip.
- Apply Rust Converter: Apply a rust converter to neutralize any remaining rust.
- Prime the Area: Apply a layer of primer to protect the bare metal.
- Follow the Steps Above: Follow the steps for applying touch-up paint, blending, and leveling.
Why is rust removal important?
- Prevents Further Damage: Removing rust prevents it from spreading and causing more damage.
- Ensures Proper Adhesion: Removing rust ensures the touch-up paint adheres properly to the metal.
4. Professional vs. DIY: Choosing the Right Approach
Deciding whether to fix rock chips yourself or hire a professional depends on several factors.
4.1. Weighing the Pros and Cons of DIY Repair
Pros:
- Cost-Effective: DIY repair is generally cheaper than hiring a professional.
- Convenience: You can do it yourself at your own pace and on your own schedule.
- Satisfaction: You may find satisfaction in repairing your car yourself.
Cons:
- Time-Consuming: DIY repair can be time-consuming, especially if you’re not experienced.
- Requires Skill: Achieving a professional finish requires skill and patience.
- Potential for Mistakes: If you make a mistake, you could end up making the damage worse.
4.2. When to Seek Professional Help: Identifying Complex Issues
You should consider seeking professional help if:
- You’re Not Comfortable: If you’re not comfortable working on your car or you’re worried about making a mistake.
- The Damage is Extensive: If the damage is extensive or involves rust, a professional can ensure the repairs are done properly.
- You Want a Perfect Finish: If you want a flawless, showroom-quality finish, a professional is more likely to achieve it.
4.3. Estimating Costs: DIY vs. Professional Services
Here’s a comparison of the estimated costs for DIY and professional rock chip repair:
| Repair Type | DIY Cost | Professional Cost |
|---|---|---|
| Minor Rock Chips | $20 – $50 | $50 – $150 |
| Moderate Rock Chips | $50 – $100 | $150 – $300 |
| Rust Removal | $100 – $200 | $300 – $500+ |
| Full Hood Repaint | $200 – $400+ | $300 – $800+ |
5. Long-Term Prevention: Protecting Your Car Hood from Future Damage
Preventing rock chips is better than having to fix them. Here are some tips for protecting your car hood from future damage.
5.1. Protective Measures: Paint Protection Film (PPF) and Ceramic Coatings
- Paint Protection Film (PPF): A transparent film that is applied to the hood to protect it from rock chips, scratches, and other damage. PPF is durable and can last for several years.
- Ceramic Coatings: A liquid polymer that is applied to the hood to provide a protective layer. Ceramic coatings are hydrophobic, meaning they repel water and dirt, making your car easier to clean.
5.2. Safe Driving Habits: Maintaining a Safe Distance
- Maintain a Safe Distance: Keep a safe distance from other vehicles, especially trucks and construction vehicles that are more likely to kick up rocks.
- Avoid Gravel Roads: If possible, avoid driving on gravel roads, as they are a major source of rock chips.
5.3. Regular Maintenance: Washing and Waxing Your Car
- Wash Your Car Regularly: Washing your car regularly removes dirt and debris that can cause damage to the paint.
- Wax Your Car: Waxing your car provides a protective layer that helps prevent rock chips and scratches.
6. Overcoming Challenges: Troubleshooting Common Issues
Even with the best preparation, you may encounter some challenges when fixing rock chips. Here are some common issues and how to troubleshoot them.
6.1. Paint Mismatch: Addressing Color Discrepancies
- Check Your Paint Code: Make sure you have the correct paint code for your car.
- Blend the Paint: Blend the touch-up paint with the surrounding paint to minimize color discrepancies.
- Consider Fading: Keep in mind that your car’s paint may have faded over time, so the touch-up paint may not be an exact match.
6.2. Uneven Application: Correcting Bumps and Blobs
- Apply Thin Layers: Apply the touch-up paint in thin layers to avoid drips and runs.
- Use a Blending Solution: Use a blending solution to smooth out the touch-up paint.
- Wet Sand: Wet sand the area to level the touch-up paint with the surrounding paint.
6.3. Preventing Future Rust: Treating Existing Corrosion
- Remove Rust: Remove any rust from the rock chip before applying touch-up paint.
- Apply Rust Converter: Apply a rust converter to neutralize any remaining rust.
- Prime the Area: Apply a layer of primer to protect the bare metal.
7. Real-World Examples: Case Studies of Successful Rock Chip Repairs
Let’s look at some real-world examples of successful rock chip repairs.
7.1. DIY Success Story: Restoring a Classic Car’s Hood
John, a classic car enthusiast, had a 1967 Mustang with several rock chips on the hood. He decided to tackle the repairs himself.
- Preparation: John carefully cleaned and prepped the area, removing any dirt and debris.
- Repair: He used a high-quality touch-up paint kit from Dr. Colorchip and followed the instructions carefully.
- Results: After several hours of work, John was able to restore the hood to its former glory. The rock chips were gone, and the paint looked smooth and shiny.
7.2. Professional Expertise: Repairing Extensive Damage on a Modern Vehicle
Sarah had a 2018 Honda Civic with extensive rock chip damage on the hood. She decided to take it to a professional auto body shop.
- Assessment: The professionals assessed the damage and determined that the hood needed to be repainted.
- Repair: They carefully sanded down the hood, applied primer, and repainted it with a high-quality paint.
- Results: The hood looked brand new. The paint was flawless, and there was no evidence of the previous damage.
8. The Science Behind Paint Repair: Understanding Automotive Finishes
Understanding the science behind paint repair can help you achieve better results.
8.1. Layers of Automotive Paint: Primer, Base Coat, and Clear Coat
Automotive paint typically consists of three layers:
- Primer: Provides a base for the paint to adhere to and protects the metal from rust.
- Base Coat: Provides the color and finish.
- Clear Coat: Protects the base coat from UV rays, scratches, and other damage.
8.2. Types of Automotive Paint: Acrylic Lacquer, Acrylic Enamel, and Urethane
There are several types of automotive paint, each with its own advantages and disadvantages:
- Acrylic Lacquer: Dries quickly and is easy to apply, but is not as durable as other types of paint.
- Acrylic Enamel: More durable than acrylic lacquer, but takes longer to dry.
- Urethane: The most durable type of automotive paint, but is more expensive and requires special equipment to apply.
8.3. How Paint Adheres to Metal: Chemical Bonding and Surface Preparation
Paint adheres to metal through a combination of chemical bonding and surface preparation. Proper surface preparation, such as cleaning and sanding, is essential for ensuring that the paint adheres properly.
9. Cost-Effective Solutions: Budget-Friendly Options for Rock Chip Repair
Fixing rock chips doesn’t have to break the bank. Here are some cost-effective solutions.
9.1. DIY Kits vs. Individual Products: Making the Right Choice
- DIY Kits: Provide everything you need to fix rock chips in one convenient package.
- Individual Products: Allow you to purchase only the items you need, which can be more cost-effective if you already have some of the supplies.
9.2. Generic vs. Name-Brand Products: Balancing Quality and Price
- Generic Products: Can be more affordable, but may not be as high quality as name-brand products.
- Name-Brand Products: Generally higher quality, but can be more expensive.
9.3. Finding Deals and Discounts: Saving Money on Repair Supplies
- Look for Sales: Keep an eye out for sales and discounts on automotive repair supplies.
- Use Coupons: Use coupons to save money on your purchases.
- Shop Around: Compare prices at different stores to find the best deals.
10. Expert Tips and Tricks: Mastering the Art of Rock Chip Repair
Here are some expert tips and tricks for mastering the art of rock chip repair.
10.1. Using Heat Guns and Hair Dryers: Speeding Up Drying Times
- Heat Guns: Can be used to speed up drying times, but be careful not to overheat the paint.
- Hair Dryers: A safer alternative to heat guns, but may not be as effective.
10.2. Applying Multiple Thin Coats: Achieving a Smoother Finish
- Thin Coats: Applying multiple thin coats of touch-up paint will result in a smoother finish than applying one thick coat.
10.3. The Importance of Patience: Taking Your Time for Best Results
- Patience: Take your time and don’t rush the process. Rushing can lead to mistakes and a less-than-professional finish.
At CARDIAGTECH.NET, we understand the challenges you face in maintaining your vehicle’s appearance and preventing further damage. Our mission is to provide you with the tools and knowledge you need to tackle these issues effectively. Whether you are dealing with the physical demands of auto repair, the constant need to update your skills, or the pressure to deliver efficient and high-quality service, we are here to support you.
We invite you to contact us via WhatsApp at +1 (641) 206-8880 or visit our website CARDIAGTECH.NET. Our team is ready to assist you with expert advice and top-quality tools to enhance your work, reduce repair times, and increase your garage’s profitability. Let us help you elevate your service quality and build a stellar reputation. Contact CARDIAGTECH.NET today and experience the difference! Our address is 276 Reock St, City of Orange, NJ 07050, United States.
Frequently Asked Questions (FAQs)
1. How do I find the right touch-up paint color for my car?
Finding the right touch-up paint color involves locating your car’s paint code, typically found in the owner’s manual, on a sticker inside the driver’s side door jamb, or via online lookup tools. Accurate color matching ensures a seamless repair that blends with your vehicle’s existing paint.
2. What is the best way to prepare the area before applying touch-up paint?
Proper preparation involves thoroughly washing the area with car wash soap and water, drying it with a microfiber towel, and assessing the damage to determine the depth and extent of the rock chips. Removing any dirt, grime, and debris ensures the touch-up paint adheres properly.
3. Can I use a paint pen to fix rock chips on my car hood?
It’s generally not recommended to use paint pens for rock chip repair, as they often result in blobs and uneven finishes that can look worse than the original damage. Opt for fine-tipped applicators and blending solutions for a smoother, more professional look.
4. What is the purpose of wet sanding after applying touch-up paint?
Wet sanding is used to level the touch-up paint with the surrounding paint, creating a seamless look. Using 2000-3000 grit wet sandpaper wrapped around a sanding block, gently sand the area until the touch-up paint is even with the existing paint.
5. How can I prevent rust from forming in rock chips?
To prevent rust, remove any existing rust with a wire brush or sandpaper, apply a rust converter to neutralize any remaining rust, and prime the area before applying touch-up paint. This protects the bare metal and ensures proper adhesion of the touch-up paint.
6. Is it better to use a DIY kit or buy individual products for rock chip repair?
The choice depends on your needs and preferences. DIY kits provide everything you need in one package, while buying individual products allows you to purchase only the items you need, which can be more cost-effective if you already have some of the supplies.
7. What are paint protection film (PPF) and ceramic coatings, and how do they protect my car hood?
Paint protection film (PPF) is a transparent film applied to the hood to protect it from rock chips and scratches. Ceramic coatings are liquid polymers that provide a hydrophobic protective layer, repelling water and dirt. Both options help preserve your car’s paint and appearance.
8. How often should I wash and wax my car to prevent rock chips?
Regularly washing your car removes dirt and debris that can cause damage, while waxing provides a protective layer that helps prevent rock chips and scratches. Aim to wash your car every two weeks and wax it every three to four months for optimal protection.
9. What should I do if the touch-up paint color doesn’t match my car’s paint?
Ensure you have the correct paint code and blend the touch-up paint with the surrounding paint to minimize color discrepancies. Keep in mind that your car’s paint may have faded over time, so the touch-up paint may not be an exact match.
10. Can heat guns or hair dryers be used to speed up drying times for touch-up paint?
Yes, heat guns and hair dryers can be used to speed up drying times. However, use caution with heat guns to avoid overheating the paint. Hair dryers are a safer alternative, although they may not be as effective.
By following this comprehensive guide, you can effectively fix rock chips on your car hood and maintain its pristine condition. Remember to use high-quality tools and materials from CARDIAGTECH.NET to achieve the best results. Contact us at Whatsapp: +1 (641) 206-8880 for expert advice and top-notch automotive repair solutions.