**How to Fix Rock Chips on Car Paint: Your Ultimate Guide**
Fixing rock chips on car paint is essential for maintaining your vehicle’s appearance and preventing rust. CARDIAGTECH.BIZ offers the tools and equipment you need to tackle this task effectively. This guide provides a detailed approach to addressing rock chips, ensuring a professional finish and long-lasting protection for your car’s paint job.
1. Understanding the Impact of Rock Chips on Your Car’s Paint
Rock chips are more than just cosmetic imperfections; they can lead to significant damage if left unattended.
1.1. What are Rock Chips and Why Do They Occur?
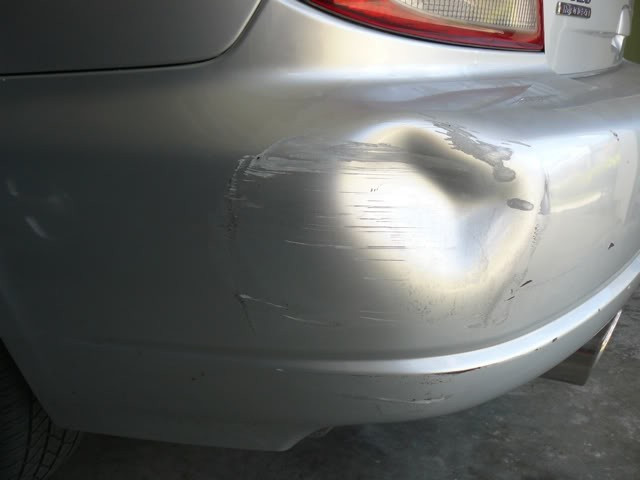
Rock chips are small damages to your car’s paint, typically caused by gravel, stones, and other road debris hitting the vehicle at high speeds. These chips expose the metal underneath, making it vulnerable to rust and corrosion. According to a study by the National Highway Traffic Safety Administration (NHTSA), vehicles frequently exposed to gravel roads or highway driving are more susceptible to rock chips.
1.2. The Long-Term Consequences of Ignoring Rock Chips
Ignoring rock chips can lead to serious problems, including:
- Rust and Corrosion: Exposed metal corrodes when it comes into contact with moisture and salt, weakening the structural integrity of the vehicle.
- Paint Degradation: Chips can cause the surrounding paint to peel and flake, exacerbating the damage.
- Reduced Resale Value: A vehicle with numerous rock chips appears poorly maintained, significantly reducing its market value.
- Costly Repairs: Addressing rust and extensive paint damage is far more expensive than fixing rock chips early on.
1.3. Preventing Rock Chips: Proactive Measures
Prevention is always better than cure. Consider these proactive measures:
- Paint Protection Film (PPF): Applying PPF to vulnerable areas like the hood, bumper, and fenders provides a robust shield against impacts.
- Mud Flaps: Installing mud flaps behind the wheels can minimize the amount of debris kicked up by the tires.
- Safe Following Distance: Maintaining a safe distance from other vehicles reduces the risk of being hit by road debris.
- Avoid Gravel Roads: Whenever possible, avoid driving on gravel roads, which are notorious for causing rock chips.
2. Essential Tools and Materials for Fixing Rock Chips
Having the right tools and materials is crucial for achieving a professional-quality repair. CARDIAGTECH.BIZ provides a comprehensive selection of tools to make the job easier.
2.1. Comprehensive List of Necessary Tools
- Touch-Up Paint: Matching the exact color code of your car is essential.
- Fine-Tipped Applicators: Small brushes or detailers for precise application.
- Rubbing Alcohol: For cleaning the affected area.
- Microfiber Cloths: To avoid scratching the paint.
- Sandpaper (2000-3000 grit): For leveling the paint.
- Buffing Compound: To restore shine.
- Polishing Pads: For use with a buffer.
- Wax or Sealant: To protect the repaired area.
- Paint Thinner or Prep Solvent: For surface preparation.
- Gloves: To keep hands clean.
- Masking Tape: To protect surrounding areas.
2.2. Selecting the Right Touch-Up Paint
Choosing the correct touch-up paint is paramount. Here’s how to ensure you get the right match:
- Locate Your Car’s Paint Code: Typically found on a sticker in the driver’s side doorjamb or under the hood.
- Purchase OEM (Original Equipment Manufacturer) Paint: Ensures the best color match and quality.
- Test the Paint: Before applying, test the paint on an inconspicuous area to verify the match.
- Consider a Paint Pen: Offers precision for small chips and scratches.
2.3. Advanced Tools for Professional Results
For those seeking professional-level results, consider these advanced tools available at CARDIAGTECH.BIZ:
- Detailing Swabs: For precise paint application in tiny chips.
- Paint Leveling Tools: Specialized tools to ensure the touch-up paint is level with the existing paint.
- Dual Action (DA) Polisher: For effective buffing and polishing.
- Magnifying Glass or Headset: To see small imperfections clearly.
3. Step-by-Step Guide to Fixing Rock Chips on Car Paint
Follow these steps to effectively repair rock chips and restore your car’s paint.
3.1. Preparing the Area: Cleaning and Inspection
- Wash the Car: Start by washing the car to remove dirt and grime. Use a pH-neutral car soap to avoid damaging the paint.
- Clean the Affected Area: Use rubbing alcohol or a prep solvent on a microfiber cloth to thoroughly clean the rock chip and surrounding area. This removes any wax, grease, or contaminants that could interfere with the touch-up paint.
- Inspect the Damage: Carefully inspect each rock chip to assess its depth and size. Use a magnifying glass if necessary.
3.2. Applying Touch-Up Paint: Techniques and Best Practices
- Shake the Paint: Thoroughly shake the touch-up paint bottle for several minutes to ensure the pigments are properly mixed.
- Apply Thin Coats: Use a fine-tipped applicator to apply a small amount of paint into the chip. Avoid applying too much paint at once, as this can result in a blob that is difficult to smooth out.
- Layering Technique: Apply multiple thin coats, allowing each coat to dry for 15-30 minutes before applying the next. This layering technique helps to gradually fill the chip and achieve a level surface.
- Avoid Overlapping: Try to confine the paint to the chip itself, avoiding excessive overlap onto the surrounding paint.
3.3. Leveling the Paint: Sanding and Blending
- Wet Sanding: After the touch-up paint has fully cured (usually 24-48 hours), use 2000-3000 grit sandpaper to gently wet sand the area. Wrap the sandpaper around a small, flat block for even pressure.
- Sanding Technique: Lightly sand the area, using a circular motion. Keep the sandpaper wet by dipping it in water frequently. The goal is to level the touch-up paint with the surrounding paint.
- Check Progress: Periodically check your progress by wiping the area dry and inspecting it under good lighting.
3.4. Polishing and Buffing: Restoring the Shine
- Apply Buffing Compound: Apply a small amount of buffing compound to the sanded area.
- Buff the Area: Use a polishing pad on a DA polisher to buff the area. Start with a low speed and gradually increase it as needed. Use overlapping passes to ensure even coverage.
- Final Polish: After buffing, use a fine polishing compound to remove any swirl marks and restore the shine.
- Clean the Area: Wipe the area clean with a microfiber cloth to remove any residue from the buffing and polishing compounds.
3.5. Protection: Waxing and Sealing
- Apply Wax or Sealant: Apply a coat of wax or sealant to protect the repaired area from the elements. This will help to maintain the shine and prevent future damage.
- Curing Time: Allow the wax or sealant to cure according to the manufacturer’s instructions.
- Final Inspection: Perform a final inspection to ensure the repair is seamless and the paint matches the surrounding area.
4. Advanced Techniques for Difficult Rock Chips
Some rock chips require more advanced techniques to achieve a flawless finish.
4.1. Addressing Deep Rock Chips
- Clean Thoroughly: Ensure the chip is free of debris and rust. Use a small pick or brush to remove any loose particles.
- Apply Primer: For deep chips, apply a thin layer of automotive primer to promote adhesion of the touch-up paint.
- Build Up Layers: Apply multiple thin layers of touch-up paint, allowing each layer to dry completely.
- Level Carefully: When leveling, be extra cautious not to sand through the surrounding paint.
4.2. Repairing Rock Chips on Edges and Corners
- Masking: Use masking tape to carefully mask off the surrounding area, protecting it from accidental scratches.
- Precise Application: Use a fine-tipped applicator to apply the touch-up paint precisely to the edge or corner.
- Feathering: Feather the edges of the paint to blend it seamlessly with the surrounding paint.
4.3. Dealing with Clusters of Rock Chips
- Assess the Damage: Evaluate the extent of the damage and determine if a full repaint is necessary.
- Individual Repairs: If the chips are relatively small and isolated, repair each one individually using the techniques described above.
- Blending: Pay extra attention to blending the repaired areas with the surrounding paint to avoid a patchy appearance.
5. Common Mistakes to Avoid When Fixing Rock Chips
Avoiding these common mistakes can save you time and ensure a better result.
5.1. Using Too Much Paint
Applying too much paint at once can result in runs, drips, and an uneven finish. Always apply thin coats and allow each coat to dry completely.
5.2. Neglecting Surface Preparation
Failing to properly clean and prepare the surface can prevent the touch-up paint from adhering properly, leading to premature failure.
5.3. Rushing the Process
Rushing the repair process can lead to mistakes and a substandard finish. Take your time and follow each step carefully.
5.4. Using the Wrong Tools
Using the wrong tools can damage the paint and make the repair more difficult. Invest in high-quality tools designed for automotive paint repair.
5.5. Ignoring Safety Precautions
Always wear gloves and work in a well-ventilated area when working with automotive paints and chemicals.
6. Maintaining Your Car’s Paint After Repair
Proper maintenance is essential to keep your car’s paint looking its best and prevent future rock chips.
6.1. Regular Washing and Waxing
Wash your car regularly to remove dirt, grime, and contaminants that can damage the paint. Apply a coat of wax or sealant every few months to protect the paint from the elements.
6.2. Avoiding Harsh Chemicals
Avoid using harsh chemicals or abrasive cleaners on your car’s paint, as these can strip away the protective layers and cause damage.
6.3. Promptly Addressing New Rock Chips
Inspect your car regularly for new rock chips and repair them promptly to prevent further damage.
6.4. Parking Strategically
When parking, try to avoid parking near gravel roads or construction sites where your car is more likely to be hit by debris.
6.5. Considering a Ceramic Coating
A ceramic coating provides a durable, protective layer that can resist scratches, chips, and other types of damage.
7. The Science Behind Automotive Paint and Rock Chip Resistance
Understanding the science behind automotive paint can help you appreciate the importance of proper maintenance and repair.
7.1. Composition of Automotive Paint
Automotive paint typically consists of several layers, including:
- Primer: Provides adhesion and corrosion resistance.
- Base Coat: Provides the color and visual appearance.
- Clear Coat: Provides gloss, UV protection, and resistance to scratches and chemicals.
7.2. Factors Affecting Paint Durability
Several factors can affect the durability of automotive paint, including:
- Paint Quality: Higher-quality paints are more resistant to chipping, scratching, and fading.
- Environmental Conditions: Exposure to sunlight, temperature extremes, and pollutants can accelerate paint degradation.
- Maintenance Practices: Regular washing, waxing, and sealing can help to prolong the life of the paint.
7.3. Innovations in Paint Technology
Automotive manufacturers are constantly developing new paint technologies to improve durability and resistance to damage. These include:
- Self-Healing Paints: Paints that can repair minor scratches and swirl marks.
- Ceramic-Infused Paints: Paints that contain ceramic particles for increased hardness and scratch resistance.
- UV-Resistant Paints: Paints that are formulated to resist fading and degradation from exposure to ultraviolet radiation.
8. DIY vs. Professional Repair: Making the Right Choice
Deciding whether to repair rock chips yourself or hire a professional depends on your skills, budget, and the extent of the damage.
8.1. Assessing Your Skill Level
If you have experience with automotive paint repair and are comfortable using the necessary tools, you may be able to achieve satisfactory results with a DIY repair. However, if you are a novice or the damage is extensive, it may be best to hire a professional.
8.2. Evaluating the Cost
DIY repairs are typically less expensive than professional repairs, as you only need to pay for the materials. However, professional repairs may be more cost-effective in the long run if they prevent further damage and ensure a flawless finish.
8.3. Considering the Time Commitment
DIY repairs can be time-consuming, especially if you are not experienced. Professional repairs are typically faster and more convenient, as the work is done by trained technicians.
8.4. Weighing the Risks and Benefits
DIY repairs carry the risk of making mistakes that could damage the paint or result in a substandard finish. Professional repairs offer a higher level of quality and guarantee, but they also come with a higher price tag.
9. Real-World Examples and Case Studies
Examining real-world examples can provide valuable insights and practical tips for fixing rock chips.
9.1. Case Study 1: Restoring a Classic Car
A classic car owner meticulously repaired rock chips on his vintage vehicle using touch-up paint, wet sanding, and polishing. The result was a flawless finish that preserved the car’s original appearance and value.
9.2. Case Study 2: Preventing Rust on a Daily Driver
A commuter repaired rock chips on her daily driver to prevent rust and maintain its resale value. By addressing the chips promptly, she avoided costly repairs and kept her car looking its best.
9.3. Example: Repairing a Large Chip on the Hood
- Prep: Thoroughly cleaned the area with a prep solvent.
- Prime: Applied a thin layer of automotive primer.
- Paint: Layered touch-up paint, allowing each coat to dry.
- Level: Wet sanded with 2500 grit sandpaper.
- Polish: Buffed and polished to restore shine.
- Protect: Applied wax for protection.
10. The Future of Automotive Paint Repair
The field of automotive paint repair is constantly evolving, with new technologies and techniques emerging all the time.
10.1. Advancements in Touch-Up Paint Formulations
New touch-up paint formulations offer improved color matching, durability, and ease of use. These paints often contain additives that enhance adhesion, prevent fading, and resist chipping.
10.2. Innovations in Sanding and Polishing Techniques
Advanced sanding and polishing techniques, such as micro-abrasive technology, allow for more precise and efficient paint leveling and restoration.
10.3. The Role of Technology in Paint Repair
Technology is playing an increasingly important role in automotive paint repair, with computerized color matching systems, automated paint application equipment, and diagnostic tools that can identify and assess paint damage.
10.4. Sustainability in Automotive Paint Repair
There is a growing emphasis on sustainability in automotive paint repair, with efforts to reduce the use of hazardous chemicals, minimize waste, and promote environmentally friendly repair practices.
Fixing rock chips on your car’s paint is a manageable task with the right tools and knowledge. CARDIAGTECH.BIZ is committed to providing you with the best products and information to keep your vehicle looking its best. By following this comprehensive guide, you can effectively repair rock chips, protect your car from rust, and maintain its value for years to come.
11. Understanding Paint Codes and Color Matching
Ensuring an exact color match is crucial for a seamless repair.
11.1. How to Find Your Car’s Paint Code
The paint code is typically located on a sticker in the driver’s side doorjamb, under the hood, or in the glove compartment. The sticker may also contain other information, such as the VIN (Vehicle Identification Number) and manufacturing date.
11.2. Decoding Paint Codes
Paint codes can be alphanumeric and vary in format depending on the manufacturer. Consult your car’s manual or a professional auto paint supplier for assistance in decoding your paint code.
11.3. Using Online Resources
Numerous online resources, such as paint code databases and color matching tools, can help you identify the correct touch-up paint for your car.
11.4. Professional Color Matching
For the most accurate color match, consider having a professional auto paint supplier custom mix touch-up paint based on a sample of your car’s paint.
12. Safety Precautions When Working with Automotive Paints
Prioritizing safety is paramount when working with automotive paints and chemicals.
12.1. Ventilation
Always work in a well-ventilated area to avoid inhaling harmful fumes. Open windows and doors or use a ventilation fan to ensure adequate airflow.
12.2. Personal Protective Equipment (PPE)
Wear gloves, safety glasses, and a respirator or mask to protect your skin, eyes, and respiratory system from exposure to automotive paints and chemicals.
12.3. Handling Chemicals
Handle automotive paints and chemicals with care, following the manufacturer’s instructions and safety guidelines. Avoid contact with skin and eyes, and do not ingest.
12.4. Fire Safety
Keep automotive paints and chemicals away from heat, sparks, and open flames. Store them in a cool, dry place in tightly sealed containers.
13. Environmental Considerations for Automotive Paint Repair
Practicing environmentally responsible paint repair is essential for minimizing your impact on the planet.
13.1. Using Eco-Friendly Products
Choose eco-friendly automotive paints and chemicals that are low in VOCs (Volatile Organic Compounds) and other harmful substances.
13.2. Proper Disposal of Waste
Dispose of waste materials, such as used sandpaper, rags, and paint cans, properly according to local regulations. Do not pour automotive paints or chemicals down the drain or into the environment.
13.3. Minimizing Waste
Minimize waste by using only the amount of paint and materials needed for the repair. Store leftover paint in tightly sealed containers for future use.
13.4. Recycling
Recycle used paint cans and other recyclable materials whenever possible.
14. Cost-Effective Solutions for Minor Paint Damage
Exploring cost-effective solutions for minor paint damage can save you money without compromising the appearance of your car.
14.1. DIY Touch-Up Kits
DIY touch-up kits offer a convenient and affordable way to repair minor rock chips and scratches. These kits typically include touch-up paint, applicators, and instructions.
14.2. Using a Paint Pen
A paint pen is a precision tool for applying touch-up paint to small chips and scratches. It is easy to use and provides a clean, accurate application.
14.3. Spot Repair Techniques
Spot repair techniques involve repairing only the damaged area of the paint, rather than repainting the entire panel. This can save time and money while still achieving a satisfactory result.
14.4. Blending and Feathering
Blending and feathering techniques can help to seamlessly integrate the repaired area with the surrounding paint, minimizing the appearance of the repair.
15. Addressing Customer Challenges with CARDIAGTECH.BIZ
At CARDIAGTECH.BIZ, we understand the challenges technicians face, from physical demands and chemical exposure to keeping up with new technologies and managing time constraints. That’s why we offer top-quality tools and equipment to enhance efficiency, precision, and safety.
- Efficiency: Our tools are designed to reduce repair times, helping you complete more jobs.
- Accuracy: Achieve precise results, minimizing errors and ensuring customer satisfaction.
- Safety: Protect yourself with our range of safety equipment, reducing exposure to harmful substances.
- Knowledge: Stay ahead with our access to the latest tools and techniques.
16. Call to Action: Get Expert Advice from CARDIAGTECH.BIZ
Ready to tackle those rock chips like a pro? Contact CARDIAGTECH.BIZ today for expert advice and the best tools in the market. Visit us at 276 Reock St, City of Orange, NJ 07050, United States, call or WhatsApp us at +1 (641) 206-8880, or browse our selection online at CARDIAGTECH.BIZ. Let us help you elevate your auto repair game!
17. Understanding the Role of Clear Coat in Paint Protection
The clear coat is the unsung hero of your car’s paint job.
17.1. What is Clear Coat?
Clear coat is a transparent layer applied over the base coat of paint. It provides gloss, UV protection, and resistance to scratches and chemicals.
17.2. Benefits of Clear Coat
The benefits include protection from:
- UV Radiation: Prevents fading and discoloration.
- Scratches and Swirl Marks: Resists minor abrasions.
- Chemicals: Protects against damage from acid rain, bird droppings, and road salt.
- Gloss and Shine: Enhances the visual appearance of the paint.
17.3. Maintaining Clear Coat
To maintain your clear coat:
- Regular Washing and Waxing: Removes dirt and grime.
- Avoiding Abrasive Cleaners: Prevents scratching.
- Promptly Repairing Damage: Prevents further degradation.
17.4. Clear Coat Repair
When clear coat is damaged, it can be repaired using specialized techniques, such as:
- Clear Coat Touch-Up: Applying a thin layer of clear coat to small scratches and chips.
- Clear Coat Blending: Blending the repaired area with the surrounding clear coat.
- Clear Coat Restoration: Polishing and buffing to remove swirl marks and restore gloss.
18. Preparing Your Car for Professional Paint Repair Services
If you choose to hire a professional, here’s how to prepare your car:
18.1. Washing Your Car
Wash your car thoroughly to remove dirt and grime, allowing the technician to assess the damage accurately.
18.2. Documenting the Damage
Take photos of the damage to provide the technician with a clear record of the condition of your car before the repair.
18.3. Removing Personal Items
Remove any personal items from the car to prevent them from being damaged during the repair process.
18.4. Providing Information
Provide the technician with any relevant information about the damage, such as the cause and when it occurred.
19. Exploring Paint Protection Film (PPF) as a Preventive Measure
PPF is an excellent way to protect your car’s paint from rock chips and other damage.
19.1. What is Paint Protection Film (PPF)?
PPF is a transparent, self-adhesive film applied to the surface of your car to protect the paint from scratches, chips, and other types of damage.
19.2. Benefits of PPF
PPF offers these benefits:
- Scratch and Chip Resistance: Protects against damage from rocks, gravel, and other road debris.
- UV Protection: Prevents fading and discoloration.
- Self-Healing Properties: Minor scratches and swirl marks can disappear with heat.
- Preserves Resale Value: Keeps your car looking new.
19.3. Types of PPF
Different types of PPF include:
- Clear PPF: Provides transparent protection without altering the appearance of the paint.
- Matte PPF: Provides a matte finish while protecting the paint.
- Colored PPF: Adds a custom look while protecting the paint.
19.4. PPF Installation
PPF installation should be done by a trained professional to ensure proper application and avoid bubbles or wrinkles.
20. FAQs About Fixing Rock Chips on Car Paint
20.1. What is the best way to fix rock chips on car paint?
The best way to fix rock chips is by cleaning the area, applying thin layers of touch-up paint, leveling the paint, and then polishing and waxing for protection.
20.2. How do I match the touch-up paint to my car’s color?
Locate your car’s paint code on the driver’s side doorjamb or under the hood and purchase OEM paint for the best match.
20.3. Can I use a paint pen to fix rock chips?
Yes, a paint pen is ideal for applying paint precisely to small chips and scratches, offering a clean and accurate application.
20.4. How long does touch-up paint take to dry?
Touch-up paint typically takes 15-30 minutes to dry between coats and 24-48 hours to fully cure before wet sanding.
20.5. What grit sandpaper should I use for wet sanding touch-up paint?
Use 2000-3000 grit sandpaper for wet sanding touch-up paint to level it with the surrounding paint without causing damage.
20.6. How do I prevent rust from forming in rock chips?
Clean the chip thoroughly, apply automotive primer, and seal it with touch-up paint and wax to prevent moisture from reaching the metal.
20.7. Is it better to fix rock chips myself or hire a professional?
It depends on your skill level, budget, and the extent of the damage. DIY is cheaper, but professional repairs ensure a flawless finish.
20.8. What is the purpose of clear coat on car paint?
Clear coat provides gloss, UV protection, and resistance to scratches and chemicals, enhancing the appearance and durability of the paint.
20.9. How can I protect my car’s paint from future rock chips?
Consider applying paint protection film (PPF) to vulnerable areas and maintain a safe following distance to avoid road debris.
20.10. Where can I find quality tools and materials for fixing rock chips?
Visit CARDIAGTECH.BIZ for a comprehensive selection of tools and materials for automotive paint repair. We provide top-quality tools designed to enhance efficiency, precision, and safety. Contact us at +1 (641) 206-8880 or visit us at 276 Reock St, City of Orange, NJ 07050, United States.
By addressing rock chips promptly and properly, you can maintain your car’s appearance, prevent costly repairs, and preserve its value. Remember, CARDIAGTECH.BIZ is here to support you with the best tools and equipment for all your automotive repair needs.