How to Fix Scratches on Cars: A Comprehensive Guide

Fixing scratches on cars is a common concern for vehicle owners. At CARDIAGTECH.NET, we understand the importance of maintaining your car’s appearance and value. This guide provides detailed, step-by-step instructions on how to repair scratches, offering solutions ranging from minor clear coat imperfections to more significant primer damage. Learn professional techniques for car scratch repair, paint correction methods, and effective scratch removal tips.
1. Understanding Car Scratches: A Detailed Overview
Identifying the type of scratch is crucial for effective repair. Scratches vary in depth and severity, each requiring a different approach.
1.1. Clear Coat Scratches
These are surface-level blemishes that affect only the clear coat, the outermost protective layer of your car’s paint. Clear coat scratches are often caused by minor abrasions, such as:
- Light brushes against bushes
- Improper washing techniques
- Fine debris on cleaning cloths
They appear as faint, hairline marks that don’t penetrate the color coat. These are the easiest to fix and often respond well to simple polishing compounds.
1.2. Base Coat Scratches
Base coat scratches extend beyond the clear coat and into the colored layer of paint. These are typically caused by:
- More abrasive contact, like a key scratch
- Slightly larger debris impacting the car
- More aggressive washing or cleaning methods
These scratches are more noticeable as they reveal a different color underneath the clear coat. Repairing base coat scratches involves addressing the color layer and then protecting it.
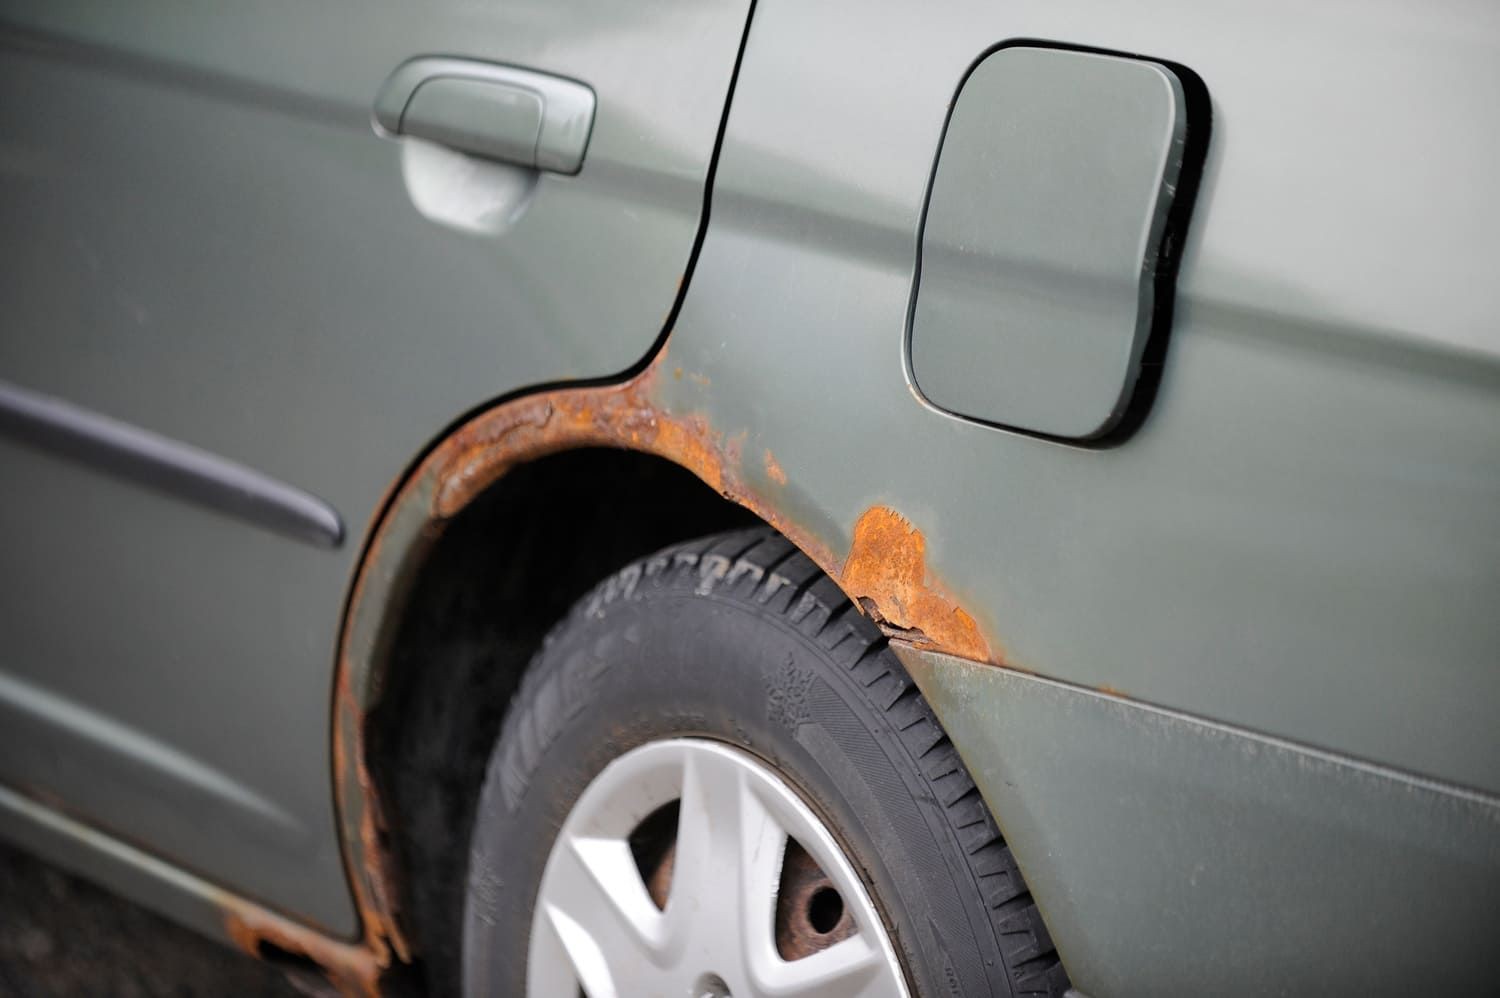
1.3. Primer Coat Scratches (Deep Scratches)
Primer coat scratches are the most severe, reaching through the clear coat, base coat, and into the primer layer. These are caused by:
- Significant impacts, like accidents or vandalism
- Sharp objects deeply gouging the paint
- Severe environmental factors over time
These scratches expose the bare metal or plastic underneath the paint and require more extensive repair to prevent rust and maintain structural integrity.
Car Scratch
Alt: Close-up of a car scratch, revealing damage to the paint layers.
2. Essential Tools and Materials for Scratch Repair
Having the right tools and materials is essential for achieving professional-quality scratch repairs. Here’s a comprehensive list:
2.1. Cleaning Supplies
- Car Wash Soap: A pH-balanced soap designed for automotive finishes.
- Microfiber Cloths: Soft, non-abrasive cloths for washing, polishing, and buffing.
- Detailing Clay: To remove embedded contaminants from the paint surface.
- Isopropyl Alcohol: For cleaning surfaces before applying touch-up paint or polish.
2.2. Scratch Removal Compounds
- Scratch Remover: For clear coat scratches.
- Rubbing Compound: A more abrasive compound for deeper scratches.
- Polishing Compound: To refine the finish after using rubbing compound.
2.3. Application and Sanding Tools
- Touch-Up Paint: Matching your car’s color code for base coat and primer scratches.
- Fine-Tipped Brushes or Toothpicks: For precise application of touch-up paint.
- Wet/Dry Sandpaper (2000-grit, 3000-grit): For leveling touch-up paint and smoothing rough edges.
- Sanding Block: To ensure even pressure when sanding.
2.4. Polishing and Buffing Tools
- Dual-Action (DA) Polisher: For efficient and consistent polishing.
- Polishing Pads: Various grades for cutting, polishing, and finishing.
- Microfiber Buffing Pads: For final buffing and polishing.
2.5. Protective Gear
- Gloves: To protect your hands from chemicals.
- Mask: To avoid inhaling dust and fumes.
- Eye Protection: Safety glasses to protect your eyes.
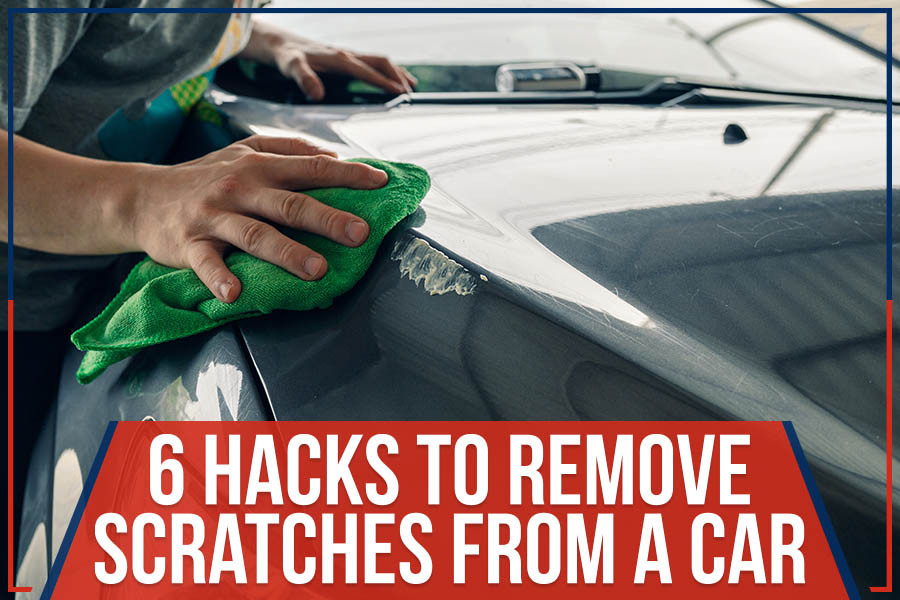
3. Step-by-Step Guide: Removing Clear Coat Scratches
Clear coat scratches are the easiest to repair, often requiring only a few basic steps.
3.1. Preparation
- Wash the Area: Use car wash soap and water to thoroughly clean the area around the scratch. This removes dirt and debris that could further damage the paint during the repair process.
- Dry the Area: Use a clean microfiber cloth to dry the area completely. Ensure no moisture remains, as it can interfere with the scratch removal compound.
- Inspect the Scratch: Carefully examine the scratch to ensure it is only in the clear coat. If it penetrates deeper, you’ll need to follow the steps for base coat or primer scratches.
3.2. Applying Scratch Remover
- Apply Compound: Place a small amount of scratch remover compound onto a clean microfiber cloth.
- Rub the Scratch: Gently rub the compound into the scratch using a circular motion. Apply light pressure and continue buffing the area for several minutes. The goal is to allow the compound to gently abrade the clear coat and blend the edges of the scratch.
- Wipe Away Residue: Use a clean section of the microfiber cloth to wipe away any excess compound.
3.3. Polishing
- Apply Polish: Place a small amount of car polish onto a clean microfiber cloth.
- Buff the Area: Buff the polished area to restore the shine and smoothness of the clear coat. Use a circular motion with light pressure.
- Final Wipe: Use a clean, dry microfiber cloth to wipe the area one last time, ensuring no residue remains.
3.4. Advanced Techniques for Clear Coat Scratches
- Using a DA Polisher: For larger areas or more stubborn scratches, a dual-action polisher can provide more consistent and efficient results. Use a polishing pad and work in small sections, overlapping each pass.
- Clay Bar Treatment: Before polishing, use detailing clay to remove any embedded contaminants from the paint surface. This will help the polishing compound work more effectively.
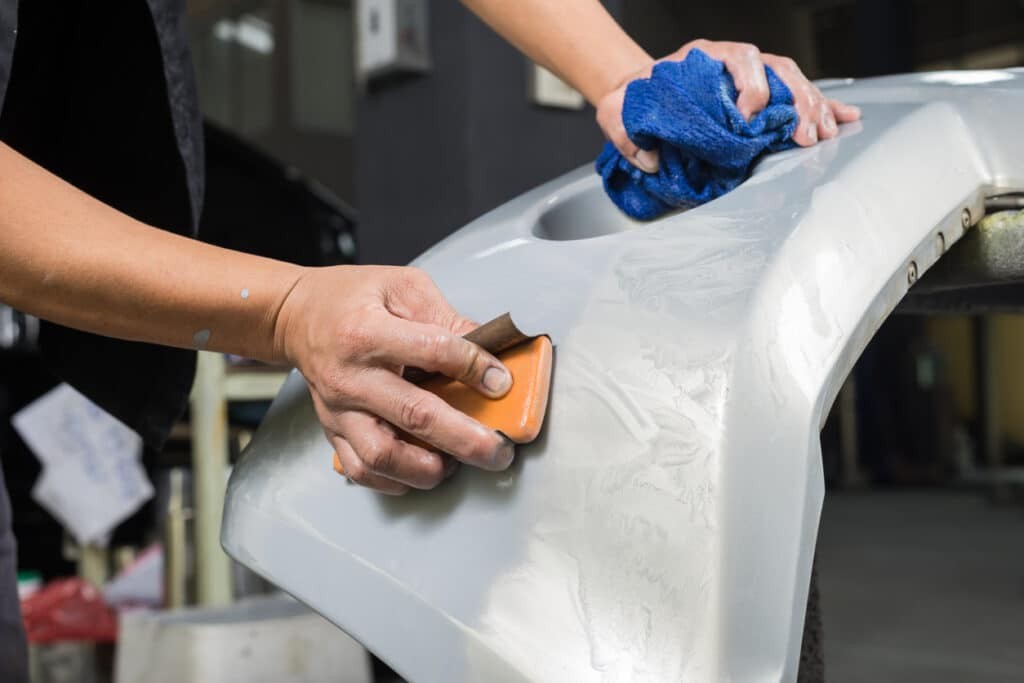
4. Repairing Base Coat Scratches: A Detailed Process
Base coat scratches require a more involved process, including touch-up paint to restore the color layer.
4.1. Preparation
- Clean the Area: Wash and dry the area around the scratch as described in the clear coat scratch repair section.
- Sand the Edges: Use 3000-grit sandpaper to gently smooth the edges of the scratch. This helps the touch-up paint blend seamlessly with the surrounding paint.
4.2. Applying Touch-Up Paint
- Select Touch-Up Paint: Ensure you have touch-up paint that matches your car’s color code. You can find the color code on a sticker inside the driver’s side door or in the owner’s manual.
- Apply Thin Coats: Use a fine-tipped brush or toothpick to apply thin, even coats of touch-up paint to the scratch. Allow each coat to dry completely before applying the next. Multiple thin coats are better than one thick coat, as they prevent runs and ensure proper adhesion.
- Allow to Dry: Let the touch-up paint dry completely, typically for 24-48 hours, depending on the product instructions.
4.3. Leveling and Polishing
- Wet Sanding: After the touch-up paint is fully dry, use 3000-grit sandpaper to gently wet sand the area. Wrap the sandpaper around a sanding block to ensure even pressure. Sand until the touch-up paint is level with the surrounding paint.
- Rubbing Compound: Apply a small amount of rubbing compound to a microfiber cloth and rub the area in a circular motion. This will remove the sanding marks and blend the touch-up paint with the surrounding paint.
- Polishing Compound: Follow up with polishing compound to restore the shine and smoothness of the paint.
- Final Polish: Use a clean microfiber cloth to buff the area to a high gloss.
4.4. Advanced Techniques for Base Coat Scratches
- Blending: Use a blending solution to help the touch-up paint seamlessly integrate with the surrounding paint.
- Clear Coat Application: After the color coat is repaired, consider applying a thin layer of clear coat over the touch-up paint to provide additional protection and enhance the shine.
5. Addressing Primer Coat Scratches: Professional-Level Repair
Primer coat scratches require the most attention and can be challenging to repair without professional help.
5.1. Preparation
- Clean the Area: Thoroughly clean the area around the scratch to remove any dirt, rust, or debris.
- Sand the Area: Use 800-grit sandpaper to remove any rough edges or rust. Then, switch to 1000-grit sandpaper to smooth the surface.
- Apply Rust Inhibitor: If there is any rust present, apply a rust inhibitor to prevent it from spreading.
5.2. Applying Primer
- Apply Primer: Apply a thin, even coat of automotive primer to the exposed metal or plastic. This will provide a base for the touch-up paint to adhere to and prevent corrosion.
- Allow to Dry: Let the primer dry completely, following the manufacturer’s instructions.
5.3. Applying Touch-Up Paint
- Apply Multiple Coats: Apply several thin coats of touch-up paint to the primed area, allowing each coat to dry before applying the next.
- Allow to Dry: Let the touch-up paint dry completely, typically for 24-48 hours.
5.4. Leveling and Polishing
- Wet Sanding: Wet sand the area with 3000-grit sandpaper to level the touch-up paint with the surrounding paint.
- Rubbing Compound: Use rubbing compound to remove sanding marks and blend the touch-up paint.
- Polishing Compound: Follow up with polishing compound to restore the shine.
- Final Polish: Buff the area to a high gloss with a clean microfiber cloth.
5.5. Advanced Techniques for Primer Coat Scratches
- Professional Color Matching: For larger areas, consider having a professional match the paint color to ensure a seamless repair.
- Body Filler: For deep gouges, use body filler to fill the void before applying primer and touch-up paint.
- Professional Clear Coat: Apply a professional-grade clear coat for maximum protection and shine.
6. Protecting Your Car: Preventing Future Scratches
Prevention is always better than cure. Here are some tips to protect your car from scratches:
6.1. Regular Washing and Waxing
- Regular Washing: Wash your car regularly to remove dirt, dust, and debris that can cause scratches.
- Waxing: Apply a coat of wax every few months to protect the paint from the elements and provide a barrier against minor scratches.
6.2. Careful Parking
- Avoid Tight Spaces: Park in open areas where there is less risk of contact with other vehicles or objects.
- Use Garage or Carport: Park your car in a garage or carport to protect it from the elements and potential scratches.
6.3. Safe Driving Habits
- Avoid Tailgating: Maintain a safe following distance to avoid rocks and debris kicked up by other vehicles.
- Drive Carefully on Gravel Roads: Drive slowly and carefully on gravel roads to minimize the risk of rock chips and scratches.
6.4. Protective Measures
- Car Cover: Use a car cover when parking outside to protect the paint from scratches, dust, and UV rays.
- Paint Protection Film (PPF): Consider applying paint protection film to high-impact areas, such as the hood, fenders, and bumpers.
7. Maintaining Your Car’s Finish: Long-Term Care
Long-term care is essential for maintaining your car’s finish and preventing future scratches.
7.1. Regular Inspections
- Inspect Regularly: Regularly inspect your car for scratches, chips, and other damage. Addressing minor issues promptly can prevent them from becoming more significant problems.
7.2. Professional Detailing
- Professional Detailing: Consider having your car professionally detailed every year or two. Professional detailers have the tools and expertise to correct paint imperfections and protect the finish.
7.3. Proper Storage
- Store Properly: If you store your car for extended periods, keep it covered in a clean, dry environment to prevent damage.
8. The Role of Professional Tools in Scratch Repair
Investing in high-quality tools can significantly improve the results of your scratch repair efforts. CARDIAGTECH.NET offers a wide range of professional-grade tools designed to make scratch repair easier and more effective.
8.1. Dual-Action Polishers
- Consistent Results: DA polishers provide consistent, swirl-free results, making them ideal for both beginners and experienced detailers.
- Versatility: They can be used with various pads and compounds to correct a wide range of paint imperfections.
8.2. Sanding Blocks
- Even Pressure: Sanding blocks ensure even pressure when sanding, preventing uneven spots and improving the overall finish.
- Precision: They allow for more precise sanding, especially in tight areas.
8.3. Microfiber Products
- Non-Abrasive: High-quality microfiber cloths and pads are non-abrasive, reducing the risk of further scratching the paint.
- Effective Cleaning: They effectively remove dirt, polish, and compound residue.
8.4. Paint Thickness Gauges
- Accurate Measurement: Paint thickness gauges accurately measure the thickness of the paint layers, helping you avoid sanding too aggressively.
- Preventing Damage: They can prevent you from sanding through the clear coat or base coat, which can cause irreversible damage.
9. Common Mistakes to Avoid When Repairing Car Scratches
Repairing car scratches can be a rewarding DIY project, but it’s easy to make mistakes that can worsen the problem. Here are some common pitfalls to avoid:
9.1. Using the Wrong Products
- Incompatible Compounds: Using abrasive compounds on minor scratches can damage the clear coat.
- Mismatched Paint: Applying touch-up paint that doesn’t match your car’s color code can result in a mismatched finish.
9.2. Applying Too Much Pressure
- Aggressive Sanding: Sanding too aggressively can remove too much paint and cause swirl marks.
- Over-Polishing: Polishing with too much pressure can generate heat and damage the paint.
9.3. Neglecting Preparation
- Skipping Cleaning: Failing to clean the area thoroughly can trap dirt and debris, causing further scratches during the repair process.
- Ignoring Rust: Neglecting to treat rust can cause it to spread and damage the surrounding paint.
9.4. Impatience
- Rushing the Process: Rushing through the steps can result in a poor-quality repair.
- Insufficient Drying Time: Failing to allow touch-up paint to dry completely can cause it to peel or crack.
9.5. Working in Direct Sunlight
- Uneven Drying: Direct sunlight can cause compounds and paint to dry unevenly, resulting in streaks and blemishes.
- Overheating: It can also overheat the paint surface, making it more difficult to work with.
10. Frequently Asked Questions (FAQs) About Car Scratch Repair
-
How do I know if a scratch can be repaired at home, or if I need to take it to a professional?
- If the scratch is shallow and only affects the clear coat, you can typically repair it at home with the right tools and products. If the scratch is deep and penetrates the base coat or primer, it’s best to take it to a professional.
-
What is the best way to match touch-up paint to my car’s color?
- Find your car’s color code on a sticker inside the driver’s side door or in the owner’s manual. Use this code to purchase touch-up paint that matches your car’s color.
-
How long does it take for touch-up paint to dry?
- Touch-up paint typically takes 24-48 hours to dry completely, depending on the product instructions.
-
Can I use a household cleaner to wash my car before repairing a scratch?
- No, you should only use car wash soap designed for automotive finishes. Household cleaners can be too harsh and damage the paint.
-
How often should I wax my car to prevent scratches?
- You should wax your car every few months to protect the paint and prevent scratches.
-
Is it safe to use an automatic car wash?
- Automatic car washes can be harsh on your car’s paint and cause scratches. It’s best to wash your car by hand or use a touchless car wash.
-
What is paint protection film (PPF)?
- Paint protection film is a clear, transparent film that is applied to the car’s paint to protect it from scratches, chips, and other damage.
-
How do I remove swirl marks from my car’s paint?
- Swirl marks can be removed with a dual-action polisher and polishing compound.
-
What is detailing clay, and how do I use it?
- Detailing clay is a clay bar that is used to remove embedded contaminants from the paint surface. To use it, spray the area with a lubricant and gently rub the clay bar over the surface.
-
How can CARDIAGTECH.NET help me with my car scratch repair needs?
- CARDIAGTECH.NET offers a wide range of professional-grade tools and products for car scratch repair, including dual-action polishers, sanding blocks, microfiber products, and paint thickness gauges. Contact us at +1 (641) 206-8880 or visit our website at CARDIAGTECH.NET for more information. Our address is 276 Reock St, City of Orange, NJ 07050, United States.
Conclusion: Achieving a Flawless Finish
Repairing scratches on your car can be a satisfying and cost-effective way to maintain its appearance and value. Whether you’re dealing with minor clear coat imperfections or more significant primer damage, following the right steps and using the appropriate tools and materials can help you achieve a flawless finish.
Remember, prevention is key. Regularly washing and waxing your car, parking carefully, and using protective measures can help minimize the risk of future scratches. And for all your car scratch repair needs, CARDIAGTECH.NET is here to provide you with the professional-grade tools and expertise you need to get the job done right.
Is your car plagued by unsightly scratches? Don’t let them diminish your vehicle’s appearance and value. Contact CARDIAGTECH.NET today at +1 (641) 206-8880 for expert advice and the best tools to restore your car’s finish. Our knowledgeable team is ready to help you find the perfect solutions for your scratch repair needs. Visit our website at CARDIAGTECH.NET or stop by our location at 276 Reock St, City of Orange, NJ 07050, United States, and let us help you bring back the shine and protect your investment. Act now and give your car the care it deserves with CARDIAGTECH.NET!
Alt: Assortment of car scratch repair tools, including polishing compounds, microfiber cloths, and applicators.