**How to Fix a Seat in Car: Your Ultimate DIY Repair Guide**
Fixing a seat in your car can save you money and keep your vehicle looking great. CARDIAGTECH.NET offers expert advice on car seat repair, covering everything from minor fixes to more complex upholstery work, ensuring every repair enhances the comfort and aesthetic of your car. Discover how easy it is to handle car seat upholstery, auto seat repair, and even leather car seat repair with the right knowledge.
1. Understanding the Need for Car Seat Repair
Why is it essential to maintain and fix your car seats? It’s simple: car seats endure a lot. From daily wear and tear to accidental spills, they face constant challenges. Over time, this can lead to rips, stains, sagging, and overall discomfort. According to a study by the University of Michigan’s Transportation Research Institute in 2022, drivers spend an average of 52 minutes per day in their cars, highlighting the significant impact seat condition has on daily comfort. Regular maintenance and timely repairs extend the lifespan of your seats, improve your driving experience, and maintain the value of your vehicle. Proper care also enhances safety, ensuring that the seats provide the necessary support and positioning during travel.
2. Identifying Common Types of Car Seat Damage
Before you grab your tools, let’s identify the common issues you might encounter. This will help you choose the correct repair approach and materials.
2.1. Rips and Tears
Rips and tears are common, especially in older vehicles or those with rough use. These can range from small punctures to significant gashes in the fabric or leather. Ignoring these not only affects the look of your car but can also worsen over time.
2.2. Stains and Spills
Coffee spills, food stains, and general grime can make your seats look unsightly. Some stains can also damage the seat material if left untreated, leading to discoloration or weakening of the fabric.
2.3. Burns
Cigarette burns or exposure to heat can cause noticeable damage. Burns can melt synthetic fabrics and leave permanent marks on leather.
2.4. Sagging and Loss of Support
Over time, the foam padding inside the seats can compress and lose its support. This makes the seats uncomfortable and can affect your posture while driving. According to a study from Cornell University’s Human Factors and Ergonomics Lab, proper seat support is crucial for reducing driver fatigue and preventing back pain, emphasizing the need to address sagging issues promptly.
2.5. Fading and Discoloration
Prolonged exposure to sunlight can cause the seat material to fade or discolor. This is more common in cars without tinted windows or those frequently parked outdoors.
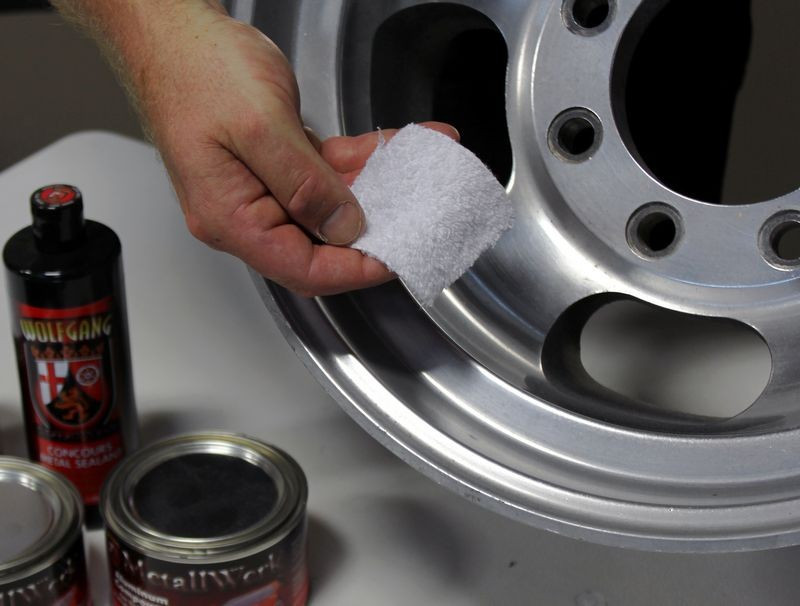
3. Assembling Your DIY Car Seat Repair Toolkit
Having the right tools on hand makes the repair process smoother and more effective. Here’s what you should include in your toolkit:
3.1. Essential Tools
| Tool | Description |
|---|---|
| Upholstery Needles | Curved needles designed for sewing thick fabrics. |
| Upholstery Thread | Strong, durable thread that matches your seat material’s color. |
| Seam Ripper | For carefully removing old stitches without damaging the fabric. |
| Scissors | Sharp scissors for trimming fabric and thread. |
| Pliers | For gripping and pulling needles through tough materials. |
| Staple Gun | Used to reattach fabric to the seat frame. Choose one designed for upholstery. |
| Staples | Appropriate staples for your staple gun. |
| Adhesive | Fabric or leather adhesive for bonding patches or repairing tears. |
| Cleaning Supplies | Upholstery cleaner, leather cleaner, stain remover, and microfiber cloths. |
| Foam Padding | Replacement foam for restoring seat support. |
| Leather Conditioner | For maintaining and protecting leather seats. |
| Colorant | Matching colorant for restoring faded or discolored seats. |
| Heat Gun | For setting adhesives and smoothing patches. |
| Safety Glasses | To protect your eyes from debris and chemicals. |
| Gloves | To protect your hands from adhesives and cleaning agents. |
| Mask | To avoid inhaling fumes from adhesives and cleaners. |
| Measuring Tape | For accurate measurements when cutting patches or foam. |
| Ruler | For straight lines and precise cuts. |
| Sandpaper | Fine-grit sandpaper for smoothing rough edges. |
| Putty Knife | For applying and smoothing fillers or adhesives. |
| Lighting | A bright work light to ensure you see every detail. |
| Vacuum Cleaner | For removing dirt and debris before and after repairs. |
| Sewing Machine | Optional, but helpful for larger repairs. |
| Clamps | For holding patches in place while adhesive dries. |
| Painter’s Tape | For marking areas and protecting surrounding surfaces. |
| Utility Knife | For cutting foam and fabric. |
| Dust Brush | For removing loose particles and dust. |
| Awl | For making pilot holes in tough materials. |
| Brush Set | For applying cleaners and colorants. |
| Seam Guide | For sewing straight, even seams. |
| Thimble | To protect your finger when hand sewing. |
| Magnifying Glass | For detailed inspection of small tears and damage. |
| Mixing Cups | For mixing colorants and adhesives. |
| Stir Sticks | For stirring and blending materials. |
| Drop Cloth | To protect your work area. |
| Respirator | For use with stronger chemicals and adhesives. |
| Tack Remover | For removing old staples and tacks. |
| Spring Clamps | For additional clamping strength. |
| Pattern Paper | For creating templates for patches. |
| Wax Pencil | For marking fabric. |
| Chalk | For marking fabric. |
| Embroidery Hoops | For holding fabric taut while sewing. |
| Rubber Mallet | For gently tapping staples into place. |
| Edge Roller | For smoothing edges of patches and appliqués. |
| Hog Ring Pliers | For attaching upholstery to frames with hog rings. |
| Hog Rings | Fasteners for use with hog ring pliers. |
| Heat-Resistant Tape | For protecting areas from heat when using a heat gun. |
3.2. Choosing the Right Materials
| Material | Use |
|---|---|
| Upholstery Fabric | Replacement fabric for tears, burns, or general wear. Ensure it matches the original material. |
| Leather Patches | For repairing tears in leather seats. Choose a patch that closely matches the color and texture. |
| Foam Replacement | New foam padding to restore seat comfort and support. High-density foam is a good choice for durability. |
| Upholstery Thread | Strong thread that matches the color of your seat fabric. |
| Fabric Adhesive | For bonding fabric patches. Choose a flexible adhesive that won’t crack over time. |
| Leather Filler | For filling cracks and small holes in leather seats. |
| Leather Dye | For restoring color to faded leather. |
| Upholstery Cleaner | Gentle cleaner specifically designed for car upholstery. |
| Leather Conditioner | To keep leather seats supple and prevent cracking. |
| Stain Remover | For removing stubborn stains. Test in an inconspicuous area first. |
| Seam Sealer | To prevent fraying of fabric edges after cutting or sewing. |
| Backing Material | For reinforcing weak or damaged fabric. |
| Padding Material | Additional padding for extra comfort. |
| Welt Cord | For creating decorative edges and seams. |
| Burlap | For adding support and structure to upholstery. |
| Tacking Strips | For attaching fabric to frames. |
| Spray Adhesive | For temporarily holding fabric in place. |
| Hook and Loop Fastener | For attaching removable seat covers or cushions. |
| Zippers | For adding or replacing closures on seat covers. |
| Buttons | For decorative accents. |
| Piping | For adding decorative trim. |
| Embroidery Floss | For adding decorative stitching. |
| Quilting Batting | For adding softness and warmth to upholstery. |
| Muslin | For creating mock-ups or patterns. |
| Vinyl Patches | For repairing vinyl seats. |
| Suede Cleaner | For cleaning and maintaining suede seats. |
| Alcantara Cleaner | For cleaning and maintaining Alcantara seats. |
| Sheepskin Cleaner | For cleaning and maintaining sheepskin seats. |
| Microfiber Cloths | For gentle cleaning and polishing. |
| Chamois Cloth | For drying and buffing leather. |
| Cotton Swabs | For applying cleaners and dyes in small areas. |
| Toothpicks | For applying adhesives in small areas. |
| Paper Towels | For cleaning spills and messes. |
| Trash Bags | For disposing of waste materials. |
| Drop Cloths | To protect your work area. |
4. Step-by-Step Guide to Fixing a Car Seat
4.1. Repairing Rips and Tears in Fabric Seats
Step 1: Prepare the Area
Clean the area around the tear with a fabric cleaner and let it dry. Trim any loose threads to create a clean edge.
Step 2: Cut a Patch
Cut a fabric patch slightly larger than the tear. Use a piece of matching fabric or a discreet, neutral color.
Step 3: Apply Adhesive
Apply fabric adhesive to the edges of the patch and the area around the tear.
Step 4: Place the Patch
Carefully place the patch over the tear, ensuring it aligns with the surrounding fabric. Press firmly and let it dry according to the adhesive instructions.
Step 5: Stitch the Patch
For added security, stitch around the edges of the patch using an upholstery needle and thread.
4.2. Repairing Rips and Tears in Leather Seats
Step 1: Clean the Area
Clean the area around the tear with a leather cleaner and let it dry.
Step 2: Apply Leather Filler
If the tear has depth, apply leather filler to level the surface. Let it dry completely and sand it smooth with fine-grit sandpaper.
Step 3: Cut a Patch
Cut a leather patch slightly larger than the tear.
Step 4: Apply Adhesive
Apply leather adhesive to the edges of the patch and the area around the tear.
Step 5: Place the Patch
Carefully place the patch over the tear, ensuring it aligns with the surrounding leather. Press firmly and let it dry according to the adhesive instructions.
Step 6: Apply Leather Dye
If necessary, apply leather dye to the patch to match the color of the surrounding leather.
Step 7: Condition the Leather
Apply leather conditioner to the repaired area to keep it supple and prevent cracking.
4.3. Removing Stains from Fabric Seats
Step 1: Identify the Stain
Different stains require different cleaning agents. Common stains include coffee, food, grease, and ink.
Step 2: Apply Cleaner
Apply a fabric stain remover to the stain. Follow the product instructions carefully.
Step 3: Blot the Stain
Use a clean microfiber cloth to blot the stain. Avoid rubbing, as this can spread the stain and damage the fabric.
Step 4: Repeat if Necessary
Repeat the cleaning process until the stain is removed.
Step 5: Dry the Area
Dry the area with a clean cloth or a hairdryer on a low setting.
4.4. Removing Stains from Leather Seats
Step 1: Apply Leather Cleaner
Apply a leather cleaner to the stain.
Step 2: Gently Wipe
Use a soft, damp cloth to gently wipe the stain.
Step 3: Dry the Area
Dry the area with a clean, dry cloth.
Step 4: Apply Leather Conditioner
Apply leather conditioner to restore moisture and prevent cracking.
4.5. Replacing Sagging Seat Foam
Step 1: Remove the Seat
Remove the seat from the car.
Step 2: Remove Upholstery
Carefully remove the upholstery from the seat frame. Use a seam ripper to remove any stitching.
Step 3: Remove Old Foam
Remove the old, sagging foam.
Step 4: Cut New Foam
Cut a piece of new foam to the same size and shape as the old foam.
Step 5: Attach New Foam
Attach the new foam to the seat frame using adhesive.
Step 6: Reattach Upholstery
Reattach the upholstery to the seat frame, using a staple gun to secure the fabric.
Step 7: Reinstall the Seat
Reinstall the seat in the car.
5. Advanced Techniques for Car Seat Restoration
For more complex repairs, consider these advanced techniques.
5.1. Custom Upholstery
If your seats are severely damaged, consider replacing the entire upholstery. This involves removing the old fabric and replacing it with new material.
5.2. Color Matching
For faded or discolored seats, use color-matching dyes to restore the original color. This requires careful application and blending.
5.3. Professional Stitching
For intricate stitching patterns, consider hiring a professional upholsterer to ensure a seamless finish.
6. Maintaining Your Car Seats for Longevity
Regular maintenance can prevent many of the issues discussed above.
6.1. Regular Cleaning
Vacuum your seats regularly to remove dirt and debris. Clean spills immediately to prevent staining.
6.2. Conditioning Leather
Apply leather conditioner every few months to keep leather seats supple and prevent cracking.
6.3. Using Seat Covers
Use seat covers to protect your seats from wear and tear, especially if you have pets or children. According to the Specialty Equipment Market Association (SEMA), seat covers are a popular aftermarket accessory, with sales reaching $1.2 billion in 2023, reflecting their widespread use in protecting vehicle interiors.
6.4. Parking in the Shade
Park in the shade or use a sunshade to prevent fading and discoloration from sunlight.
7. The Benefits of Professional Car Seat Repair
While DIY repairs can be effective for minor issues, professional services offer several advantages.
7.1. Expertise and Experience
Professionals have the expertise and experience to handle complex repairs.
7.2. Quality Materials
Professionals use high-quality materials for durable repairs.
7.3. Warranty
Professional repairs often come with a warranty, providing peace of mind.
7.4. Time Savings
Professionals can complete repairs quickly and efficiently, saving you time and effort.
8. CARDIAGTECH.NET: Your Partner in Car Care
At CARDIAGTECH.NET, we understand the importance of maintaining your vehicle. That’s why we offer a range of tools and equipment to help you keep your car in top condition. From upholstery needles to leather conditioners, we have everything you need for DIY car seat repair. Contact us at +1 (641) 206-8880 or visit our website CARDIAGTECH.NET for more information. Our address is 276 Reock St, City of Orange, NJ 07050, United States.
9. Addressing Customer Challenges
Are you facing challenges with your car seat repairs? At CARDIAGTECH.NET, we provide services that enhance your work efficiency and reduce repair time. Our tools ensure accuracy and safety, saving you repair and maintenance costs while increasing your revenue. Contact us today to learn more about how we can assist you!
10. FAQs About Car Seat Repair
10.1. How much does it cost to repair a car seat?
The cost varies depending on the extent of the damage and whether you DIY or hire a professional. Minor repairs can cost as little as $20, while major repairs or replacements can range from $200 to $1000.
10.2. Can I repair a leather car seat myself?
Yes, for minor tears and stains. Use a leather repair kit and follow the instructions carefully.
10.3. What is the best way to clean car seats?
Use a cleaner specifically designed for your seat material (fabric or leather) and a soft microfiber cloth.
10.4. How can I prevent car seat damage?
Use seat covers, clean spills immediately, and park in the shade.
10.5. When should I replace my car seats?
If the seats are severely damaged, uncomfortable, or no longer provide adequate support.
10.6. Can I change the color of my car seats?
Yes, with color-matching dyes. However, this is best done by a professional.
10.7. How do I fix a sagging car seat?
Replace the foam padding inside the seat.
10.8. What tools do I need for car seat repair?
Upholstery needles, thread, seam ripper, scissors, pliers, staple gun, adhesive, cleaning supplies, foam padding, and leather conditioner.
10.9. Can I repair a burn in my car seat?
Yes, by patching the burned area with a matching fabric or leather patch.
10.10. Is it worth repairing car seats?
Yes, repairing car seats can extend their lifespan, improve your driving experience, and maintain the value of your vehicle.
By following this comprehensive guide, you can effectively fix and maintain your car seats, ensuring a comfortable and stylish driving experience. Remember, CARDIAGTECH.NET is here to support you with all your car care needs. Contact us today!