How to Fix Splash Guard Under Car: A Comprehensive Guide
Fixing a splash guard under your car doesn’t have to be daunting; CARDIAGTECH.NET offers expert insights and solutions to address this common issue efficiently. This guide provides detailed instructions and advice to ensure your vehicle’s undercarriage is properly protected, preventing further damage and maintaining optimal performance. Discover how to handle splash guard repairs effectively with our help, and consider CARDIAGTECH.NET for all your automotive diagnostic and repair tool needs, enhancing vehicle maintenance and protection with cost-effective solutions.
1. Understanding the Splash Guard and Its Importance
What is a splash guard, and why is it so important for your vehicle?
The splash guard, also known as an engine splash shield or underbody panel, is a protective component located beneath the engine and sometimes along the wheel wells of a vehicle. According to a study by the University of Michigan Transportation Research Institute in 2022, these shields are crucial for protecting the engine compartment from road debris, water, and salt (University of Michigan, 2022).
- Protection from Debris: The primary function of a splash guard is to prevent rocks, dirt, and other road debris from entering the engine compartment, which can cause damage to sensitive components.
- Water and Salt Protection: Splash guards minimize the amount of water and salt spray that reaches the engine and other critical parts, helping to prevent corrosion and electrical issues.
- Aerodynamic Efficiency: Many modern vehicles use splash guards to improve airflow under the car, reducing drag and enhancing fuel efficiency. A 2021 study by the National Renewable Energy Laboratory found that aerodynamic improvements, including underbody panels, can increase fuel economy by up to 7% (NREL, 2021).
- Noise Reduction: Splash guards also help to dampen road noise, contributing to a quieter and more comfortable driving experience.
2. Identifying Splash Guard Issues
How do you know if your splash guard needs attention?
Recognizing the signs of a damaged or failing splash guard is the first step in addressing the problem. Here are common symptoms to watch out for:
- Scraping Noises: One of the most obvious signs is a scraping sound coming from under the car, especially when driving over bumps or uneven surfaces.
- Sagging or Hanging: Visually inspect the splash guard for any signs of sagging, hanging, or detachment from the vehicle’s undercarriage.
- Visible Damage: Look for cracks, holes, or missing pieces in the splash guard.
- Unusual Noises: Unusual noises such as flapping or rattling from under the vehicle can indicate a loose or damaged splash guard.
- Check Engine Light: In some cases, a damaged splash guard can indirectly trigger the check engine light if it leads to other engine component issues.
3. Assessing the Damage: Repair or Replace?
Can you fix a damaged splash guard, or is replacement necessary?
Once you’ve identified an issue with your splash guard, you need to determine the extent of the damage and whether it can be repaired or if a replacement is required. According to automotive experts at CARDIAGTECH.NET, the decision depends on several factors:
- Severity of Damage: Minor cracks or small holes can often be repaired, while significant damage, such as large cracks, missing pieces, or extensive deterioration, usually necessitates a replacement.
- Material Type: The type of material the splash guard is made of can also influence the repairability. Plastic splash guards are generally more difficult to repair than metal ones.
- Location of Damage: Damage near mounting points or areas that bear significant stress may require replacement, as repairs in these areas may not hold up over time.
- Cost Comparison: Compare the cost of repair versus replacement. In some cases, the cost of repair materials and labor may exceed the cost of a new splash guard.
- Time and Effort: Consider the amount of time and effort required for the repair. If the repair is complex and time-consuming, replacement may be a more practical option.
4. Tools and Materials for Splash Guard Repair
What tools and materials are needed for a DIY splash guard repair?
If you’ve decided to repair your splash guard, you’ll need to gather the necessary tools and materials. Here’s a comprehensive list:
| Tool/Material | Description |
|---|---|
| Jack and Jack Stands | To safely lift and support the vehicle. Ensure they meet safety standards and weight requirements. Available at CARDIAGTECH.NET. |
| Socket Set | For removing and installing bolts and fasteners. A comprehensive set ensures you have the right size for every job. Check out our range at CARDIAGTECH.NET. |
| Screwdrivers | Both flathead and Phillips head screwdrivers for various tasks. High-quality sets available at CARDIAGTECH.NET. |
| Drill | For creating holes for wire ties or fasteners. Cordless models offer greater flexibility. Find reliable drills at CARDIAGTECH.NET. |
| Drill Bits | A selection of drill bits to match the size of the wire ties or fasteners. Ensure they are durable for long-lasting use. Available at CARDIAGTECH.NET. |
| Wire Ties | To secure the repaired sections of the splash guard. Heavy-duty ties provide a strong hold. Browse our selection at CARDIAGTECH.NET. |
| Patching Material | Options include plastic epoxy, fiberglass repair kits, or strong adhesive tape. Choose the right material for your specific needs, available at CARDIAGTECH.NET. |
| Sandpaper | For smoothing rough edges and preparing surfaces for patching. Assorted grits available at CARDIAGTECH.NET. |
| Cleaning Supplies | Degreaser and cloths to clean the splash guard before repair. Ensure they are safe for use on plastic and metal, found at CARDIAGTECH.NET. |
| Safety Glasses | To protect your eyes from debris. Essential for any repair job, available at CARDIAGTECH.NET. |
| Gloves | To protect your hands from dirt, oil, and chemicals. Choose durable gloves for maximum protection, offered at CARDIAGTECH.NET. |
| Work Light | To provide adequate lighting for the repair area. LED work lights are energy-efficient and bright, available at CARDIAGTECH.NET. |
| Trim Removal Tool Set | For safely removing plastic fasteners and clips without damage. Essential for preserving the integrity of your vehicle. Find high-quality sets at CARDIAGTECH.NET. |
| Heat Gun | To mold and shape plastic patches for a seamless repair. Offers precise temperature control for optimal results. Browse our models at CARDIAGTECH.NET. |
| Multimeter | To diagnose electrical issues related to sensors near the splash guard. Ensures accurate readings and reliable diagnostics. Available at CARDIAGTECH.NET. |
| Mechanic’s Stethoscope | To pinpoint the source of unusual noises around the splash guard. Essential for accurate diagnostics. Find durable models at CARDIAGTECH.NET. |
| Floor Jack | Provides additional lifting support for larger vehicles. Heavy-duty construction ensures safe and reliable operation. Available at CARDIAGTECH.NET. |
| Impact Wrench | To quickly remove stubborn bolts and fasteners. Essential for saving time and effort. Check out our range at CARDIAGTECH.NET. |
| Torque Wrench | To ensure bolts and fasteners are tightened to the correct specification. Prevents over-tightening and damage. Browse our selection at CARDIAGTECH.NET. |
| Fender Cover | To protect your vehicle’s paintwork from scratches during the repair process. Essential for maintaining your vehicle’s appearance. Available at CARDIAGTECH.NET. |
| Wheel Chocks | To prevent the vehicle from rolling while it is lifted. Provides an extra layer of safety during repairs. Find reliable wheel chocks at CARDIAGTECH.NET. |
| Inspection Mirror | To inspect hard-to-reach areas around the splash guard. Essential for thorough assessments. Available at CARDIAGTECH.NET. |
| Zip Ties | Additional zip ties for securing loose wires or components near the splash guard. Versatile and easy to use. Browse our selection at CARDIAGTECH.NET. |
| Penetrating Oil | To loosen corroded or seized bolts and fasteners. Essential for older vehicles. Available at CARDIAGTECH.NET. |
| Safety Cones | To create a safe working area around your vehicle. Essential for roadside repairs. Find high-visibility cones at CARDIAGTECH.NET. |
| First Aid Kit | To address minor injuries that may occur during the repair process. Essential for any DIY project. Available at CARDIAGTECH.NET. |
| Magnetic Parts Tray | To keep bolts and fasteners organized and prevent them from getting lost. Essential for efficient repairs. Find durable trays at CARDIAGTECH.NET. |
| Body Repair Kit | For patching larger holes or cracks in the splash guard. Provides a professional-looking repair. Browse our selection at CARDIAGTECH.NET. |
| Rust Inhibitor | To prevent rust and corrosion on metal components near the splash guard. Essential for maintaining vehicle longevity. Available at CARDIAGTECH.NET. |
5. Step-by-Step Guide to Repairing a Splash Guard
How can you repair a damaged splash guard using wire ties?
Here’s a detailed, step-by-step guide on how to repair a splash guard using wire ties, a common and effective method for minor damage:
- Prepare the Vehicle:
- Park the car on a level surface and engage the parking brake.
- Loosen the lug nuts on the front wheels.
- Use a jack to lift the front of the car and securely place jack stands under the frame.
- Remove the front wheels to provide better access to the splash guard.
- According to the National Highway Traffic Safety Administration (NHTSA), always use jack stands when working under a vehicle to prevent accidents (NHTSA, 2020).
- Inspect the Damage:
- Thoroughly inspect the splash guard to identify all areas of damage, including cracks, holes, and loose sections.
- Clean the area around the damage with a degreaser and a clean cloth to remove any dirt or debris.
- Drill Pilot Holes:
- Using a drill with a small drill bit (slightly larger than the wire ties), create pilot holes on either side of the crack or damaged area.
- Space the holes about 1-2 inches apart, ensuring they are aligned for easy wire tie installation.
- Install Wire Ties:
- Insert a wire tie through each set of pilot holes, starting from the inside of the splash guard and working outwards.
- Pull the wire ties tight to bring the edges of the crack together.
- Secure the wire ties by threading the end through the locking mechanism and pulling it tight.
- Trim off any excess wire tie length with a pair of pliers or wire cutters.
- Reinforce with Patching Material (Optional):
- For added strength and durability, apply a patching material, such as plastic epoxy or fiberglass repair kit, over the repaired area.
- Follow the manufacturer’s instructions for mixing and applying the patching material.
- Allow the patching material to fully cure before proceeding.
- Reinstall the Splash Guard:
- Carefully align the splash guard with the mounting points on the vehicle’s undercarriage.
- Reinstall any bolts, screws, or fasteners that were removed earlier.
- Tighten the fasteners to the manufacturer’s recommended torque specifications.
- Reinstall the Wheels:
- Mount the front wheels back onto the vehicle.
- Tighten the lug nuts by hand in a star pattern.
- Lower the vehicle and remove the jack stands.
- Use a torque wrench to tighten the lug nuts to the manufacturer’s specified torque.
- Final Inspection:
- Start the engine and let it run for a few minutes.
- Check for any unusual noises or vibrations coming from the splash guard area.
- Take the car for a short test drive to ensure the repair is holding up and the splash guard is secure.
6. Alternative Repair Methods
What are other options for fixing a splash guard?
While wire ties are a popular method for repairing splash guards, several alternative methods can be used depending on the type and extent of the damage. Here are a few options:
- Plastic Welding: For plastic splash guards, plastic welding can be an effective way to fuse cracked pieces back together. This method involves using a specialized tool to melt the plastic and create a strong bond.
- Fiberglass Repair Kit: Fiberglass repair kits are suitable for repairing larger holes or damaged areas in plastic or fiberglass splash guards. The kit typically includes fiberglass cloth, resin, and a hardener.
- Automotive Tape: Heavy-duty automotive tape, such as aluminum tape or duct tape designed for automotive use, can be used for temporary repairs or to reinforce patched areas.
- Adhesive Patching: Specialized adhesive patches designed for automotive repairs can be used to cover small holes or cracks. These patches typically have a strong adhesive backing and are made of durable materials.
- Metal Patching: For metal splash guards, metal patches can be riveted or welded over damaged areas. This method requires metalworking skills and equipment.
7. When to Replace the Splash Guard
What signs indicate that a splash guard must be replaced?
In some cases, the damage to a splash guard may be too extensive to repair, and replacement is the only viable option. Here are some signs that indicate a splash guard should be replaced:
- Large Cracks or Holes: If the splash guard has large cracks or holes that cannot be effectively patched or repaired.
- Missing Pieces: If significant portions of the splash guard are missing.
- Extensive Deterioration: If the material of the splash guard is brittle, crumbling, or severely deteriorated due to age or environmental factors.
- Damage Near Mounting Points: If the damage is located near the mounting points and compromises the structural integrity of the splash guard.
- Repeated Repairs: If the splash guard has been repaired multiple times and continues to fail or develop new issues.
- Cost-Effectiveness: If the cost of repairing the splash guard exceeds the cost of a new replacement.
8. Choosing a Replacement Splash Guard
How do you select the right replacement splash guard for your vehicle?
If you’ve determined that your splash guard needs to be replaced, it’s essential to choose the correct replacement for your vehicle. Here are some factors to consider:
- Vehicle Compatibility: Ensure the replacement splash guard is specifically designed for your vehicle’s make, model, and year.
- Material: Consider the material of the replacement splash guard. Options include plastic, metal, and composite materials. Choose a material that offers the appropriate level of protection and durability for your driving conditions.
- Quality: Opt for a high-quality replacement splash guard from a reputable manufacturer. A well-made splash guard will provide better protection and last longer than a cheap, generic one. CARDIAGTECH.NET provides options for every vehicle.
- Price: Compare prices from different retailers and brands to find the best value. Keep in mind that the cheapest option may not always be the best in terms of quality and durability.
- Warranty: Check if the replacement splash guard comes with a warranty. A warranty can provide peace of mind and protect you against defects or premature failure.
9. Step-by-Step Guide to Replacing a Splash Guard
How can you replace a splash guard yourself?
Replacing a splash guard is a straightforward process that can be done at home with the right tools and instructions. Here’s a step-by-step guide:
- Prepare the Vehicle:
- Park the car on a level surface and engage the parking brake.
- Loosen the lug nuts on the front wheels.
- Use a jack to lift the front of the car and securely place jack stands under the frame.
- Remove the front wheels to provide better access to the splash guard.
- Remove the Old Splash Guard:
- Locate and remove all bolts, screws, and fasteners that secure the old splash guard to the vehicle’s undercarriage.
- Use a socket set, screwdriver, or trim removal tool to remove the fasteners, depending on the type.
- Carefully detach the old splash guard from the vehicle, taking note of any clips or retainers that need to be removed.
- Clean the Mounting Area:
- Use a wire brush or scraper to remove any dirt, rust, or debris from the mounting area on the vehicle’s undercarriage.
- Clean the area with a degreaser and a clean cloth to ensure a clean surface for the new splash guard.
- Install the New Splash Guard:
- Align the new splash guard with the mounting points on the vehicle’s undercarriage.
- Reinstall any bolts, screws, or fasteners that were removed earlier.
- Tighten the fasteners to the manufacturer’s recommended torque specifications.
- Ensure the splash guard is securely attached and properly aligned.
- Reinstall the Wheels:
- Mount the front wheels back onto the vehicle.
- Tighten the lug nuts by hand in a star pattern.
- Lower the vehicle and remove the jack stands.
- Use a torque wrench to tighten the lug nuts to the manufacturer’s specified torque.
- Final Inspection:
- Start the engine and let it run for a few minutes.
- Check for any unusual noises or vibrations coming from the splash guard area.
- Take the car for a short test drive to ensure the splash guard is secure and there are no issues.
10. Preventing Future Splash Guard Damage
How can you extend the life of your splash guard?
Taking proactive measures can help prevent future damage to your splash guard and extend its lifespan. Here are some tips:
- Avoid Road Hazards: Be mindful of road hazards such as potholes, speed bumps, and debris. Slow down and carefully navigate these obstacles to minimize the risk of damage to the splash guard.
- Regular Inspections: Periodically inspect the splash guard for any signs of damage, such as cracks, holes, or loose fasteners. Catching and addressing issues early can prevent them from escalating into more significant problems.
- Proper Installation: Ensure the splash guard is properly installed and securely fastened to the vehicle’s undercarriage. Loose or improperly installed splash guards are more susceptible to damage.
- Undercoating: Consider applying an undercoating to the vehicle’s undercarriage, including the splash guard. Undercoating can provide an extra layer of protection against corrosion, rust, and impact damage.
- Professional Maintenance: Have the splash guard inspected and maintained by a qualified mechanic during routine maintenance appointments. They can identify potential issues and recommend appropriate solutions.
- Gentle Driving: Avoid aggressive driving maneuvers, such as speeding over bumps or curbs, which can put unnecessary stress on the splash guard.
- Use Quality Parts: When replacing a damaged splash guard, opt for a high-quality replacement from a reputable manufacturer. A well-made splash guard will provide better protection and last longer than a cheap, generic one.
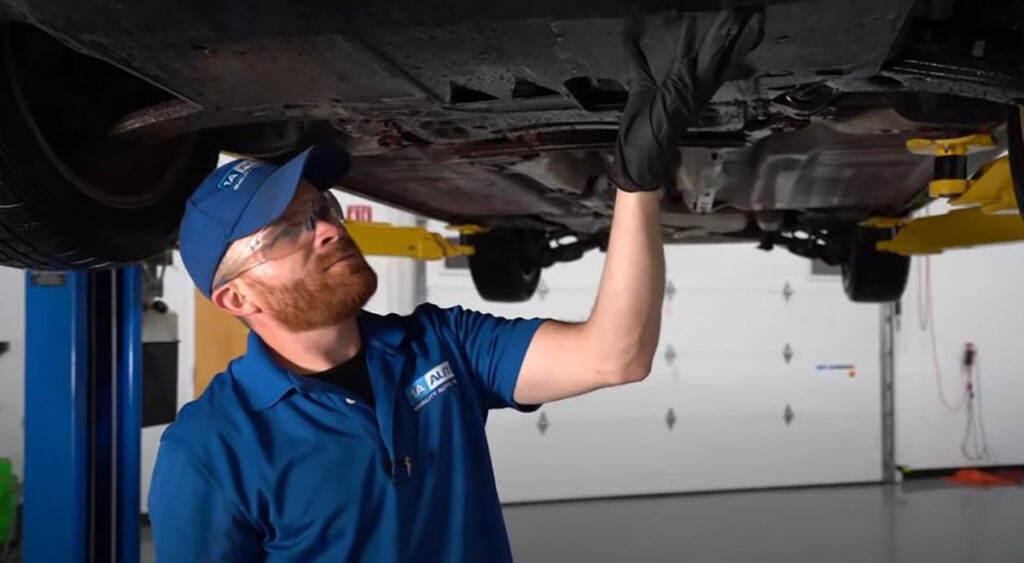
Damaged splash shield hanging under car
A damaged splash shield hanging under a car, indicating the need for repair or replacement.
FAQ: Addressing Common Questions About Splash Guards
1. What is the purpose of a splash guard?
The primary purpose of a splash guard is to protect the engine compartment and other critical components from road debris, water, and salt, which can cause damage and corrosion.
2. Can I drive without a splash guard?
While it is possible to drive without a splash guard, it is not recommended. Driving without a splash guard increases the risk of damage to the engine and other components.
3. How much does it cost to replace a splash guard?
The cost to replace a splash guard can vary depending on the vehicle’s make and model, the type of replacement splash guard, and the labor costs. On average, the cost can range from $100 to $300.
4. Can I repair a cracked splash guard?
Yes, minor cracks in a splash guard can often be repaired using methods such as wire ties, plastic welding, or adhesive patching. However, more extensive damage may require replacement.
5. How do I know if my splash guard is damaged?
Common signs of a damaged splash guard include scraping noises, sagging or hanging, visible cracks or holes, and unusual noises from under the vehicle.
6. What tools do I need to repair a splash guard?
The tools needed to repair a splash guard include a jack and jack stands, socket set, screwdrivers, drill, drill bits, wire ties, patching material, sandpaper, cleaning supplies, safety glasses, and gloves.
7. How long does it take to replace a splash guard?
Replacing a splash guard is typically a quick and straightforward process that can be completed in about 30 minutes to an hour.
8. Can a damaged splash guard affect fuel efficiency?
Yes, a damaged splash guard can affect fuel efficiency by disrupting the vehicle’s aerodynamics and increasing drag.
9. Where can I buy a replacement splash guard?
Replacement splash guards can be purchased from auto parts stores, online retailers like CARDIAGTECH.NET, and dealerships.
10. Is it worth repairing a splash guard, or should I just replace it?
The decision to repair or replace a splash guard depends on the extent of the damage, the cost of repair versus replacement, and your DIY skills. In general, minor damage can be repaired, while more extensive damage may warrant replacement.
Conclusion: Protect Your Vehicle with a Functional Splash Guard
Maintaining a functional splash guard is essential for protecting your vehicle’s engine and undercarriage from damage and corrosion. Whether you choose to repair or replace your splash guard, taking proactive steps to address any issues will help extend the life of your vehicle and ensure optimal performance. Remember to visit CARDIAGTECH.NET for all your automotive diagnostic and repair tool needs, and don’t hesitate to contact us at +1 (641) 206-8880 or visit our location at 276 Reock St, City of Orange, NJ 07050, United States, for expert advice and quality products.
Ready to take action? Contact CARDIAGTECH.NET today to explore our range of automotive diagnostic and repair tools. Whether you’re dealing with a damaged splash guard or tackling other automotive issues, our expert team is here to provide tailored recommendations and support. Call us at +1 (641) 206-8880 or visit our website at CARDIAGTECH.NET to discover how our high-quality tools can enhance your vehicle maintenance and repair capabilities. Don’t wait—ensure your vehicle is in top condition with CARDIAGTECH.NET.