How to Fix Tears in Leather Car Seats Like A Pro
Fixing tears in leather car seats can restore your car’s interior. CARDIAGTECH.NET offers top-notch solutions for auto repair. Discover simple methods to fix those unsightly rips and tears, and maintain the value of your vehicle. Learn about auto upholstery repair, car seat restoration, and leather care products.
1. Understanding Leather Car Seat Damage
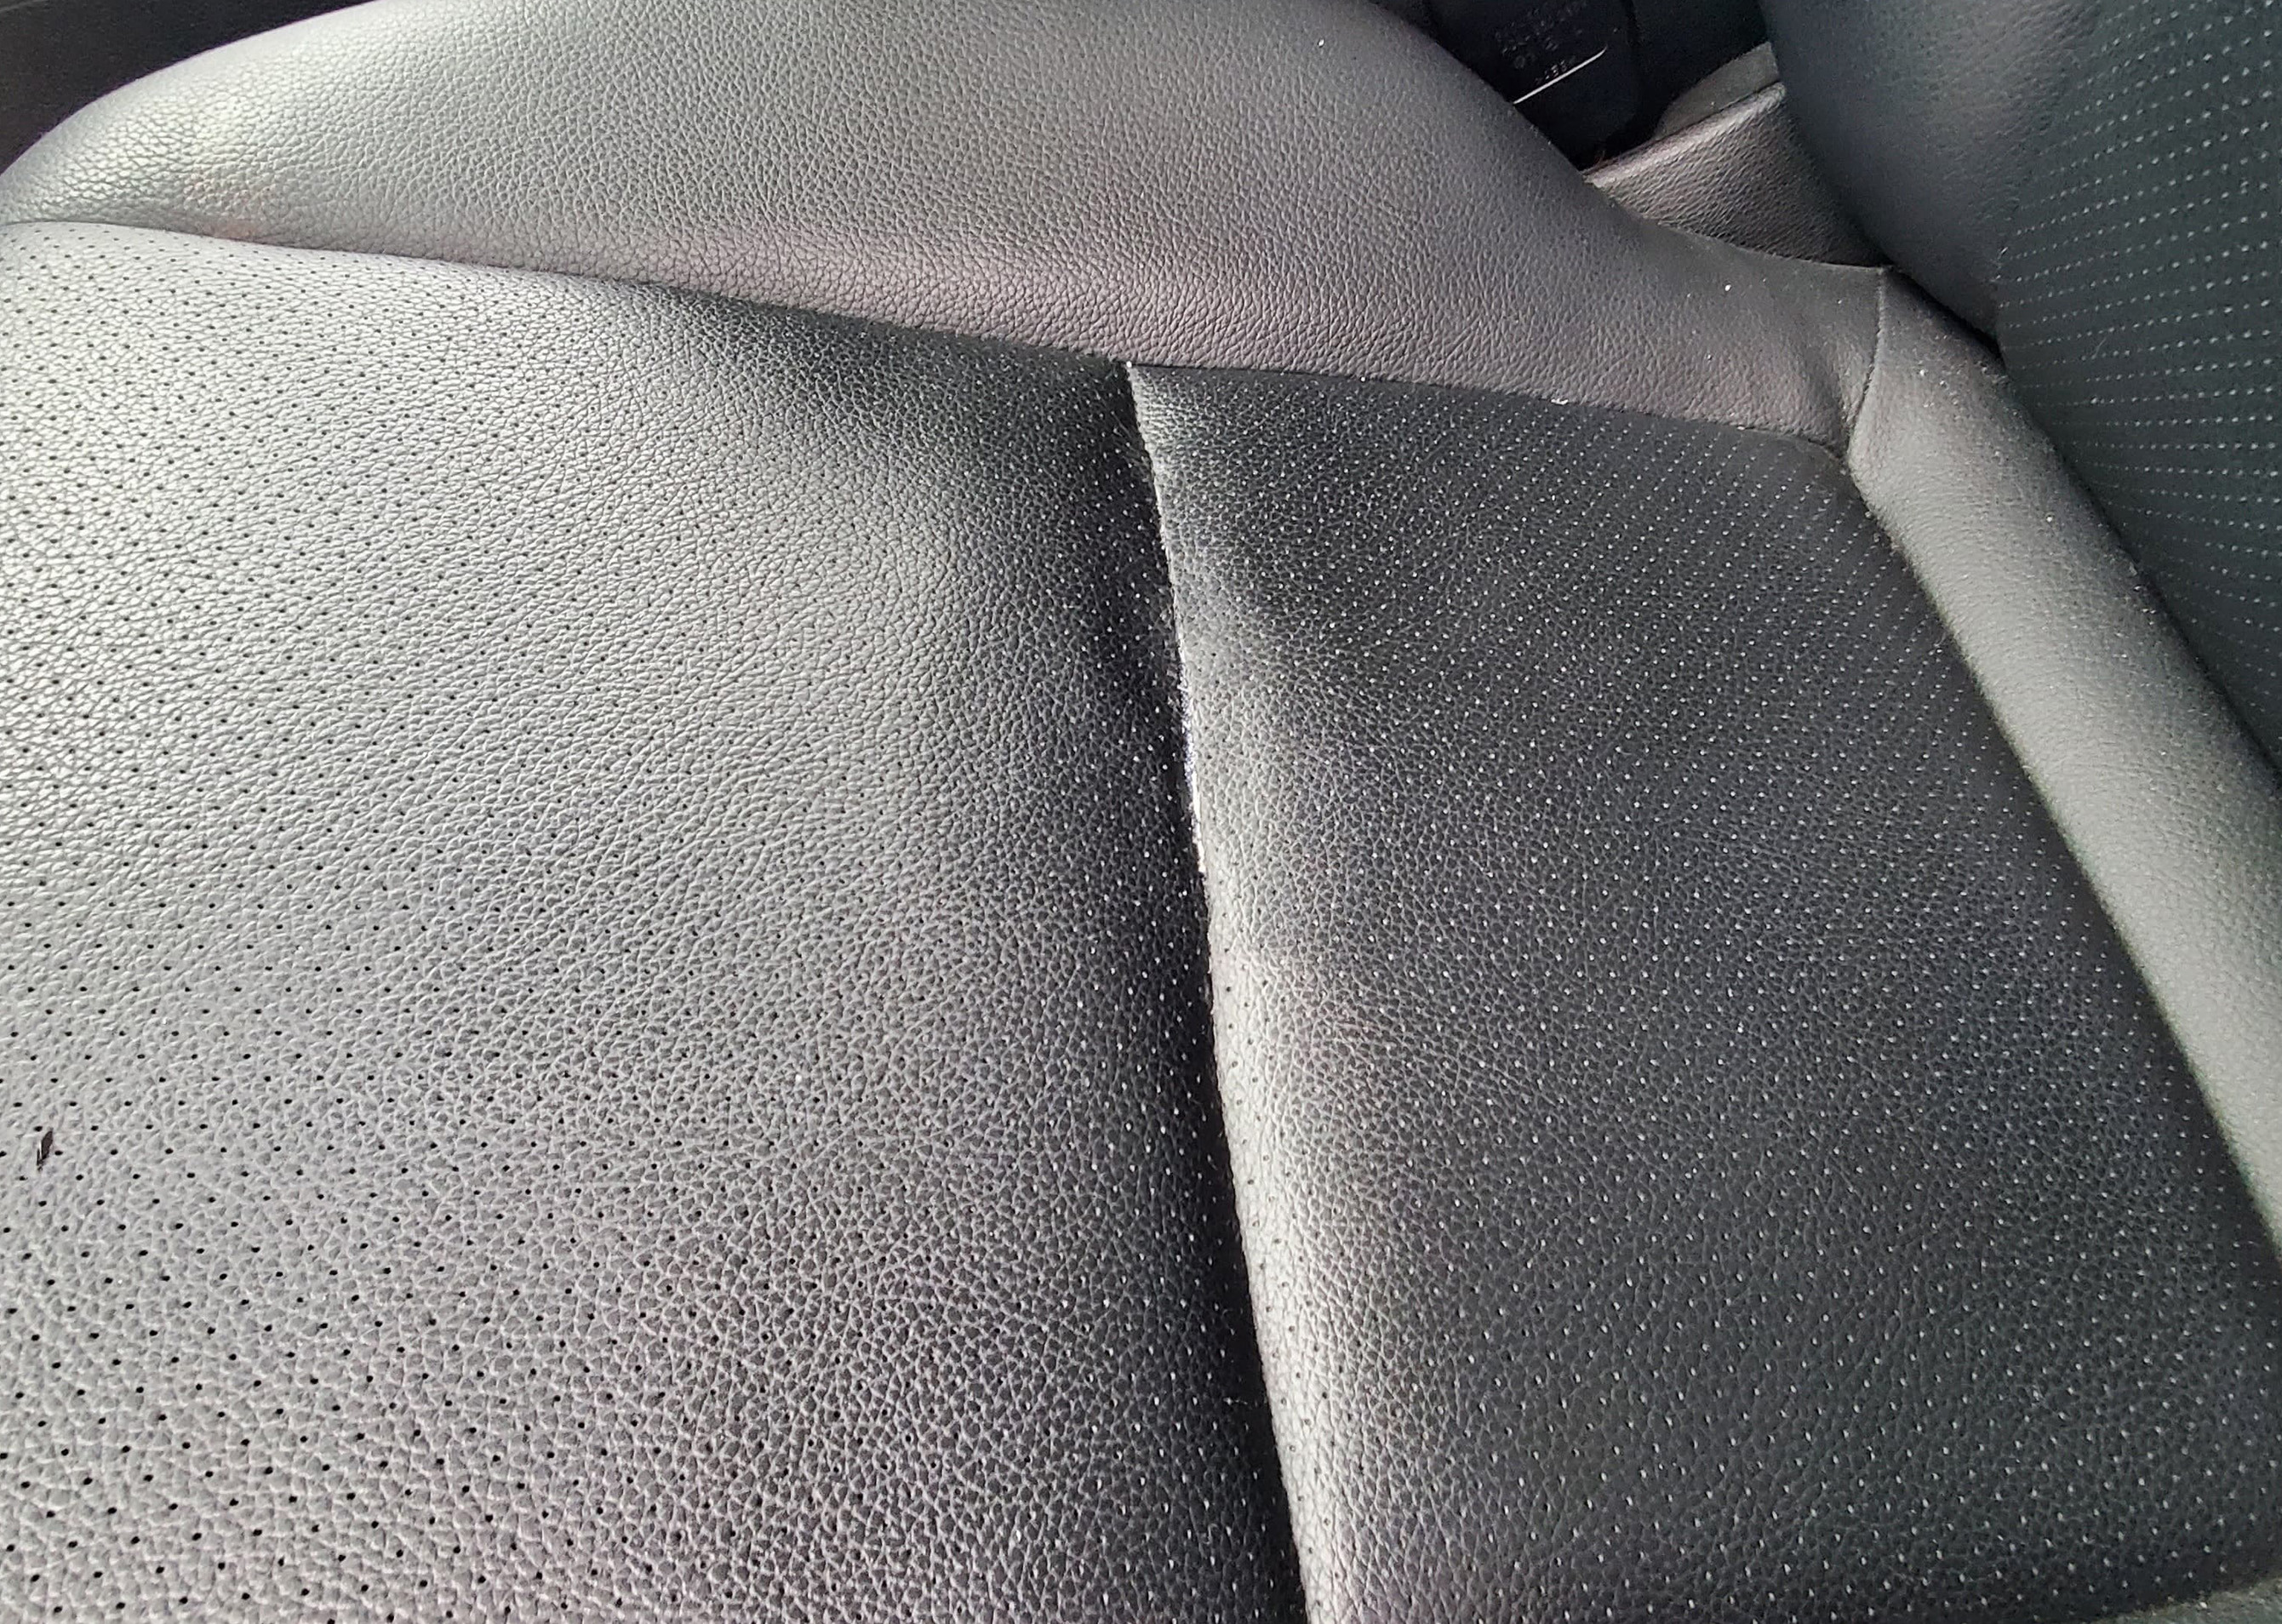
Leather car seats add luxury to any vehicle, but they’re prone to wear and tear. Recognizing the types of damage is the first step in effective repair. Let’s explore common issues:
- Types of Tears: Seam tears (clean breaks at the seams), surface tears (shallow cuts on the surface), and cracks (spiderweb-like patterns)
- Common Causes: Everyday use, sunlight exposure, temperature fluctuations, and accidental punctures
- Impact of Damage: Reduced vehicle value, uncomfortable seating, and further damage if left unaddressed
Knowing these details helps you choose the right repair approach. Regular maintenance and prompt repairs are key.
1.1. Assessing the Damage
Before diving into repairs, a proper assessment is essential. Determine the severity and type of tear. Surface cracks might need a simple conditioning treatment, while larger tears require more intensive methods.
- Surface Cracks: Fine lines on the leather surface. Often caused by dryness.
- Small Tears: Minor rips that haven’t fully penetrated the leather.
- Large Tears: Significant damage exposing the seat cushioning.
- Seam Separations: Stitching coming undone at the seams.
1.2. Identifying the Leather Type
Leather car seats come in various types, each needing specific care. Knowing your leather helps avoid damage during repair.
- Aniline Leather: Pure leather with natural grain. Requires gentle products.
- Semi-Aniline Leather: Protected with a light coating. More resistant to wear.
- Corrected Leather: Heavily treated and embossed. Most durable.
- Faux Leather (Leatherette): Synthetic material mimicking leather. Needs different repair techniques.
2. Essential Tools and Materials for Leather Repair
Having the right tools and materials makes the repair process smoother. Here’s a list of must-haves:
- Leather Repair Kit: Includes leather filler, colorants, and sealant.
- Tear Mender: Strong adhesive for bonding leather. Available at CARDIAGTECH.NET.
- Denim Patch: Used to reinforce larger tears.
- Emery Board: For smoothing rough edges.
- Alcohol Pad: To clean the repair area.
- Color Compounds: White, black, and brown to match the leather color.
- Plastic Spatula: For applying filler evenly.
- Sponge: For adding texture to the final coat.
- Gloves: Protect your hands from chemicals.
- Safety Glasses: Protect your eyes.
Investing in quality tools ensures a professional finish. Explore CARDIAGTECH.NET for the best equipment.
2.1. Selecting the Right Leather Repair Kit
Choosing the right repair kit is essential for achieving a seamless fix. A comprehensive kit should include various components to address different types of damage.
| Feature | Description |
|---|---|
| Leather Filler | A compound used to fill in gaps and tears, providing a smooth base for color application. Look for flexible fillers that won’t crack over time. |
| Colorants | Pigments used to match the original color of the leather. High-quality kits include a range of colors that can be mixed to achieve a perfect match. |
| Sealant | A protective layer applied after coloring to seal the repair and protect it from wear and tear. |
| Applicators | Tools like spatulas, sponges, and brushes for applying the filler and colorants evenly. |
| Sandpaper | Fine-grit sandpaper for smoothing the repaired area and blending it with the surrounding leather. |
| Instructions | A detailed guide on how to use the kit effectively, with step-by-step instructions and tips for achieving the best results. |
2.2. Where to Buy Quality Repair Tools
Finding reliable suppliers is crucial for sourcing high-quality leather repair tools and materials. CARDIAGTECH.NET, along with other reputable retailers, offers a wide range of options to suit various needs and budgets.
- CARDIAGTECH.NET: Offers specialized tools and kits designed for professional auto repair, ensuring top-notch quality and performance.
- Auto Supply Stores: Stores like AutoZone, Advance Auto Parts, and O’Reilly Auto Parts carry basic leather repair kits and individual tools.
- Online Marketplaces: Amazon and eBay offer a vast selection of leather repair products, but it’s important to read reviews and check seller ratings to ensure quality.
- Specialty Leather Shops: These shops provide high-end products and expert advice for leather care and repair.
3. Step-by-Step Guide: Fixing a Seam Tear
Seam tears are common and relatively straightforward to fix. Follow these steps for a lasting repair:
-
Prepare the Area: Clean the area around the tear with an alcohol pad. Remove any loose threads.
-
Cut a Denim Patch: Cut a piece of denim slightly larger than the tear. This will provide support.
-
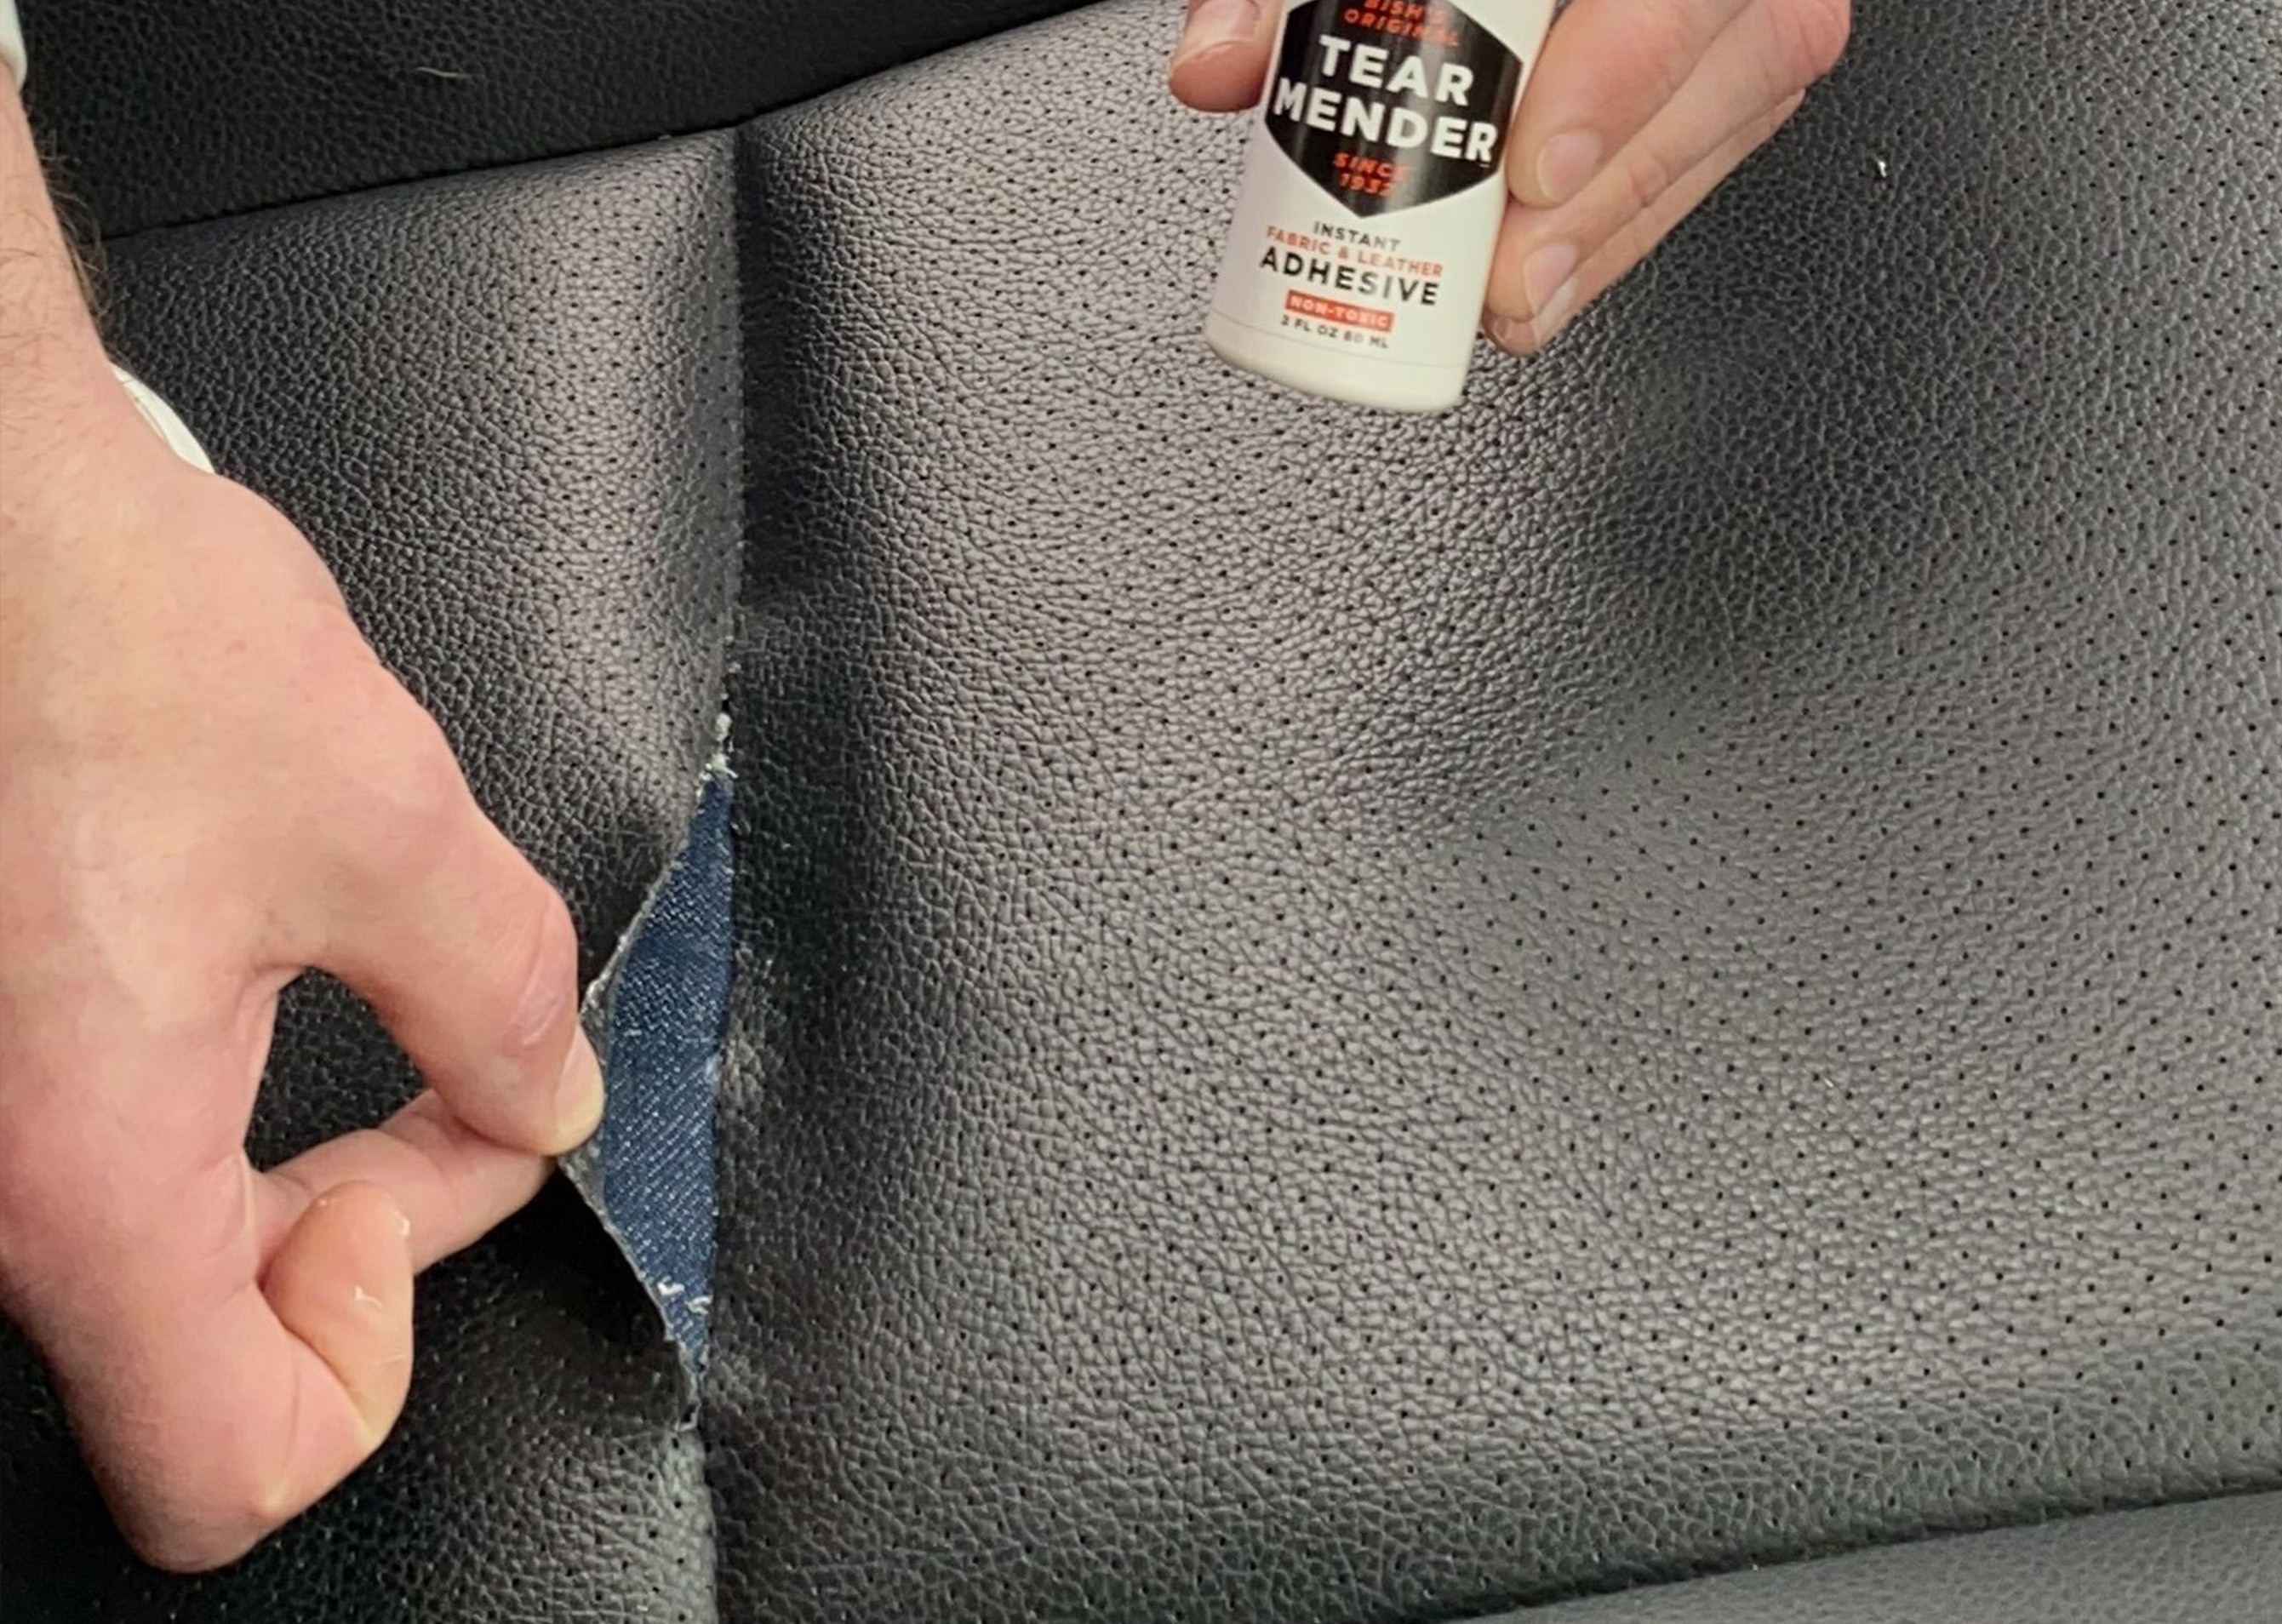
Insert the Patch: Insert the denim patch into the hole. Center it under the torn area.
Place Repair Patch Inside Rip -
Apply Tear Mender: Dispense Tear Mender into a paper bowl. Dip your finger and apply a thin layer to the denim.
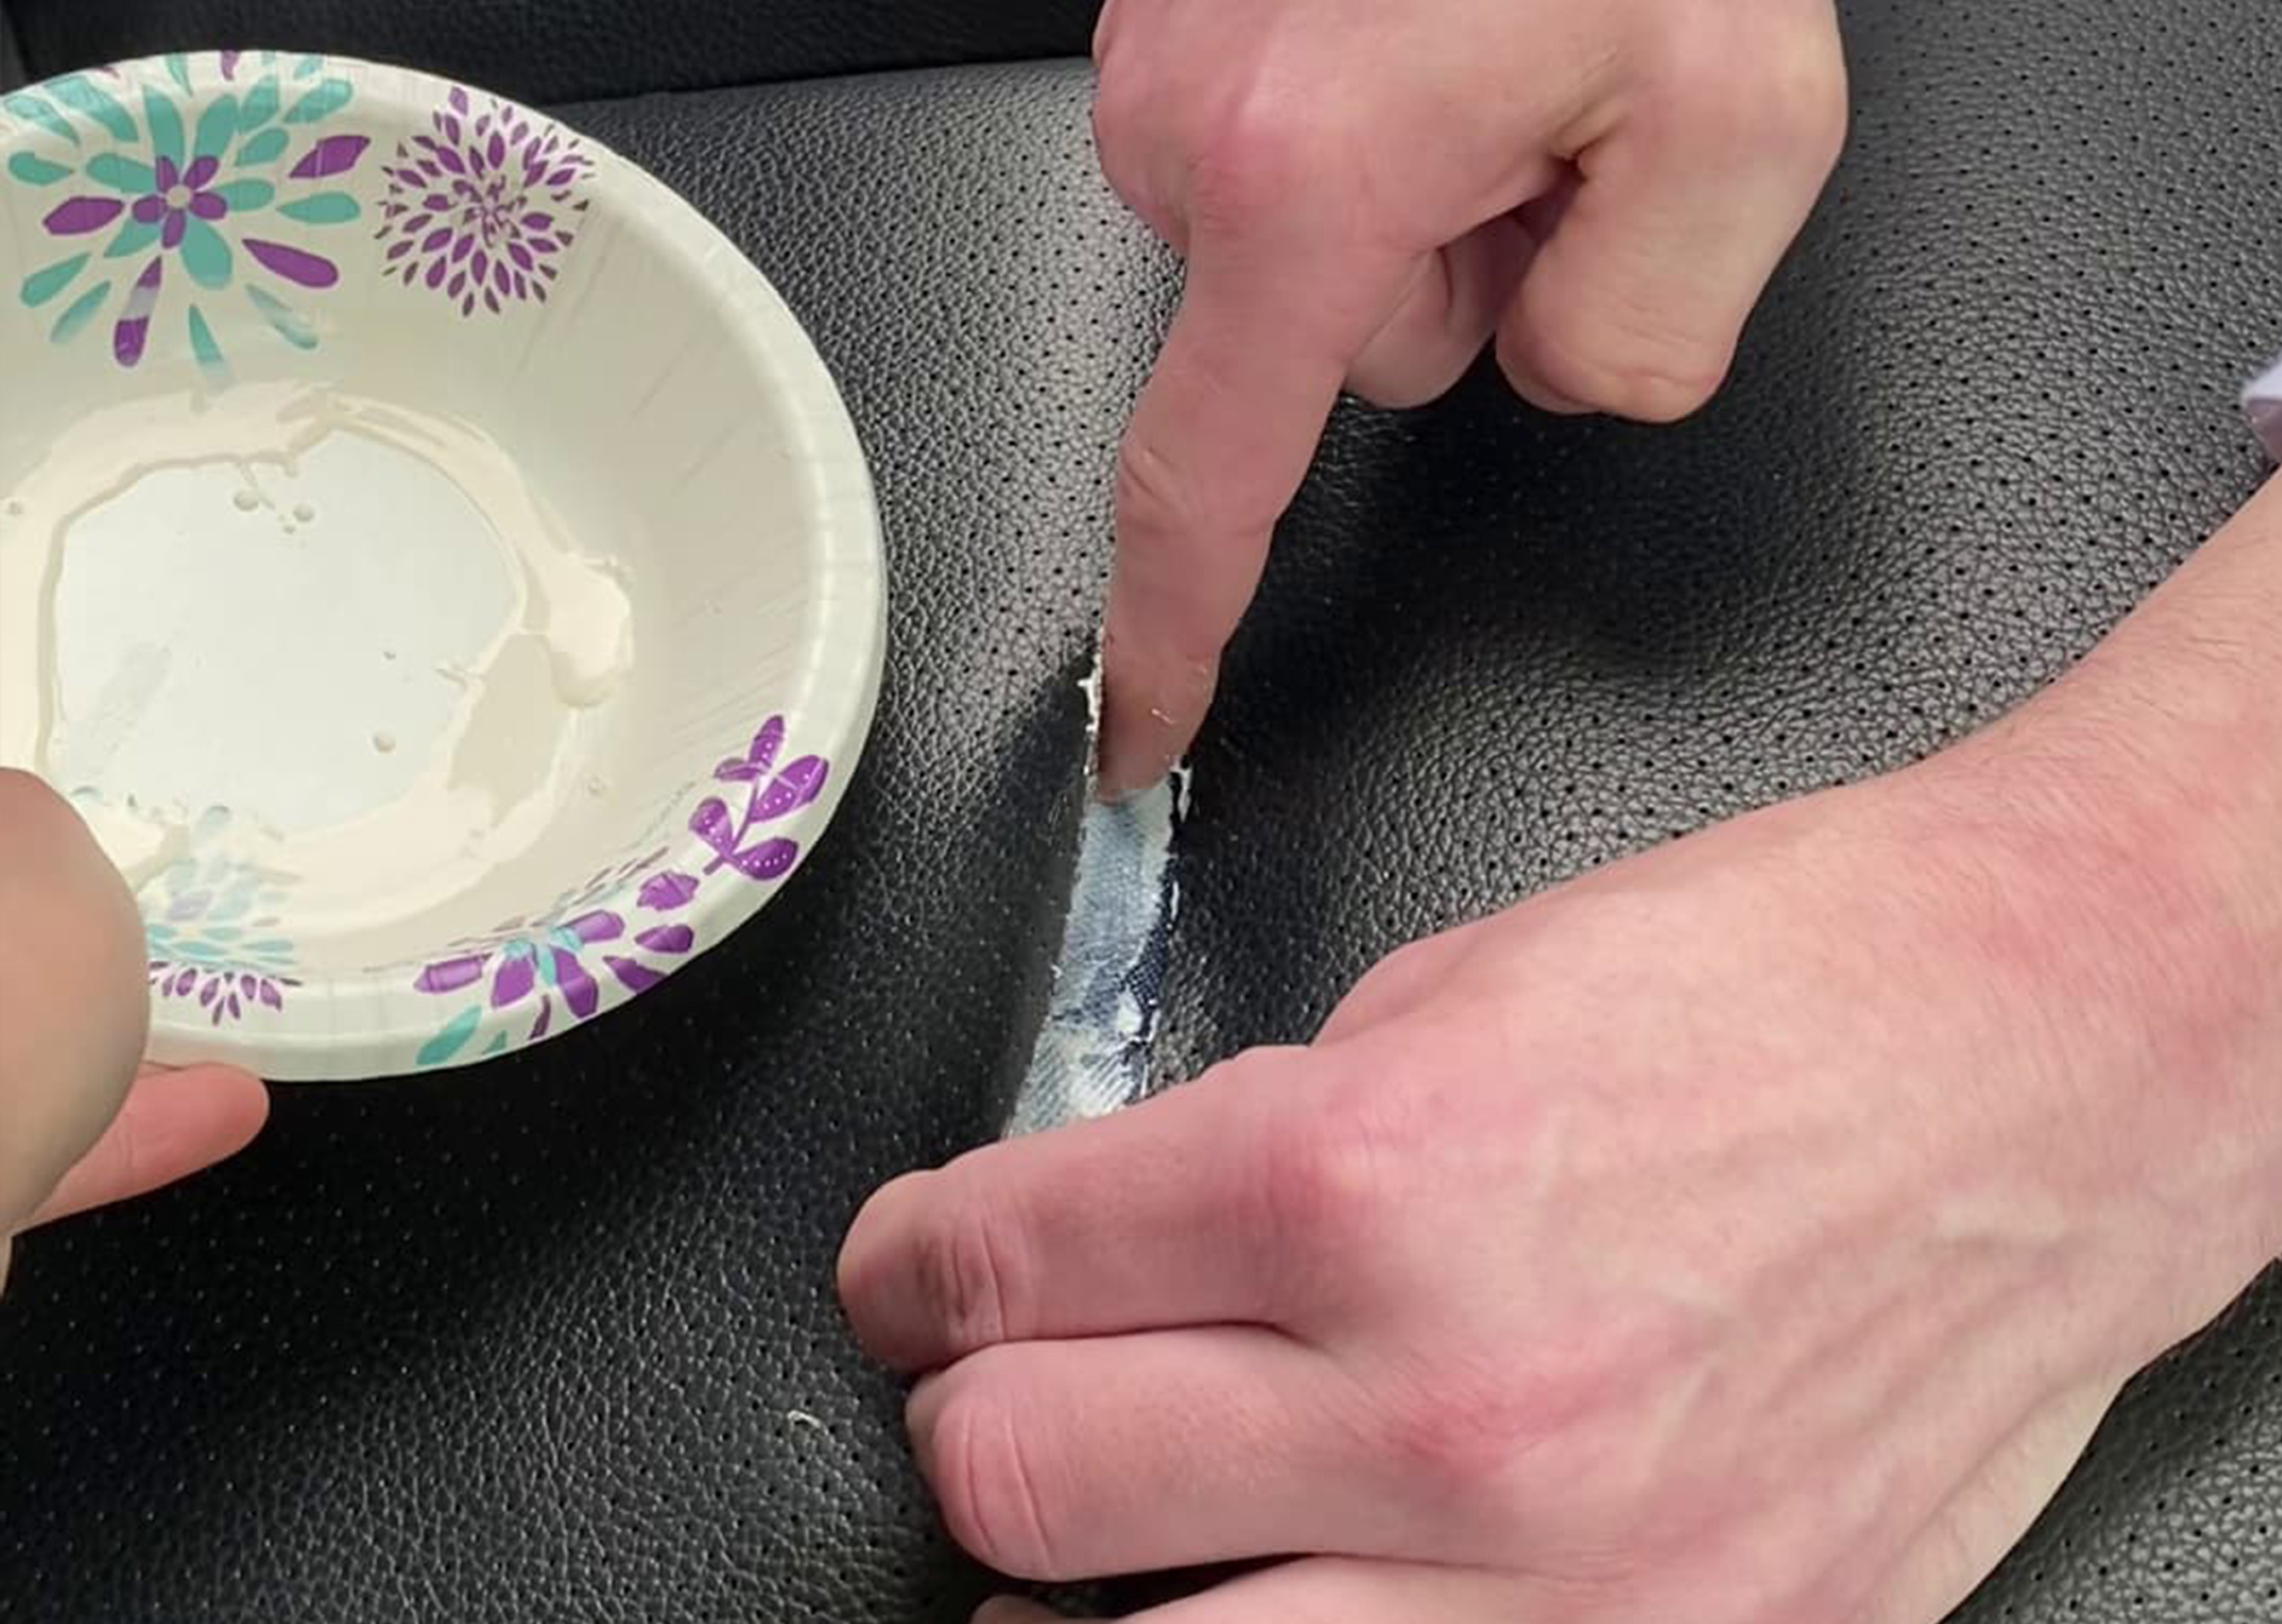 Apply Thin Layer Of Tear Mender
 -
Press and Dry: Press the leather down onto the denim. Allow it to dry for about 3 minutes.
 Press Leather Down On Denim and Allow to Dry
 -
Stitch the Seam: Use a leather needle and thread to stitch the seam back together. Follow the original stitch pattern for a seamless look.
With these steps, your seam tear should be as good as new. CARDIAGTECH.NET offers expert tips.
3.1. Preparing the Area
Thorough preparation is key to a successful leather repair. Cleaning and prepping the damaged area ensures the repair materials adhere properly.
- Cleaning the Leather: Use a leather cleaner to remove dirt, oil, and grime from the area around the tear.
- Removing Loose Threads: Trim any loose or frayed threads with scissors or a seam ripper.
- Softening the Edges: Use a leather softening solution to make the edges of the tear more pliable.
- Masking the Surrounding Area: Protect the surrounding leather with masking tape to prevent accidental staining or damage.
3.2. Reinforcing the Tear with a Denim Patch
Reinforcing the tear with a denim patch provides added strength and support, preventing the tear from reopening.
- Choosing the Right Denim: Select a piece of denim that is slightly thicker than the leather but not too bulky.
- Cutting the Patch: Cut the denim patch slightly larger than the tear to ensure full coverage.
- Positioning the Patch: Insert the patch inside the tear, centering it under the damaged area.
- Securing the Patch: Use a strong adhesive like Tear Mender from CARDIAGTECH.NET to bond the patch to the back of the leather.
3.3. Stitching the Seam
If the tear is along a seam, stitching it closed is crucial for a durable repair. Here’s how to do it properly:
- Choosing the Right Thread: Use a heavy-duty thread that matches the color and thickness of the original stitching.
- Using a Leather Needle: A leather needle has a sharp, triangular point that easily penetrates leather without tearing it.
- Following the Original Stitch Pattern: Duplicate the original stitch pattern as closely as possible to maintain the integrity and appearance of the seam.
- Securing the Stitches: Knot the thread securely at the beginning and end of the seam to prevent unraveling.
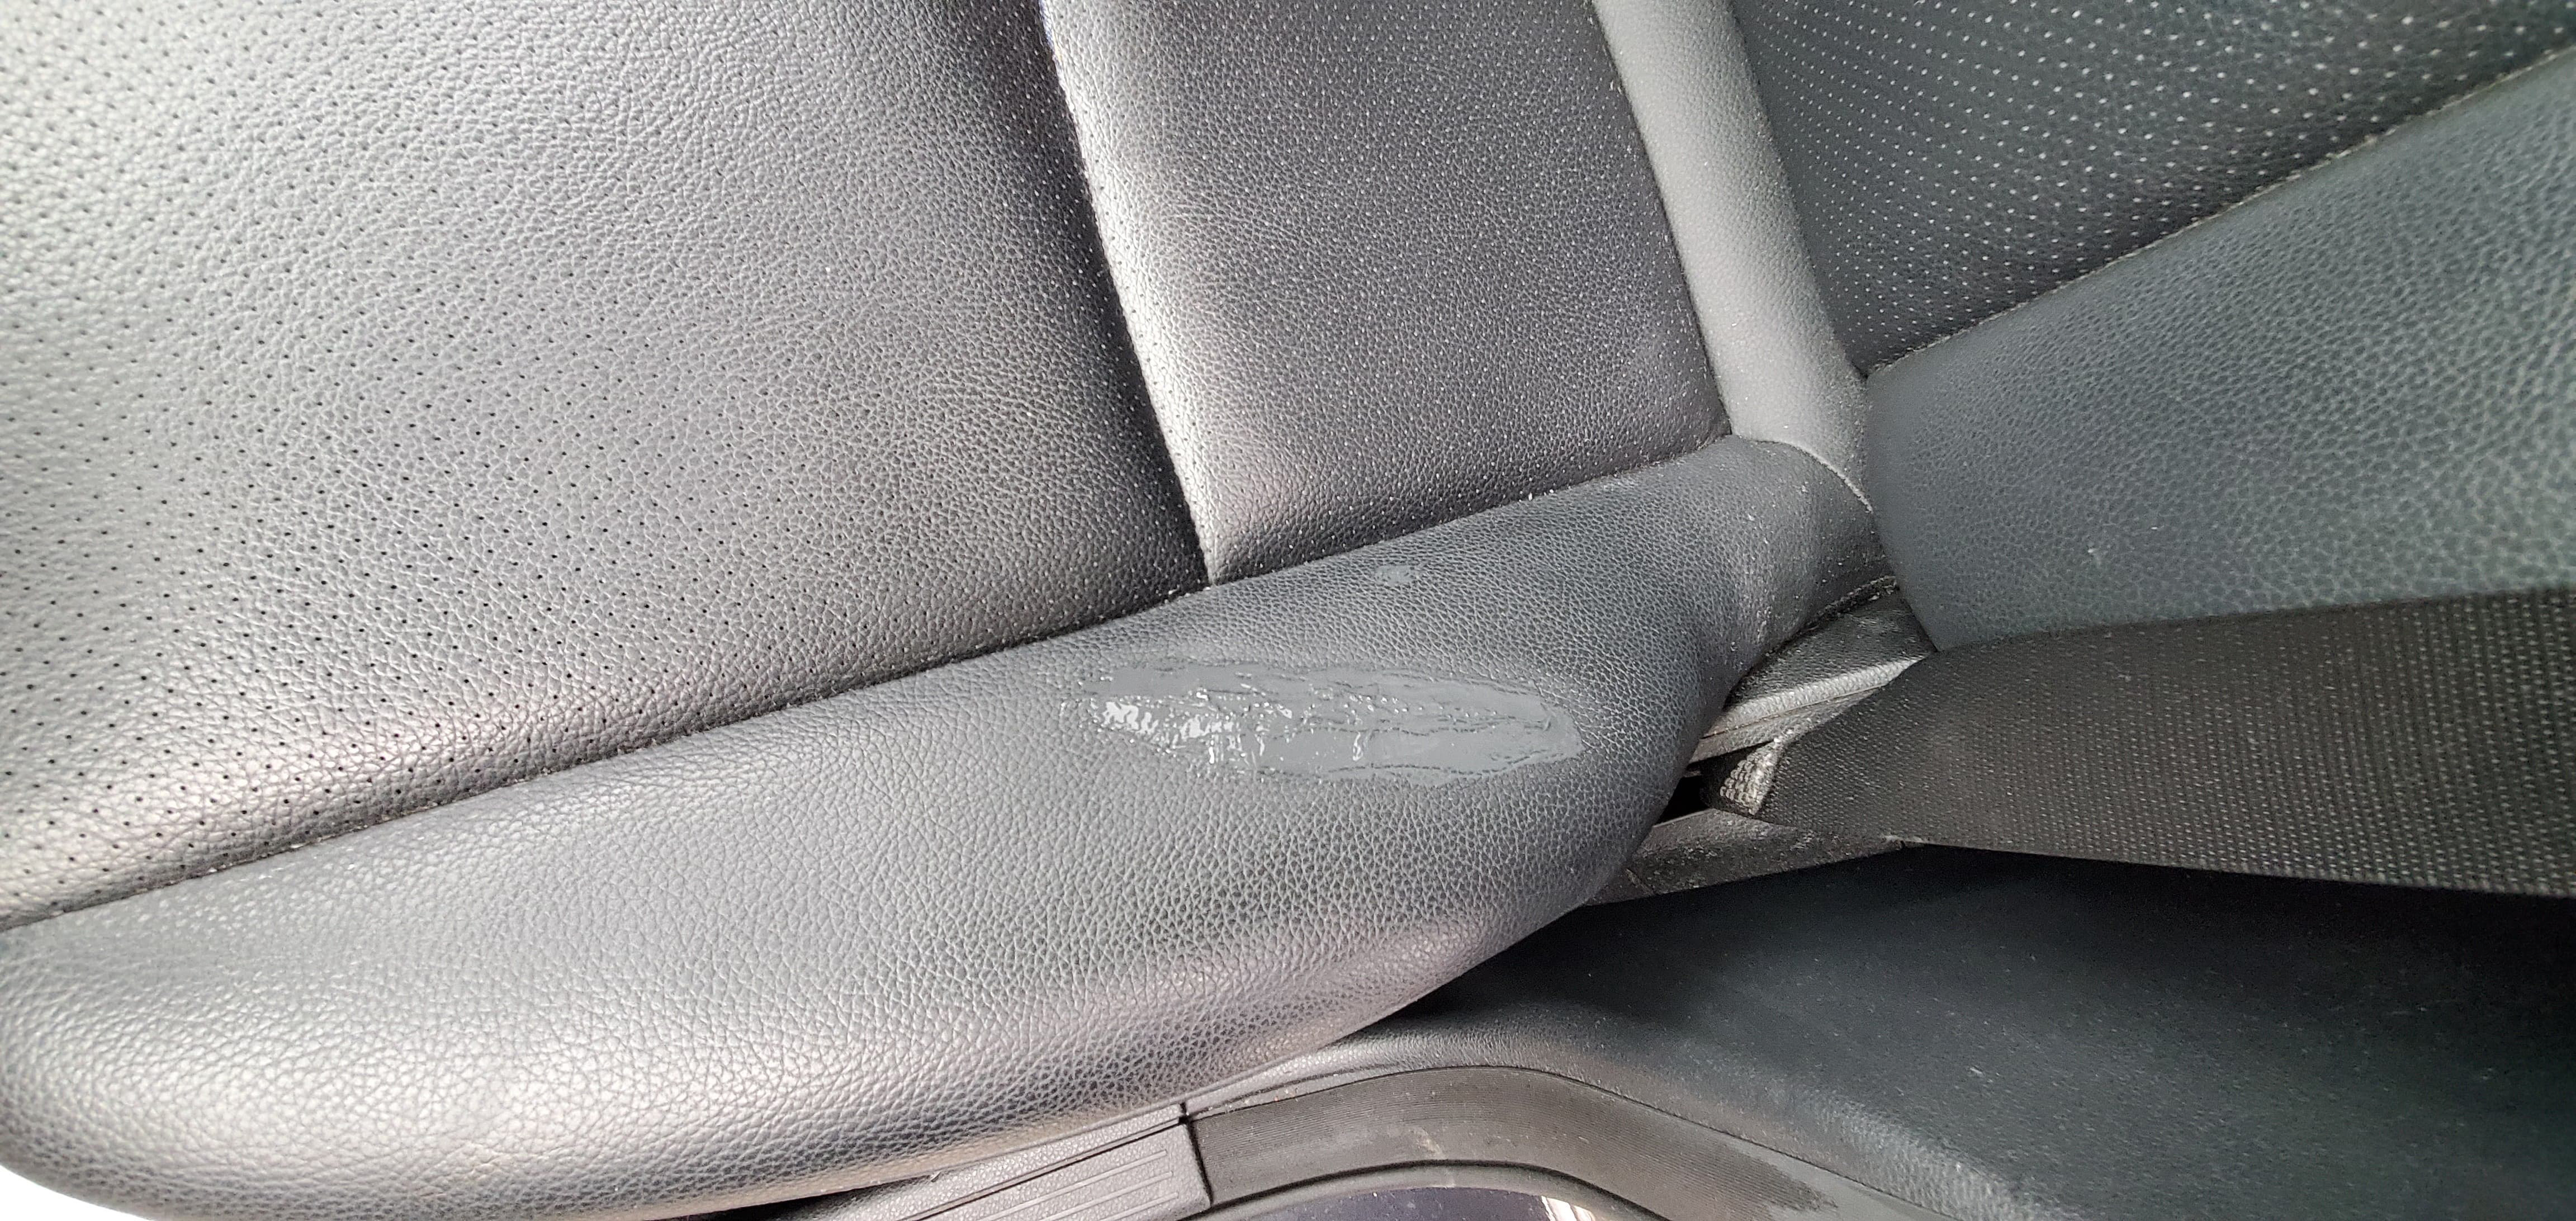
4. Repairing Surface Damage and Cracks
Surface cracks and damage need a different approach. Here’s how to restore your leather:
-
Clean the Surface: Use a leather cleaner to remove dirt and oil.
-
Apply Tear Mender: Dip your finger in Tear Mender and fill in the cracks. Let it dry.
 Fill in the Cracks With Tear Mender
 -
Sand the Area: Use an emery board to smooth the surface. Remove any shiny finish.
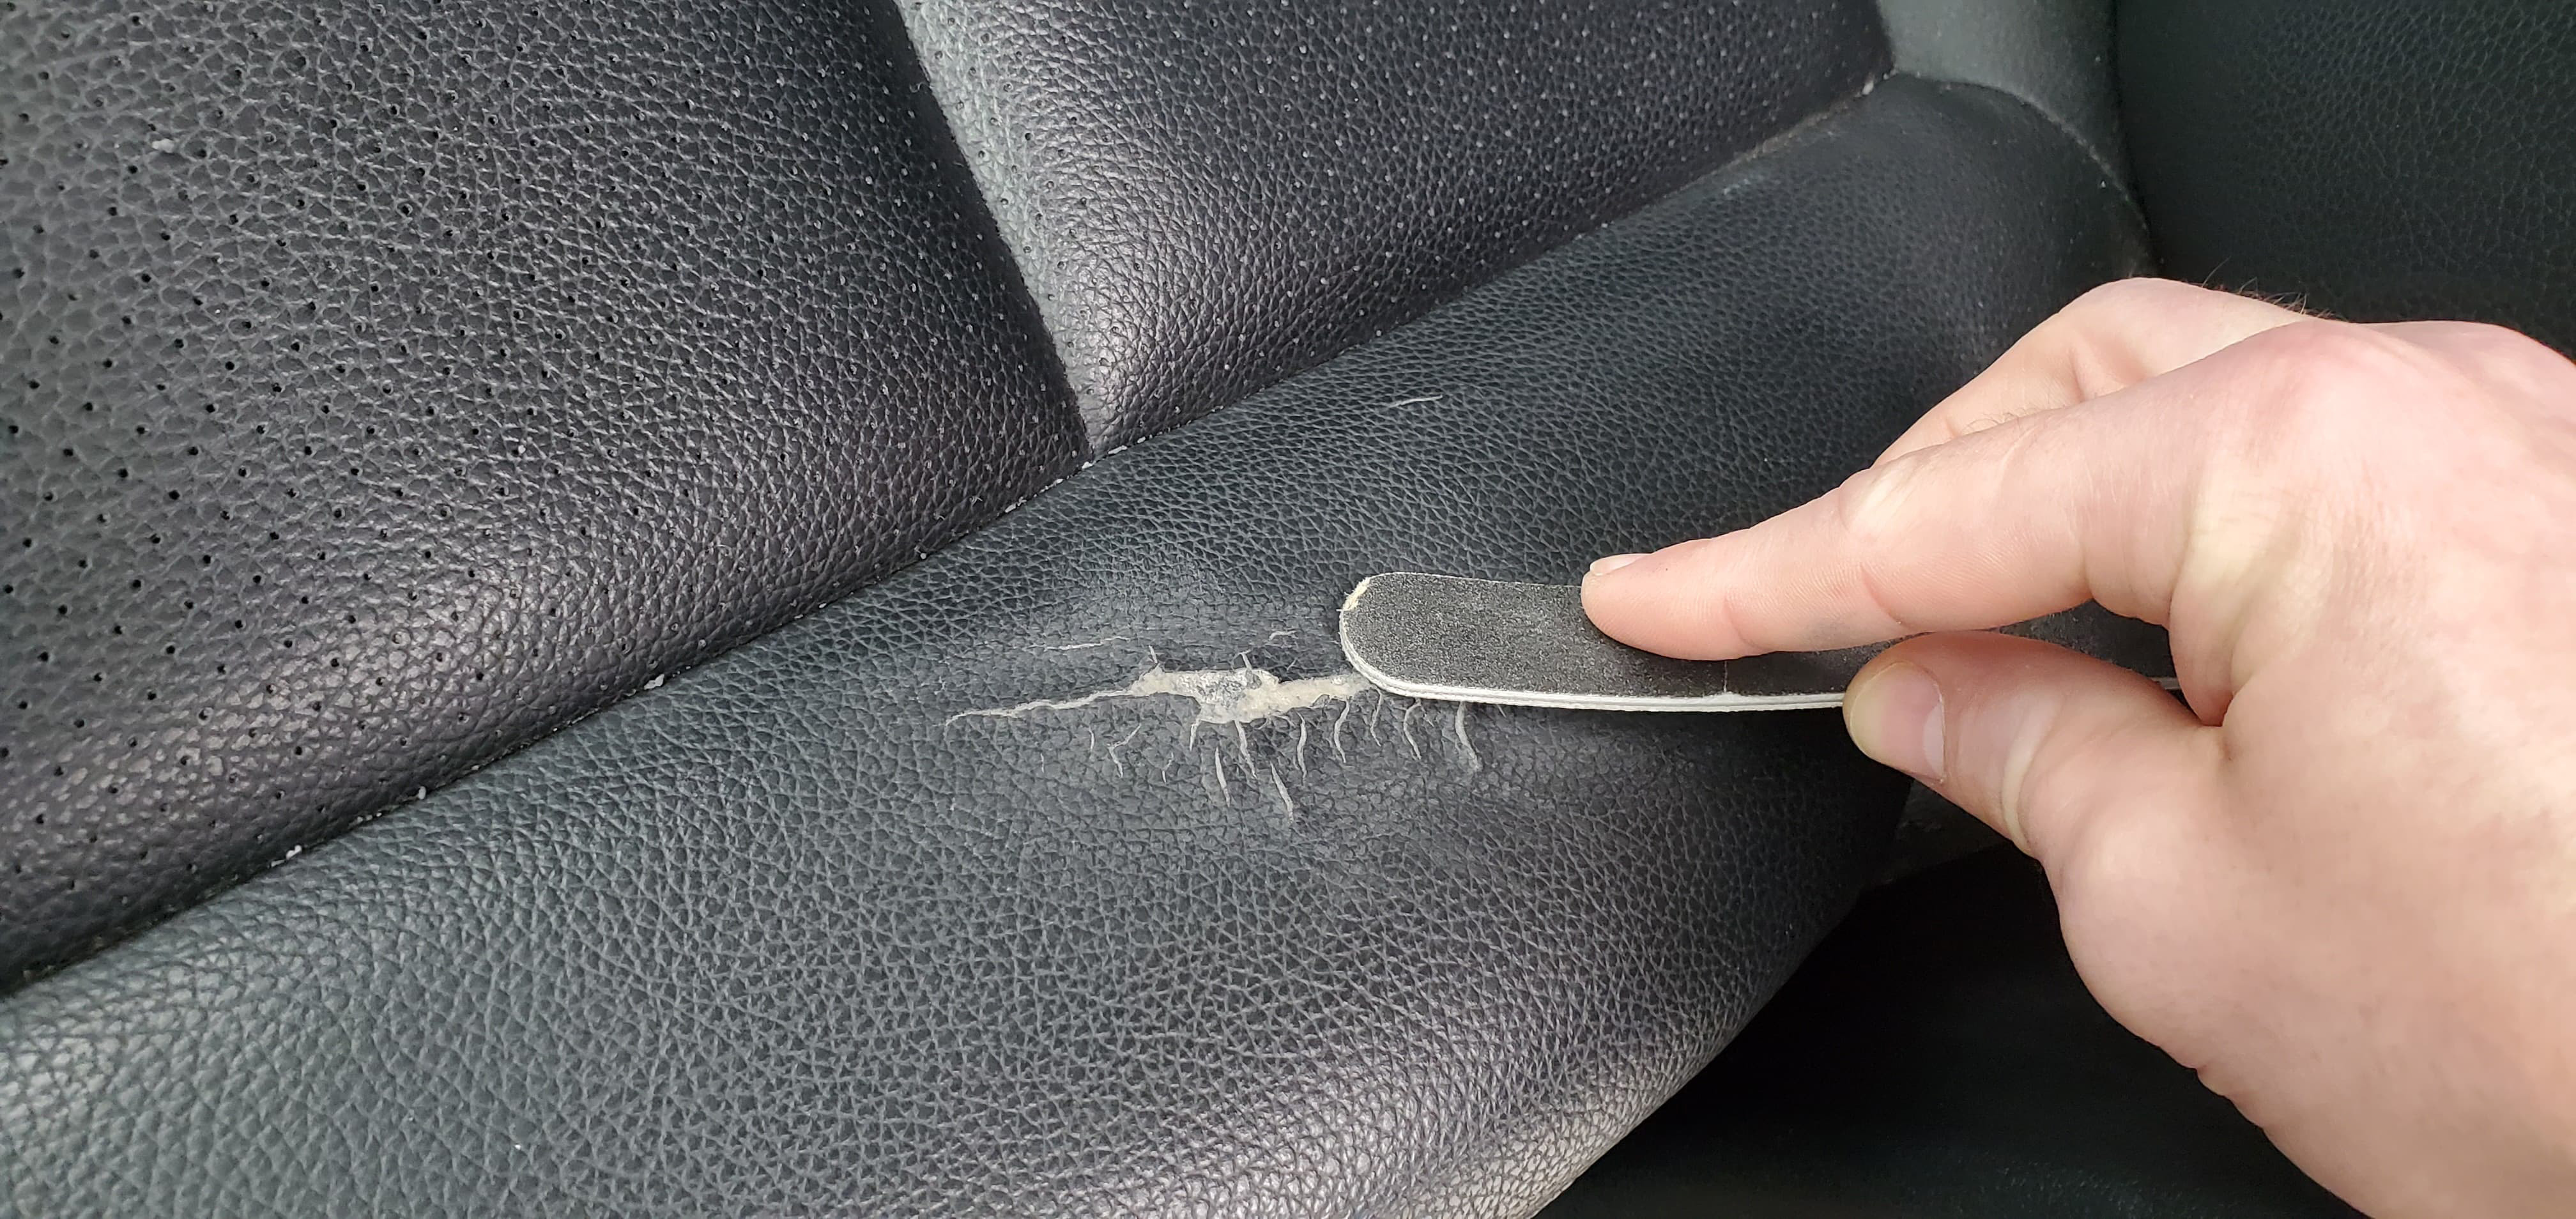 Sand The Area
 -
Wipe with Alcohol: Clean the area with an alcohol pad for better adhesion.
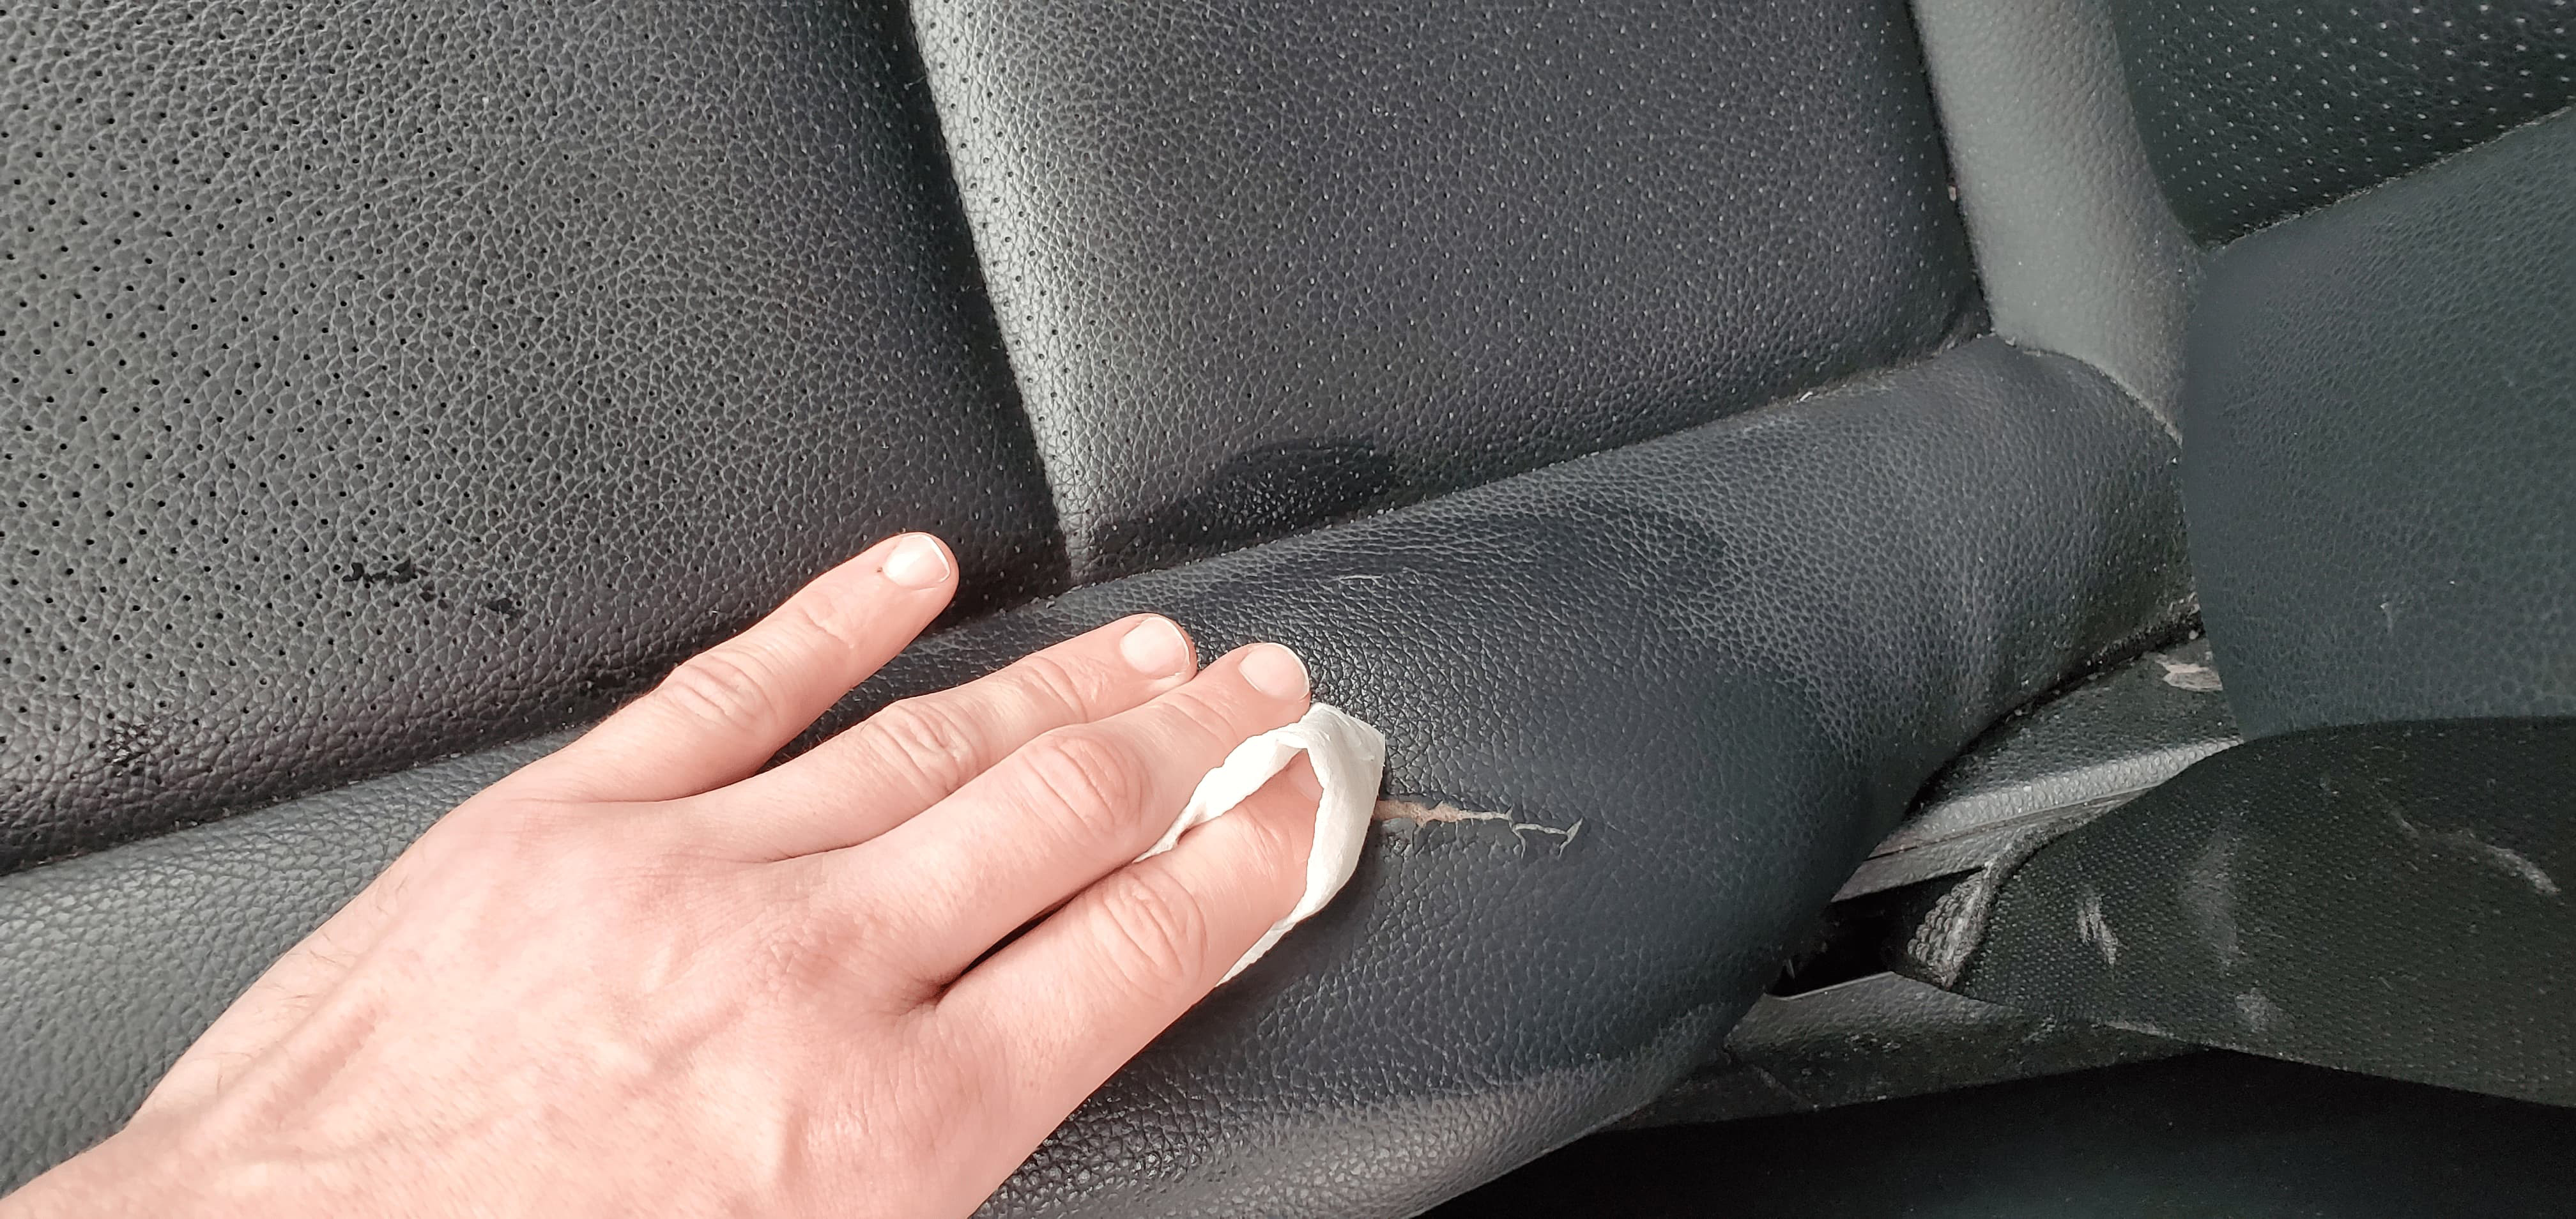 Wipe Area With Alcohol
 -
Mix Color Compounds: Combine white, black, and brown to match the leather color.
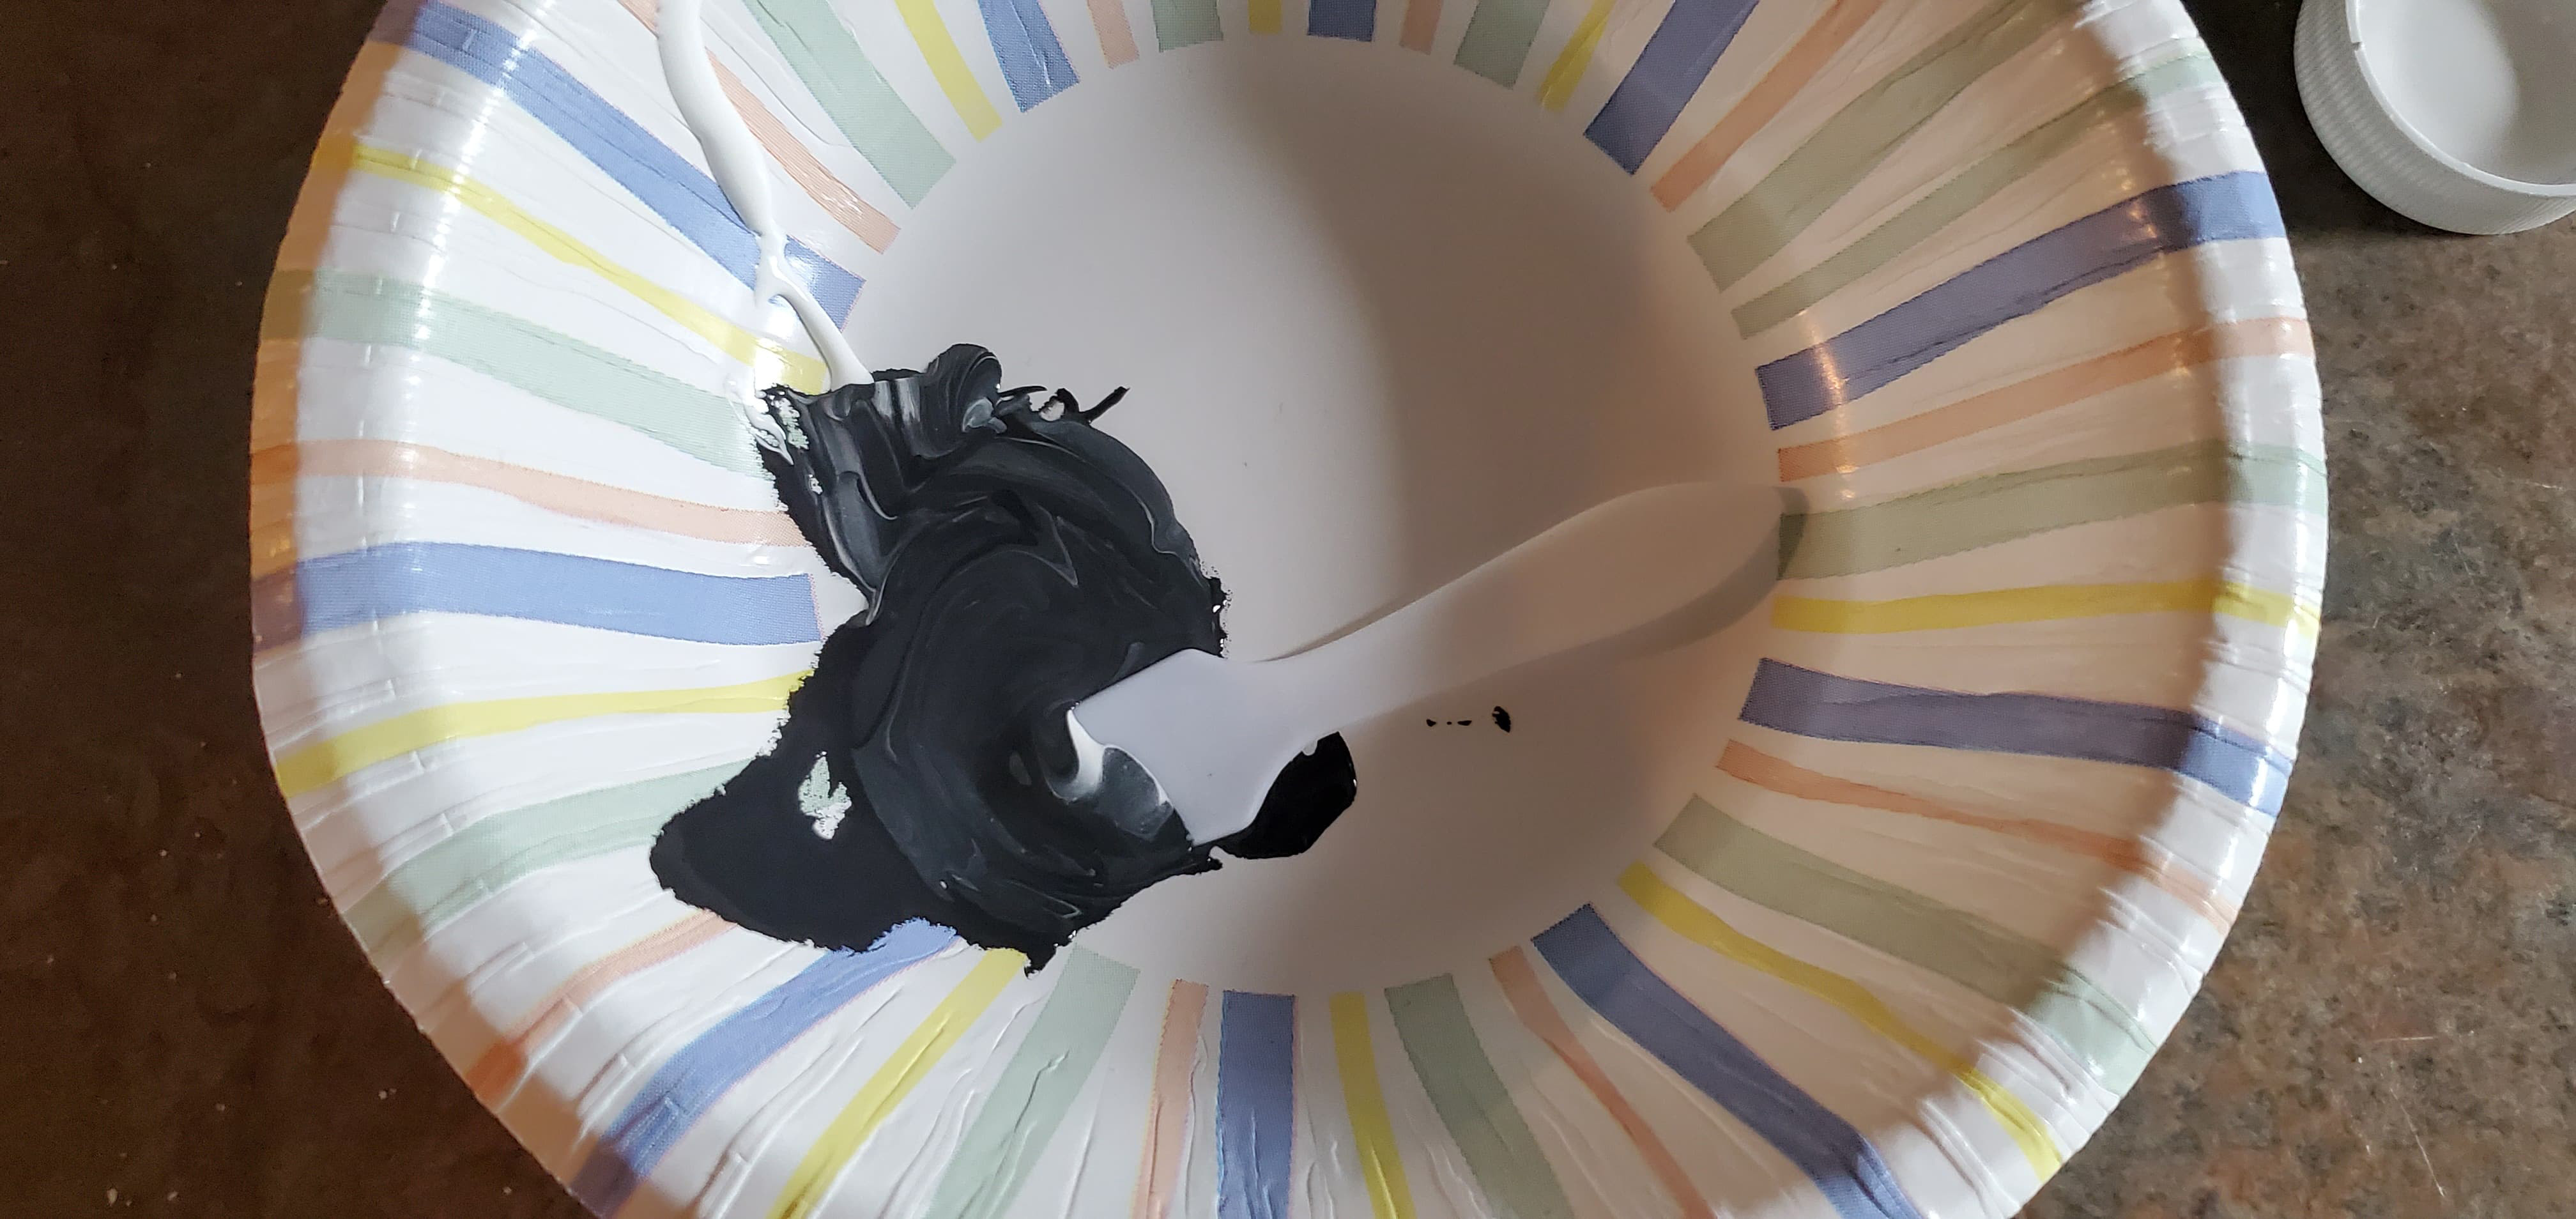 Mix Color Compounds
 -
Apply Finishing Compound: Use a plastic spatula to apply a thin layer. Let it dry and repeat until the repair is obscured.
 Apply Finishing Compound
These steps will rejuvenate your leather seats. Visit CARDIAGTECH.NET for top-quality repair kits.
4.1. Filling in Cracks and Surface Tears
Filling in cracks and surface tears is essential for restoring the smooth appearance of leather car seats.
- Applying Leather Filler: Use a small spatula to apply leather filler into the cracks and tears, working it in gently.
- Smoothing the Filler: Smooth the filler with your finger or the edge of the spatula, removing any excess.
- Allowing the Filler to Dry: Let the filler dry completely according to the manufacturer’s instructions.
- Sanding the Filled Area: Use fine-grit sandpaper to smooth the filled area, blending it with the surrounding leather.
4.2. Matching the Leather Color
Matching the leather color is crucial for a seamless repair.
- Mixing Colorants: Use a color mixing guide to create a custom color that matches your leather.
- Testing the Color: Test the color on an inconspicuous area to ensure it’s a perfect match.
- Applying the Color: Use a sponge or brush to apply the color evenly over the filled area, blending it into the surrounding leather.
- Sealing the Color: Apply a leather sealant to protect the color and prevent it from fading or rubbing off.
5. Advanced Techniques for Severe Damage
Sometimes, damage is extensive. Advanced techniques can salvage even severely damaged seats:
- Replacing Leather Panels: If a panel is beyond repair, replace it with a new piece. Source matching leather from CARDIAGTECH.NET.
- Professional Upholstery Services: For complex repairs, consider a professional. They have specialized tools.
- Using Leather Patches: For large tears, a leather patch can provide a strong, seamless repair.
5.1. Replacing Leather Panels
Replacing entire leather panels is a more involved process but can be necessary for severely damaged areas.
- Sourcing Matching Leather: Find a leather supplier that can provide a close match to your existing leather in terms of color, texture, and grain.
- Removing the Old Panel: Carefully remove the damaged panel, taking note of how it is attached to the seat frame.
- Cutting the New Panel: Use the old panel as a template to cut the new panel to the correct size and shape.
- Attaching the New Panel: Sew or glue the new panel to the seat frame, ensuring it is securely attached and properly aligned.
5.2. Using Leather Patches for Large Tears
For larger tears, using a leather patch can provide a strong and seamless repair.
- Selecting a Patch: Choose a patch that matches the color, texture, and thickness of the original leather.
- Cutting the Patch: Cut the patch slightly larger than the tear, rounding the edges to prevent them from catching.
- Thinning the Edges: Thin the edges of the patch with a leather skiving tool to create a smooth transition between the patch and the original leather.
- Adhering the Patch: Apply leather adhesive to both the patch and the surrounding area, then press the patch firmly into place.
6. Preventative Measures to Protect Leather Car Seats
Prevention is better than cure. Protect your leather seats with these tips:
- Regular Cleaning: Clean your seats every few weeks with a leather cleaner.
- Conditioning: Apply a leather conditioner to keep the leather supple and prevent cracks.
- Avoid Direct Sunlight: Park in the shade or use a sunshade to prevent fading and cracking.
- Use Seat Covers: Protect your seats from spills and wear with seat covers.
6.1. Regular Cleaning and Conditioning
Regular cleaning and conditioning are essential for maintaining the health and appearance of leather car seats.
- Cleaning: Use a pH-balanced leather cleaner to remove dirt, oil, and grime without damaging the leather.
- Conditioning: Apply a leather conditioner to hydrate the leather, keeping it soft and supple.
- Frequency: Clean your leather seats every 1-2 months and condition them every 3-4 months.
6.2. Protecting Against Sunlight and Heat
Sunlight and heat can cause leather to fade, crack, and dry out.
- Parking in the Shade: Park your car in the shade whenever possible to protect the leather from direct sunlight.
- Using a Sunshade: Use a sunshade to block sunlight from entering your car and heating up the interior.
- Applying a UV Protectant: Use a leather conditioner that contains UV protectants to shield the leather from harmful rays.
7. DIY vs. Professional Repair: Making the Right Choice
Deciding whether to DIY or seek professional help depends on the damage’s complexity. Here’s a guide:
- DIY Repairs: Suitable for small tears and cracks. Cost-effective if you have the skills.
- Professional Services: Best for large tears, panel replacements, and color matching. Ensures a perfect finish.
7.1. Assessing Your Skill Level
Before attempting a DIY repair, honestly assess your skill level and experience.
- Basic Repairs: If you’re comfortable with basic cleaning, patching, and color matching, you can likely handle minor repairs yourself.
- Advanced Repairs: For more complex repairs like panel replacements or extensive stitching, it’s best to seek professional help.
7.2. When to Call a Professional
Knowing when to call a professional can save you time, money, and frustration in the long run.
- Extensive Damage: If the damage is severe or covers a large area, a professional can provide a more thorough and lasting repair.
- Color Matching Issues: If you’re unable to match the color of the leather yourself, a professional can use specialized tools and techniques to achieve a seamless match.
- Lack of Experience: If you’re not confident in your ability to perform the repair correctly, it’s best to leave it to the experts.
8. Cost-Effective Solutions for Leather Car Seat Repair
Repairing leather car seats doesn’t have to break the bank. Here are some cost-effective solutions:
- DIY Kits: Leather repair kits offer an affordable way to fix minor damage. CARDIAGTECH.NET has options for every budget.
- Preventative Care: Regular cleaning and conditioning prevent costly repairs down the line.
- Refurbishing: Instead of replacing, consider refurbishing your seats to save money.
8.1. Budget-Friendly Repair Kits
Budget-friendly repair kits provide an affordable way to address minor damage without breaking the bank.
- Basic Kits: These kits typically include leather filler, colorants, and applicators for small repairs.
- All-in-One Kits: Some kits offer a comprehensive set of tools and materials for a wider range of repairs.
- Online Discounts: Look for online discounts and promotions to save even more on budget-friendly kits.
8.2. Long-Term Savings Through Preventative Maintenance
Investing in preventative maintenance can save you money in the long run by preventing costly repairs.
- Regular Cleaning: Regular cleaning removes dirt and grime that can damage the leather over time.
- Conditioning: Conditioning keeps the leather soft and supple, preventing cracks and tears.
- Sun Protection: Protecting the leather from sunlight and heat can prevent fading and drying.
9. Common Mistakes to Avoid During Leather Repair
Even with the best intentions, mistakes can happen. Here are common pitfalls to avoid:
- Using Harsh Chemicals: Avoid cleaners with bleach or ammonia. These can damage leather.
- Over-Sanding: Sanding too aggressively can remove the leather’s finish.
- Ignoring Color Matching: Using the wrong colorant will make the repair obvious.
- Skipping Preparation: Neglecting to clean and prep the area reduces adhesion.
9.1. Improper Cleaning Techniques
Improper cleaning techniques can damage leather car seats, leading to further problems.
- Using Harsh Cleaners: Avoid using harsh chemicals, solvents, or abrasive cleaners that can strip the leather of its natural oils.
- Over-Wetting the Leather: Avoid saturating the leather with water, as this can cause it to swell and crack.
- Rubbing Too Hard: Avoid rubbing the leather too vigorously, as this can damage the surface and cause discoloration.
9.2. Poor Color Matching
Poor color matching can result in a repair that stands out and detracts from the overall appearance of the car interior.
- Using the Wrong Colorants: Avoid using colorants that don’t match the original leather color.
- Failing to Test the Color: Always test the color on an inconspicuous area before applying it to the damaged area.
- Applying Too Much Color: Avoid applying too much color at once, as this can result in a blotchy or uneven finish.
10. Maintaining Your Repaired Leather Car Seats
Once repaired, maintain your leather seats to prolong their life:
- Regular Conditioning: Keep the leather soft with regular conditioning.
- Gentle Cleaning: Use a soft cloth and leather cleaner for routine cleaning.
- Protect from the Elements: Use sunshades and seat covers to shield from sun and spills.
- Professional Detailing: Consider professional detailing for deep cleaning and conditioning.
10.1. Routine Cleaning Practices
Establishing a routine cleaning practice is essential for maintaining the appearance and longevity of your repaired leather car seats.
- Dusting: Dust the seats regularly with a soft cloth or vacuum with a brush attachment.
- Wiping: Wipe the seats down with a damp cloth and a mild leather cleaner to remove dirt and grime.
- Drying: Dry the seats with a clean, dry cloth to prevent water spots.
10.2. Long-Term Care Tips
Following these long-term care tips can help keep your repaired leather car seats looking their best for years to come.
- Conditioning: Condition the leather seats every 3-4 months to keep them soft and supple.
- Protecting: Protect the seats from sunlight, heat, and spills with seat covers or a UV protectant.
- Professional Detailing: Consider professional detailing services for deep cleaning and conditioning.
11. The Science Behind Leather Repair
Understanding the science behind leather repair can help you make informed decisions and achieve better results.
- Leather Composition: Leather is a natural material composed of collagen fibers that provide strength and flexibility.
- Causes of Damage: Damage to leather can be caused by physical wear, chemical exposure, and environmental factors.
- Repair Mechanisms: Leather repair involves filling in gaps, reinforcing weak areas, and restoring the original appearance of the leather.
11.1. Understanding Leather Composition
Understanding the composition of leather is essential for choosing the right repair techniques and materials.
- Collagen Fibers: Collagen fibers are the main structural component of leather, providing strength and flexibility.
- Tanning Process: The tanning process converts raw animal hide into stable leather by cross-linking the collagen fibers.
- Finishing Treatments: Finishing treatments add color, texture, and protection to the leather surface.
11.2. How Repair Products Work
Understanding how repair products work can help you choose the right products for your specific needs.
- Leather Fillers: Leather fillers fill in gaps and tears by bonding to the existing leather fibers.
- Colorants: Colorants restore the original color of the leather by penetrating the surface and bonding to the fibers.
- Sealants: Sealants protect the repaired area from wear, fading, and spills.
12. Frequently Asked Questions (FAQs)
- Can I use household cleaners on leather car seats? No, household cleaners can damage leather. Use a dedicated leather cleaner.
- How often should I condition my leather seats? Every 3-4 months, or more often in hot climates.
- What’s the best way to prevent cracks in leather seats? Regular conditioning and avoiding direct sunlight.
- Can I repair a tear myself, or should I go to a professional? Small tears can be DIY; large tears need a pro.
- How do I match the color of my leather seats when repairing them? Use a leather colorant kit and test on a hidden area.
- What is the best type of leather filler to use for car seats? A flexible leather filler that won’t crack.
- How do I clean up spills on leather car seats? Blot immediately with a clean, dry cloth. Then, use a leather cleaner.
- Can I use steam to clean leather car seats? It’s best to avoid steam as it can damage the leather.
- What tools do I need for a DIY leather repair? Leather repair kit, denim patch, emery board, and alcohol pad.
- Where can I buy quality leather repair tools? CARDIAGTECH.NET offers a range of options.
13. Testimonials and Success Stories
Real-life examples can inspire confidence. Here are a few:
- John, Los Angeles: “The Tear Mender kit from CARDIAGTECH.NET saved my vintage car seats. Easy to use and looks great!”
- Maria, Miami: “I was skeptical, but the color matching was perfect. My seats look new again!”
- David, Chicago: “Professional results at a DIY price. Highly recommend CARDIAGTECH.NET.”
14. Contact Us for Expert Advice
Need help with your leather repair? Contact CARDIAGTECH.NET for expert advice and premium products.
- Address: 276 Reock St, City of Orange, NJ 07050, United States
- WhatsApp: +1 (641) 206-8880
- Website: CARDIAGTECH.NET
15. Conclusion: Restore and Protect Your Leather Car Seats
Fixing tears in leather car seats is achievable with the right tools and knowledge. Follow these steps, and your seats will look fantastic. Trust CARDIAGTECH.NET for all your auto repair needs.
Don’t let damaged leather car seats detract from your vehicle’s value and comfort. Contact CARDIAGTECH.NET today for expert advice and high-quality repair tools. Our team is ready to assist you in finding the perfect solutions to restore and protect your car’s interior. Call us now at +1 (641) 206-8880 or visit our website at CARDIAGTECH.NET. Let us help you make your car seats look as good as new.