How To Fix The Front Bumper Of A Car: A Comprehensive Guide
Fixing the front bumper of a car is a common task, and CARDIAGTECH.NET provides expert insights and solutions to address this issue efficiently. Understanding when to repair versus replace, and mastering the repair process can save time and money. From plastic welding techniques to bumper restoration and cosmetic repairs, let’s dive into how to restore your vehicle’s appearance and structural integrity.
1. Assessing the Damage: Repair or Replace?
Before diving into the repair process, it’s crucial to determine whether the bumper needs repair or replacement. A cracked bumper doesn’t always necessitate a full replacement. Automotive plastic repairs have become increasingly common due to the increased use of plastics in car manufacturing. However, certain situations demand a replacement. Some manufacturers advise against repairs altogether, and vehicles with extensive or multiple cracks might also need a new bumper. A thorough assessment is key to making the right decision.
1.1. Factors to Consider
To properly evaluate the damage, consider the following questions:
- Possibility: Is a repair even feasible? Check the manufacturer’s guidelines to ensure repairs are permitted. Evaluate the size and depth of the crack, as this can impact the bumper’s structure.
- Safety: Will the repair compromise safety? The structural integrity of the bumper is critical for protecting drivers and passengers. If the integrity is questionable, replacement is the safer option. Always adhere to manufacturer guidelines regarding replacements, especially if underlying structures or safety systems are affected.
- Efficiency: Is repair the most time-effective solution? Minor cracks might be quicker to repair, while severe damage could take significantly longer, making replacement more efficient.
- Customer Benefit: What is best for the customer in the long run? A temporary fix might not be the best solution. Transparency about the options, including the speed of completion and associated costs, is vital.
1.2. SMART Repairs
If the cracks or dents are minor, consider SMART (Small to Medium Area Repair Technology) repairs. These localized repairs can be done without removing the bumper, offering a cost-effective and efficient solution.
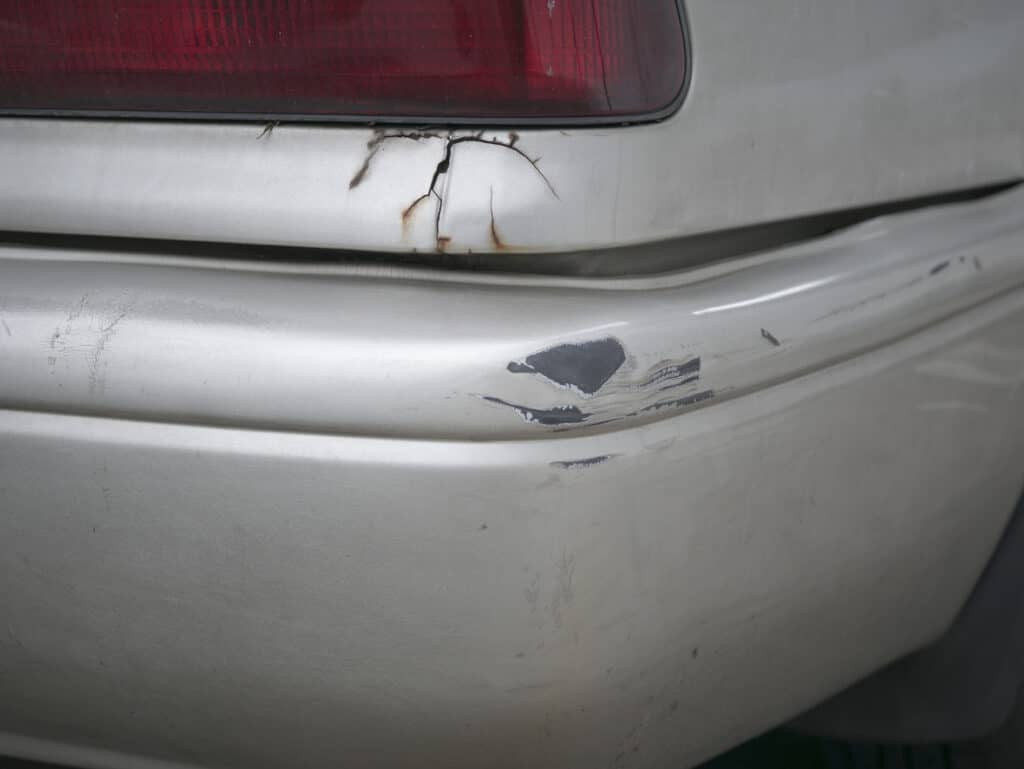
Cracked bumper close-up
2. Step-by-Step Guide to Repairing a Cracked Bumper
If repair is the chosen route, follow these steps to achieve a professional finish. While removing the bumper might be necessary in some cases, attempt the repair with the bumper attached if possible.
2.1. Step 1: Damage Assessment
Thoroughly assess the extent of the damage. Removing the bumper provides the best view for determining the crack’s size and identifying any hidden damage.
2.2. Step 2: Masking
Protect adjacent panels from drilling, sanding, and painting by applying JTAPE Premium Cloth Protection Tape around the bumper’s edges. This prevents unwanted damage and ensures a clean, high-quality finish.
2.3. Step 3: Drilling
Carefully drill two 6mm diameter holes, one at each end of the crack. These act as barriers to prevent further cracking.
2.4. Step 4: Carving and Grinding
Create a larger surface area for bonding by carving a V-shaped groove along the crack’s edges. Use a grinder and sharp knife to remove excess plastic, following the ‘V’ pattern.
2.5. Step 5: Sanding
Sand the front and back of the damaged area with medium-grit sandpaper. This removes damage and creates micro-abrasions that enhance adhesion for the plastic adhesion promoter and paint.
2.6. Step 6: Applying Adhesion Promoter
Spray a plastic adhesion promoter on both sides of the damaged area to ensure proper adhesion of the epoxy and filler. This sets the stage for a smooth finish.
2.7. Step 7: Applying Epoxy
Apply epoxy to both sides of the bumper and allow it to dry. Start with the back, smoothing the application with a spreader, then move to the front. This strengthens the area before adding body filler.
2.8. Step 8: Surface Preparation
Once the epoxy has hardened, sand the area again to create a smooth base for the body filler. Feather the edges of the repair area and create a slight dip where the crack was.
2.9. Step 9: Applying Body Filler
Apply pre-mixed automotive body filler evenly to the repair area, following the bumper’s curves and corners. Smooth it over with a spreader for a professional finish. After it dries, lightly sand the area to prepare it for painting.
2.10. Step 10: Painting
Paint the plastic bumper to achieve a like-new finish. Use JTAPE Foam Masking Tapes to mask off surrounding panels for a seamless blend. Apply an even coat of primer, let it dry, and then spray several coats of the base color, allowing each to dry. Finish with a few clear coat layers. Once cured, remove the foam masking tape to reveal a high-quality, blended finish.
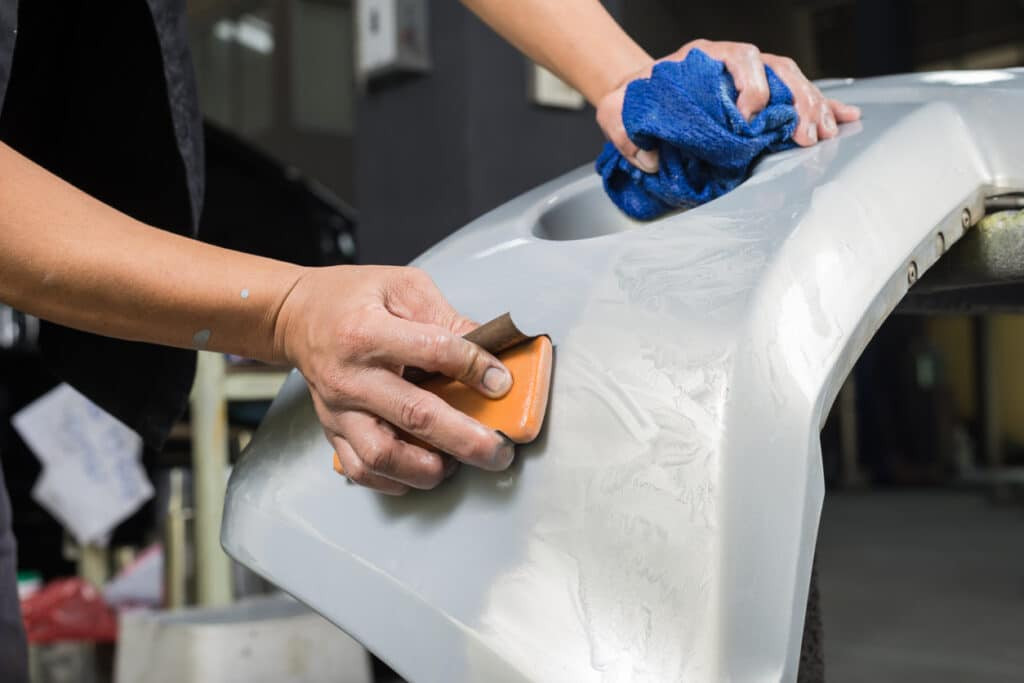
 Technician repairing a silver bumper
3. When to Remove the Bumper
For minor scuffs and cracks, removing the bumper might not be necessary. However, for significant damage or suspected defects on the bumper’s back, removal is advisable to fully assess the situation.
3.1. Removing the Bumper: A Quick Guide
If removal is required:
- Lift the car with a jack.
- Locate the pins, latches, and screws holding the bumper in place, typically found in the wheel arches.
- Remove these fasteners and any electrical connections.
3.2. Replacing vs. Repairing: Final Considerations
If the crack extends to the bumper’s edge, replacement is usually best due to compromised structural integrity.
4. Advanced Techniques and Tools
To further enhance your bumper repair skills, consider mastering advanced techniques and utilizing specialized tools.
4.1. Plastic Welding
Plastic welding is a highly effective technique for repairing cracks and splits in plastic bumpers. It involves using a specialized plastic welder to melt and fuse the plastic material back together. This creates a strong, durable bond that restores the bumper’s structural integrity.
Benefits of Plastic Welding:
- Strength: Creates a bond as strong as the original material.
- Durability: Provides a long-lasting repair.
- Versatility: Suitable for various types of plastic bumpers.
Tools Required:
- Plastic welder
- Welding rods (matching the bumper material)
- Safety glasses and gloves
4.2. Bumper Fillers and Compounds
High-quality bumper fillers and compounds are essential for achieving a smooth, seamless finish after repairing cracks and dents. These products fill in imperfections and create a uniform surface that is ready for priming and painting.
Types of Fillers:
- Two-part epoxy fillers: Offer excellent adhesion and durability.
- Lightweight body fillers: Easy to sand and shape.
- Flexible bumper repair compounds: Designed to withstand impacts and vibrations.
Application Tips:
- Clean the repair area thoroughly before applying the filler.
- Mix the filler according to the manufacturer’s instructions.
- Apply thin layers, allowing each layer to dry before adding the next.
- Sand the filler smooth to match the surrounding surface.
4.3. Heat Guns for Shaping
Heat guns are useful for reshaping and molding plastic bumpers that have been deformed by impacts. The heat softens the plastic, allowing you to gently manipulate it back into its original shape.
How to Use a Heat Gun:
- Set the heat gun to a low or medium setting.
- Hold the heat gun several inches away from the bumper surface.
- Move the heat gun in a sweeping motion to evenly heat the plastic.
- Gently push or pull the bumper to reshape it.
- Allow the plastic to cool before releasing it.
4.4. Paint Blending Techniques
Achieving a seamless paint finish requires advanced blending techniques. This involves gradually fading the new paint into the existing paintwork to create an invisible transition.
Steps for Paint Blending:
- Prepare the surface by sanding and cleaning the repair area.
- Apply a primer to the repair area.
- Apply the base coat in thin, even layers, gradually extending beyond the repair area.
- Blend the edges of the base coat with the existing paintwork using a blending solvent.
- Apply a clear coat over the entire area to protect the paint and create a glossy finish.
5. Essential Tools and Materials for Bumper Repair
Having the right tools and materials is critical for successful bumper repairs. Here’s a comprehensive list of essential items:
5.1. Sanding Tools
- Sandpaper: Various grits (80, 120, 220, 320, 400) for different stages of sanding.
- Sanding block: Provides a flat, even surface for sanding.
- DA sander (Dual Action): Speeds up the sanding process and creates a smooth finish.
5.2. Cutting and Grinding Tools
- Rotary tool (Dremel): For precise cutting and grinding.
- Grinder: For removing larger amounts of material.
- Cutting knife: For trimming and shaping plastic.
5.3. Adhesion and Bonding
- Plastic adhesion promoter: Enhances the adhesion of fillers and paint.
- Epoxy resin: For bonding broken pieces and filling gaps.
- Body filler: For filling dents and imperfections.
5.4. Painting Supplies
- Primer: Creates a smooth base for paint.
- Base coat paint: Matches the vehicle’s original color.
- Clear coat: Protects the paint and adds a glossy finish.
- Spray gun: For applying paint evenly.
- Masking tape and paper: Protects surrounding areas from overspray.
5.5. Safety Gear
- Safety glasses: Protects eyes from debris.
- Gloves: Protects hands from chemicals and sharp objects.
- Respirator: Protects lungs from paint fumes and dust.
6. Cost-Effective Solutions
To save money on bumper repairs, consider these cost-effective solutions:
6.1. DIY Repair Kits
DIY bumper repair kits are available for minor damage. These kits typically include fillers, sandpaper, and instructions for repairing small cracks and dents. While they might not provide the same level of finish as professional repairs, they can be a budget-friendly option for cosmetic improvements.
6.2. Salvage Yards
Salvage yards are a great source for used bumpers in good condition. You can often find a bumper that matches your vehicle’s make and model at a fraction of the cost of a new bumper.
6.3. Mobile Repair Services
Mobile repair services offer on-site bumper repairs, which can be more convenient and affordable than taking your car to a body shop. These services typically specialize in minor cosmetic repairs.
7. Understanding the Role of CARDIAGTECH.NET in Automotive Repairs
CARDIAGTECH.NET is your trusted partner in providing high-quality diagnostic tools and equipment that are essential for effective automotive repairs. We offer a comprehensive range of products designed to streamline your repair processes and enhance the accuracy of your diagnostics, leading to increased customer satisfaction and business growth.
7.1. Comprehensive Diagnostic Solutions
At CARDIAGTECH.NET, we understand the critical role that accurate diagnostics play in automotive repairs. Our diagnostic tools are designed to provide comprehensive insights into vehicle systems, enabling you to identify and address issues quickly and efficiently.
7.2. Key Benefits of Using CARDIAGTECH.NET Diagnostic Tools:
- Enhanced Accuracy: Our tools provide precise and reliable diagnostic data, reducing the likelihood of misdiagnosis and repeat repairs.
- Increased Efficiency: Streamline your repair process with tools that quickly identify the root cause of issues.
- Comprehensive Coverage: Our diagnostic solutions cover a wide range of vehicle makes and models, ensuring you can service a diverse customer base.
7.3. High-Quality Tools
We pride ourselves on offering only the highest quality tools and equipment. Our products are sourced from leading manufacturers and undergo rigorous testing to ensure they meet our stringent standards for performance and reliability.
8. Safety Precautions
Safety should always be a priority when repairing car bumpers. Here are some essential safety precautions to follow:
8.1. Personal Protective Equipment (PPE)
Always wear appropriate PPE to protect yourself from injuries and exposure to chemicals. This includes:
- Safety Glasses: Protect your eyes from debris and splashes.
- Gloves: Protect your hands from chemicals, solvents, and sharp objects.
- Respirator: Protect your lungs from dust, fumes, and vapors.
- Ear Protection: Protect your ears from loud noises, such as grinding and sanding.
8.2. Ventilation
Work in a well-ventilated area to avoid inhaling harmful fumes and dust. If you are working indoors, open windows and doors or use a ventilation system to ensure adequate airflow.
8.3. Fire Safety
Keep flammable materials away from heat sources, such as welding equipment and heat guns. Have a fire extinguisher nearby in case of a fire.
8.4. Electrical Safety
Use caution when working with electrical tools and equipment. Make sure that all cords are in good condition and that the equipment is properly grounded.
8.5. Chemical Safety
Follow the manufacturer’s instructions when using chemicals, such as solvents, paints, and adhesives. Wear gloves and eye protection, and avoid inhaling fumes.
9. Choosing the Right Products and Materials
Selecting the right products and materials is crucial for achieving professional-quality bumper repairs. Here are some factors to consider:
9.1. Quality
Choose high-quality products and materials from reputable brands. This will ensure that your repairs are durable and long-lasting.
9.2. Compatibility
Make sure that the products and materials you choose are compatible with the type of plastic used in your bumper. Some plastics require special adhesives and fillers.
9.3. Environmental Factors
Consider the environmental impact of the products you choose. Look for eco-friendly options that are low in VOCs (volatile organic compounds).
9.4. Cost
Balance quality with cost to find the best value for your money. Compare prices from different suppliers and read reviews to get an idea of the quality of the products.
9.5. Manufacturer Recommendations
Follow the manufacturer’s recommendations for products and materials. This will ensure that you are using the right products for your vehicle and that you are following the correct procedures.
10. The Future of Automotive Repair: Innovations and Trends
The automotive repair industry is constantly evolving, with new technologies and trends emerging all the time. Here are some of the key innovations and trends to watch for:
10.1. Advanced Materials
Automakers are increasingly using advanced materials, such as carbon fiber and composites, in vehicle construction. These materials are lightweight and strong, but they require specialized repair techniques.
10.2. Electric Vehicles (EVs)
The growing popularity of EVs is creating new challenges and opportunities for automotive repair professionals. EVs have different maintenance requirements than traditional gasoline-powered vehicles, and they require specialized training and equipment.
10.3. Artificial Intelligence (AI)
AI is being used in a variety of ways in the automotive repair industry, such as:
- Diagnostic tools: AI-powered diagnostic tools can quickly and accurately identify the root cause of vehicle problems.
- Predictive maintenance: AI can analyze data from vehicle sensors to predict when maintenance will be needed, helping to prevent breakdowns.
- Robotics: Robots are being used to automate some repair tasks, such as painting and welding.
10.4. Augmented Reality (AR)
AR technology is being used to provide technicians with real-time guidance during repairs. AR headsets can overlay digital information onto the technician’s field of view, providing step-by-step instructions and diagrams.
10.5. Sustainability
Sustainability is becoming increasingly important in the automotive repair industry. Repair shops are looking for ways to reduce their environmental impact, such as using eco-friendly products and recycling waste materials.
11. The Imperative of Quality Tools: Why CARDIAGTECH.NET Stands Out
In the fast-paced world of automotive repair, the quality of your tools can make or break your efficiency and the satisfaction of your customers. This is where CARDIAGTECH.NET shines, providing top-tier diagnostic instruments designed for the modern mechanic.
11.1. Precision Diagnostics
CARDIAGTECH.NET’s tools allow you to pinpoint issues quickly and accurately, reducing guesswork and saving valuable time.
11.2. Broad Compatibility
Our diagnostic equipment supports a wide array of vehicle makes and models, ensuring that you can cater to a diverse clientele without needing multiple devices.
11.3. Durable Investment
Investing in CARDIAGTECH.NET means investing in tools that are built to last. Constructed from high-grade materials, our tools withstand the rigors of daily use, providing reliability that pays off in the long run.
12. Understanding Customer Needs and Offering Solutions
Understanding the needs of your customers and offering tailored solutions is essential for building trust and loyalty. Here are some tips for providing excellent customer service:
12.1. Effective Communication
Communicate clearly and honestly with your customers about the repairs that are needed, the costs involved, and the expected timeline. Explain the options available and help them make informed decisions.
12.2. Transparency
Be transparent about your pricing and labor rates. Provide written estimates that detail the costs of all parts and services. Avoid hidden fees and surprises.
12.3. Building Trust
Build trust with your customers by being honest, reliable, and professional. Treat them with respect and listen to their concerns.
12.4. Exceeding Expectations
Go the extra mile to exceed your customers’ expectations. Offer complimentary services, such as a car wash or a courtesy ride. Follow up after the repairs to make sure they are satisfied.
12.5. Continuous Improvement
Continuously improve your customer service by seeking feedback and addressing any issues that arise. Train your staff on customer service skills and empower them to resolve customer complaints.
 Close up of hands cleaning a car bumper
13. Frequently Asked Questions (FAQs)
1. Can I fix a cracked bumper myself, or do I need to take it to a professional?
- For minor cracks, a DIY repair might be possible, but for significant damage, professional repair is recommended.
2. How much does it typically cost to repair a cracked bumper?
- The cost varies, but SMART repairs can be as low as $150, while extensive repairs might reach $800 or more.
3. Is it safe to drive with a cracked bumper?
- It depends on the severity of the crack. Minor cracks might be okay, but significant damage can compromise safety.
4. What tools do I need to repair a cracked bumper?
- Essential tools include sandpaper, body filler, epoxy, plastic adhesion promoter, and paint.
5. Can a cracked bumper affect my car’s performance?
- If the damage is severe, it can affect the car’s aerodynamics and safety.
6. How long does it take to repair a cracked bumper?
- SMART repairs can take a few hours, while extensive repairs might take a day or two.
7. What is plastic welding, and is it effective?
- Plastic welding is a technique that melts and fuses plastic together. It’s highly effective for strong, durable repairs.
8. What are the signs that a bumper needs to be replaced rather than repaired?
- Extensive cracks, damage to underlying structures, and manufacturer recommendations for replacement are key indicators.
9. Are there any eco-friendly options for repairing a cracked bumper?
- Yes, eco-friendly options include using low-VOC paints and recycled materials.
10. How can CARDIAGTECH.NET help with automotive repairs?
- CARDIAGTECH.NET offers high-quality diagnostic tools that streamline the repair process and enhance accuracy.
14. The Call to Action: Why Wait? Elevate Your Automotive Repair Game Today!
Are you tired of struggling with inefficient tools and outdated diagnostic methods? It’s time to revolutionize your approach to automotive repair with CARDIAGTECH.NET.
Here’s how CARDIAGTECH.NET can transform your business:
- Boost Efficiency: Our state-of-the-art diagnostic tools provide accurate results quickly, reducing downtime and increasing your shop’s throughput.
- Enhance Accuracy: Say goodbye to guesswork! With CARDIAGTECH.NET, you’ll pinpoint problems with precision, ensuring repairs are done right the first time.
- Increase Customer Satisfaction: Impress your clients with faster turnaround times and reliable service, leading to repeat business and glowing reviews.
Ready to take the leap? Here’s what you need to do:
- Explore Our Product Range: Visit CARDIAGTECH.NET to discover our extensive selection of diagnostic tools tailored to meet your specific needs.
- Contact Us for a Consultation: Have questions or need help choosing the right tools? Reach out to our expert team via WhatsApp at +1 (641) 206-8880 for personalized assistance.
- Visit Our Location: Stop by our facility at 276 Reock St, City of Orange, NJ 07050, United States, to see our products in action and discuss your requirements in person.
Don’t let outdated equipment hold you back. Invest in CARDIAGTECH.NET today and experience the difference that quality tools can make. Your success is just a click or a call away. Contact us now and let’s drive your business forward together!