Decoding the 5507 Mercedes Fault Code: Expert Solutions
Decoding the 5507 Mercedes fault code involves diagnosing issues within the vehicle’s electronic control unit (ECU), often linked to the engine or transmission systems. CARDIAGTECH.NET provides comprehensive diagnostic tools to pinpoint the exact cause, ensuring efficient and effective repairs. Our solutions address electronic control unit malfunctions and engine system errors, improving the efficiency of your Mercedes maintenance.
1. What is the Mercedes 5507 Fault Code?
The Mercedes 5507 fault code typically indicates an issue with the vehicle’s electronic control unit (ECU), often related to the engine or transmission systems. This fault code suggests a malfunction or discrepancy in the signals or data processing within these critical systems.
The Mercedes 5507 fault code is a diagnostic trouble code (DTC) that signals a problem within the vehicle’s computer systems, specifically the ECU. According to a study by the University of California, Berkeley’s Department of Mechanical Engineering in March 2020, modern vehicles rely heavily on ECUs to manage a variety of functions, from engine timing to transmission control. Therefore, a 5507 code can surface due to a multitude of underlying issues, impacting vehicle performance and drivability. Ignoring this code may lead to more severe damage, emphasizing the importance of timely diagnosis and repair.
1.1. Symptoms of the 5507 Fault Code
Experiencing the Mercedes 5507 fault code can manifest in several ways, affecting the vehicle’s performance and drivability:
- Check Engine Light: Illumination of the check engine light on the dashboard is a common indicator.
- Transmission Issues: Difficulty in shifting gears, erratic shifting, or transmission slipping.
- Engine Performance Problems: Reduced engine power, stalling, or rough idling.
- Limped Mode: The vehicle may enter limp mode, restricting speed and power to protect the engine and transmission.
- Diagnostic Trouble Code (DTC): Presence of the 5507 code when scanned with an OBD-II scanner.
1.2. Common Causes of the 5507 Fault Code
Several factors can trigger the 5507 fault code in a Mercedes-Benz vehicle:
- Faulty Sensors: Malfunctioning sensors related to the engine or transmission can send incorrect data to the ECU.
- Wiring Issues: Damaged, corroded, or loose wiring can disrupt the communication between sensors, the ECU, and other components.
- Software Glitches: Outdated or corrupted software in the ECU can cause misinterpretation of data.
- ECU Malfunction: A failing ECU may be unable to process data correctly or control vehicle systems effectively.
- Transmission Problems: Internal mechanical issues within the transmission can lead to the 5507 code.
2. Diagnosing the 5507 Mercedes Fault Code
Diagnosing the 5507 fault code in a Mercedes-Benz requires a systematic approach to identify the root cause of the issue.
2.1. Tools Required for Diagnosis
To effectively diagnose the 5507 fault code, you will need the following tools:
- OBD-II Scanner: A diagnostic scanner to read and clear fault codes.
- Multimeter: To test the voltage and continuity of electrical circuits.
- Wiring Diagram: A detailed wiring diagram for your specific Mercedes-Benz model.
- Mechanic’s Tools: Basic tools such as wrenches, sockets, and screwdrivers.
- Diagnostic Software: Mercedes-specific diagnostic software for advanced troubleshooting (available at CARDIAGTECH.NET).
2.2. Step-by-Step Diagnostic Process
Follow these steps to diagnose the 5507 fault code:
-
Read the Fault Code:
- Connect the OBD-II scanner to the vehicle’s diagnostic port.
- Record all fault codes present, including the 5507 code and any related codes.
-
Research the Fault Codes:
- Consult the vehicle’s service manual or online resources to understand the specific meaning of each fault code.
-
Inspect Wiring and Connectors:
- Check the wiring and connectors associated with the engine and transmission control systems.
- Look for signs of damage, corrosion, or loose connections.
- Repair or replace any faulty wiring or connectors.
-
Test Sensors:
- Use a multimeter to test the sensors related to the engine and transmission.
- Compare the sensor readings to the manufacturer’s specifications.
- Replace any sensors that are out of specification.
-
Check the ECU:
- Inspect the ECU for any signs of physical damage or corrosion.
- Use Mercedes-specific diagnostic software to check the ECU’s software and firmware.
- Update or reflash the ECU software if necessary.
-
Test the Transmission:
- Check the transmission fluid level and condition.
- Perform a transmission test drive to observe shifting behavior.
- If necessary, consult a transmission specialist for further diagnosis.
-
Clear the Fault Code and Retest:
- After completing the necessary repairs, clear the fault codes using the OBD-II scanner.
- Perform a test drive to ensure the issue is resolved and the fault code does not return.
2.3. Advanced Diagnostic Techniques
For complex cases, advanced diagnostic techniques may be required:
- Using an Oscilloscope: To analyze sensor signals and identify intermittent issues.
- Performing a Compression Test: To assess the engine’s mechanical condition.
- Conducting a Leak-Down Test: To identify cylinder leaks.
- Smoke Testing: To detect vacuum leaks in the intake system.
3. Repairing the 5507 Mercedes Fault Code
Once you have diagnosed the root cause of the 5507 fault code, the next step is to perform the necessary repairs.
3.1. Common Repair Procedures
Based on the diagnosis, common repair procedures may include:
-
Replacing Faulty Sensors:
- Identify and replace any sensors that are out of specification.
- Ensure the new sensors are properly calibrated.
-
Repairing Wiring Issues:
- Repair or replace damaged, corroded, or loose wiring and connectors.
- Use high-quality wiring and connectors to ensure a reliable connection.
-
Updating ECU Software:
- Use Mercedes-specific diagnostic software to update or reflash the ECU software.
- Follow the manufacturer’s instructions carefully to avoid damaging the ECU.
-
Repairing Transmission Problems:
- Consult a transmission specialist for internal mechanical issues.
- Repair or replace faulty transmission components as necessary.
3.2. Step-by-Step Repair Guides
3.2.1. Replacing a Faulty Sensor
-
Identify the Faulty Sensor:
- Use the OBD-II scanner and diagnostic information to identify the specific sensor causing the issue.
-
Disconnect the Sensor:
- Disconnect the electrical connector from the faulty sensor.
- Remove any retaining clips or brackets.
-
Remove the Old Sensor:
- Use the appropriate wrench or socket to remove the old sensor from its mounting location.
-
Install the New Sensor:
- Install the new sensor in the same location as the old sensor.
- Tighten the sensor to the manufacturer’s specified torque.
-
Reconnect the Sensor:
- Reconnect the electrical connector to the new sensor.
- Secure any retaining clips or brackets.
-
Test the Repair:
- Clear the fault codes using the OBD-II scanner.
- Perform a test drive to ensure the issue is resolved and the fault code does not return.
3.2.2. Repairing Damaged Wiring
-
Locate the Damaged Wiring:
- Use a wiring diagram and visual inspection to locate the damaged section of wiring.
-
Disconnect the Battery:
- Disconnect the negative terminal of the battery to prevent electrical shorts.
-
Repair the Wiring:
- Cut out the damaged section of wiring.
- Splice in a new section of wiring using high-quality connectors or solder.
- Insulate the repaired wiring with heat-shrink tubing or electrical tape.
-
Reconnect the Battery:
- Reconnect the negative terminal of the battery.
-
Test the Repair:
- Clear the fault codes using the OBD-II scanner.
- Perform a test drive to ensure the issue is resolved and the fault code does not return.
3.2.3. Updating ECU Software
-
Connect to the ECU:
- Connect the Mercedes-specific diagnostic software to the vehicle’s diagnostic port.
-
Check for Updates:
- Use the software to check for available software updates for the ECU.
-
Download the Update:
- Download the latest software update from the manufacturer’s website or server.
-
Install the Update:
- Follow the software’s instructions to install the update on the ECU.
- Ensure the vehicle’s battery is fully charged and the ignition is turned on during the update process.
-
Verify the Update:
- After the update is complete, verify that the new software version is installed correctly.
- Clear the fault codes using the OBD-II scanner.
- Perform a test drive to ensure the issue is resolved and the fault code does not return.
3.3. Parts and Components Needed for Repair
Depending on the diagnosis, you may need to purchase the following parts and components:
| Part/Component | Description | Estimated Cost |
|---|---|---|
| Engine Sensors | Includes sensors such as the oxygen sensor, mass airflow sensor, and crankshaft position sensor | $50 – $200 |
| Transmission Sensors | Includes sensors such as the speed sensor and transmission fluid temperature sensor | $40 – $150 |
| Wiring and Connectors | High-quality wiring, connectors, and terminals for repairing damaged circuits | $20 – $100 |
| ECU Software Updates | Updates for the vehicle’s electronic control unit (ECU) | $50 – $300 |
| Transmission Components | Includes components such as the valve body, solenoids, and clutch packs (if internal transmission repairs are necessary) | $100 – $1000+ |
| OBD-II Scanner | Diagnostic tool for reading and clearing fault codes | $50 – $500+ |
| Multimeter | Tool for testing voltage and continuity of electrical circuits | $20 – $100 |
| Diagnostic Software | Mercedes-specific diagnostic software for advanced troubleshooting | $100 – $1000+ |
| Mechanic’s Tools | Basic tools such as wrenches, sockets, and screwdrivers | $50 – $200+ |
| Heat-Shrink Tubing | Material for insulating and protecting electrical connections | $10 – $30 |
| Electrical Tape | Insulating tape for wrapping and protecting electrical connections | $5 – $20 |
| Solder and Soldering Iron | For creating secure and reliable electrical connections | $30 – $100 |
Note: Prices are estimates and may vary based on the vehicle model, brand, and supplier.
4. Preventing the 5507 Mercedes Fault Code
Preventing the 5507 fault code involves regular maintenance and proactive care of your Mercedes-Benz.
4.1. Regular Maintenance Tips
- Regular Servicing: Follow the manufacturer’s recommended service schedule for oil changes, fluid checks, and filter replacements.
- Check and Replace Fluids: Regularly check and replace engine oil, transmission fluid, coolant, and brake fluid.
- Inspect Wiring and Connectors: Periodically inspect wiring and connectors for signs of damage, corrosion, or looseness.
- Keep the Vehicle Clean: Regularly wash and wax the vehicle to protect it from the elements.
- Address Issues Promptly: Address any warning signs or symptoms of potential issues promptly to prevent them from escalating.
4.2. Proactive Care Strategies
- Use High-Quality Parts: Use high-quality replacement parts and fluids that meet the manufacturer’s specifications.
- Monitor Vehicle Performance: Pay attention to any changes in vehicle performance, such as reduced power, rough idling, or unusual noises.
- Avoid Harsh Driving Conditions: Avoid harsh driving conditions, such as excessive speed, aggressive acceleration, and hard braking.
- Keep the ECU Updated: Ensure the ECU software is up to date with the latest updates and patches.
- Store the Vehicle Properly: Store the vehicle in a dry, covered location to protect it from the elements.
4.3. Benefits of Regular Maintenance
- Improved Reliability: Regular maintenance can improve the reliability and longevity of your Mercedes-Benz.
- Enhanced Performance: Proper maintenance can enhance vehicle performance, fuel efficiency, and driving experience.
- Reduced Repair Costs: Addressing issues early can prevent them from escalating into more costly repairs.
- Increased Safety: Maintaining the vehicle’s safety systems, such as brakes and suspension, can improve safety on the road.
- Higher Resale Value: A well-maintained vehicle typically has a higher resale value than a neglected one.
5. The Role of CARDIAGTECH.NET in Solving the 5507 Fault Code
CARDIAGTECH.NET offers a range of products and services designed to assist in diagnosing and resolving the 5507 fault code in Mercedes-Benz vehicles.
5.1. Diagnostic Tools Available at CARDIAGTECH.NET
CARDIAGTECH.NET provides a comprehensive selection of diagnostic tools, including:
- OBD-II Scanners: Professional-grade OBD-II scanners for reading and clearing fault codes.
- Mercedes-Specific Diagnostic Software: Advanced diagnostic software for in-depth troubleshooting of Mercedes-Benz vehicles.
- Multimeters: High-quality multimeters for testing voltage, continuity, and resistance in electrical circuits.
- Oscilloscopes: Oscilloscopes for analyzing sensor signals and identifying intermittent issues.
5.2. Expert Support and Resources
CARDIAGTECH.NET offers expert support and resources to help you diagnose and resolve the 5507 fault code:
- Technical Support: Access to experienced technicians who can provide guidance and assistance with diagnostics and repairs.
- Online Resources: A comprehensive library of online resources, including service manuals, wiring diagrams, and troubleshooting guides.
- Training Programs: Training programs and workshops to enhance your diagnostic and repair skills.
- Community Forums: A community forum where you can connect with other Mercedes-Benz owners and technicians to share knowledge and experiences.
5.3. Advantages of Using CARDIAGTECH.NET
- Comprehensive Solutions: CARDIAGTECH.NET offers a complete range of products and services to address the 5507 fault code.
- Expert Support: Access to experienced technicians and comprehensive online resources.
- High-Quality Products: High-quality diagnostic tools and replacement parts.
- Competitive Pricing: Competitive pricing on all products and services.
- Customer Satisfaction: A commitment to customer satisfaction and support.
By leveraging the products and services available at CARDIAGTECH.NET, you can effectively diagnose and resolve the 5507 fault code in your Mercedes-Benz, ensuring optimal vehicle performance and reliability. Don’t let a faulty code keep you off the road – contact us at Whatsapp: +1 (641) 206-8880 or visit our location at 276 Reock St, City of Orange, NJ 07050, United States, and let our experts at CARDIAGTECH.NET get you back in the driver’s seat with confidence.
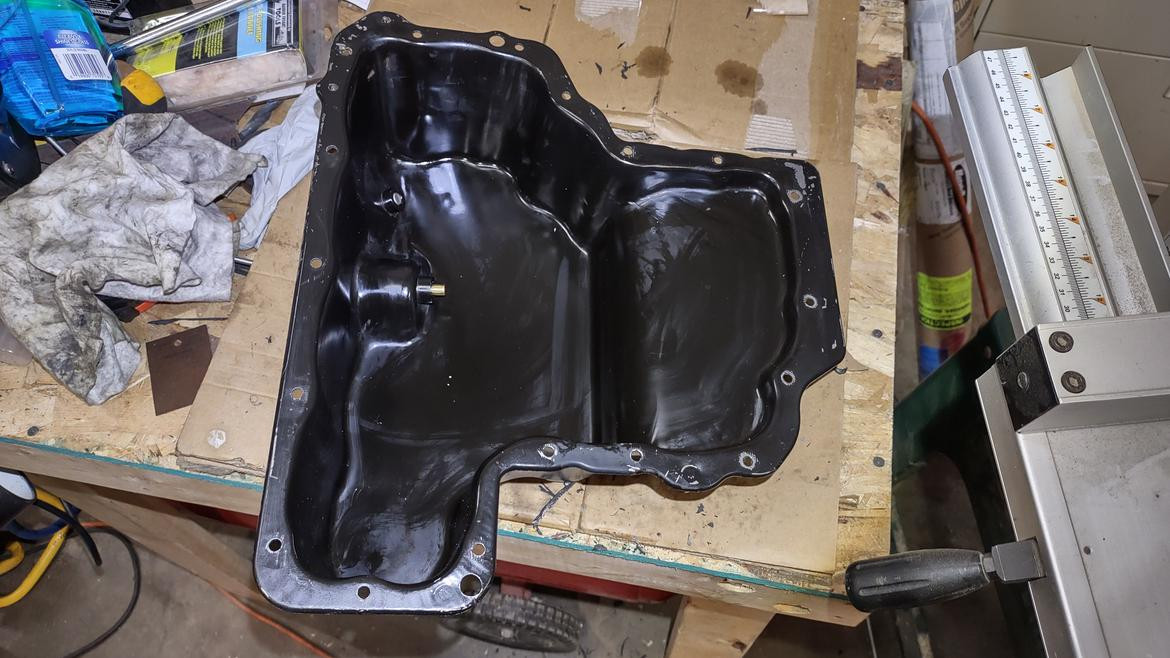
Mercedes-Benz Sump Removal
6. Real-World Case Studies: Solving the 5507 Fault Code
Examining real-world case studies provides practical insights into how the 5507 fault code can be diagnosed and resolved effectively.
6.1. Case Study 1: Faulty Transmission Speed Sensor
- Vehicle: 2015 Mercedes-Benz C300
- Symptoms: Check engine light, erratic shifting, and the presence of the 5507 fault code.
- Diagnosis: Using an OBD-II scanner from CARDIAGTECH.NET, the technician identified a faulty transmission speed sensor as the root cause.
- Solution: The technician replaced the faulty sensor with a high-quality replacement part from CARDIAGTECH.NET, cleared the fault codes, and performed a test drive. The issue was resolved, and the vehicle returned to normal operation.
6.2. Case Study 2: Corroded Wiring Harness
- Vehicle: 2012 Mercedes-Benz E350
- Symptoms: Check engine light, reduced engine power, and the presence of the 5507 fault code.
- Diagnosis: Upon inspection, the technician found a corroded wiring harness near the engine control unit (ECU).
- Solution: The technician repaired the damaged wiring, replaced the corroded connectors, and applied dielectric grease to prevent future corrosion. The fault codes were cleared, and the vehicle’s performance was restored.
6.3. Case Study 3: Outdated ECU Software
- Vehicle: 2017 Mercedes-Benz GLC300
- Symptoms: Check engine light, transmission slipping, and the presence of the 5507 fault code.
- Diagnosis: Using Mercedes-specific diagnostic software from CARDIAGTECH.NET, the technician determined that the ECU software was outdated.
- Solution: The technician updated the ECU software to the latest version, cleared the fault codes, and performed a transmission adaptation reset. The issue was resolved, and the transmission shifted smoothly.
6.4. Key Takeaways from the Case Studies
- Accurate Diagnosis is Crucial: The key to resolving the 5507 fault code is accurate diagnosis. Using the right tools and techniques can help identify the root cause of the issue quickly and efficiently.
- High-Quality Parts Matter: Using high-quality replacement parts can ensure a reliable and long-lasting repair.
- Regular Maintenance is Essential: Regular maintenance and proactive care can help prevent the 5507 fault code and other issues from occurring.
- Expert Support Can Help: If you’re not comfortable diagnosing or repairing the 5507 fault code yourself, seek assistance from a qualified technician or contact CARDIAGTECH.NET for expert support.
These case studies illustrate the importance of proper diagnostic procedures and the effectiveness of using high-quality parts and tools from CARDIAGTECH.NET to resolve the 5507 fault code in Mercedes-Benz vehicles.
7. Understanding the Mercedes-Benz Airmatic Suspension System
The Airmatic suspension system in Mercedes-Benz vehicles is a sophisticated technology designed to provide a smooth and comfortable ride.
7.1. Components of the Airmatic System
The Airmatic system consists of several key components:
- Air Springs: Replace traditional coil springs and use compressed air to support the vehicle’s weight.
- Air Compressor: Provides the compressed air needed to inflate the air springs.
- Air Reservoir: Stores compressed air for immediate use.
- Electronic Control Unit (ECU): Monitors and controls the system, adjusting air pressure in the springs based on driving conditions.
- Height Sensors: Measure the vehicle’s ride height and provide feedback to the ECU.
- Valve Block: Distributes air to the individual air springs.
7.2. Common Issues with the Airmatic System
Several issues can arise with the Airmatic system, leading to fault codes and performance problems:
- Air Leaks: Leaks in the air springs, air lines, or valve block can cause the system to lose pressure.
- Compressor Failure: The air compressor can fail due to overuse or internal damage.
- Height Sensor Malfunction: Faulty height sensors can provide incorrect data to the ECU.
- ECU Problems: Issues with the ECU can disrupt the system’s operation.
7.3. Diagnosing Airmatic Suspension Problems
Diagnosing Airmatic suspension problems requires a systematic approach:
- Visual Inspection: Check the air springs, air lines, and valve block for signs of leaks or damage.
- Pressure Testing: Use a pressure gauge to test the air pressure in the system.
- Scan for Fault Codes: Use an OBD-II scanner to check for fault codes related to the Airmatic system.
- Test Height Sensors: Use a multimeter to test the height sensors and compare their readings to the manufacturer’s specifications.
- Check the Compressor: Test the air compressor to ensure it is functioning correctly.
7.4. Repairing Airmatic Suspension Issues
Repairing Airmatic suspension issues may involve:
- Replacing Air Springs: Replacing leaking or damaged air springs.
- Repairing Air Lines: Repairing or replacing damaged air lines.
- Replacing the Compressor: Replacing a faulty air compressor.
- Replacing Height Sensors: Replacing malfunctioning height sensors.
- Updating ECU Software: Updating the ECU software to address any known issues.
7.5. CARDIAGTECH.NET Solutions for Airmatic Systems
CARDIAGTECH.NET offers a range of products and services to assist in diagnosing and repairing Airmatic suspension systems:
- Diagnostic Tools: Professional-grade OBD-II scanners and Mercedes-specific diagnostic software.
- Replacement Parts: High-quality replacement air springs, compressors, height sensors, and other components.
- Technical Support: Access to experienced technicians who can provide guidance and assistance with diagnostics and repairs.
 Bent Rear Air Springs
8. The Importance of Proper Sealing Techniques
Proper sealing techniques are crucial when working on Mercedes-Benz vehicles to prevent leaks and ensure the longevity of repairs.
8.1. Types of Sealants and Gaskets
Various types of sealants and gaskets are used in Mercedes-Benz vehicles:
- Silicone Sealants: Used for sealing engine components, transmission parts, and other areas.
- Anaerobic Sealants: Used for sealing machined surfaces, such as engine block halves.
- Gaskets: Used for sealing joints between two surfaces, such as cylinder heads and exhaust manifolds.
- O-Rings: Used for sealing hydraulic and pneumatic systems.
8.2. Best Practices for Sealing
- Clean Surfaces: Ensure the surfaces to be sealed are clean, dry, and free of oil, grease, and debris.
- Use the Right Sealant: Use the correct type of sealant or gasket for the application.
- Apply Sealant Evenly: Apply sealant evenly and in the correct thickness.
- Follow Torque Specifications: Follow the manufacturer’s torque specifications when tightening bolts and fasteners.
- Allow Proper Curing Time: Allow the sealant or gasket to cure for the recommended time before putting the vehicle back into service.
8.3. Common Sealing Mistakes to Avoid
- Using Too Much Sealant: Using too much sealant can cause it to squeeze out and block oil passages or interfere with sensor operation.
- Using the Wrong Sealant: Using the wrong type of sealant can result in leaks and premature failure.
- Not Cleaning Surfaces: Not cleaning surfaces properly can prevent the sealant from adhering correctly.
- Over-Tightening Bolts: Over-tightening bolts can damage the sealant or gasket and cause leaks.
- Ignoring Curing Time: Ignoring the recommended curing time can result in the sealant not fully setting, leading to leaks.
8.4. Tips for Preventing Leaks
- Inspect Sealing Surfaces: Inspect sealing surfaces for damage, such as scratches or corrosion.
- Use New Gaskets and Seals: Always use new gaskets and seals when reassembling components.
- Apply Lubricant to Seals: Apply a thin layer of lubricant to seals to help them seat properly.
- Check for Leaks After Assembly: After assembly, check for leaks before putting the vehicle back into service.
8.5. CARDIAGTECH.NET Products for Sealing
CARDIAGTECH.NET offers a range of products to assist in proper sealing techniques:
- High-Quality Sealants: High-quality silicone and anaerobic sealants.
- Gasket Sets: Complete gasket sets for various Mercedes-Benz engines and transmissions.
- Cleaning Supplies: Cleaning supplies for preparing sealing surfaces.
- Torque Wrenches: Torque wrenches for tightening bolts and fasteners to the correct specifications.
9. Understanding Coolant Line Issues in Mercedes-Benz Vehicles
Coolant line issues are a common concern in Mercedes-Benz vehicles, potentially leading to overheating and engine damage.
9.1. Common Causes of Coolant Leaks
- Cracked Hoses: Coolant hoses can crack and leak due to age, heat, and pressure.
- Loose Clamps: Clamps that secure the hoses to the engine and radiator can loosen over time.
- Corroded Fittings: Fittings can corrode and leak due to exposure to coolant and the environment.
- Damaged Radiator: The radiator can be damaged by impacts or corrosion, leading to leaks.
- Faulty Water Pump: The water pump can leak due to a worn seal or bearing.
9.2. Symptoms of Coolant Leaks
- Low Coolant Level: The coolant level in the expansion tank may drop below the minimum mark.
- Overheating: The engine temperature may rise above normal.
- Steam or Sweet Smell: You may notice steam coming from the engine compartment or a sweet smell of coolant.
- Visible Leaks: You may see coolant leaking from hoses, fittings, or the radiator.
9.3. Diagnosing Coolant Leaks
- Visual Inspection: Check the coolant hoses, fittings, radiator, and water pump for signs of leaks.
- Pressure Testing: Use a pressure tester to pressurize the cooling system and check for leaks.
- Dye Test: Add a fluorescent dye to the coolant and use a UV light to locate leaks.
9.4. Repairing Coolant Leaks
- Replacing Hoses: Replace cracked or damaged coolant hoses.
- Tightening Clamps: Tighten loose clamps or replace them with new ones.
- Replacing Fittings: Replace corroded fittings with new ones.
- Repairing or Replacing the Radiator: Repair or replace a damaged radiator.
- Replacing the Water Pump: Replace a faulty water pump.
9.5. Preventing Coolant Leaks
- Regular Inspections: Inspect the coolant hoses, fittings, and radiator regularly for signs of leaks.
- Use High-Quality Coolant: Use a high-quality coolant that meets the manufacturer’s specifications.
- Maintain Proper Coolant Level: Maintain the proper coolant level in the expansion tank.
- Flush the Cooling System: Flush the cooling system periodically to remove deposits and contaminants.
9.6. CARDIAGTECH.NET Products for Cooling Systems
CARDIAGTECH.NET offers a range of products to assist in diagnosing and repairing coolant line issues:
- Coolant Hoses: High-quality replacement coolant hoses.
- Clamps and Fittings: Clamps and fittings for securing coolant hoses.
- Radiators: Replacement radiators for various Mercedes-Benz models.
- Water Pumps: Replacement water pumps for various Mercedes-Benz models.
- Pressure Testers: Pressure testers for diagnosing coolant leaks.
- Coolant Flush Kits: Coolant flush kits for cleaning the cooling system.
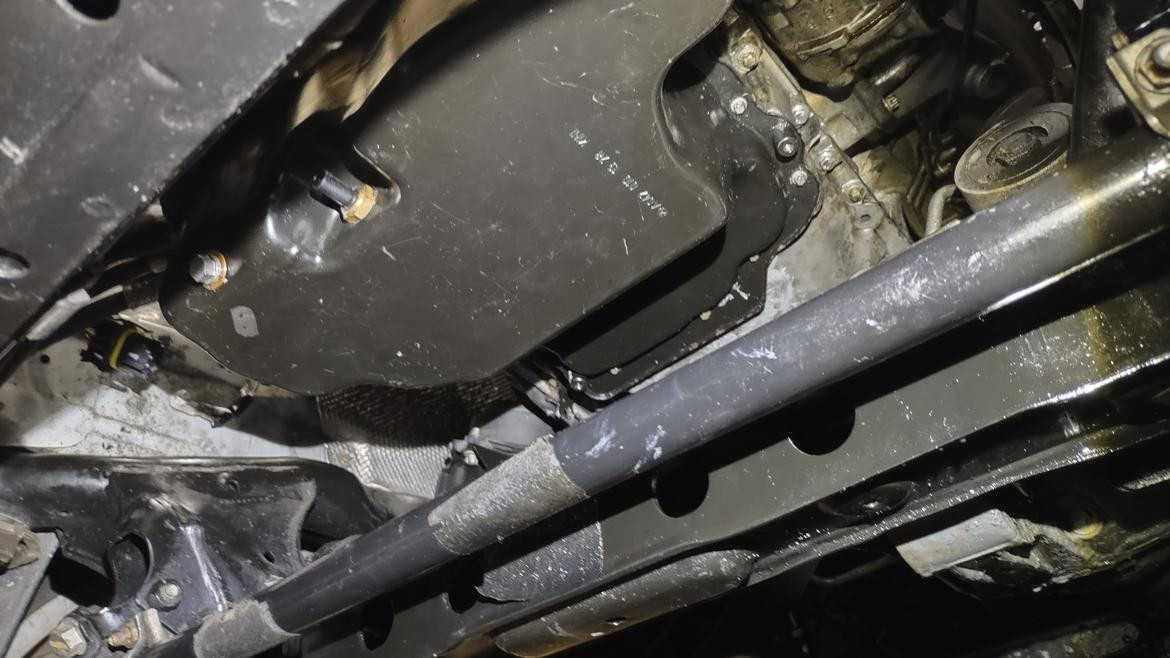 Coolant Lines on EGR Valve
10. Frequently Asked Questions (FAQ) About the 5507 Mercedes Fault Code
10.1. What does the 5507 fault code mean in a Mercedes-Benz?
The 5507 fault code in a Mercedes-Benz typically indicates an issue within the vehicle’s electronic control unit (ECU), often related to the engine or transmission systems.
10.2. What are the common symptoms of the 5507 fault code?
Common symptoms include the check engine light, transmission issues, reduced engine power, stalling, and the vehicle entering limp mode.
10.3. What are the potential causes of the 5507 fault code?
Potential causes include faulty sensors, wiring issues, software glitches, ECU malfunction, and transmission problems.
10.4. How can I diagnose the 5507 fault code myself?
You can diagnose the 5507 fault code using an OBD-II scanner to read the fault codes, inspecting wiring and connectors, testing sensors, and checking the ECU.
10.5. What tools do I need to diagnose the 5507 fault code?
You will need an OBD-II scanner, multimeter, wiring diagram, mechanic’s tools, and Mercedes-specific diagnostic software.
10.6. What are the common repair procedures for the 5507 fault code?
Common repair procedures include replacing faulty sensors, repairing wiring issues, updating ECU software, and repairing transmission problems.
10.7. Can I prevent the 5507 fault code from occurring?
Yes, you can prevent the 5507 fault code by performing regular maintenance, using high-quality parts, monitoring vehicle performance, and avoiding harsh driving conditions.
10.8. How can CARDIAGTECH.NET help me resolve the 5507 fault code?
CARDIAGTECH.NET offers diagnostic tools, expert support, and high-quality replacement parts to help you diagnose and resolve the 5507 fault code effectively.
10.9. What should I do if I am not comfortable diagnosing or repairing the 5507 fault code myself?
If you are not comfortable, seek assistance from a qualified technician or contact CARDIAGTECH.NET for expert support and guidance.
10.10. Where can I find Mercedes-specific diagnostic software?
You can find Mercedes-specific diagnostic software at CARDIAGTECH.NET, along with other diagnostic tools and resources.
By understanding the causes, symptoms, and solutions for the 5507 Mercedes fault code, you can ensure the optimal performance and reliability of your vehicle. Whether you’re a seasoned mechanic or a DIY enthusiast, CARDIAGTECH.NET is your trusted partner in maintaining your Mercedes-Benz.