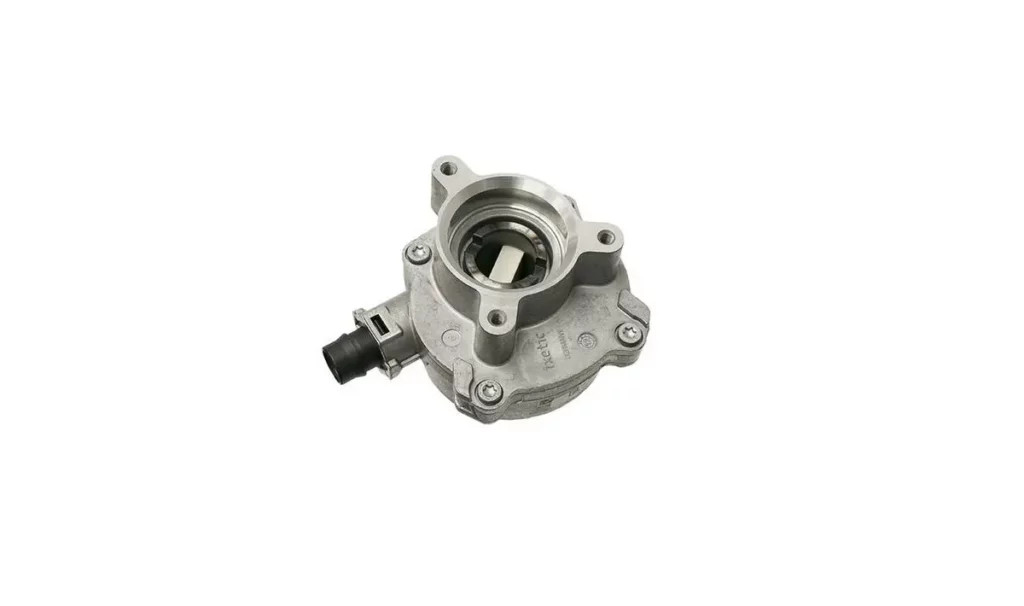
P0071 Mercedes Code: Comprehensive Guide to Diagnostics and Solutions
The P0071 Mercedes code indicates a problem with the ambient air temperature sensor range or performance, often leading to reduced engine power. At CARDIAGTECH.NET, we provide the tools and expertise to diagnose and resolve this issue efficiently, restoring your vehicle’s performance. This guide explores potential causes, diagnostic steps, and repair solutions, incorporating real-world scenarios and expert recommendations, and covers related diagnostic trouble codes.
1. Understanding the P0071 Mercedes Code
The P0071 code, specifically for Mercedes-Benz vehicles, signifies an issue with the ambient air temperature (AAT) sensor. This sensor is crucial for monitoring the air temperature outside your car. The engine control unit (ECU) utilizes this data to optimize engine performance, fuel efficiency, and emissions.
1.1 What Does the P0071 Code Mean?
The P0071 diagnostic trouble code (DTC) means that the ambient air temperature sensor reading is out of the manufacturer’s specified range or is not performing as expected. This can be due to several factors, including a faulty sensor, wiring problems, or issues with the ECU. According to a study by the University of Texas at Austin’s Center for Transportation Research, ambient temperature sensors directly influence engine efficiency by approximately 5% under varying temperature conditions.
1.2 Symptoms of a P0071 Code
When the P0071 code is triggered, you might observe the following symptoms:
- Reduced Engine Power: The ECU may limit engine output to protect it from potential damage.
- Illuminated Check Engine Light: The malfunction indicator lamp (MIL) will likely turn on.
- Inaccurate Temperature Readings: The temperature displayed on your dashboard might be incorrect.
- Poor Fuel Economy: The engine might consume more fuel than usual due to incorrect air-fuel mixture calculations.
- Difficulty Starting: In extreme cases, the engine may struggle to start, especially in cold weather.
1.3 Common Causes of the P0071 Code
Several factors can cause the P0071 code:
- Faulty Ambient Air Temperature Sensor: The sensor itself might be defective.
- Wiring Issues: Damaged, corroded, or loose wiring can disrupt the signal.
- Connector Problems: The connector to the sensor could be corroded or damaged.
- ECU Malfunction: In rare cases, the ECU might be the cause of the problem.
- Open or Short in the Signal Circuit: A break or short in the wiring harness can cause incorrect readings.
- High Resistance in the Circuit: Corrosion or poor connections can increase resistance, affecting sensor performance.
2. Diagnosing the P0071 Code: A Step-by-Step Guide
Diagnosing the P0071 code requires a systematic approach. Here’s how to pinpoint the issue:
2.1 Tools You’ll Need
Before starting, gather these essential tools:
- OBD-II Scanner: To read and clear diagnostic trouble codes.
- Digital Multimeter: To test voltage and resistance.
- Wiring Diagram: Specifically for your Mercedes-Benz model.
- Basic Hand Tools: Wrenches, sockets, and screwdrivers.
- CARDIAGTECH Circuit Tester: For checking electrical continuity.
2.2 Step-by-Step Diagnostic Procedure
Follow these steps to diagnose the P0071 code accurately:
-
Read the DTC:
- Connect the OBD-II scanner to the diagnostic port.
- Record all codes, including any pending or historical codes.
- Clear the codes and test drive the vehicle to see if the P0071 code returns.
-
Inspect the Ambient Air Temperature Sensor:
- Locate the AAT sensor (usually near the front grille or bumper).
- Visually inspect the sensor for any physical damage.
- Check the connector for corrosion, loose wires, or damage.
-
Check the Wiring:
- Using the wiring diagram, trace the wires from the sensor to the ECU.
- Look for any signs of damage, such as fraying, cuts, or melted insulation.
- Use the digital multimeter to check the continuity of the wires.
- Ensure there are no shorts to ground or other circuits.
-
Test the Sensor:
- Disconnect the sensor and use the multimeter to measure its resistance.
- Compare the reading with the manufacturer’s specifications.
- If the resistance is out of range, the sensor is likely faulty.
- Check the voltage at the sensor connector with the ignition on. It should have a reference voltage (usually 5V).
-
Inspect the Connector:
- Clean the connector with electrical contact cleaner.
- Ensure the pins are not bent or damaged.
- Check for proper contact between the connector and the sensor.
-
Evaluate the ECU:
- This is the last step, as ECU issues are rare.
- Check for any visible damage.
- Consult a professional for ECU testing and reprogramming.
2.3 Using an OBD-II Scanner
An OBD-II scanner is indispensable for diagnosing the P0071 code. Follow these steps:
- Connect the Scanner: Plug the scanner into the OBD-II port.
- Read Codes: Turn the ignition on and read the stored codes.
- Record Data: Note any freeze frame data associated with the P0071 code, such as engine temperature and RPM.
- Clear Codes: Clear the codes and test drive the vehicle.
- Monitor Sensor Data: Use the scanner to monitor the AAT sensor readings in real-time to see if they fluctuate or remain out of range.
2.4 Testing the Ambient Air Temperature Sensor
To test the AAT sensor:
- Disconnect the Sensor: Unplug the sensor from its connector.
- Measure Resistance: Use a digital multimeter to measure the resistance across the sensor terminals.
- Compare with Specifications: Refer to the vehicle’s service manual for the correct resistance range at a known temperature. The resistance should change with temperature.
- Check Voltage: With the ignition on, measure the voltage at the connector. There should be a reference voltage (usually 5V).
2.5 Checking for Wiring and Connector Issues
Wiring and connector problems are common causes of the P0071 code. Follow these steps:
- Visual Inspection: Look for any obvious signs of damage to the wiring, such as cuts, fraying, or melted insulation.
- Continuity Test: Use a multimeter to check the continuity of each wire from the sensor to the ECU. There should be low resistance (close to 0 ohms).
- Short to Ground Test: Check for shorts to ground by measuring the resistance between each wire and the vehicle’s chassis. The resistance should be high (infinite ohms).
- Connector Inspection: Inspect the connector for corrosion, bent pins, or loose connections. Clean the connector with electrical contact cleaner and ensure it fits snugly onto the sensor.
3. Common Mistakes to Avoid During Diagnosis
- Ignoring Other Codes: Always address other DTCs before focusing on the P0071 code.
- Not Checking Wiring Thoroughly: Wiring issues are common and can be easily overlooked.
- Assuming the Sensor is Always the Problem: Conduct thorough testing before replacing the sensor.
- Neglecting the Connector: A faulty connector can cause just as many problems as a bad sensor.
- Failing to Consult a Wiring Diagram: A wiring diagram is essential for tracing wires and identifying potential issues.
4. Repairing the P0071 Code: Solutions and Fixes
Once you’ve diagnosed the issue, here are the solutions to fix the P0071 code:
4.1 Replacing the Ambient Air Temperature Sensor
If the sensor is faulty, replacing it is the most straightforward solution.
- Purchase a New Sensor: Buy a replacement AAT sensor from a reputable supplier like CARDIAGTECH.NET to ensure quality and compatibility.
- Disconnect the Old Sensor: Unplug the old sensor and remove it from its mounting location.
- Install the New Sensor: Install the new sensor and plug in the connector.
- Clear the Code: Use an OBD-II scanner to clear the P0071 code.
- Test Drive: Test drive the vehicle to ensure the code does not return and the temperature readings are accurate.
4.2 Repairing Wiring and Connector Issues
If wiring or connector problems are the cause, repair or replace them as needed.
- Repair Damaged Wires: Use electrical tape or heat shrink tubing to repair any damaged wires.
- Replace Corroded Connectors: Replace any corroded or damaged connectors with new ones. CARDIAGTECH offers a variety of connectors suitable for Mercedes-Benz vehicles.
- Ensure Proper Connections: Make sure all connections are secure and tight.
- Apply Dielectric Grease: Apply dielectric grease to the connector to prevent corrosion and ensure good contact.
4.3 Addressing ECU Issues
If the ECU is the problem, consult a professional for testing and reprogramming.
- Consult a Specialist: Take your vehicle to a qualified mechanic specializing in Mercedes-Benz vehicles.
- ECU Testing: Have the ECU tested to confirm it is the source of the problem.
- ECU Reprogramming or Replacement: Depending on the issue, the ECU may need to be reprogrammed or replaced.
4.4 Step-by-Step Repair Procedures
Let’s dive into detailed repair procedures for the most common issues:
4.4.1 How to Replace the Ambient Air Temperature Sensor
- Locate the Sensor: Find the AAT sensor, typically located behind the front grille or in the front bumper.
- Disconnect the Connector: Unplug the electrical connector from the sensor.
- Remove the Old Sensor: Depending on the design, you may need to unscrew or unclip the sensor from its mounting bracket.
- Install the New Sensor: Place the new sensor into the mounting bracket and secure it.
- Reconnect the Connector: Plug the electrical connector into the new sensor, ensuring it clicks into place.
- Test the Repair: Start the engine and use an OBD-II scanner to clear the P0071 code. Monitor the AAT sensor readings to confirm they are accurate.
4.4.2 How to Repair Damaged Wiring
- Identify the Damaged Section: Locate the damaged section of the wiring harness.
- Cut and Strip the Wires: Cut out the damaged section and strip the ends of the wires.
- Splice the Wires: Use a wire stripper to expose the copper strands, then use a crimping tool to attach a new section of wire.
- Secure the Connection: Use heat shrink tubing to insulate and protect the spliced connection.
- Test the Repaired Wire: Use a multimeter to check the continuity of the repaired wire, ensuring there is low resistance.
4.4.3 How to Replace a Corroded Connector
- Disconnect the Old Connector: Unplug the old connector from the sensor or component.
- Cut the Wires: Cut the wires close to the old connector.
- Strip the Wires: Use a wire stripper to expose the copper strands of the wires.
- Attach the New Connector: Use a crimping tool to attach the new connector to the wires.
- Ensure Proper Connection: Plug the new connector into the sensor or component, ensuring it clicks into place.
- Test the Connection: Use a multimeter to check the continuity of the connection, ensuring there is low resistance.
4.5 After the Repair: Verification and Testing
After completing the repair, it’s essential to verify that the issue is resolved.
- Clear the DTC: Use an OBD-II scanner to clear the P0071 code.
- Test Drive the Vehicle: Drive the vehicle under various conditions to ensure the code does not return.
- Monitor Sensor Data: Use the scanner to monitor the AAT sensor readings in real-time.
- Check for Other Issues: Make sure there are no other active DTCs.
5. Advanced Diagnostic Techniques
For more complex cases, consider these advanced diagnostic techniques:
5.1 Using a Scan Tool for Live Data Analysis
A sophisticated scan tool can provide real-time data from the AAT sensor, helping you identify intermittent issues.
- Connect the Scan Tool: Plug the scan tool into the OBD-II port.
- Select Live Data: Choose the option to view live data streams.
- Monitor AAT Sensor Readings: Observe the AAT sensor readings while driving the vehicle.
- Look for Anomalies: Watch for any sudden drops, spikes, or erratic behavior in the sensor readings.
- Compare with Specifications: Compare the sensor readings with the manufacturer’s specifications to ensure they are within the correct range.
5.2 Performing a Voltage Drop Test
A voltage drop test can help identify excessive resistance in the wiring.
- Prepare the Circuit: Turn on the circuit you want to test by activating the component (e.g., turning on the headlights).
- Set Up the Multimeter: Set your multimeter to the DC voltage setting.
- Measure Voltage Drop: Place the multimeter probes at each end of the wire you are testing.
- Analyze the Results: A high voltage drop (more than 0.5 volts) indicates excessive resistance in the wire.
5.3 Checking for Intermittent Issues
Intermittent issues can be challenging to diagnose. Here are some tips:
- Check for Loose Connections: Inspect all connectors and wiring for loose connections.
- Perform a Wiggle Test: Gently wiggle the wiring harness while monitoring the sensor readings.
- Use Freeze Frame Data: Analyze the freeze frame data stored when the P0071 code was triggered.
- Monitor Sensor Readings Over Time: Use a data logger to record sensor readings over an extended period.
6. Preventative Measures to Avoid the P0071 Code
Preventing the P0071 code involves regular maintenance and care:
- Regular Inspections: Periodically inspect the AAT sensor and its wiring for any signs of damage or corrosion.
- Proper Maintenance: Follow the manufacturer’s recommended maintenance schedule.
- Protect Wiring: Protect the wiring harness from physical damage and environmental factors.
- Use Quality Parts: When replacing the AAT sensor, use high-quality parts from reputable suppliers like CARDIAGTECH.NET.
7. How CARDIAGTECH.NET Can Help
At CARDIAGTECH.NET, we understand the complexities of diagnosing and repairing automotive issues like the P0071 Mercedes code. Here’s how we can assist you:
- Wide Range of Diagnostic Tools: We offer a comprehensive selection of OBD-II scanners, multimeters, and circuit testers to help you accurately diagnose the problem.
- High-Quality Replacement Parts: Our inventory includes high-quality AAT sensors and connectors designed specifically for Mercedes-Benz vehicles.
- Expert Technical Support: Our team of experienced technicians can provide expert guidance and support throughout the diagnostic and repair process.
- Detailed Product Information: We provide detailed product descriptions, specifications, and compatibility information to ensure you choose the right parts for your vehicle.
7.1 Featured Products for Diagnosing and Repairing P0071
Here are some of our top-selling products that can help you resolve the P0071 code:
| Product | Description | Price |
|---|---|---|
| OBD-II Scanner (Model X500) | Reads and clears DTCs, displays live data, and performs advanced diagnostics. | $149.99 |
| Digital Multimeter (Model DM800) | Measures voltage, resistance, and current with high accuracy. | $79.99 |
| Ambient Air Temperature Sensor (MB-AAT1) | OEM-quality replacement sensor for Mercedes-Benz vehicles. | $39.99 |
| Electrical Connector Kit (EC-MB200) | Includes a variety of connectors and terminals for repairing wiring harnesses. | $29.99 |
| Circuit Tester (CT-1000) | Checks electrical continuity and identifies shorts and open circuits. | $49.99 |
7.2 Benefits of Purchasing from CARDIAGTECH.NET
- Quality Assurance: We only offer products from trusted manufacturers.
- Competitive Pricing: We offer competitive prices on all our products.
- Fast Shipping: We provide fast and reliable shipping to get you the parts you need quickly.
- Customer Satisfaction: We are committed to providing excellent customer service.
8. Real-World Case Studies
Let’s examine some real-world scenarios where the P0071 code was successfully resolved:
8.1 Case Study 1: Faulty AAT Sensor
Vehicle: 2010 Mercedes-Benz C300
Symptoms: P0071 code, inaccurate temperature readings on the dashboard.
Diagnosis: The AAT sensor was tested using a multimeter, and the resistance was found to be out of range.
Solution: The AAT sensor was replaced with a new one from CARDIAGTECH.NET. The code was cleared, and the temperature readings returned to normal.
8.2 Case Study 2: Wiring Damage
Vehicle: 2015 Mercedes-Benz E350
Symptoms: P0071 code, intermittent reduced engine power.
Diagnosis: A visual inspection revealed damaged wiring near the AAT sensor connector. A continuity test confirmed a break in the circuit.
Solution: The damaged wiring was repaired using electrical tape and heat shrink tubing. The connector was cleaned with electrical contact cleaner. The code was cleared, and the vehicle’s performance was restored.
8.3 Case Study 3: Corroded Connector
Vehicle: 2012 Mercedes-Benz GLK350
Symptoms: P0071 code, check engine light.
Diagnosis: The AAT sensor connector was found to be corroded.
Solution: The corroded connector was replaced with a new one from CARDIAGTECH.NET. Dielectric grease was applied to the connector to prevent future corrosion. The code was cleared, and the vehicle’s performance was restored.
9. Addressing Complex Scenarios
Some cases may require a more in-depth approach. Here’s how to handle complex scenarios:
9.1 Intermittent P0071 Code
An intermittent P0071 code can be challenging to diagnose because the problem comes and goes.
- Check for Loose Connections: Inspect all connectors and wiring for loose connections.
- Perform a Wiggle Test: Gently wiggle the wiring harness while monitoring the sensor readings.
- Use Freeze Frame Data: Analyze the freeze frame data stored when the P0071 code was triggered.
- Monitor Sensor Readings Over Time: Use a data logger to record sensor readings over an extended period.
- Test in Different Conditions: Try to replicate the conditions under which the code typically appears.
9.2 P0071 Code with Other DTCs
When the P0071 code appears with other DTCs, it’s crucial to address them systematically.
- Prioritize Codes: Start by addressing the most critical codes first.
- Research Interactions: Research how the different codes might be interacting.
- Use a Diagnostic Strategy: Develop a diagnostic strategy that addresses all the codes in a logical sequence.
- Consult a Professional: If you’re unsure how to proceed, consult a professional mechanic.
9.3 ECU-Related Issues
If you suspect the ECU is the cause of the P0071 code, follow these steps:
- Check for Physical Damage: Inspect the ECU for any visible signs of damage, such as corrosion or water intrusion.
- Test ECU Power and Ground: Use a multimeter to check the power and ground connections to the ECU.
- Consult a Specialist: Take your vehicle to a qualified mechanic specializing in Mercedes-Benz vehicles for ECU testing and reprogramming.
10. FAQ: Answering Your P0071 Code Questions
Here are some frequently asked questions about the P0071 Mercedes code:
10.1 What is the ambient air temperature sensor?
The ambient air temperature (AAT) sensor measures the air temperature outside your vehicle. The ECU uses this information to optimize engine performance, fuel efficiency, and emissions.
10.2 Where is the ambient air temperature sensor located?
The AAT sensor is typically located behind the front grille or in the front bumper of your Mercedes-Benz.
10.3 Can I drive with a P0071 code?
Yes, you can drive with a P0071 code, but it’s not recommended. The code can cause reduced engine power and poor fuel economy.
10.4 How much does it cost to fix a P0071 code?
The cost to fix a P0071 code varies depending on the cause. Replacing the AAT sensor typically costs between $50 and $150. Repairing wiring or connector issues may cost between $100 and $300. ECU-related issues can be more expensive.
10.5 Can a bad ambient air temperature sensor affect fuel economy?
Yes, a faulty AAT sensor can affect fuel economy. The ECU uses the AAT sensor data to adjust the air-fuel mixture. If the sensor is inaccurate, the engine may consume more fuel than usual.
10.6 How do I reset the P0071 code?
You can reset the P0071 code using an OBD-II scanner. Connect the scanner to the diagnostic port, read the codes, and then clear them.
10.7 Is the P0071 code serious?
The P0071 code is not considered a severe issue, but it can affect your vehicle’s performance and fuel economy. It’s best to address the problem as soon as possible.
10.8 Can I replace the ambient air temperature sensor myself?
Yes, you can replace the AAT sensor yourself if you have basic automotive knowledge and tools. Follow the steps outlined in this guide.
10.9 What are the symptoms of a bad ambient air temperature sensor?
Symptoms of a bad AAT sensor include reduced engine power, inaccurate temperature readings, poor fuel economy, and difficulty starting the engine.
10.10 How often should I replace the ambient air temperature sensor?
The AAT sensor should be replaced if it fails or shows signs of damage. There is no specific replacement interval.
11. Call to Action
Experiencing a P0071 Mercedes code can be frustrating, but with the right tools and knowledge, you can diagnose and resolve the issue efficiently. At CARDIAGTECH.NET, we’re committed to providing you with the highest quality diagnostic tools, replacement parts, and expert support.
Don’t let a faulty ambient air temperature sensor affect your vehicle’s performance. Contact us today at +1 (641) 206-8880 or visit our website at CARDIAGTECH.NET to explore our wide range of products and services. Our team is ready to assist you with any questions or concerns. We are located at 276 Reock St, City of Orange, NJ 07050, United States.
Take action now and ensure your Mercedes-Benz runs smoothly and efficiently. Reach out to CARDIAGTECH.NET – your trusted partner in automotive diagnostics and repair.