P0110 Code Mercedes: Diagnosis, Causes, And Solutions
The P0110 code Mercedes indicates a problem with the Intake Air Temperature (IAT) sensor circuit, which is essential for the engine control unit (ECU) to function effectively. At CARDIAGTECH.NET, we understand the frustration that comes with diagnosing car problems and that’s why we offer detailed information to help you resolve them quickly. Diagnosing the root cause and using the appropriate tools can solve problems related to the P0110 code. Let’s explore the ins and outs of this code, including common causes, diagnostic steps, and repair solutions, so you can confidently get your Mercedes back on the road.
1. Understanding the P0110 Code Mercedes
The P0110 code is a diagnostic trouble code (DTC) that indicates a fault in the intake air temperature (IAT) sensor circuit. The IAT sensor measures the temperature of the air entering the engine, providing crucial data to the engine control unit (ECU). The ECU uses this information to adjust the air-fuel mixture and ignition timing for optimal engine performance. When the ECU detects a reading from the IAT sensor that is out of the specified range, it triggers the P0110 code. The ideal air-fuel mixture ensures that the engine runs efficiently, reduces emissions, and delivers the best possible performance.
1.1. Role of the Intake Air Temperature (IAT) Sensor
The IAT sensor is a crucial component in the engine management system. Its primary function is to measure the temperature of the air entering the engine. This temperature data is then relayed to the ECU, which uses it to make necessary adjustments to the air-fuel mixture.
Here’s a detailed look at its role:
- Measurement of Air Temperature: The IAT sensor uses a thermistor, a type of resistor whose resistance varies with temperature. As the air temperature changes, the resistance of the thermistor also changes.
- Signal Transmission to ECU: The sensor converts the temperature reading into an electrical signal, which is then sent to the ECU. This signal is typically a voltage that varies with temperature.
- ECU Adjustments: Based on the IAT sensor data, the ECU adjusts the amount of fuel injected into the engine. Colder air is denser and requires more fuel, while warmer air requires less. The ECU also adjusts the ignition timing to optimize combustion.
- Impact on Engine Performance: Accurate IAT readings are essential for maintaining optimal engine performance. Incorrect readings can lead to poor fuel economy, reduced power, and increased emissions.
1.2. How the ECU Uses IAT Sensor Data
The ECU relies heavily on the data provided by the IAT sensor to ensure the engine runs efficiently. Here’s how the ECU uses this data:
- Air-Fuel Mixture Adjustment: The ECU adjusts the air-fuel mixture based on the IAT readings. When the intake air is cold, the ECU enriches the mixture by adding more fuel. This helps with cold starts and ensures smooth engine operation in cold weather. When the intake air is warm, the ECU leans the mixture by reducing the amount of fuel.
- Ignition Timing Adjustment: The ECU also adjusts the ignition timing based on the IAT data. Colder air allows for more advanced timing, which can improve engine power and efficiency. Warmer air requires retarded timing to prevent engine knocking or pinging.
- Altitude Compensation: In some vehicles, the IAT sensor works in conjunction with the manifold absolute pressure (MAP) sensor to compensate for changes in altitude. As altitude increases, the air becomes less dense. The ECU uses the IAT and MAP data to adjust the air-fuel mixture and ignition timing to maintain optimal performance at different altitudes.
- Diagnostic Monitoring: The ECU continuously monitors the IAT sensor readings to ensure they are within the specified range. If the readings are consistently too high or too low, or if the sensor signal is erratic, the ECU will set the P0110 code.
1.3. Common Symptoms of P0110 Code
When the P0110 code is triggered, it can manifest in several noticeable symptoms that affect your Mercedes’ performance. Recognizing these symptoms can help you diagnose the problem more quickly. Here are some common symptoms:
- Check Engine Light: The most common symptom is the illumination of the check engine light on the dashboard. This is the ECU’s way of alerting you to a problem within the engine management system.
- Poor Fuel Economy: Incorrect IAT sensor readings can cause the ECU to miscalculate the air-fuel mixture, leading to increased fuel consumption. You may notice that you are filling up your gas tank more frequently.
- Reduced Engine Performance: The engine may suffer from reduced power and acceleration. This is because the ECU is not able to optimize the air-fuel mixture and ignition timing.
- Rough Idling: The engine may idle roughly or stall, especially when it is cold. This is due to the incorrect air-fuel mixture during the initial start-up phase.
- Difficulty Starting: In some cases, the vehicle may be hard to start, particularly in cold weather. This is because the ECU is not providing the correct amount of fuel for a cold start.
- Increased Emissions: An improper air-fuel mixture can lead to increased emissions, which may cause your vehicle to fail an emissions test.
Understanding these symptoms is the first step in diagnosing and resolving the P0110 code. Now, let’s delve into the potential causes of this code.
2. Potential Causes of the P0110 Code in Mercedes Vehicles
Several factors can trigger the P0110 code in your Mercedes. Identifying the root cause is essential for effective repair. Here are the common causes:
- Faulty IAT Sensor: The sensor itself may be defective and providing inaccurate readings. Over time, the sensor can degrade due to exposure to heat, vibration, and contaminants.
- Wiring Issues: Damaged, corroded, or loose wiring in the IAT sensor circuit can disrupt the signal to the ECU. This includes issues with the sensor connector or the wiring harness.
- Connector Problems: The electrical connector to the IAT sensor may be corroded or damaged, leading to poor contact and inaccurate readings.
- Vacuum Leaks: Vacuum leaks in the intake manifold can affect the air pressure and temperature, leading to incorrect IAT sensor readings.
- ECU Malfunction: Although less common, a malfunctioning ECU can misinterpret the IAT sensor signal or fail to process it correctly.
- Dirty or Clogged Air Filter: A severely dirty or clogged air filter can restrict airflow and affect the IAT sensor readings.
- MAF Sensor Issues: In some Mercedes models, the IAT sensor is integrated into the mass airflow (MAF) sensor. Problems with the MAF sensor can also trigger the P0110 code.
Understanding these potential causes can help you narrow down the diagnostic process and identify the specific issue affecting your vehicle.
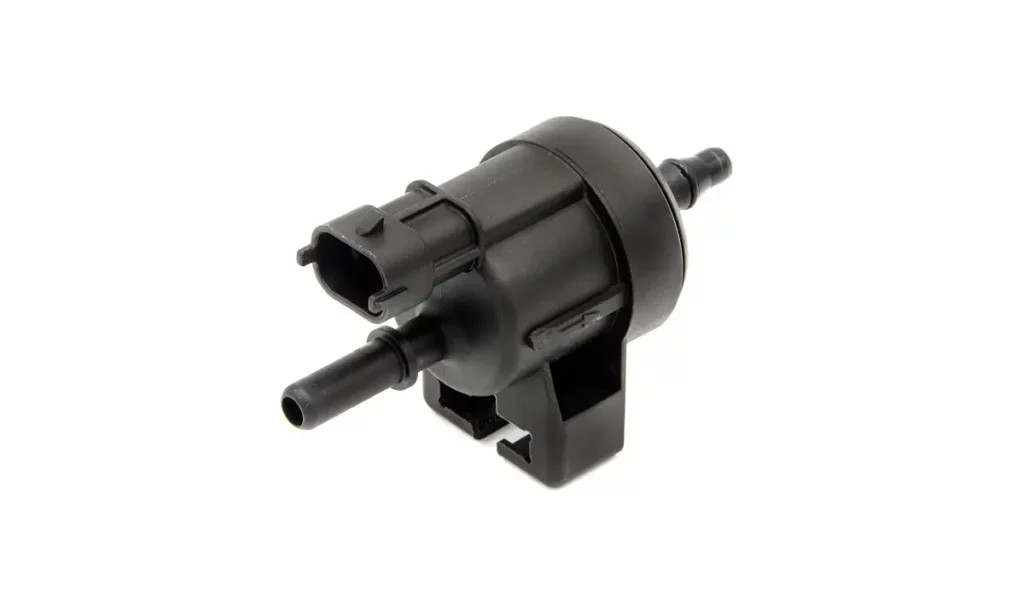
This image shows a Mercedes engine bay, which helps to visualize the location of components such as the IAT sensor and wiring that may be related to the P0110 code.
3. Step-by-Step Guide to Diagnosing the P0110 Code
Diagnosing the P0110 code involves a systematic approach to identify the root cause. Here’s a detailed step-by-step guide to help you through the process:
3.1. Gather Necessary Tools and Equipment
Before you begin, make sure you have the following tools and equipment:
- OBD-II Scanner: An OBD-II scanner is essential for reading and clearing diagnostic trouble codes.
- Multimeter: A multimeter is needed to test the voltage and resistance of the IAT sensor and its wiring.
- Wiring Diagram: A wiring diagram for your specific Mercedes model can help you trace the IAT sensor circuit.
- Socket Set and Wrenches: These tools are necessary to remove and install the IAT sensor if needed.
- Contact Cleaner: Contact cleaner can help clean corroded electrical connectors.
- Shop Rags: Shop rags are useful for cleaning and wiping down components.
- Personal Protective Equipment (PPE): Safety glasses and gloves are recommended to protect yourself during the diagnostic process.
3.2. Initial Inspection
Start with a visual inspection of the engine bay. Look for any obvious signs of damage, such as:
- Damaged Wiring: Check the wiring harness for cuts, abrasions, or melted insulation.
- Loose Connections: Ensure that all electrical connectors are securely attached.
- Corrosion: Look for signs of corrosion on the IAT sensor connector and wiring terminals.
- Vacuum Leaks: Inspect vacuum hoses for cracks, leaks, or loose connections.
3.3. Reading the Diagnostic Trouble Codes
- Connect the OBD-II Scanner: Plug the OBD-II scanner into the diagnostic port, typically located under the dashboard on the driver’s side.
- Turn on the Ignition: Turn the ignition key to the “ON” position without starting the engine.
- Read the Codes: Use the scanner to read the diagnostic trouble codes stored in the ECU.
- Record the Codes: Write down all the codes, including the P0110 code and any other related codes.
- Clear the Codes: Clear the codes from the ECU and start the engine.
- Monitor the Codes: Allow the engine to run for a few minutes, then recheck the codes to see if the P0110 code returns.
3.4. Testing the IAT Sensor
- Locate the IAT Sensor: The IAT sensor is typically located in the intake manifold or air intake duct. Refer to your vehicle’s service manual for the exact location.
- Disconnect the Sensor: Disconnect the electrical connector from the IAT sensor.
- Measure Resistance: Use a multimeter to measure the resistance across the sensor terminals. Refer to your vehicle’s service manual for the correct resistance values at different temperatures.
- If the resistance is significantly outside the specified range, the sensor is likely faulty and needs to be replaced.
- Check Voltage Supply: With the ignition on, use a multimeter to check the voltage at the IAT sensor connector. There should be a voltage supply, typically 5 volts, from the ECU.
- If there is no voltage, there may be a problem with the wiring or the ECU.
3.5. Checking the Wiring and Connectors
- Inspect Wiring: Carefully inspect the wiring harness leading to the IAT sensor for any signs of damage, such as cuts, abrasions, or melted insulation.
- Test for Continuity: Use a multimeter to test the continuity of the wiring between the IAT sensor connector and the ECU.
- Disconnect the battery before testing continuity to avoid damaging the ECU.
- If there is no continuity, there is a break in the wiring that needs to be repaired.
- Check for Shorts: Use a multimeter to check for shorts to ground in the wiring.
- If there is a short, the wiring is likely damaged and needs to be repaired or replaced.
- Clean Connectors: Clean the IAT sensor connector and the ECU connector with contact cleaner to remove any corrosion or dirt.
3.6. Inspecting for Vacuum Leaks
- Visual Inspection: Check all vacuum hoses connected to the intake manifold for cracks, leaks, or loose connections.
- Smoke Test: A smoke test can help you identify hard-to-find vacuum leaks. Connect a smoke machine to the intake system and look for smoke escaping from any leaks.
- Listen for Hissing: With the engine running, listen for any hissing sounds that may indicate a vacuum leak.
3.7. Testing the MAF Sensor (If Applicable)
- Locate the MAF Sensor: The MAF sensor is typically located in the air intake duct, near the air filter housing.
- Disconnect the Sensor: Disconnect the electrical connector from the MAF sensor.
- Inspect the Sensor: Visually inspect the MAF sensor for any signs of damage or contamination.
- Test the Sensor: Use a multimeter to test the MAF sensor according to your vehicle’s service manual.
- Replace if Necessary: If the MAF sensor is faulty, replace it with a new one.
3.8. ECU Diagnostics
If you have checked all the other components and the P0110 code persists, the ECU may be the problem. However, ECU problems are rare, so it is important to rule out all other possibilities first.
- Check ECU Connections: Inspect the ECU connectors for any signs of corrosion or damage.
- Test ECU Power and Ground: Use a multimeter to check that the ECU is receiving power and ground.
- Consult a Professional: If you suspect an ECU problem, it is best to consult a professional mechanic or an ECU repair specialist for further diagnostics and repair.
By following this step-by-step guide, you can systematically diagnose the P0110 code and identify the root cause of the problem. Once you have identified the cause, you can proceed with the appropriate repairs.
This image illustrates the process of diagnosing a car engine, highlighting the use of diagnostic tools and visual inspection to identify issues related to the P0110 code.
4. Repairing the P0110 Code on Your Mercedes
Once you have diagnosed the cause of the P0110 code, the next step is to perform the necessary repairs. Here are some common repair procedures:
4.1. Replacing the IAT Sensor
If the IAT sensor is faulty, replacing it is a straightforward process.
- Disconnect the Battery: Disconnect the negative battery terminal to prevent electrical shorts.
- Locate the IAT Sensor: Find the IAT sensor in the intake manifold or air intake duct.
- Disconnect the Connector: Disconnect the electrical connector from the IAT sensor.
- Remove the Sensor: Use a socket or wrench to remove the IAT sensor from its mounting location.
- Install the New Sensor: Install the new IAT sensor and tighten it to the specified torque.
- Reconnect the Connector: Reconnect the electrical connector to the IAT sensor.
- Reconnect the Battery: Reconnect the negative battery terminal.
- Clear the Codes: Use an OBD-II scanner to clear the P0110 code from the ECU.
- Test the Vehicle: Start the engine and monitor for any signs of the P0110 code returning.
4.2. Repairing Wiring Issues
If the wiring to the IAT sensor is damaged, it will need to be repaired or replaced.
- Identify the Damage: Locate the damaged section of the wiring harness.
- Disconnect the Battery: Disconnect the negative battery terminal.
- Repair the Wiring:
- If the wiring is cut, use butt connectors or solder to reconnect the wires.
- If the wiring is corroded, clean the terminals with contact cleaner or replace the corroded section of the wiring.
- Protect the Wiring: Wrap the repaired wiring with electrical tape or heat shrink tubing to protect it from the elements.
- Reconnect the Battery: Reconnect the negative battery terminal.
- Clear the Codes: Use an OBD-II scanner to clear the P0110 code from the ECU.
- Test the Vehicle: Start the engine and monitor for any signs of the P0110 code returning.
4.3. Cleaning or Replacing Connectors
Corroded or damaged connectors can cause intermittent problems with the IAT sensor signal.
- Disconnect the Battery: Disconnect the negative battery terminal.
- Inspect the Connector: Examine the IAT sensor connector and the ECU connector for any signs of corrosion or damage.
- Clean the Connector: Use contact cleaner to clean the connector terminals.
- Repair or Replace:
- If the connector is damaged, repair it with new terminals or replace the entire connector.
- Reconnect the Battery: Reconnect the negative battery terminal.
- Clear the Codes: Use an OBD-II scanner to clear the P0110 code from the ECU.
- Test the Vehicle: Start the engine and monitor for any signs of the P0110 code returning.
4.4. Addressing Vacuum Leaks
Vacuum leaks can cause incorrect IAT sensor readings and trigger the P0110 code.
- Locate the Leak: Use a smoke test or visual inspection to locate the vacuum leak.
- Repair the Leak:
- If the leak is in a vacuum hose, replace the hose.
- If the leak is in the intake manifold gasket, replace the gasket.
- Test the Repair: After repairing the leak, perform another smoke test to ensure that the leak is completely sealed.
- Clear the Codes: Use an OBD-II scanner to clear the P0110 code from the ECU.
- Test the Vehicle: Start the engine and monitor for any signs of the P0110 code returning.
4.5. Replacing the MAF Sensor (If Applicable)
If the IAT sensor is integrated into the MAF sensor and the MAF sensor is faulty, you will need to replace the entire MAF sensor.
- Disconnect the Battery: Disconnect the negative battery terminal.
- Locate the MAF Sensor: Find the MAF sensor in the air intake duct.
- Disconnect the Connector: Disconnect the electrical connector from the MAF sensor.
- Remove the Sensor: Use a screwdriver or wrench to remove the MAF sensor from the air intake duct.
- Install the New Sensor: Install the new MAF sensor and tighten it to the specified torque.
- Reconnect the Connector: Reconnect the electrical connector to the MAF sensor.
- Reconnect the Battery: Reconnect the negative battery terminal.
- Clear the Codes: Use an OBD-II scanner to clear the P0110 code from the ECU.
- Test the Vehicle: Start the engine and monitor for any signs of the P0110 code returning.
4.6. ECU Repair or Replacement
If all other components have been checked and repaired, and the P0110 code persists, the ECU may be faulty.
- Consult a Professional: Consult a professional mechanic or an ECU repair specialist for further diagnostics.
- ECU Repair: In some cases, the ECU can be repaired by an ECU repair specialist.
- ECU Replacement: If the ECU is beyond repair, it will need to be replaced with a new or remanufactured unit.
- Programming: After replacing the ECU, it may need to be programmed to match your vehicle’s specific settings.
By following these repair procedures, you can effectively address the P0110 code on your Mercedes and restore your vehicle to optimal performance.
This image demonstrates the process of repairing car engine wiring, which is a common step in resolving the P0110 code, especially when wiring issues are the root cause.
5. Maintenance Tips to Prevent the P0110 Code
Preventing the P0110 code involves regular maintenance and care of your Mercedes’ engine components. Here are some practical tips to help you avoid this issue:
5.1. Regular Inspection of Wiring and Connectors
- Frequency: Conduct a visual inspection of the wiring and connectors at least every six months or during routine maintenance.
- Focus: Look for signs of damage, such as cuts, abrasions, corrosion, or loose connections.
- Action: Repair or replace any damaged wiring or connectors promptly to ensure a reliable electrical connection.
5.2. Cleaning the IAT Sensor
- Frequency: Clean the IAT sensor every 12 months or 12,000 miles, or as part of your regular maintenance schedule.
- Procedure:
- Disconnect the IAT sensor connector.
- Remove the IAT sensor from its mounting location.
- Use a specialized sensor cleaner to gently clean the sensor element.
- Allow the sensor to dry completely before reinstalling it.
- Benefits: Regular cleaning helps remove dirt, oil, and other contaminants that can affect the sensor’s accuracy.
5.3. Replacing the Air Filter Regularly
- Frequency: Replace the air filter every 12,000 to 15,000 miles, or as recommended in your vehicle’s owner’s manual.
- Benefits: A clean air filter ensures proper airflow to the engine, which can prevent the IAT sensor from becoming contaminated.
5.4. Checking for Vacuum Leaks
- Frequency: Check for vacuum leaks every six months or during routine maintenance.
- Method:
- Visually inspect all vacuum hoses for cracks, leaks, or loose connections.
- Listen for any hissing sounds that may indicate a vacuum leak.
- Use a smoke test to identify hard-to-find leaks.
- Action: Repair or replace any leaking vacuum hoses or components promptly.
5.5. Monitoring Engine Performance
- Observe: Pay attention to your vehicle’s engine performance, including fuel economy, idling, and acceleration.
- Address Issues: If you notice any unusual symptoms, such as rough idling, reduced power, or increased fuel consumption, have your vehicle inspected by a qualified mechanic.
5.6. Scheduled Maintenance
- Follow the Schedule: Adhere to the recommended maintenance schedule in your vehicle’s owner’s manual.
- Professional Inspections: Have your vehicle inspected by a professional mechanic at regular intervals to catch any potential issues early.
By following these maintenance tips, you can help prevent the P0110 code and keep your Mercedes running smoothly for years to come.
This image shows a car air filter replacement, emphasizing the importance of regular air filter maintenance in preventing issues like the P0110 code.
6. The Role of High-Quality Diagnostic Tools from CARDIAGTECH.NET
At CARDIAGTECH.NET, we provide a range of high-quality diagnostic tools that can help you accurately diagnose and repair the P0110 code on your Mercedes. Here’s how our tools can assist you:
6.1. OBD-II Scanners for Accurate Code Reading
Our OBD-II scanners are designed to provide accurate and reliable code readings, allowing you to quickly identify the P0110 code and any other related codes.
- Features:
- User-friendly interface
- Real-time data monitoring
- Code definitions and troubleshooting tips
- Compatibility with a wide range of Mercedes models
- Benefits:
- Accurate diagnosis of engine problems
- Reduced diagnostic time
- Improved repair efficiency
6.2. Multimeters for Electrical Testing
Our multimeters are essential for testing the voltage, resistance, and continuity of the IAT sensor and its wiring.
- Features:
- Digital display for accurate readings
- Auto-ranging capability
- Built-in safety features
- Durable construction
- Benefits:
- Precise electrical testing
- Identification of wiring and connector problems
- Verification of sensor functionality
6.3. Professional-Grade Smoke Machines for Vacuum Leak Detection
Our smoke machines are designed to quickly and accurately detect vacuum leaks in your Mercedes’ intake system.
- Features:
- High-output smoke generation
- Adjustable pressure control
- Compatibility with a wide range of vehicles
- Durable construction
- Benefits:
- Easy identification of vacuum leaks
- Improved engine performance
- Reduced emissions
6.4. Comprehensive Diagnostic Kits
We offer comprehensive diagnostic kits that include a variety of tools and accessories to help you diagnose and repair a wide range of automotive problems, including the P0110 code.
- Components:
- OBD-II scanner
- Multimeter
- Vacuum tester
- Wiring diagram
- Socket set and wrenches
- Benefits:
- Complete diagnostic solution
- Convenient and cost-effective
- Improved repair capabilities
Investing in high-quality diagnostic tools from CARDIAGTECH.NET can help you save time and money on repairs, while also ensuring that your Mercedes is running at its best.
This image showcases car diagnostic tools, emphasizing the importance of using high-quality equipment from CARDIAGTECH.NET for accurate diagnostics and effective repairs.
7. Real-World Examples of P0110 Code Resolution
To illustrate the diagnostic and repair process, here are a couple of real-world examples of how the P0110 code was resolved on Mercedes vehicles:
7.1. Case Study 1: Faulty IAT Sensor on a Mercedes C-Class
- Vehicle: 2012 Mercedes-Benz C250
- Symptoms: Check engine light, poor fuel economy, reduced engine performance
- Diagnostic Steps:
- The technician used an OBD-II scanner to read the diagnostic trouble codes and found the P0110 code.
- A visual inspection revealed no obvious signs of damage to the wiring or connectors.
- The technician used a multimeter to test the IAT sensor and found that the resistance was significantly outside the specified range.
- Repair:
- The technician replaced the faulty IAT sensor with a new one.
- The OBD-II scanner was used to clear the P0110 code.
- The technician test-drove the vehicle and confirmed that the check engine light did not return and the engine performance was restored.
- Outcome: The P0110 code was resolved, and the vehicle’s fuel economy and engine performance were restored to normal.
7.2. Case Study 2: Wiring Issues on a Mercedes E-Class
- Vehicle: 2015 Mercedes-Benz E350
- Symptoms: Check engine light, rough idling, difficulty starting
- Diagnostic Steps:
- The technician used an OBD-II scanner to read the diagnostic trouble codes and found the P0110 code.
- A visual inspection revealed a damaged section of the wiring harness leading to the IAT sensor.
- The technician used a multimeter to test the continuity of the wiring and found a break in the circuit.
- Repair:
- The technician repaired the damaged wiring by splicing in a new section of wire and using butt connectors to secure the connections.
- The wiring was protected with electrical tape.
- The OBD-II scanner was used to clear the P0110 code.
- The technician test-drove the vehicle and confirmed that the check engine light did not return and the engine ran smoothly.
- Outcome: The P0110 code was resolved, and the vehicle’s engine ran smoothly with no starting issues.
These case studies demonstrate the importance of thorough diagnostics and proper repair procedures when addressing the P0110 code on Mercedes vehicles.
8. The Importance of Staying Updated with Automotive Technology
The automotive industry is constantly evolving, with new technologies and systems being introduced every year. Staying updated with these advancements is crucial for effectively diagnosing and repairing modern vehicles, including Mercedes models.
8.1. Continuous Learning
- Training Programs: Participate in training programs and workshops offered by automotive manufacturers, industry organizations, and technical schools.
- Online Resources: Utilize online resources, such as technical articles, videos, and forums, to stay informed about the latest automotive technologies and repair techniques.
- Technical Publications: Subscribe to technical publications and journals that provide in-depth information on automotive systems and diagnostic procedures.
8.2. Investing in Advanced Diagnostic Tools
- Up-to-Date Scanners: Invest in advanced OBD-II scanners with the latest software updates to ensure compatibility with new vehicle models and systems.
- Specialized Tools: Purchase specialized diagnostic tools, such as oscilloscope and graphing multimeters, to troubleshoot complex electrical and electronic problems.
8.3. Networking with Other Professionals
- Industry Events: Attend industry events and trade shows to network with other automotive professionals and learn about new products and technologies.
- Online Communities: Participate in online communities and forums to share knowledge and experiences with other technicians.
8.4. Understanding Vehicle-Specific Systems
- Mercedes-Benz Training: Take advantage of Mercedes-Benz-specific training programs to gain a deeper understanding of the unique systems and technologies used in these vehicles.
- Service Manuals: Refer to the service manuals and technical documentation for specific Mercedes models to ensure accurate diagnostic and repair procedures.
By staying updated with automotive technology, you can improve your diagnostic skills, enhance your repair capabilities, and provide better service to your customers.
9. Contact CARDIAGTECH.NET for Expert Advice and Quality Tools
If you’re struggling with the P0110 code on your Mercedes or need assistance with any other automotive diagnostic or repair issue, don’t hesitate to contact us at CARDIAGTECH.NET. We’re here to help!
9.1. Expert Advice
Our team of experienced technicians and automotive experts can provide you with expert advice and guidance on diagnosing and repairing the P0110 code and other automotive problems.
- Technical Support: We offer technical support via phone, email, and online chat to answer your questions and provide assistance with your diagnostic and repair efforts.
- Troubleshooting Tips: We can provide you with troubleshooting tips and step-by-step instructions to help you identify the root cause of the P0110 code and perform the necessary repairs.
9.2. High-Quality Tools
We offer a wide range of high-quality diagnostic tools and equipment to help you accurately diagnose and repair automotive problems, including the P0110 code.
- OBD-II Scanners: We carry a variety of OBD-II scanners from top brands, designed to provide accurate and reliable code readings.
- Multimeters: Our multimeters are essential for testing the voltage, resistance, and continuity of electrical circuits.
- Smoke Machines: Our smoke machines are designed to quickly and accurately detect vacuum leaks.
- Comprehensive Diagnostic Kits: We offer comprehensive diagnostic kits that include a variety of tools and accessories to help you diagnose and repair a wide range of automotive problems.
9.3. Contact Information
- Address: 276 Reock St, City of Orange, NJ 07050, United States
- WhatsApp: +1 (641) 206-8880
- Website: CARDIAGTECH.NET
Whether you’re a professional mechanic or a DIY enthusiast, we have the tools and expertise to help you resolve the P0110 code and keep your Mercedes running smoothly. Contact us today for expert advice and quality tools.
Is the check engine light causing you stress? Experiencing poor fuel economy and reduced engine performance? Don’t wait. Contact CARDIAGTECH.NET today at +1 (641) 206-8880 or visit our store at 276 Reock St, City of Orange, NJ 07050, United States. Our experts can help you select the perfect tools to resolve the P0110 code and restore your Mercedes to peak performance. We are available on Whatsapp and look forward to answering your questions.
10. Frequently Asked Questions (FAQ) About the P0110 Code
Here are some frequently asked questions about the P0110 code:
Q1: What does the P0110 code mean on a Mercedes?
A1: The P0110 code indicates a problem with the Intake Air Temperature (IAT) sensor circuit. This means the ECU is receiving a signal from the IAT sensor that is out of the specified range.
Q2: Can I drive my Mercedes with the P0110 code?
A2: While it is technically possible to drive with the P0110 code, it is not recommended. The incorrect IAT sensor readings can lead to poor fuel economy, reduced engine performance, and potential damage to the engine.
Q3: How do I fix the P0110 code on my Mercedes?
A3: To fix the P0110 code, you will need to diagnose the root cause of the problem and perform the necessary repairs. This may involve replacing the IAT sensor, repairing damaged wiring, cleaning or replacing connectors, addressing vacuum leaks, or replacing the MAF sensor.
Q4: How much does it cost to fix the P0110 code on a Mercedes?
A4: The cost to fix the P0110 code can vary depending on the root cause of the problem and the repair procedures required. Replacing the IAT sensor may cost between $50 and $200, while repairing wiring issues or addressing vacuum leaks may cost more.
Q5: Where is the IAT sensor located on a Mercedes?
A5: The IAT sensor is typically located in the intake manifold or air intake duct. Refer to your vehicle’s service manual for the exact location.
Q6: Can a bad MAF sensor cause the P0110 code?
A6: Yes, in some Mercedes models, the IAT sensor is integrated into the mass airflow (MAF) sensor. Problems with the MAF sensor can also trigger the P0110 code.
Q7: How do I test the IAT sensor?
A7: You can test the IAT sensor using a multimeter to measure the resistance across the sensor terminals. Refer to your vehicle’s service manual for the correct resistance values at different temperatures.
Q8: Can a dirty air filter cause the P0110 code?
A8: Yes, a severely dirty or clogged air filter can restrict airflow and affect the IAT sensor readings, leading to the P0110 code.
Q9: Is the P0110 code related to emissions?
A9: Yes, an improper air-fuel mixture caused by incorrect IAT sensor readings can lead to increased emissions, which may cause your vehicle to fail an emissions test.
Q10: What tools do I need to diagnose the P0110 code?
A10: To diagnose the P0110 code, you will need an OBD-II scanner, a multimeter, a wiring diagram, a socket set and wrenches, contact cleaner, and shop rags.
By addressing these frequently asked questions, you can gain a better understanding of the P0110 code and how to resolve it on your Mercedes.