**2006 Mercedes C230 Window Regulator: Your Complete Guide**
Is your 2006 Mercedes C230 window acting up? The 2006 Mercedes C230 window regulator is a common culprit behind issues like slow window movement, clicking noises, or a window that simply won’t budge. Fortunately, CARDIAGTECH.NET provides the tools and expert information you need to tackle this repair yourself, saving you time and money. Investing in quality tools from CARDIAGTECH.NET ensures a smooth repair process and long-lasting results, restoring your window to perfect working order. Explore our selection of auto repair tools, power window repair solutions, and replacement window motors to get your Mercedes back in top shape.
1. Understanding the 2006 Mercedes C230 Window Regulator
The window regulator in your 2006 Mercedes C230 is a critical component responsible for the smooth operation of your power windows. It’s a mechanical assembly that uses a motor to raise and lower the window glass. Over time, these regulators can wear out or break down, leading to a variety of frustrating window problems. Let’s delve into the specifics of this vital part.
1.1. What is a Window Regulator?
The window regulator is the mechanism inside your car door that controls the movement of the window. It typically consists of a motor, cables, pulleys, and a track system. When you press the window switch, the motor activates, turning the cables and pulleys, which then move the window glass up or down along the track.
1.2. Common Symptoms of a Failing Window Regulator
Recognizing the signs of a failing window regulator can save you from further damage and inconvenience. Here are some common symptoms:
- Slow or Jerky Window Movement: The window moves sluggishly or in an uneven, jerky manner.
- Clicking or Grinding Noises: Unusual sounds coming from inside the door when operating the window.
- Window Falling into the Door: The window suddenly drops down into the door cavity.
- Window Stuck in One Position: The window refuses to move, either up or down.
- Motor Runs But Window Doesn’t Move: You can hear the motor working, but the window remains stationary.
1.3. Why Do Window Regulators Fail?
Several factors can contribute to the failure of a window regulator:
- Wear and Tear: Over time, the moving parts of the regulator can wear out due to friction and constant use.
- Cable Damage: The cables that drive the window can stretch, fray, or break.
- Motor Failure: The electric motor can burn out or become weak.
- Corrosion: Moisture and rust can damage the regulator components.
- Debris Accumulation: Dirt and debris can clog the tracks and hinder smooth operation.
1.4. OEM vs. Aftermarket Window Regulators
When replacing your window regulator, you’ll have the option of choosing between an Original Equipment Manufacturer (OEM) part and an aftermarket part. Here’s a quick comparison:
| Feature | OEM Window Regulator | Aftermarket Window Regulator |
|---|---|---|
| Manufacturer | Made by the same company that manufactured the original part for your Mercedes C230. | Made by a third-party manufacturer. |
| Quality | Generally considered to be of higher quality and more reliable. | Quality can vary widely depending on the manufacturer. |
| Fit | Designed to fit perfectly and function exactly like the original part. | May require some modification to fit properly. |
| Price | Typically more expensive than aftermarket parts. | Usually more affordable than OEM parts. |
| Warranty | Often comes with a warranty from the manufacturer. | May or may not come with a warranty. |
| Recommendation | If you want the best possible performance and reliability, an OEM window regulator is the way to go. However, if you’re on a tight budget, an aftermarket part can be a viable option, just be sure to choose a reputable brand. Consider brands like Dorman, TYC, or ACI, known for their quality aftermarket parts. | If you want to save money, an aftermarket window regulator can be a choice. However, be sure to research the brand and read reviews before making a purchase. Consider brands like Dorman, TYC, or ACI, known for their aftermarket parts. Also, CARDIAGTECH.NET provides quality options to help you choose. |
2. Tools and Parts Needed for the Replacement
Before you begin the replacement process, it’s essential to gather all the necessary tools and parts. Having everything on hand will make the job go much smoother and prevent unnecessary delays. CARDIAGTECH.NET offers a wide range of high-quality tools specifically designed for automotive repairs.
2.1. Essential Tools
- Socket Set: A set of sockets in various sizes to remove bolts and nuts.
- Ratchet: For turning sockets and loosening or tightening fasteners.
- Torx Bit Set: Torx bits are required for many of the screws and bolts used in Mercedes vehicles.
- Screwdrivers: Both flathead and Phillips head screwdrivers will be needed.
- Drill: To drill out the rivets holding the old regulator in place.
- Drill Bits: Various sizes, including one suitable for drilling out rivets (approximately 1/8″ or 3/16″).
- Rivet Gun: To install the new rivets and secure the new regulator.
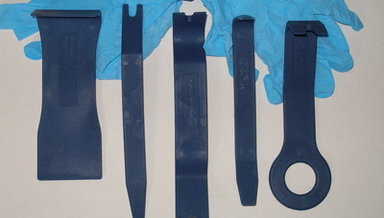
- Panel Removal Tool: To safely remove the door panel without damaging it.
- Pliers: For gripping and manipulating small parts.
- Multimeter: To test electrical connections and ensure proper voltage.
- Safety Glasses: To protect your eyes from debris.
- Work Gloves: To protect your hands and improve grip.
2.2. Required Parts
- New Window Regulator: The most important part, make sure it’s the correct one for your 2006 Mercedes C230.
- Rivets: New rivets to secure the regulator to the door frame.
- Door Panel Clips: These often break during removal, so it’s good to have replacements on hand.
- Silicone Spray Lubricant: To lubricate the window tracks and ensure smooth operation.
2.3. Optional But Recommended Tools
- Suction Cup Handle: To hold the window in place while working on the regulator.
- Magnetic Parts Tray: To keep small parts organized and prevent them from getting lost.
- Work Light: To provide better visibility inside the door.
- Car Repair Manual: A repair manual specific to your 2006 Mercedes C230 can provide valuable information and diagrams.
2.4. Where to Buy Tools and Parts
CARDIAGTECH.NET is your one-stop shop for all the tools and parts you need for your 2006 Mercedes C230 window regulator replacement. We offer a wide selection of high-quality tools, OEM and aftermarket parts, and expert advice to help you get the job done right. Other options include:
- Local Auto Parts Stores: NAPA, AutoZone, and Advance Auto Parts are popular choices.
- Online Retailers: Amazon and eBay are convenient for ordering parts online.
- Mercedes-Benz Dealership: For OEM parts, the dealership is your best bet.
3. Step-by-Step Guide to Replacing the Window Regulator
Now that you have all the necessary tools and parts, let’s get to the actual replacement process. This step-by-step guide will walk you through each stage, from removing the door panel to installing the new regulator.
Disclaimer: This guide is for informational purposes only. If you’re not comfortable performing this repair yourself, it’s best to take your car to a qualified mechanic.
3.1. Safety First
Before you start, disconnect the negative battery cable to prevent any electrical accidents. This is especially important because you’ll be working around the airbag system.
3.2. Removing the Door Panel
-
Remove the trim pieces: Use a panel removal tool to carefully pry off the trim piece covering the door pull handle and the SRS airbag cover.
-
Remove the screws: Remove the three Torx screws securing the door panel. Two are located behind the door pull handle trim, and one is behind the SRS airbag cover.
-
Remove the door latch cover: Remove the screw securing the door latch cover at the rear of the door and remove the cover.
-
Remove the door lock knob: Unscrew and remove the door lock knob from the actuator rod.
-
Pry off the door panel: Use a panel removal tool or a screwdriver wrapped in tape to gently pry the door panel away from the door, starting at the bottom. There are usually several clips holding the panel in place.
-
Lift and remove the panel: Once all the clips are disengaged, lift the door panel slightly to clear the door lock actuator rod and the top of the door frame.
-
Disconnect the door latch cable: Disconnect the door latch cable from the handle. It helps to pull the cable out of the bracket near the handle before removing the cable end from the handle.
-
Remove the power window switch: Slide the white latch up (or down) and the switch will pop loose. Feed it through its hole, leaving the harness attached.
-
Remove the courtesy light: Push down on the courtesy light from the inside of the door panel or use a screwdriver to pop it out from the bottom. Disconnect the connector once the light assembly is out.
-
Carefully remove the door panel: Ensure that there is nothing still connected before pulling the panel away completely.
3.3. Accessing the Window Regulator
- Remove the airbag (if necessary): Drill out the three rivets holding the airbag to the door frame. Support the airbag assembly so it’s not hanging by the wire harness.
- Remove the door pull handle support bracket: Drill out the four rivets attaching the door pull handle support bracket to the door frame and remove the bracket.
- Remove the door speaker: Disconnect the door speaker connector, remove the three screws holding the speaker, and remove the speaker.
- Peel back the foam insulation pad: Carefully peel off the foam insulation pad from the door frame, pulling the airbag and the power window switch through the foam. You don’t need to remove the foam completely; just peel it back enough to access the window regulator rivets.
3.4. Removing the Old Window Regulator
- Secure the window: If possible, move the window to the full up position and secure it with a suction cup to prevent it from falling. If you can’t move the window, use extreme caution when drilling out the rivets.
- Loosen the window from the regulator: Manually reposition and secure the window to access the screws securing the bottom of the window to the window regulator assembly. Loosen the two screws.
- Separate the window from the regulator: Slide the window up and away from the regulator assembly until it’s in the fully closed position and secure it. It may take some force to separate the window from the rubber pads on the regulator assembly.
- Remove the zip tie: Remove the zip tie near the top of the door frame securing the regulator cable.
- Drill out the rivets: Drill out the six rivets attaching the regulator assembly to the door frame.
- Detach the window motor connector: Disconnect the electrical connector from the window motor.
- Remove the regulator: Remove the window regulator assembly from the door. It may take some maneuvering, but it can be removed in one piece.
3.5. Installing the New Window Regulator
- Transfer the motor: Remove the three screws from the power window motor and reinstall the motor on the new regulator.
- Position the new regulator: Carefully position the new window regulator assembly inside the door, aligning it with the rivet holes.
- Attach the regulator: Use a rivet gun to install new rivets and secure the regulator to the door frame.
- Connect the motor: Reconnect the electrical connector to the window motor.
- Reattach the window: Slide the window down and into the regulator assembly, aligning the screw holes. Tighten the screws to secure the window to the regulator.
- Test the window: Connect the battery and test the window to make sure it moves up and down smoothly.
3.6. Reassembling the Door
- Reattach the foam insulation pad: Carefully reattach the foam insulation pad to the door frame.
- Reinstall the door speaker: Reinstall the door speaker, connecting the speaker connector and securing it with the three screws.
- Reinstall the door pull handle support bracket: Reinstall the door pull handle support bracket and secure it with new rivets.
- Reinstall the airbag (if removed): Reinstall the airbag and secure it with new rivets.
- Reattach the door panel: Carefully align the door panel with the door frame and push it into place, engaging all the clips.
- Reinstall the screws: Reinstall the three Torx screws securing the door panel.
- Reinstall the door latch cover: Reinstall the door latch cover and secure it with the screw.
- Reinstall the door lock knob: Screw the door lock knob back onto the actuator rod.
- Reinstall the power window switch: Feed the power window switch through its hole and slide the white latch to secure it.
- Reinstall the courtesy light: Reinstall the courtesy light and connect the connector.
- Reinstall the door latch cable: Reconnect the door latch cable to the handle.
- Reinstall the trim pieces: Snap the trim piece covering the door pull handle and the SRS airbag cover back into place.
3.7. Final Steps
- Reconnect the battery: Reconnect the negative battery cable.
- Test all functions: Test the power window, door lock, and courtesy light to make sure everything is working properly.
- Clean up: Remove any tools or debris from the work area.
Congratulations! You’ve successfully replaced the window regulator in your 2006 Mercedes C230.
4. Troubleshooting Common Issues
Even with careful installation, you may encounter some issues after replacing the window regulator. Here are some common problems and how to troubleshoot them.
4.1. Window Still Doesn’t Move
- Check the Fuse: The power window circuit has its own fuse. Check the fuse box (usually located under the dashboard or in the engine compartment) and replace any blown fuses.
- Check the Wiring: Make sure all the electrical connections are secure and that there are no damaged wires. Use a multimeter to test for voltage at the motor connector.
- Check the Motor: The window motor itself may be faulty. You can test it by applying direct power to the motor terminals. If the motor doesn’t run, it needs to be replaced.
- Check the Regulator: Double-check that the regulator is properly installed and that the window is securely attached to the regulator mechanism.
4.2. Window Moves Slowly
- Lubricate the Tracks: Apply silicone spray lubricant to the window tracks to reduce friction.
- Check for Obstructions: Make sure there are no obstructions in the window tracks that could be hindering movement.
- Check the Regulator: The regulator may be binding or have damaged components.
4.3. Window Makes Noise
- Lubricate the Tracks: As with slow movement, lubricating the window tracks can often eliminate noises.
- Check for Loose Parts: Make sure all the screws and rivets are tight and that there are no loose parts in the door.
- Check the Regulator: The regulator may have worn or damaged components that are causing the noise.
4.4. Window Goes Up But Not Down (or Vice Versa)
- Check the Switch: The window switch may be faulty. Try using the switch on the other door to see if the problem persists. If the window works with the other switch, the original switch needs to be replaced.
- Check the Wiring: There may be a broken wire in the circuit that controls the window movement in one direction.
5. Maintaining Your Window Regulator
To prolong the life of your new window regulator and prevent future problems, here are some maintenance tips:
- Lubricate the Window Tracks: Regularly lubricate the window tracks with silicone spray lubricant to keep them moving smoothly.
- Keep the Tracks Clean: Clean the window tracks periodically to remove dirt and debris.
- Avoid Overusing the Windows: Avoid repeatedly raising and lowering the windows in short intervals, as this can put extra strain on the regulator.
- Address Problems Promptly: If you notice any signs of a failing window regulator, address the problem promptly to prevent further damage.
6. The Importance of Using Quality Tools
Using high-quality tools is crucial for any automotive repair, and the 2006 Mercedes C230 window regulator replacement is no exception. Quality tools not only make the job easier but also ensure a safer and more reliable repair.
6.1. Precision and Accuracy
Quality tools are designed with precision and accuracy in mind. This means they fit fasteners properly, reducing the risk of stripping bolts or damaging components.
6.2. Durability and Longevity
High-quality tools are made from durable materials that can withstand the rigors of automotive repair. They’re built to last, saving you money in the long run by reducing the need for frequent replacements.
6.3. Safety
Quality tools are designed with safety in mind. They provide a secure grip and reduce the risk of slipping or breaking, which can cause injuries.
6.4. Efficiency
Quality tools can make the job go much faster and easier. They’re designed to be ergonomic and comfortable to use, reducing fatigue and improving efficiency.
6.5. Protecting Your Vehicle
Using the right tools can help protect your vehicle from damage. For example, using a panel removal tool can prevent you from scratching or denting the door panel.
6.6. CARDIAGTECH.NET: Your Source for Quality Tools
CARDIAGTECH.NET is committed to providing our customers with the highest quality tools for automotive repair. We offer a wide selection of tools from trusted brands, all at competitive prices. Whether you’re a professional mechanic or a DIY enthusiast, we have the tools you need to get the job done right.
7. Why Choose CARDIAGTECH.NET for Your Automotive Needs?
At CARDIAGTECH.NET, we understand the challenges that automotive technicians face every day. That’s why we’re dedicated to providing you with the best tools, equipment, and support to help you succeed. Here are just a few reasons why you should choose CARDIAGTECH.NET for your automotive needs.
7.1. Wide Selection of Products
We offer a wide selection of tools, equipment, and parts for all makes and models of vehicles. Whether you need a window regulator, a socket set, or a diagnostic scanner, we have you covered.
7.2. High-Quality Products
We only sell products from trusted brands that are known for their quality and reliability. We stand behind our products and offer a satisfaction guarantee.
7.3. Competitive Prices
We offer competitive prices on all of our products. We also offer discounts and promotions to help you save even more money.
7.4. Expert Advice
Our team of experts is always available to answer your questions and provide you with advice on the best tools and equipment for your needs. We can help you troubleshoot problems, find the right parts, and get the job done right.
7.5. Excellent Customer Service
We are committed to providing our customers with excellent customer service. We are always available to answer your questions and resolve any issues you may have.
7.6. Convenient Online Shopping
Our website is easy to use and allows you to shop for tools and equipment from the comfort of your own home. We offer fast and reliable shipping to get you the products you need quickly.
8. Real-World Benefits of a Properly Functioning Window
A properly functioning window in your 2006 Mercedes C230 isn’t just a matter of convenience; it offers several real-world benefits that enhance your driving experience and safety.
8.1. Enhanced Safety
A working window allows you to quickly and easily communicate with others, whether it’s paying a toll, asking for directions, or responding to an emergency. It also provides a clear view of your surroundings, which is essential for safe driving.
8.2. Improved Comfort
A functioning window allows you to control the airflow in your vehicle, keeping you cool in the summer and warm in the winter. It also helps to reduce wind noise and turbulence, making for a more comfortable ride.
8.3. Increased Security
A working window provides an extra layer of security for your vehicle. It prevents unauthorized access and protects your belongings from theft.
8.4. Convenience
A working window makes everyday tasks like going through drive-throughs, parking, and retrieving tickets much easier.
8.5. Maintaining Vehicle Value
A properly functioning window is a sign that your vehicle is well-maintained, which can increase its value when you decide to sell or trade it in.
9. Call to Action: Get Your Window Regulator Today!
Don’t let a faulty window regulator ruin your driving experience. Contact CARDIAGTECH.NET today to get the tools and parts you need to fix your 2006 Mercedes C230 window regulator.
Address: 276 Reock St, City of Orange, NJ 07050, United States
Whatsapp: +1 (641) 206-8880
Website: CARDIAGTECH.NET
Our experts are standing by to answer your questions and help you find the right products for your needs. We offer fast and reliable shipping, so you can get your car back on the road in no time.
Don’t wait, call us today and experience the CARDIAGTECH.NET difference!
10. Frequently Asked Questions (FAQ)
Here are some frequently asked questions about the 2006 Mercedes C230 window regulator:
10.1. How much does it cost to replace a window regulator in a 2006 Mercedes C230?
The cost can vary depending on whether you do it yourself or hire a mechanic. The regulator itself can cost between $50 and $200, while labor costs can add another $100 to $300.
10.2. Can I replace a window regulator myself?
Yes, if you have some basic mechanical skills and the right tools, you can replace a window regulator yourself. However, it’s important to follow the instructions carefully and take safety precautions.
10.3. How long does it take to replace a window regulator?
The replacement process typically takes between one and three hours, depending on your experience and the complexity of the repair.
10.4. What tools do I need to replace a window regulator?
You’ll need a socket set, ratchet, Torx bit set, screwdrivers, a drill, drill bits, a rivet gun, a panel removal tool, pliers, and safety glasses.
10.5. Where can I buy a new window regulator?
You can buy a new window regulator from CARDIAGTECH.NET, local auto parts stores, online retailers, or a Mercedes-Benz dealership.
10.6. What are the symptoms of a bad window regulator?
Common symptoms include slow or jerky window movement, clicking or grinding noises, the window falling into the door, the window being stuck in one position, or the motor running but the window not moving.
10.7. How can I tell if my window regulator is broken?
If you experience any of the symptoms listed above, it’s likely that your window regulator is broken. You can also visually inspect the regulator to see if there are any damaged components.
10.8. Is it safe to drive with a broken window regulator?
It’s generally safe to drive with a broken window regulator, but it can be inconvenient and may compromise your security. It’s best to get it fixed as soon as possible.
10.9. Can I fix a window regulator instead of replacing it?
In some cases, you may be able to repair a window regulator by replacing individual components like cables or pulleys. However, it’s often more cost-effective and reliable to replace the entire regulator.
10.10. How can I prevent my window regulator from breaking?
You can prolong the life of your window regulator by lubricating the window tracks regularly, keeping the tracks clean, avoiding overusing the windows, and addressing problems promptly.
By following this guide, you can successfully replace the window regulator in your 2006 Mercedes C230 and enjoy the benefits of a properly functioning window. Remember to use high-quality tools from CARDIAGTECH.NET and take your time to ensure a safe and reliable repair.