Mercedes Benz Sprinter Windows: Your Ultimate Guide
Mercedes Benz Sprinter windows are more than just glass; they’re a crucial element of your van’s functionality and comfort. At CARDIAGTECH.NET, we understand this and offer top-quality solutions to enhance your vehicle. Discover how upgrading or repairing your windows can transform your Sprinter experience with our expert guidance.
1. Understanding Mercedes Benz Sprinter Windows
Mercedes Benz Sprinter windows are designed to provide visibility, ventilation, and security for your van. Whether you’re converting your Sprinter into a camper or using it for commercial purposes, the right windows can significantly enhance its functionality.
1.1. Types of Sprinter Windows
There are several types of windows available for Mercedes Benz Sprinters, each serving different purposes:
- Sliding Windows: These offer excellent ventilation and easy access.
- Fixed Windows: Providing a clear view and added security, these are ideal for areas where ventilation isn’t a primary concern.
- Awning Windows: Hinged at the top, these windows provide ventilation even during light rain.
- Rear Windows: Essential for visibility when reversing or maneuvering.
1.2. OEM vs. Aftermarket Windows
When it comes to replacing or upgrading your Sprinter windows, you have two main options: Original Equipment Manufacturer (OEM) windows and aftermarket windows.
- OEM Windows: These are made by the same manufacturer as the original windows in your Sprinter. They guarantee a perfect fit and maintain the vehicle’s original aesthetics.
- Aftermarket Windows: These are produced by third-party manufacturers and can offer cost savings. However, quality can vary, so it’s essential to choose reputable brands.
2. Key Considerations When Choosing Sprinter Windows
Selecting the right windows for your Mercedes Benz Sprinter involves several factors. Here’s what you need to consider:
2.1. Size and Placement
The size and placement of your windows will depend on your specific needs and the layout of your van. Consider the following:
- Ventilation Needs: Sliding windows are great for areas where you need fresh air.
- Privacy Concerns: Tinted or privacy windows can enhance security and comfort.
- Layout of Your Van: Ensure the windows fit well with your interior design and furniture placement.
2.2. Material and Durability
The material used in your windows affects their durability and performance. Common materials include:
- Glass: Offers excellent clarity and scratch resistance.
- Acrylic: Lighter and more impact-resistant than glass, but can scratch more easily.
- Polycarbonate: Extremely durable and impact-resistant, making it ideal for off-road adventures.
2.3. Tinting and Glazing
Tinting and glazing can significantly impact the comfort and energy efficiency of your van.
- Tinting: Reduces glare and heat, protecting your interior from UV damage.
- Glazing: Provides insulation, keeping your van cooler in the summer and warmer in the winter.
3. The Benefits of Upgrading to Mercedes Benz Sprinter OEM Sliding Windows
Upgrading to Mercedes Benz Sprinter OEM sliding windows offers several advantages, particularly for those looking to enhance ventilation and accessibility.
3.1. Enhanced Ventilation
Sliding windows allow you to control the amount of fresh air entering your van, making them ideal for camping and travel.
3.2. Easy Access
These windows provide convenient access to the outside, making them useful for loading and unloading cargo or enjoying scenic views.
3.3. OEM Quality and Fit
OEM windows ensure a perfect fit and maintain the original aesthetics of your Sprinter, preserving its value and appearance.
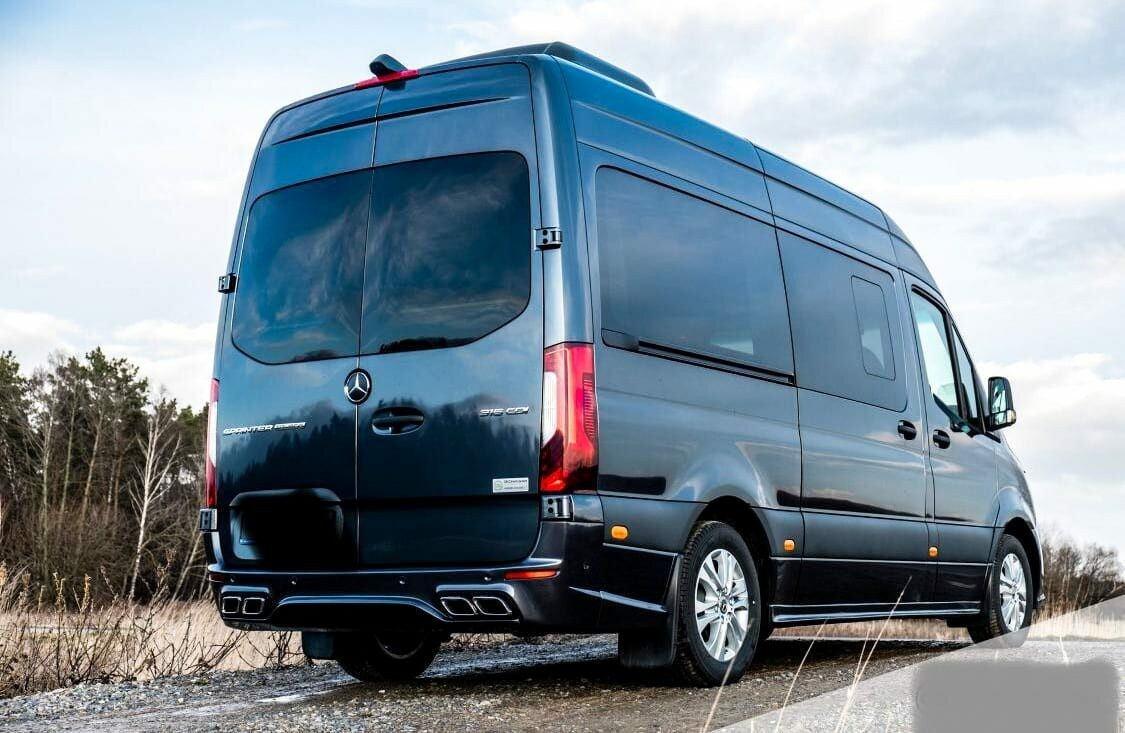
Mercedes Sprinter Van Conversion
The image shows a Mercedes Sprinter van conversion, highlighting the integration of aftermarket components to enhance its utility and appearance.
4. Compatibility of Mercedes Sprinter OEM Sliding Door Windows
Mercedes Sprinter OEM sliding door windows are designed to fit a range of models and years, making them a versatile upgrade option.
4.1. Model Years
These windows are typically compatible with Mercedes-Benz Sprinters from 2007 onwards, including both the NCV3 and VS30 models.
4.2. Wheelbase Compatibility
Mercedes Sprinter OEM sliding windows fit both the 144″ and 170″ wheelbase models, ensuring a seamless integration regardless of your van’s size.
4.3. Vans Without Original Windows
Even if your Sprinter didn’t originally come with side windows, you can still install these OEM sliding windows. However, professional installation is recommended, as it involves cutting out the window blank.
5. Installation Guide for Mercedes Benz Sprinter Windows
Installing Mercedes Benz Sprinter windows can be a DIY project or a professional job. Here’s a step-by-step guide to help you through the process:
5.1. Tools and Materials
Before you begin, gather the necessary tools and materials:
- New Mercedes Benz Sprinter window
- SikaFlex P2G Urethane Automotive Window Adhesive & Primer Kit
- Primer base
- Trim-Lok Edge Molding
- Wire cutter or Equalizer Window Cut-Out Set (for replacing existing windows)
- CRL Adhesive Cleaner, Acetone, Goo-Gone, and WD-40 (for cleaning)
- Body Saw, Air Saw, or One-Handed Reciprocating Saw (for vans without windows)
- Drill
- File
- Securing tape/masking/painters’ tape
- Caulking gun (12:1 Thrust Ratio or above)
5.2. Step-by-Step Installation
Follow these steps for a successful window installation:
5.2.1. Replacing an Existing OEM Window
- Remove the Old Window: If you’re replacing an existing window, carefully cut through the urethane bond using a wire cutter or Equalizer Window Cut-Out Set. Professional removal is recommended.
- Clean the Surface: Cut and shave down the original urethane as flat as possible. Clean the area with CRL Adhesive Cleaner, Acetone, Goo-Gone, and WD-40. After cleaning, wash the wall with soap and water or rubbing alcohol.
5.2.2. Adding a Window to a Van Without Windows
- Prepare the Area: On the interior of the van, locate the area where the inner metal ends. Drill a hole large enough to accommodate the blade of your cutting tool within the single sheet metal section.
- Cut the Hole: Use a Body Saw, Air Saw, or One-Handed Reciprocating Saw to cut along the OEM stamp line. Cut sides and bottom first, leaving the top cut for last to prevent the sheet metal from bending.
- Smooth the Edges: Once the cut is complete, file any rough edges or high points to smooth the cut line.
- Prime the Edge: Prime the raw metal edge before installing Trim-Lok Edge Molding for added protection.
5.2.3. Installing Trim-Lok Edge Molding (Optional)
- Measure and Cut: Measure the edges of the cut-out and cut the Trim-Lok Edge Molding to the appropriate length.
- Install the Molding: Press the Trim-Lok Edge Molding onto the cut edges, ensuring it covers both the inner and outer sheet metal edges.
5.2.4. Urethane Bonding
- Apply Primer: Brush the urethane primer onto the outer body of your van, close to the opening, leaving a 1/2″ gap from the trim or hole. Allow the primer to dry for about 10 minutes.
- Apply Urethane: Using a caulking gun with a 12:1 Thrust Ratio or higher, apply a consistent bead of urethane around the perimeter of the window opening. Start a few inches down from the top rear corner to avoid joints on the top or front of the window.
5.2.5. Installing the Window
- Position the Window: With two people, align the bottom edge of the window with the body line, holding the top at a slight angle.
- Press the Window: Tilt the window up and press it into the urethane. Ensure the window is flush with the outer body of the van.
- Secure the Window: Use window securing tape to tape each corner with 3-4 strips, holding the glass in place.
5.3. Post-Installation Care
- Set Time: Allow 3-6 hours of set time before driving. Keep all windows closed and use A/C with recirculate during the first 24 hours.
- Washing: Wait at least 3 days before washing the vehicle. Avoid using car wash soaps with alcohol, as they can deteriorate the urethane seals.
6. Common Issues and Troubleshooting
Even with careful installation, some issues may arise. Here are common problems and how to address them:
6.1. Leaks
Leaks can occur if the urethane bead is not consistent or if there are gaps in the seal.
- Troubleshooting: Identify the source of the leak and apply additional urethane to fill any gaps. Ensure the surface is clean and dry before applying more urethane.
6.2. Condensation
Condensation can form on the inside of the windows, especially in humid conditions.
- Troubleshooting: Improve ventilation by opening the sliding windows or using a dehumidifier inside the van.
6.3. Cracks and Damage
Cracks and damage can occur due to impacts or stress.
- Troubleshooting: Replace the damaged window as soon as possible to prevent further damage and maintain safety.
7. Maintaining Your Mercedes Benz Sprinter Windows
Proper maintenance can extend the life of your Mercedes Benz Sprinter windows and keep them looking their best.
7.1. Regular Cleaning
Clean your windows regularly with a mild soap and water solution. Avoid using abrasive cleaners that can scratch the glass or acrylic.
7.2. Inspecting Seals
Inspect the window seals regularly for signs of wear and tear. Replace any damaged seals to prevent leaks.
7.3. Protecting from Damage
Protect your windows from impacts by avoiding rough roads and securing cargo inside the van.
8. Why Choose CARDIAGTECH.NET for Your Sprinter Window Needs?
At CARDIAGTECH.NET, we offer a wide range of Mercedes Benz Sprinter windows and accessories to meet your needs. Here’s why you should choose us:
8.1. High-Quality Products
We source our windows from reputable manufacturers, ensuring you receive high-quality products that are built to last.
8.2. Expert Advice
Our team of experts can provide guidance and support to help you choose the right windows for your Sprinter.
8.3. Comprehensive Support
We offer comprehensive support, including installation guides, troubleshooting tips, and customer service to assist you with any issues.
9. Customer Testimonials
Here’s what our customers are saying about our Mercedes Benz Sprinter windows:
- “The OEM sliding windows from CARDIAGTECH.NET were a perfect fit for my Sprinter. The installation was straightforward, and the ventilation is fantastic!” – John S.
- “I was impressed with the quality of the aftermarket windows I purchased from CARDIAGTECH.NET. They look great and provide excellent insulation.” – Maria K.
- “The customer service at CARDIAGTECH.NET is outstanding. They helped me choose the right windows for my van and provided excellent support throughout the installation process.” – David L.
10. The Future of Sprinter Van Customization
The customization of Sprinter vans is an evolving trend, with more owners looking to personalize their vehicles for both recreational and commercial purposes.
10.1. Emerging Trends
- Smart Windows: Windows with integrated technology, such as automatic tinting and temperature control.
- Modular Designs: Windows that can be easily swapped and reconfigured to suit changing needs.
- Sustainable Materials: Eco-friendly window materials that reduce environmental impact.
10.2. The Role of CARDIAGTECH.NET
CARDIAGTECH.NET is committed to staying at the forefront of Sprinter van customization, offering innovative products and solutions to meet the evolving needs of our customers.
11. Optimizing Your Sprinter for Different Uses
Depending on how you use your Sprinter, the right windows can make a significant difference.
11.1. Camper Van Conversions
For camper van conversions, consider windows that offer ventilation, privacy, and insulation. Sliding windows, tinted windows, and insulated glazing are excellent choices.
11.2. Commercial Vans
For commercial vans, prioritize windows that provide security and durability. Fixed windows and polycarbonate materials are ideal for protecting cargo and withstanding wear and tear.
11.3. Family Vans
For family vans, focus on windows that enhance comfort and visibility. Large windows, tinted windows, and awning windows can create a pleasant and enjoyable travel experience.
12. Mercedes Benz Sprinter Windows and Safety
Safety is a paramount consideration when choosing and installing Sprinter windows.
12.1. Importance of Proper Installation
Proper installation is crucial for ensuring the windows function correctly and provide adequate protection in the event of an accident.
12.2. Compliance with Safety Standards
Ensure that the windows you choose comply with all relevant safety standards and regulations.
12.3. Maintaining Visibility
Keep your windows clean and free of obstructions to maintain optimal visibility and ensure safe driving.
13. Choosing the Right Adhesive and Sealant
The adhesive and sealant you use for installing your Sprinter windows are critical for ensuring a watertight and secure fit.
13.1. Types of Adhesives
- Urethane Adhesives: These provide a strong and flexible bond, ideal for automotive window installations.
- Silicone Sealants: These offer excellent water resistance and flexibility, but may not provide as strong a bond as urethane adhesives.
13.2. Application Tips
- Clean Surfaces: Ensure the surfaces are clean, dry, and free of contaminants before applying the adhesive.
- Apply Evenly: Apply the adhesive in a consistent bead around the perimeter of the window opening.
- Follow Instructions: Follow the manufacturer’s instructions for proper application and curing times.
14. Environmental Considerations
When choosing Sprinter windows, consider the environmental impact of your choices.
14.1. Energy Efficiency
Opt for windows with insulated glazing to reduce energy consumption and lower your carbon footprint.
14.2. Sustainable Materials
Choose windows made from sustainable materials, such as recycled glass or eco-friendly plastics.
14.3. Responsible Disposal
Dispose of old windows responsibly by recycling them whenever possible.
15. Cost Analysis of Sprinter Window Upgrades
Understanding the costs associated with Sprinter window upgrades can help you make informed decisions.
15.1. Factors Affecting Cost
- Type of Window: Sliding windows and tinted windows typically cost more than fixed windows.
- Material: Glass windows tend to be more expensive than acrylic or polycarbonate windows.
- Installation: Professional installation can add to the overall cost, but ensures a proper fit and finish.
15.2. Budgeting Tips
- Prioritize Needs: Focus on the windows that provide the most value and functionality for your specific needs.
- Shop Around: Compare prices from different suppliers to find the best deals.
- Consider DIY Installation: If you’re comfortable with DIY projects, installing the windows yourself can save on labor costs.
16. Common Mistakes to Avoid During Installation
Avoiding common mistakes during Sprinter window installation can save you time, money, and frustration.
16.1. Not Preparing the Surface Properly
Failing to clean and prime the surface properly can result in poor adhesion and leaks.
16.2. Using the Wrong Adhesive
Using the wrong adhesive can compromise the strength and integrity of the window installation.
16.3. Rushing the Process
Rushing the installation process can lead to mistakes and a subpar finish.
16.4. Ignoring Safety Precautions
Ignoring safety precautions can result in injury and damage.
17. Resources and Further Reading
For more information on Mercedes Benz Sprinter windows, consult these resources:
- Mercedes-Benz Official Website: Provides information on OEM windows and accessories.
- Online Forums: Engage with other Sprinter owners and share experiences.
- Professional Installers: Consult with experienced installers for expert advice and guidance.
18. Contacting CARDIAGTECH.NET for Assistance
If you have any questions or need assistance with your Mercedes Benz Sprinter window project, don’t hesitate to contact us at CARDIAGTECH.NET.
- Address: 276 Reock St, City of Orange, NJ 07050, United States
- WhatsApp: +1 (641) 206-8880
- Website: CARDIAGTECH.NET
Our team is here to help you find the perfect windows for your Sprinter and ensure a successful installation.
19. Frequently Asked Questions (FAQ)
19.1. What is the best type of window for a Mercedes Benz Sprinter camper van conversion?
Sliding windows are often preferred for camper van conversions due to their excellent ventilation and easy access.
19.2. Can I install Sprinter windows myself, or should I hire a professional?
While DIY installation is possible, professional installation is recommended for those without experience to ensure a proper fit and finish.
19.3. How do I clean my Sprinter windows to prevent streaks and smudges?
Use a mild soap and water solution and a microfiber cloth to clean your windows. Avoid using abrasive cleaners that can scratch the surface.
19.4. What is the difference between OEM and aftermarket Sprinter windows?
OEM windows are made by the same manufacturer as the original windows in your Sprinter, while aftermarket windows are produced by third-party manufacturers.
19.5. How can I improve the insulation of my Sprinter windows?
Use insulated glazing or window coverings to improve insulation and reduce heat transfer.
19.6. What should I do if my Sprinter window is leaking?
Identify the source of the leak and apply additional urethane to fill any gaps. Ensure the surface is clean and dry before applying more urethane.
19.7. Are tinted windows legal in all states?
Tinting laws vary by state, so check your local regulations before tinting your Sprinter windows.
19.8. How do I choose the right size window for my Sprinter van?
Measure the available space and consider your ventilation and visibility needs when choosing the right size window.
19.9. Can I install windows on a Sprinter van that didn’t originally come with them?
Yes, but professional installation is recommended, as it involves cutting out the window blank.
19.10. What are the benefits of using Trim-Lok Edge Molding on my Sprinter windows?
Trim-Lok Edge Molding provides a better appearance on the van’s interior by covering the raw cut edge, offering a clean and finished look.
20. Final Thoughts
Choosing and installing the right Mercedes Benz Sprinter windows can significantly enhance the functionality, comfort, and appearance of your van. Whether you’re converting your Sprinter into a camper, using it for commercial purposes, or simply looking to upgrade, CARDIAGTECH.NET has the products and expertise to meet your needs. Contact us today to explore our wide range of Sprinter windows and accessories and take your van to the next level.
Ready to upgrade your Mercedes Benz Sprinter windows? Contact CARDIAGTECH.NET today for expert advice and high-quality products. Address: 276 Reock St, City of Orange, NJ 07050, United States. WhatsApp: +1 (641) 206-8880. Website: CARDIAGTECH.NET. Our team is ready to assist you with all your Sprinter window needs, ensuring a seamless and satisfying experience.