Mercedes CLS Window Problem: Diagnosis And Repair Guide
Mercedes CLS window problems can be frustrating, but understanding the issues and how to address them can save you time and money. This comprehensive guide from CARDIAGTECH.NET will walk you through diagnosing common Mercedes CLS window malfunctions and explore DIY repair options. Learn how to identify the root cause of the problem, from a faulty window regulator to motor issues, and find reliable solutions. Discover the essential tools and equipment needed for successful repairs and explore how CARDIAGTECH.NET can support your repair endeavors with quality automotive tools, diagnostic equipment, and expert advice.
1. Identifying Common Mercedes CLS Window Problems
Mercedes CLS vehicles, known for their elegance and performance, can sometimes experience window malfunctions. Identifying these issues early can prevent more extensive damage and costly repairs. Let’s explore some of the most common window problems encountered in Mercedes CLS models:
1.1 Window Regulator Failure
A frequent culprit behind window troubles is the window regulator. This mechanism is responsible for moving the window up and down smoothly. Over time, the regulator’s cables can fray, the plastic components can break, or the entire assembly can seize. Signs of a failing regulator include:
- Grinding Noises: Unusual sounds when operating the window.
- Slow or Jerky Movement: The window moves erratically or sluggishly.
- Window Slippage: The window slides down on its own.
- Complete Failure: The window stops responding altogether.
1.2 Motor Malfunctions
The window motor provides the power to move the regulator. If the motor fails, the window will not move. Motor issues can arise due to:
- Electrical Problems: Wiring issues or a blown fuse.
- Worn-Out Motor: The motor’s internal components degrade over time.
- Overload: Excessive strain on the motor from a faulty regulator.
1.3 Switch Problems
The window switch controls the window’s movement. A faulty switch can prevent the window from operating correctly. Common switch issues include:
- Non-Responsive Switch: The window does not respond when the switch is activated.
- Intermittent Operation: The window works sometimes but not others.
- Sticking Switch: The switch feels stiff or difficult to move.
1.4 Window Off-Track
Sometimes, the window can come off its track, causing it to become misaligned or stuck. This can be due to:
- Loose Fasteners: Screws or clips that hold the window in place become loose.
- Damaged Tracks: The tracks that guide the window are bent or broken.
- Obstructions: Debris or foreign objects interfere with the window’s movement.
1.5 Electrical Issues
Electrical problems can also affect window operation. These may include:
- Blown Fuses: A fuse that protects the window circuit blows.
- Wiring Problems: Damaged or corroded wires.
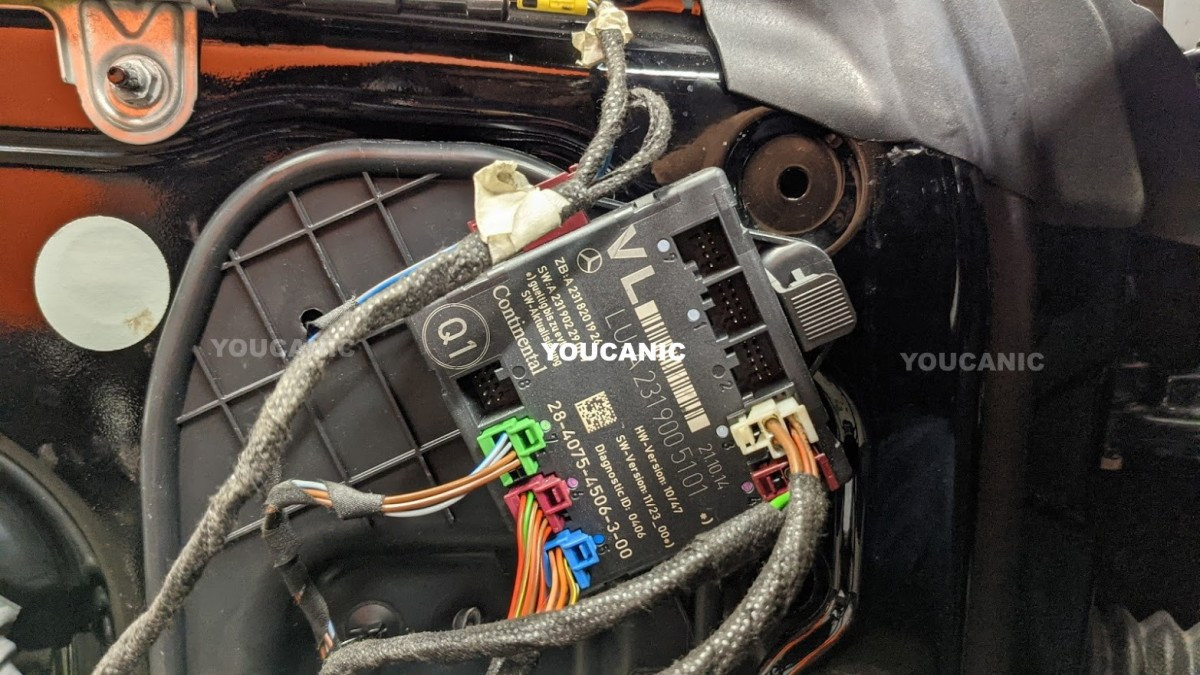
- Faulty Control Module: Issues with the car’s central control unit.
Identifying the specific problem is the first step toward effective repair. Understanding these common issues will help you diagnose the problem accurately and choose the appropriate solution.
2. Tools And Equipment Needed For Mercedes CLS Window Repair
Before diving into the repair process, it’s essential to gather the necessary tools and equipment. Having the right tools will make the job easier, safer, and more efficient. Here’s a comprehensive list of what you’ll need:
2.1 Basic Hand Tools
- Screwdrivers: A set of Phillips and flathead screwdrivers of various sizes.
- Socket Set: Metric socket set with various sizes and extensions.
- Wrenches: Metric wrench set.
- Pliers: Needle-nose pliers, regular pliers, and wire cutters.
- Trim Removal Tools: Plastic trim removal tools to avoid damaging interior panels.
2.2 Specialty Tools
- Torx Bit Set: Torx bits (TX30, TX25, TX20) are commonly used in Mercedes vehicles.
- Multimeter: For testing electrical circuits and components.
- Window Regulator Rivet Tool: If the regulator is riveted in place.
- Wire Stripper/Crimper: For electrical repairs.
2.3 Safety Equipment
- Safety Glasses: To protect your eyes from debris.
- Gloves: To protect your hands from sharp edges and chemicals.
2.4 Diagnostic Tools
- OBD-II Scanner: To read diagnostic trouble codes (DTCs) and identify electrical issues.
- Wiring Diagrams: To understand the electrical system and troubleshoot wiring problems.
2.5 Replacement Parts
- Window Regulator: New or refurbished window regulator assembly.
- Window Motor: Replacement window motor.
- Window Switch: New window switch.
- Fuses: Replacement fuses of the correct amperage.
- Wiring: Extra wiring for repairing damaged circuits.
2.6 Consumables
- Grease: Lithium grease or silicone grease for lubricating moving parts.
- Electrical Tape: For insulating and protecting wires.
- Cable Ties: For securing wires and cables.
Having all these tools and equipment on hand will ensure you’re well-prepared to tackle Mercedes CLS window repairs. Consider investing in high-quality tools from CARDIAGTECH.NET to ensure durability and reliability, making your repair work more efficient and effective.
3. Step-By-Step Guide To Diagnosing The Problem
Diagnosing the exact cause of a Mercedes CLS window problem requires a systematic approach. By following these steps, you can pinpoint the issue and determine the best course of action.
3.1 Initial Inspection
- Observe the Symptoms: Note exactly what happens when you try to operate the window. Does it make any noise? Does it move at all? Is the movement slow or jerky?
- Check All Windows: Determine if the problem is isolated to one window or affects multiple windows. If multiple windows are affected, the issue might be related to a central control unit or power supply.
- Test the Switches: Try operating the window using all the switches (driver’s side, passenger’s side, and rear switches). If the window works with some switches but not others, the switch itself is likely the problem.
3.2 Checking Fuses
- Locate the Fuse Box: Consult your Mercedes CLS owner’s manual to find the location of the fuse box. There are usually fuse boxes in the engine compartment and under the dashboard.
- Identify the Window Fuse: Refer to the fuse box diagram in the owner’s manual to identify the fuse for the power windows.
- Inspect the Fuse: Remove the fuse and visually inspect it. Look for a broken filament inside the fuse.
- Test with a Multimeter: Use a multimeter to test the fuse for continuity. If there is no continuity, the fuse is blown and needs to be replaced.
- Replace the Fuse: Replace the blown fuse with a new fuse of the same amperage. Test the window operation to see if the new fuse resolves the issue.
3.3 Testing the Window Motor
- Access the Window Motor: Remove the door panel to access the window motor. Refer to the door panel removal guide in Section 4.
- Disconnect the Motor: Disconnect the electrical connector from the window motor.
- Test for Power: Use a multimeter to check for power at the connector when the window switch is activated. If there is no power, the problem may be in the wiring or the switch.
- Direct Power Test: If there is power at the connector, directly apply 12V power to the motor using jumper wires. If the motor runs, the issue may be with the car’s wiring or control system. If the motor does not run, the motor is likely faulty and needs to be replaced.
3.4 Inspecting the Window Regulator
- Visual Inspection: With the door panel removed, visually inspect the window regulator. Look for broken cables, damaged plastic parts, or any signs of wear and tear.
- Manual Test: Try to manually move the window up and down. If the regulator is binding or difficult to move, it may be damaged.
- Listen for Noises: Operate the window switch and listen for unusual noises coming from the regulator. Grinding, clicking, or popping sounds can indicate a problem with the regulator mechanism.
3.5 Checking the Window Switch
- Remove the Switch: Carefully remove the window switch from the door panel.
- Inspect the Connector: Check the electrical connector for corrosion or damage.
- Test for Continuity: Use a multimeter to test the switch for continuity. Check that the switch makes proper contact when activated.
- Replace the Switch: If the switch is faulty, replace it with a new switch and test the window operation.
3.6 Using an OBD-II Scanner
- Connect the Scanner: Plug an OBD-II scanner into the OBD-II port of your Mercedes CLS.
- Read Diagnostic Trouble Codes (DTCs): Turn on the ignition and use the scanner to read any stored DTCs.
- Interpret the Codes: Refer to the scanner’s manual or an online database to interpret the DTCs. Common codes related to window problems include those indicating motor faults, switch failures, or communication issues.
- Clear the Codes: After addressing the identified issues, clear the DTCs and retest the system.
By following these diagnostic steps, you can effectively identify the root cause of your Mercedes CLS window problem and take the necessary steps for repair. Accurate diagnosis is crucial for a successful and lasting solution. If you need help locating an OBD-II scanner or other diagnostic tools, CARDIAGTECH.NET offers a wide range of equipment to assist you.
4. Removing And Replacing The Door Panel
Before you can access the window regulator, motor, or other components, you’ll need to remove the door panel. This process requires care to avoid damaging the panel or its components. Follow these steps to safely remove and replace the door panel on your Mercedes CLS.
4.1 Gathering Tools
- Trim removal tools
- Screwdriver set (Phillips and flathead)
- Socket set
- Torx bit set
4.2 Step-By-Step Removal
- Prepare the Door: Ensure the window is fully up, if possible. Turn off the ignition and remove the key to prevent accidental operation of the window.
- Locate and Remove Screws:
- Check for screws located around the door handle, armrest, and along the bottom edge of the door panel.
- Use the appropriate screwdriver or Torx bit to remove these screws. Keep the screws in a safe place for reinstallation.
- Remove Trim Pieces:
- Use a trim removal tool to gently pry off any trim pieces around the door handle, window switch, and door panel edges.
- Insert the trim tool between the trim piece and the door panel, then gently apply pressure to release the clips holding the trim in place.
- Disconnect Electrical Connectors:
- Carefully disconnect any electrical connectors attached to the door panel, such as those for the window switch, door lock, speaker, and ambient lighting.
- Gently squeeze the locking tabs on the connectors and pull them straight out.
- Pry Off the Door Panel:
- Insert a trim removal tool between the door panel and the metal door frame.
- Gently pry around the edges of the door panel to release the clips holding it in place.
- Work your way around the entire perimeter of the door panel until all the clips are released.
- Lift the Door Panel:
- Once all the clips are released, lift the door panel upward to disengage it from the top edge of the door frame.
- Be careful not to damage any wires or components as you lift the panel.
- Remove the Door Panel:
- Carefully detach any remaining wires or cables connected to the door panel.
- Set the door panel aside in a safe place.
4.3 Step-By-Step Replacement
- Prepare the Door Frame: Before reinstalling the door panel, inspect the door frame for any damaged clips or mounting points. Replace any damaged components to ensure a secure fit.
- Reconnect Electrical Connectors:
- Reconnect all the electrical connectors to their corresponding components on the door panel, such as the window switch, door lock, speaker, and ambient lighting.
- Ensure the connectors are fully seated and the locking tabs are engaged.
- Align the Door Panel:
- Align the door panel with the top edge of the door frame.
- Ensure the panel is properly positioned before proceeding.
- Reattach the Door Panel:
- Gently push the door panel onto the door frame, aligning the clips with the mounting holes.
- Apply pressure around the edges of the door panel to snap the clips into place.
- Reinstall Screws:
- Reinstall all the screws that were removed earlier, including those around the door handle, armrest, and along the bottom edge of the door panel.
- Tighten the screws securely, but be careful not to overtighten them.
- Reattach Trim Pieces:
- Reattach any trim pieces that were removed earlier, such as those around the door handle, window switch, and door panel edges.
- Align the trim pieces with their mounting points and gently press them into place until the clips engage.
- Test the Door Functions:
- Test all the door functions, including the power windows, door lock, speaker, and ambient lighting, to ensure they are working properly.
- If any functions are not working, double-check the electrical connections and wiring.
By following these steps carefully, you can safely remove and replace the door panel on your Mercedes CLS. This will give you access to the window regulator and motor, allowing you to proceed with the necessary repairs. CARDIAGTECH.NET offers a variety of trim removal tools and other essential equipment to make this process easier and more efficient.
5. Replacing The Window Regulator
Replacing the window regulator is a common repair for Mercedes CLS window problems. This step-by-step guide will help you through the process.
5.1 Accessing The Regulator
- Remove the Door Panel: Follow the steps in Section 4 to remove the door panel.
- Peel Back the Vapor Barrier: Carefully peel back the plastic vapor barrier behind the door panel. This will expose the window regulator and motor.
5.2 Disconnecting The Motor
- Disconnect the Electrical Connector: Disconnect the electrical connector from the window motor.
- Remove the Motor: Depending on the model, the motor may be attached with screws or bolts. Remove these fasteners and detach the motor from the regulator.
5.3 Removing The Old Regulator
- Secure the Window: Use tape or clamps to secure the window in the raised position. This will prevent it from falling when the regulator is removed.
- Detach the Window from the Regulator:
- Locate the points where the window is attached to the regulator. These may be clips, bolts, or other fasteners.
- Carefully detach the window from the regulator.
- Remove the Regulator Fasteners:
- Locate the bolts or rivets that secure the regulator to the door frame.
- Remove the bolts using a socket set. If the regulator is riveted in place, you’ll need to drill out the rivets using a drill and appropriate-sized drill bit.
- Remove the Regulator:
- Carefully maneuver the old regulator out of the door frame through the access holes.
- Take note of the orientation of the regulator as you remove it, as this will help with installing the new one.
5.4 Installing The New Regulator
- Position the New Regulator:
- Carefully maneuver the new regulator into the door frame through the access holes.
- Align the regulator with the mounting points on the door frame.
- Attach the Regulator:
- Install the bolts or rivets to secure the regulator to the door frame.
- If using rivets, use a rivet tool to install them securely.
- Attach the Window to the Regulator:
- Carefully attach the window to the new regulator at the designated attachment points.
- Ensure the window is securely attached to the regulator.
- Reconnect the Motor:
- Reattach the window motor to the new regulator using the screws or bolts that were removed earlier.
- Reconnect the electrical connector to the window motor.
5.5 Testing And Reassembly
- Test the Window Operation:
- Reconnect the car battery if it was disconnected earlier.
- Test the window operation by using the window switch to raise and lower the window.
- Ensure the window moves smoothly and correctly.
- Reattach the Vapor Barrier:
- Carefully reattach the plastic vapor barrier to the door frame, ensuring it is properly sealed to prevent moisture from entering the interior of the car.
- Reinstall the Door Panel:
- Follow the steps in Section 4 to reinstall the door panel.
- Final Test:
- Perform a final test of the window operation to ensure everything is working correctly.
- Check for any unusual noises or issues.
Replacing the window regulator can be a complex task, but with the right tools and a step-by-step approach, it’s manageable. CARDIAGTECH.NET provides a range of high-quality tools and replacement parts to ensure your repair is successful.
6. Replacing The Window Motor
If the window motor is the culprit, replacing it is a straightforward process. Here’s how to do it:
6.1 Accessing The Motor
- Remove the Door Panel: Follow the steps in Section 4 to remove the door panel and access the window motor.
- Peel Back the Vapor Barrier: Carefully peel back the plastic vapor barrier to expose the window motor.
6.2 Disconnecting The Old Motor
- Disconnect the Electrical Connector: Disconnect the electrical connector from the window motor.
- Remove the Motor Fasteners: Locate the screws or bolts that secure the motor to the regulator. Remove these fasteners.
- Detach the Motor: Carefully detach the motor from the regulator.
6.3 Installing The New Motor
- Position the New Motor: Align the new motor with the mounting points on the regulator.
- Attach the Motor: Secure the motor to the regulator using the screws or bolts that were removed earlier.
- Reconnect the Electrical Connector: Reconnect the electrical connector to the window motor.
6.4 Testing And Reassembly
- Test the Window Operation:
- Reconnect the car battery if it was disconnected earlier.
- Test the window operation by using the window switch to raise and lower the window.
- Ensure the window moves smoothly and correctly.
- Reattach the Vapor Barrier:
- Carefully reattach the plastic vapor barrier to the door frame, ensuring it is properly sealed to prevent moisture from entering the interior of the car.
- Reinstall the Door Panel:
- Follow the steps in Section 4 to reinstall the door panel.
- Final Test:
- Perform a final test of the window operation to ensure everything is working correctly.
- Check for any unusual noises or issues.
Replacing the window motor is a relatively simple task, and with the right tools, you can have your Mercedes CLS window working smoothly again. CARDIAGTECH.NET offers a variety of high-quality window motors and tools to assist with your repair.
7. Fixing Window Switch Problems
A malfunctioning window switch can prevent the window from operating correctly. Here’s how to troubleshoot and fix switch problems:
7.1 Accessing The Switch
- Remove the Door Panel: Follow the steps in Section 4 to remove the door panel and access the window switch.
- Remove the Switch Panel: Depending on the model, the window switch may be part of a larger switch panel. Use a trim removal tool to carefully pry the switch panel from the door panel.
7.2 Inspecting The Switch
- Disconnect the Electrical Connector: Disconnect the electrical connector from the window switch.
- Inspect the Connector: Check the connector for corrosion or damage. Clean the connector with electrical contact cleaner if necessary.
- Test the Switch: Use a multimeter to test the switch for continuity. Check that the switch makes proper contact when activated.
7.3 Replacing The Switch
- Remove the Old Switch: If the switch is faulty, carefully remove it from the switch panel.
- Install the New Switch: Install the new switch into the switch panel, ensuring it is properly seated.
- Reconnect the Electrical Connector: Reconnect the electrical connector to the window switch.
7.4 Testing And Reassembly
- Test the Window Operation:
- Reconnect the car battery if it was disconnected earlier.
- Test the window operation by using the window switch to raise and lower the window.
- Ensure the window moves smoothly and correctly.
- Reinstall the Switch Panel:
- Reinstall the switch panel into the door panel, ensuring it is properly seated.
- Reinstall the Door Panel:
- Follow the steps in Section 4 to reinstall the door panel.
- Final Test:
- Perform a final test of the window operation to ensure everything is working correctly.
- Check for any unusual noises or issues.
Fixing window switch problems can often be resolved with a simple switch replacement. CARDIAGTECH.NET offers a range of high-quality window switches and tools to assist with your repair.
8. Addressing Window Off-Track Issues
When a window comes off its track, it can be frustrating and may require immediate attention. Here’s how to address window off-track issues:
8.1 Accessing The Window Mechanism
- Remove the Door Panel: Follow the steps in Section 4 to remove the door panel and access the window mechanism.
- Peel Back the Vapor Barrier: Carefully peel back the plastic vapor barrier to expose the window regulator and window tracks.
8.2 Inspecting The Tracks And Window
- Visual Inspection: Check the window tracks for any signs of damage, such as bends, breaks, or loose fasteners.
- Inspect the Window: Examine the window for any damage or misalignment.
- Identify the Cause: Determine why the window came off track. Common causes include loose fasteners, damaged tracks, or obstructions.
8.3 Realigning The Window
- Loosen Fasteners: If the tracks are adjustable, loosen the fasteners that hold the tracks in place.
- Realign the Window: Carefully realign the window with the tracks, ensuring it is properly seated.
- Tighten Fasteners: Tighten the fasteners to secure the tracks in place.
- Test the Window Operation: Test the window operation by using the window switch to raise and lower the window. Ensure the window moves smoothly and correctly.
8.4 Replacing Damaged Components
- Replace Tracks: If the window tracks are damaged beyond repair, replace them with new tracks.
- Replace Fasteners: Replace any loose or damaged fasteners to ensure a secure fit.
8.5 Testing And Reassembly
- Test the Window Operation:
- Reconnect the car battery if it was disconnected earlier.
- Test the window operation by using the window switch to raise and lower the window.
- Ensure the window moves smoothly and correctly.
- Reattach the Vapor Barrier:
- Carefully reattach the plastic vapor barrier to the door frame, ensuring it is properly sealed to prevent moisture from entering the interior of the car.
- Reinstall the Door Panel:
- Follow the steps in Section 4 to reinstall the door panel.
- Final Test:
- Perform a final test of the window operation to ensure everything is working correctly.
- Check for any unusual noises or issues.
Addressing window off-track issues requires careful inspection and realignment. CARDIAGTECH.NET offers a range of tools and replacement parts to assist with this repair.
9. Electrical Issues And Troubleshooting
Electrical problems can be a common cause of Mercedes CLS window malfunctions. Troubleshooting and addressing these issues requires a systematic approach.
9.1 Checking Fuses
- Locate the Fuse Box: Consult your Mercedes CLS owner’s manual to find the location of the fuse box. There are usually fuse boxes in the engine compartment and under the dashboard.
- Identify the Window Fuse: Refer to the fuse box diagram in the owner’s manual to identify the fuse for the power windows.
- Inspect the Fuse: Remove the fuse and visually inspect it. Look for a broken filament inside the fuse.
- Test with a Multimeter: Use a multimeter to test the fuse for continuity. If there is no continuity, the fuse is blown and needs to be replaced.
- Replace the Fuse: Replace the blown fuse with a new fuse of the same amperage. Test the window operation to see if the new fuse resolves the issue.
9.2 Testing Wiring
- Inspect Wiring: Check the wiring for any signs of damage, such as cuts, breaks, or corrosion.
- Test for Continuity: Use a multimeter to test the wiring for continuity. Ensure there are no breaks in the circuit.
- Test for Voltage: Use a multimeter to test for voltage at the window motor and switch connectors. Ensure there is proper voltage when the switch is activated.
9.3 Checking The Control Module
- Locate the Control Module: Consult your Mercedes CLS service manual to find the location of the power window control module.
- Inspect the Connector: Check the electrical connector for corrosion or damage. Clean the connector with electrical contact cleaner if necessary.
- Test the Control Module: Use an OBD-II scanner to read any diagnostic trouble codes (DTCs) related to the control module. If there are any codes, refer to the service manual for troubleshooting steps.
9.4 Repairing Wiring
- Repair Damaged Wiring: If you find any damaged wiring, repair it by splicing in new wiring and using electrical tape or heat shrink tubing to insulate the connection.
- Replace Wiring: If the wiring is severely damaged, replace it with new wiring of the same gauge.
9.5 Testing And Reassembly
- Test the Window Operation:
- Reconnect the car battery if it was disconnected earlier.
- Test the window operation by using the window switch to raise and lower the window.
- Ensure the window moves smoothly and correctly.
- Reinstall Components: Reinstall any components that were removed during the troubleshooting process.
- Final Test:
- Perform a final test of the window operation to ensure everything is working correctly.
- Check for any unusual noises or issues.
Addressing electrical issues requires careful inspection and testing. CARDIAGTECH.NET offers a range of diagnostic tools and electrical components to assist with this repair.
10. Tips For Preventing Future Window Problems
Preventing window problems can save you time and money in the long run. Here are some tips to keep your Mercedes CLS windows in good working order:
10.1 Regular Maintenance
- Lubricate Moving Parts: Regularly lubricate the window tracks and regulator mechanism with silicone grease. This will help to keep the windows moving smoothly and prevent wear and tear.
- Inspect Wiring: Periodically inspect the wiring for any signs of damage or corrosion. Repair any damaged wiring promptly.
- Check Fuses: Regularly check the fuses for the power windows and replace any blown fuses immediately.
10.2 Proper Usage
- Avoid Overloading the Motor: Avoid holding the window switch for extended periods when the window is fully up or down. This can overload the motor and cause it to fail prematurely.
- Keep Tracks Clean: Keep the window tracks clean and free of debris. Use a soft cloth to wipe the tracks regularly.
- Avoid Forcing Windows: If the window is stuck, do not force it. Forcing the window can damage the regulator or motor.
10.3 Professional Inspections
- Regular Service: Have your Mercedes CLS serviced regularly by a qualified mechanic. They can inspect the windows and identify any potential problems before they become major issues.
- Diagnostic Checks: Periodically have a diagnostic check performed on your car’s electrical system. This can help to identify any electrical issues that may be affecting the windows.
10.4 Addressing Issues Promptly
- Early Detection: If you notice any signs of window problems, such as slow movement, grinding noises, or intermittent operation, address the issue promptly.
- Professional Help: If you are not comfortable performing the repairs yourself, seek professional help from a qualified mechanic.
By following these tips, you can help prevent future window problems and keep your Mercedes CLS windows in good working order. CARDIAGTECH.NET offers a range of maintenance products and diagnostic tools to assist with preventive maintenance.
FAQ: Mercedes CLS Window Problems
Here are some frequently asked questions about Mercedes CLS window problems:
1. Why won’t my Mercedes CLS window go up or down?
Possible causes include a blown fuse, faulty window motor, failing window regulator, or a problem with the window switch. Begin by checking the fuse and then test the switch and motor.
2. How much does it cost to fix a Mercedes CLS window regulator?
The cost can vary depending on whether you DIY or go to a mechanic. Parts can range from $100 to $300, and labor can add another $200 to $500.
3. Can I replace a window regulator myself?
Yes, but it requires some mechanical skill and the right tools. Follow a detailed guide and take your time.
4. How do I know if my window motor is bad?
Symptoms include no movement, slow movement, or a clicking sound when you try to operate the window. Use a multimeter to test if the motor is receiving power.
5. What are the signs of a failing window regulator?
Grinding noises, slow or jerky movement, window slippage, or complete failure are all signs of a failing window regulator.
6. Why is my Mercedes CLS window making a grinding noise?
A grinding noise usually indicates a problem with the window regulator, such as worn cables or broken components.
7. How do I reset my Mercedes CLS window after replacing the regulator?
After replacing the regulator, you may need to reset the window’s travel limits. Consult your owner’s manual for the specific procedure.
8. What tools do I need to replace a window regulator?
You’ll need a socket set, screwdrivers, trim removal tools, a Torx bit set, and possibly a rivet tool if the regulator is riveted in place.
9. Can a bad window switch cause the window to not work?
Yes, a faulty window switch can prevent the window from operating correctly. Test the switch for continuity with a multimeter.
10. How do I prevent window problems on my Mercedes CLS?
Regularly lubricate the window tracks and regulator mechanism, keep the tracks clean, and avoid forcing the windows.
Have other questions or need additional assistance? Contact CARDIAGTECH.NET for expert advice and support.
Conclusion: Resolving Mercedes CLS Window Issues
Addressing Mercedes CLS window problems requires a systematic approach, from accurate diagnosis to proper repair techniques. Whether it’s a faulty regulator, a malfunctioning motor, or a simple switch issue, understanding the steps involved can save you both time and money.
At CARDIAGTECH.NET, we’re committed to providing you with the tools, equipment, and expertise needed to tackle these repairs effectively. Our wide range of automotive tools, diagnostic equipment, and replacement parts ensures you have everything at your fingertips to get the job done right.
Ready to get your Mercedes CLS windows working smoothly again?
- Explore our extensive catalog of automotive tools and equipment.
- Contact our expert team for personalized advice and support.
Reach out to CARDIAGTECH.NET today:
- Address: 276 Reock St, City of Orange, NJ 07050, United States
- WhatsApp: +1 (641) 206-8880
- Website: CARDIAGTECH.NET
Don’t let window problems keep you off the road. Trust CARDIAGTECH.NET to provide the solutions you need. We will help you elevate your repair work and increase your efficiency. Contact us today.