Mercedes Window Motor Replacement: A Comprehensive Guide
Mercedes window motor replacement is a common repair, and CARDIAGTECH.NET provides the expertise and tools needed to get the job done right. This guide offers a detailed walkthrough, ensuring smooth and efficient power window operation, focusing on window regulator and power window motor.
1. Understanding Mercedes-Benz Window Motor Functionality
The window motor in your Mercedes-Benz is a vital component of the power window system. It’s responsible for moving the window up and down, providing convenience and safety. When this motor fails, it can leave you with a window stuck in an undesirable position, compromising security and comfort.
1.1. The Role of the Window Motor
The window motor works in conjunction with the window regulator. The regulator is a mechanical assembly that guides the window’s movement, while the motor provides the necessary power. The motor typically consists of a small electric motor, a gearbox, and electrical connections. When you press the window switch, it sends an electrical signal to the motor, which then turns the gearbox and moves the window.
1.2. Common Symptoms of a Failing Window Motor
- Slow or erratic window movement: The window moves slower than usual or stops intermittently.
- Window doesn’t move at all: The most obvious sign is when the window doesn’t respond to the switch.
- Unusual noises: Grinding, clicking, or whining sounds when operating the window.
- Window falls down: The window suddenly drops into the door.
- Motor works intermittently: Sometimes the window works, and sometimes it doesn’t.
1.3. Identifying the Root Cause
Before replacing the window motor, it’s important to rule out other potential issues. Check the window switch, wiring, and fuse. A faulty switch or a blown fuse can mimic the symptoms of a bad motor. Use a multimeter to test the switch and wiring for continuity and voltage.
2. Essential Tools and Parts for Mercedes Window Motor Replacement
Having the right tools and parts will make the replacement process smoother and more efficient. CARDIAGTECH.NET offers a wide selection of high-quality tools specifically designed for automotive repairs. Contact us via Whatsapp: +1 (641) 206-8880.
2.1. Must-Have Tools
- Socket Set: A comprehensive set with various sizes, including 10mm, is essential.
- Screwdrivers: Both Phillips head and flathead screwdrivers are needed.
- Trim Removal Tools: Plastic trim tools are crucial for removing door panels without causing damage.
- Multimeter: For testing electrical circuits and ensuring proper voltage.
- Pliers: For gripping and manipulating small parts.
- Work Gloves: To protect your hands from sharp edges and debris.
- Safety Glasses: To safeguard your eyes from dust and particles.
2.2. Required Parts
- Replacement Window Motor: Part #001-820-77-42-MBZ or the specific part number for your Mercedes model. Always verify compatibility with your vehicle’s VIN.
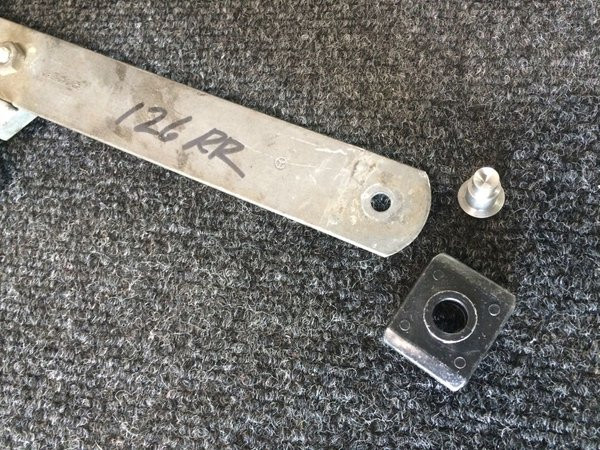
- Window Regulator (Optional): If the regulator is damaged or worn, it’s a good idea to replace it along with the motor.
- Door Panel Clips: These clips often break during removal, so having spares on hand is recommended.
2.3. Sourcing Quality Parts from CARDIAGTECH.NET
At CARDIAGTECH.NET, we understand the importance of using high-quality parts for your Mercedes-Benz. We offer a wide range of window motors and regulators that meet or exceed OEM specifications. Our parts are sourced from trusted manufacturers and undergo rigorous testing to ensure reliability and performance. Visit CARDIAGTECH.NET or contact us at 276 Reock St, City of Orange, NJ 07050, United States, to find the perfect replacement parts for your vehicle.
3. Step-by-Step Guide to Mercedes Window Motor Replacement
Replacing a window motor can seem daunting, but with the right guidance and tools, it’s a manageable DIY project. This detailed guide provides step-by-step instructions, ensuring you can confidently tackle this repair.
3.1. Safety Precautions
Before starting any automotive repair, safety should be your top priority.
- Disconnect the Battery: This prevents accidental electrical shocks or damage to the vehicle’s electrical system.
- Wear Safety Glasses and Gloves: Protect your eyes and hands from debris and sharp edges.
- Work in a Well-Lit Area: Ensure you have adequate lighting to see what you’re doing.
- Use Jack Stands: If you need to lift the vehicle, always use jack stands for support.
- Refer to Your Vehicle’s Service Manual: Consult the manual for specific instructions and torque specifications.
3.2. Removing the Door Panel
- Remove the Interior Door Handle Trim: Use a plastic trim tool to gently pry off the trim piece surrounding the interior door handle.
- Remove the Window Switch Panel: Carefully pry up the window switch panel using a trim tool. Disconnect the electrical connectors from the switches.
- Remove Screws: Locate and remove all screws holding the door panel in place. These are typically found along the bottom edge, behind the door handle, and under the armrest.
- Detach the Door Panel: Once all screws are removed, gently pull the door panel away from the door frame. Start at the bottom and work your way up. Be careful not to break any plastic clips.
- Disconnect Electrical Connectors: As you remove the door panel, disconnect any remaining electrical connectors, such as those for the door speakers and courtesy lights.
- Remove the Vapor Barrier: Carefully peel back the plastic vapor barrier that covers the inside of the door. This barrier protects the interior from moisture.
3.3. Accessing the Window Motor
- Locate the Window Motor: The window motor is typically mounted to the window regulator inside the door.
- Disconnect the Electrical Connector: Disconnect the electrical connector from the window motor.
- Remove the Window from the Regulator: Depending on the model, you may need to detach the window from the regulator. This usually involves loosening bolts or clips that secure the window to the regulator.
- Support the Window: If you detach the window, use tape or a prop to hold it in the up position. This prevents it from falling and causing damage.
3.4. Replacing the Window Motor
- Remove the Old Motor: Remove the bolts or screws that secure the window motor to the regulator.
- Install the New Motor: Attach the new window motor to the regulator, ensuring it is properly aligned.
- Reconnect the Electrical Connector: Reconnect the electrical connector to the new window motor.
- Test the Motor: Before reassembling everything, test the new motor by operating the window switch. Ensure the window moves up and down smoothly.
3.5. Reassembling the Door
- Reattach the Window to the Regulator: If you detached the window, reattach it to the regulator, ensuring it is properly secured.
- Reinstall the Vapor Barrier: Carefully reattach the plastic vapor barrier to the inside of the door.
- Reconnect Electrical Connectors: Reconnect all electrical connectors to the door panel.
- Reattach the Door Panel: Align the door panel with the door frame and gently push it into place. Make sure all plastic clips are securely fastened.
- Reinstall Screws: Reinstall all screws that hold the door panel in place.
- Reinstall the Window Switch Panel and Interior Door Handle Trim: Snap the window switch panel and interior door handle trim back into place.
- Test the Window: Operate the window switch to ensure the window moves up and down smoothly.
4. Troubleshooting Common Issues During Window Motor Replacement
Even with careful attention to detail, you might encounter some challenges during the window motor replacement process. Here are some common issues and how to address them.
4.1. Window Doesn’t Move After Installation
- Check the Electrical Connector: Ensure the electrical connector is securely attached to the motor.
- Test the Fuse: Check the fuse for the window motor. If it’s blown, replace it with a new one of the same amperage.
- Verify the Switch: Use a multimeter to test the window switch. If it’s faulty, replace it.
- Inspect the Wiring: Look for any damaged or corroded wires. Repair or replace any faulty wiring.
4.2. Window Moves Slowly or Erratically
- Check the Regulator: Inspect the window regulator for any signs of damage or wear. If it’s bent or binding, replace it.
- Lubricate the Window Tracks: Apply silicone lubricant to the window tracks to reduce friction.
- Ensure Proper Alignment: Make sure the window is properly aligned in the tracks.
4.3. Door Panel Clips Break During Removal
- Use a Trim Tool: Always use a plastic trim tool to gently pry off the door panel.
- Apply Even Pressure: Distribute pressure evenly to avoid breaking the clips.
- Have Spare Clips: Keep a supply of spare door panel clips on hand.
4.4. Difficulty Removing the Door Panel
- Locate All Screws: Ensure you have removed all screws holding the door panel in place.
- Use a Trim Tool: Gently pry around the edges of the door panel with a trim tool.
- Apply Steady Pressure: Pull the door panel away from the door frame with steady, even pressure.
5. Optimizing Window Performance and Longevity
After replacing the window motor, there are several steps you can take to ensure optimal performance and extend the lifespan of your power window system.
5.1. Regular Maintenance
- Lubricate Window Tracks: Regularly lubricate the window tracks with silicone lubricant to reduce friction and ensure smooth operation.
- Inspect Wiring: Periodically inspect the wiring for any signs of damage or corrosion.
- Clean Window Seals: Keep the window seals clean to prevent dirt and debris from accumulating.
5.2. Choosing Quality Replacement Parts
- Use OEM or Equivalent Parts: When replacing window motors or regulators, opt for OEM (Original Equipment Manufacturer) parts or high-quality aftermarket parts that meet or exceed OEM specifications. CARDIAGTECH.NET provides quality tools for you. Call us via Whatsapp: +1 (641) 206-8880.
- Verify Compatibility: Always verify that the replacement parts are compatible with your vehicle’s make, model, and year.
5.3. Addressing Underlying Issues
- Fix Regulator Problems: If the window regulator is damaged or worn, replace it along with the window motor.
- Repair Wiring Issues: Address any wiring problems, such as shorts or open circuits, to prevent future motor failures.
- Replace Faulty Switches: If the window switch is faulty, replace it to ensure proper operation.
6. Benefits of Professional Window Motor Replacement Services
While replacing a window motor can be a DIY project, there are several advantages to hiring a professional mechanic or technician.
6.1. Expertise and Experience
- Skilled Technicians: Professional mechanics have the knowledge and experience to diagnose and repair window motor issues quickly and accurately.
- Proper Tools and Equipment: They have access to specialized tools and equipment that may not be available to the average DIYer.
- Efficient Repairs: They can complete the job efficiently, saving you time and hassle.
6.2. Warranty and Guarantee
- Parts Warranty: Many professional repair shops offer a warranty on the parts they install, providing peace of mind.
- Labor Guarantee: They may also guarantee their labor, ensuring that the repair is done correctly.
6.3. Avoiding Potential Damage
- Preventing Mistakes: Professionals can avoid common mistakes that DIYers might make, such as damaging the door panel or wiring.
- Ensuring Proper Installation: They can ensure that the window motor is properly installed and aligned, preventing future problems.
6.4. Cost Considerations
- Balancing Cost and Value: While professional services may cost more upfront, they can save you money in the long run by preventing costly mistakes and ensuring a reliable repair.
- Considering Time and Effort: Factor in the time and effort required to do the job yourself. If you’re not comfortable with automotive repairs, it may be worth paying a professional to handle the task.
7. Choosing the Right Replacement Window Motor: OEM vs. Aftermarket
When it comes to replacing your Mercedes-Benz window motor, you’ll encounter two primary options: Original Equipment Manufacturer (OEM) and aftermarket motors. Each has its own set of advantages and disadvantages, and understanding these differences can help you make an informed decision.
7.1. OEM Window Motors
OEM window motors are manufactured by the same company that made the original motor for your Mercedes-Benz. They are designed to meet the exact specifications of your vehicle, ensuring a perfect fit and optimal performance.
-
Advantages of OEM Motors:
- Exact Fit: OEM motors are guaranteed to fit your vehicle without any modifications.
- Reliability: They are made to the same high standards as the original motor, ensuring long-lasting performance.
- Warranty: OEM parts typically come with a warranty from the manufacturer.
-
Disadvantages of OEM Motors:
- Cost: OEM motors are generally more expensive than aftermarket options.
- Availability: They may not be readily available, especially for older models.
7.2. Aftermarket Window Motors
Aftermarket window motors are manufactured by companies other than the original equipment manufacturer. They are designed to be compatible with a wide range of vehicles, including Mercedes-Benz models.
-
Advantages of Aftermarket Motors:
- Cost: Aftermarket motors are typically less expensive than OEM options.
- Availability: They are often more readily available than OEM motors.
- Performance Upgrades: Some aftermarket motors offer improved performance or features compared to OEM motors.
-
Disadvantages of Aftermarket Motors:
- Quality Variations: The quality of aftermarket motors can vary widely, so it’s important to choose a reputable brand.
- Fitment Issues: Some aftermarket motors may require modifications to fit your vehicle properly.
- Warranty Concerns: The warranty coverage for aftermarket motors may be limited compared to OEM parts.
7.3. Making the Right Choice
When deciding between OEM and aftermarket window motors, consider the following factors:
- Budget: How much are you willing to spend on a replacement motor?
- Quality: How important is it to you to have a motor that meets the exact specifications of your vehicle?
- Availability: How quickly do you need a replacement motor?
- Warranty: What kind of warranty coverage are you looking for?
If you prioritize quality and reliability and are willing to pay a premium, an OEM motor may be the best choice. If you’re on a budget and need a replacement motor quickly, an aftermarket motor from a reputable brand may be a suitable option.
8. Advanced Techniques for Diagnosing Window Motor Problems
Diagnosing window motor problems can sometimes be challenging, especially when the symptoms are intermittent or unclear. Here are some advanced techniques that can help you pinpoint the issue.
8.1. Using a Scan Tool
A scan tool is a valuable diagnostic tool that can read error codes stored in your vehicle’s computer system. While window motor problems don’t always trigger error codes, a scan tool can provide valuable information about the overall health of your vehicle’s electrical system.
- Connecting the Scan Tool: Plug the scan tool into the OBD-II port, which is typically located under the dashboard.
- Reading Error Codes: Turn on the ignition and follow the scan tool’s instructions to read any stored error codes.
- Interpreting the Codes: Research the error codes to identify potential issues with the window motor or related components.
8.2. Performing a Voltage Drop Test
A voltage drop test can help you identify excessive resistance in the wiring circuit, which can cause the window motor to malfunction.
- Access the Wiring: Locate the wiring harness for the window motor.
- Set Up the Multimeter: Set your multimeter to measure DC voltage.
- Connect the Multimeter: Connect the multimeter leads to both ends of the wiring circuit.
- Operate the Window: Operate the window switch and observe the voltage reading on the multimeter.
- Interpret the Results: A voltage drop of more than 0.5 volts indicates excessive resistance in the circuit.
8.3. Testing the Motor Directly
You can test the window motor directly by applying power and ground to its terminals. This can help you determine whether the motor itself is faulty.
- Disconnect the Motor: Disconnect the electrical connector from the window motor.
- Apply Power and Ground: Use jumper wires to connect the motor terminals to a 12-volt power source and ground.
- Observe the Motor: If the motor runs, it is likely functioning properly. If it doesn’t run, it may be faulty.
9. Enhancing Your Mercedes-Benz with Window Tinting and Other Upgrades
Once you’ve replaced your window motor and restored proper window function, consider enhancing your Mercedes-Benz with window tinting and other upgrades.
9.1. Benefits of Window Tinting
- UV Protection: Window tinting blocks harmful UV rays, protecting your skin and the interior of your vehicle from sun damage.
- Heat Reduction: Tinting can reduce the amount of heat that enters your vehicle, keeping the interior cooler and more comfortable.
- Privacy: Tinted windows provide increased privacy, preventing others from seeing inside your vehicle.
- Aesthetics: Window tinting can enhance the appearance of your Mercedes-Benz, giving it a sleek and stylish look.
9.2. Choosing the Right Tint
When choosing window tint, consider the following factors:
- Tint Darkness: Choose a tint darkness that complies with local laws and regulations.
- Tint Material: Opt for high-quality tint materials that offer good UV protection and heat reduction.
- Professional Installation: Have the tint professionally installed to ensure a smooth and even finish.
9.3. Other Window-Related Upgrades
- Window Regulators: Consider replacing worn or damaged window regulators to ensure smooth and reliable window operation.
- Window Switches: Upgrade to high-quality window switches for improved durability and performance.
- Automatic Window Control: Install an automatic window control system for added convenience.
10. Connecting with CARDIAGTECH.NET for Expert Assistance
At CARDIAGTECH.NET, we’re dedicated to providing you with the highest quality automotive tools and equipment. If you need assistance with your Mercedes-Benz window motor replacement or any other automotive repair, don’t hesitate to reach out to us.
10.1. How CARDIAGTECH.NET Can Help
- Wide Selection of Tools: We offer a comprehensive range of tools specifically designed for automotive repairs, including socket sets, screwdrivers, trim removal tools, and multimeters.
- Quality Parts: We source our parts from trusted manufacturers and ensure they meet or exceed OEM specifications.
- Expert Advice: Our team of experienced technicians can provide you with expert advice and guidance on your repair project.
- Fast Shipping: We offer fast and reliable shipping to get you the tools and parts you need quickly.
10.2. Contact Information
- Address: 276 Reock St, City of Orange, NJ 07050, United States
- WhatsApp: +1 (641) 206-8880
- Website: CARDIAGTECH.NET
10.3. Customer Support
Our customer support team is available to assist you with any questions or concerns you may have. We’re committed to providing you with the best possible service and ensuring your satisfaction.
Conclusion: Replacing your Mercedes-Benz window motor doesn’t have to be a daunting task. With the right tools, parts, and guidance, you can confidently tackle this repair and restore proper window function. Remember to prioritize safety, follow the step-by-step instructions, and don’t hesitate to seek professional assistance if needed.
FAQ: Mercedes Window Motor Replacement
1. How much does it cost to replace a Mercedes window motor?
The cost can vary depending on the model and whether you choose OEM or aftermarket parts. Generally, the price ranges from $140 to $528, including parts and labor.
2. How do I know if my Mercedes window motor is bad?
Common symptoms include slow or erratic window movement, the window not moving at all, unusual noises, or the window falling down.
3. Can I replace a window motor myself?
Yes, with the right tools and a detailed guide, you can replace a window motor yourself. However, if you’re not comfortable with automotive repairs, it’s best to seek professional assistance.
4. What tools do I need to replace a Mercedes window motor?
Essential tools include a socket set, screwdrivers (Phillips head and flathead), trim removal tools, a multimeter, and pliers.
5. Where can I buy a replacement Mercedes window motor?
You can purchase replacement window motors from CARDIAGTECH.NET, auto parts stores, or online retailers.
6. How long does it take to replace a window motor?
The replacement process typically takes about 1 hour.
7. Is it necessary to replace the window regulator when replacing the motor?
Not always, but if the regulator is damaged or worn, it’s a good idea to replace it along with the motor.
8. What causes a window motor to fail?
Common causes include wear and tear, electrical issues, and regulator problems.
9. How can I prevent window motor failure?
Regularly lubricate the window tracks, inspect wiring, and address any underlying issues with the regulator or switches.
10. What is the difference between OEM and aftermarket window motors?
OEM motors are made by the original manufacturer and ensure a perfect fit and reliability, while aftermarket motors are generally less expensive but may vary in quality.