Vehicle Glass 2003 Mercedes E500 Left Rear Small Window
Vehicle glass 2003 Mercedes E500 left rear small window replacements can be a frustrating process, but CARDIAGTECH.NET offers tools and expertise to simplify the job. With the right equipment and guidance, replacing this glass can be done efficiently, restoring your vehicle’s appearance and safety, so explore our options. Proper installation is key to preventing leaks and maintaining the structural integrity of your car, so consider these elements.
1. Understanding the Vehicle Glass 2003 Mercedes E500 Left Rear Small Window
The vehicle glass 2003 Mercedes E500 left rear small window, often referred to as the “quarter glass,” is a fixed pane located behind the rear passenger door. This particular piece of glass, specific to the 2003 Mercedes E500 model, plays a crucial role in the vehicle’s overall design, structural integrity, and safety features.
- Design and Aesthetics: The quarter glass contributes to the vehicle’s sleek appearance, complementing the lines of the car and enhancing its visual appeal.
- Structural Integrity: While smaller than other windows, it provides additional support to the vehicle’s frame, particularly in the rear section.
- Safety: It offers improved visibility for the driver, reducing blind spots and enhancing safety while changing lanes or maneuvering in traffic.
- Cabin Environment: A properly sealed quarter glass helps maintain a comfortable and quiet cabin environment by preventing wind noise and water leaks.
1.1. Why is the Quarter Glass Important?
The quarter glass is more than just a piece of glass, so it’s an integral component of the vehicle’s overall functionality and safety.
- Visibility: The quarter glass enhances the driver’s peripheral vision, reducing blind spots and improving overall safety on the road.
- Structural Support: This small window adds rigidity to the vehicle’s frame, contributing to its structural integrity and crashworthiness.
- Aesthetics: The quarter glass contributes to the vehicle’s aesthetic appeal, complementing the overall design and lines of the car.
- Cabin Comfort: A properly sealed quarter glass prevents wind noise, water leaks, and drafts, ensuring a comfortable and quiet cabin environment for passengers.
1.2. Common Issues with the Quarter Glass
Several factors can compromise the integrity of the quarter glass, necessitating replacement or repair.
- Cracks and Chips: Road debris, accidents, or vandalism can cause cracks and chips, impairing visibility and compromising the glass’s structural integrity.
- Leaks: Deteriorated seals or improper installation can lead to water leaks, causing discomfort, mold growth, and potential damage to the vehicle’s interior.
- Delamination: Over time, the layers of glass can separate, resulting in a cloudy or distorted appearance.
- Damage from Accidents: Collisions can shatter or break the quarter glass, requiring immediate replacement to ensure safety and prevent further damage.
2. Preparing for the Replacement: Gathering the Right Tools
Before embarking on the vehicle glass 2003 Mercedes E500 left rear small window replacement, it is essential to gather the necessary tools and materials to ensure a smooth and efficient process.
- Safety Glasses: Protect your eyes from flying debris and glass shards.
- Gloves: Shield your hands from sharp edges and chemicals.
- Plastic Trim Removal Tools: These tools help remove interior panels and trim without causing damage.
- Glass Removal Tool: A specialized tool designed to safely cut through the adhesive holding the old glass in place.
- Heat Gun: Softens the adhesive for easier removal of the old glass.
- Clean Rags: For cleaning the area around the window and removing any residue.
- Glass Cleaner: To clean the new glass before installation.
- Primer: Prepares the bonding surface for the new adhesive.
- Urethane Adhesive: A high-strength adhesive specifically designed for bonding automotive glass.
- Caulking Gun: For applying the urethane adhesive.
- Suction Cups: To lift and position the new glass.
- Masking Tape: To secure the glass in place while the adhesive cures.
Ensuring you have all the necessary tools and materials on hand before starting the replacement process will save time and prevent frustration. CARDIAGTECH.NET offers a range of high-quality tools specifically designed for automotive glass replacement, ensuring a professional and reliable result.
2.1. Essential Tools for the Job
Having the right tools is crucial for a successful vehicle glass 2003 Mercedes E500 left rear small window replacement. CARDIAGTECH.NET provides a comprehensive range of tools tailored for this task.
| Tool | Description | Use |
|---|---|---|
| Safety Glasses | Protect your eyes from debris and glass shards. | Ensuring eye safety during the removal and installation process. |
| Gloves | Shield your hands from sharp edges and chemicals. | Protecting hands from cuts and chemical exposure. |
| Plastic Trim Removal Tools | Help remove interior panels without damage. | Safely removing interior panels and trim without causing scratches or breakage. |
| Glass Removal Tool | Safely cuts through the adhesive holding the old glass. | Cutting through the old adhesive to remove the damaged glass. |
| Heat Gun | Softens the adhesive for easier removal. | Softening the adhesive for easier and cleaner removal of the old glass. |
| Clean Rags | For cleaning the area and removing residue. | Cleaning the bonding surface and removing any residual adhesive or debris. |
| Glass Cleaner | To clean the new glass before installation. | Preparing the new glass for installation by removing dirt, fingerprints, and other contaminants. |
| Primer | Prepares the bonding surface for the new adhesive. | Ensuring a strong and durable bond between the glass and the vehicle frame. |
| Urethane Adhesive | A high-strength adhesive designed for bonding automotive glass. | Bonding the new glass securely to the vehicle frame. |
| Caulking Gun | For applying the urethane adhesive. | Applying the urethane adhesive evenly and precisely. |
| Suction Cups | To lift and position the new glass. | Lifting and positioning the new glass for accurate placement. |
| Masking Tape | To secure the glass while the adhesive cures. | Holding the glass in place while the adhesive cures, ensuring a secure and watertight seal. |
| Rivet Gun | Securing the new window regulator, if applicable, using rivets. | Replacing the rivets that hold the window regulator in place. |
| Drill | Drilling out old rivets to remove the old window regulator, if applicable. | Removing old rivets without damaging the surrounding area. |
| Torx Drivers | Removing screws that hold the door panel and other components. | Ensuring proper removal and installation of screws without stripping them. |
2.2. Safety First: Essential Protective Gear
Safety should be your top priority during any auto repair, including vehicle glass replacement. Protect yourself with the following gear:
- Safety Glasses: Always wear safety glasses to protect your eyes from flying debris and glass shards.
- Gloves: Use gloves to protect your hands from sharp edges, chemicals, and adhesives.
- Long Sleeves and Pants: Wear long sleeves and pants to protect your skin from scratches and cuts.
- Respirator: A respirator can help protect you from inhaling harmful fumes from adhesives and solvents.
2.3. Where to Purchase Quality Tools
CARDIAGTECH.NET is your trusted source for high-quality automotive repair tools, including those needed for vehicle glass replacement. We offer a wide selection of tools from reputable brands, ensuring durability and reliability.
- Comprehensive Selection: Find everything you need for the job in one place.
- Quality Assurance: We only offer tools from trusted brands known for their quality and performance.
- Expert Advice: Our team can provide expert advice on selecting the right tools for your specific needs.
3. Step-by-Step Guide to Removing the Old Glass
Removing the old vehicle glass 2003 Mercedes E500 left rear small window requires careful execution to avoid damage to the vehicle.
- Prepare the Area: Clean the area around the window with a clean rag and glass cleaner. Apply masking tape to protect the surrounding paint.
- Remove Interior Trim: Use plastic trim removal tools to carefully remove any interior trim panels that cover the edges of the window.
- Heat the Adhesive: Use a heat gun to soften the adhesive around the perimeter of the window. Be careful not to overheat the glass or paint.
- Cut the Adhesive: Insert the glass removal tool between the glass and the frame, and carefully cut through the adhesive. Work your way around the entire perimeter of the window.
- Remove the Glass: Once the adhesive is cut, use suction cups to carefully lift the old glass out of the frame.
- Clean the Frame: Use a clean rag and adhesive remover to thoroughly clean the frame, removing any remaining adhesive and debris.
3.1. Preparing the Vehicle for Glass Removal
Before you begin removing the old glass, take these preparatory steps to protect your vehicle and ensure a clean work environment:
- Cover Interior Surfaces: Use drop cloths or plastic sheeting to cover the seats, dashboard, and other interior surfaces to protect them from dust, debris, and adhesive.
- Protect Exterior Paint: Apply masking tape around the perimeter of the window to protect the paint from scratches and adhesive.
- Disconnect the Battery: Disconnect the negative battery terminal to prevent any electrical issues during the removal process.
3.2. Safe Glass Removal Techniques
Removing the old glass safely requires using the right techniques and tools:
- Wear Safety Gear: Always wear safety glasses and gloves to protect yourself from glass shards and chemicals.
- Use a Glass Removal Tool: Use a specialized glass removal tool to cut through the adhesive without damaging the vehicle frame.
- Apply Heat Carefully: Use a heat gun to soften the adhesive, but be careful not to overheat the glass or paint.
- Lift with Suction Cups: Use suction cups to lift the glass out of the frame, providing a secure grip and preventing it from falling.
3.3. Dealing with Stubborn Adhesive
If the adhesive is particularly stubborn, try these techniques:
- Apply More Heat: Use the heat gun to apply more heat to the adhesive, softening it further.
- Use Adhesive Remover: Apply a specialized adhesive remover to the adhesive, allowing it to soak for a few minutes before attempting to cut through it.
- Use a Wire Cutting Tool: For particularly tough adhesive, use a wire cutting tool to carefully saw through the adhesive.
4. Installing the New Vehicle Glass 2003 Mercedes E500 Left Rear Small Window
Installing the new vehicle glass 2003 Mercedes E500 left rear small window involves careful alignment and secure bonding to ensure a watertight seal and structural integrity.
- Test Fit the New Glass: Before applying any adhesive, test fit the new glass in the frame to ensure proper alignment and fit.
- Apply Primer: Apply primer to the bonding surface on both the glass and the vehicle frame. Allow the primer to dry completely.
- Apply Urethane Adhesive: Using a caulking gun, apply a continuous bead of urethane adhesive around the perimeter of the bonding surface on the vehicle frame.
- Position the Glass: Carefully lift the new glass into place using suction cups, ensuring it is properly aligned with the frame.
- Press the Glass into Place: Press the glass firmly into the adhesive, ensuring a uniform bond around the entire perimeter.
- Secure the Glass: Use masking tape to secure the glass in place while the adhesive cures.
- Allow to Cure: Allow the adhesive to cure for the recommended time, typically 24 hours.
- Remove Masking Tape: Once the adhesive is fully cured, remove the masking tape.
- Reinstall Interior Trim: Reinstall any interior trim panels that were removed during the process.
4.1. Preparing the New Glass for Installation
Proper preparation of the new glass is crucial for a successful installation:
- Clean the Glass: Clean the new glass thoroughly with glass cleaner to remove any dirt, fingerprints, or contaminants.
- Apply Primer: Apply primer to the bonding surface of the glass, following the manufacturer’s instructions. This will ensure a strong bond with the urethane adhesive.
4.2. Applying the Urethane Adhesive
Applying the urethane adhesive correctly is essential for a watertight seal:
- Use a Caulking Gun: Use a high-quality caulking gun to apply a continuous, even bead of urethane adhesive around the perimeter of the bonding surface on the vehicle frame.
- Apply the Correct Amount: Apply the correct amount of adhesive, as specified by the manufacturer. Too little adhesive will result in a weak bond, while too much adhesive can create a mess.
- Work Quickly: Urethane adhesive cures quickly, so work quickly and efficiently to position the glass before the adhesive begins to set.
4.3. Ensuring Proper Alignment and Seal
Proper alignment and a secure seal are critical for preventing leaks and maintaining structural integrity:
- Use Suction Cups: Use suction cups to carefully lift and position the new glass in the frame, ensuring it is properly aligned with the surrounding body panels.
- Press Firmly: Press the glass firmly into the adhesive, ensuring a uniform bond around the entire perimeter.
- Use Masking Tape: Use masking tape to secure the glass in place while the adhesive cures, preventing it from shifting or moving.
- Inspect the Seal: After the adhesive has cured, inspect the seal around the perimeter of the glass to ensure there are no gaps or voids. If necessary, apply additional adhesive to fill any gaps.
5. Post-Installation Tips and Maintenance
After installing the new vehicle glass 2003 Mercedes E500 left rear small window, follow these tips to ensure its longevity and performance.
- Avoid Washing the Car: Avoid washing the car for at least 24 hours after installation to allow the adhesive to fully cure.
- Avoid Slamming Doors: Avoid slamming doors or applying excessive pressure to the glass for the first few days after installation.
- Inspect the Seal Regularly: Inspect the seal around the glass regularly for any signs of leaks or damage.
- Clean the Glass Regularly: Clean the glass regularly with a quality glass cleaner to maintain visibility and prevent the buildup of dirt and debris.
5.1. Checking for Leaks
One of the most important post-installation checks is to ensure there are no leaks:
- Water Test: After the adhesive has cured, perform a water test by spraying water around the perimeter of the glass with a garden hose. Check the interior of the vehicle for any signs of leaks.
- Visual Inspection: Inspect the seal around the perimeter of the glass for any gaps or voids.
5.2. Maintaining the New Glass
Proper maintenance will help extend the life of your new vehicle glass:
- Use Quality Glass Cleaner: Use a quality glass cleaner that is specifically designed for automotive glass. Avoid using abrasive cleaners or harsh chemicals that can damage the glass or the seal.
- Clean Regularly: Clean the glass regularly to remove dirt, dust, and debris. This will help maintain visibility and prevent the buildup of contaminants that can damage the glass.
- Protect from Extreme Temperatures: Avoid exposing the glass to extreme temperatures, such as direct sunlight or freezing conditions. These temperature fluctuations can cause the glass to expand and contract, potentially leading to cracks or leaks.
5.3. When to Seek Professional Help
While replacing the vehicle glass 2003 Mercedes E500 left rear small window can be a DIY project, there are times when it’s best to seek professional help:
- Extensive Damage: If the vehicle frame is damaged or the damage to the glass is extensive, it’s best to consult a professional.
- Lack of Experience: If you’re not comfortable working with automotive glass or you lack the necessary tools and experience, it’s best to leave the job to a professional.
- Warranty Concerns: If your vehicle is still under warranty, replacing the glass yourself may void the warranty.
CARDIAGTECH.NET is committed to providing you with the tools, resources, and expertise you need to tackle your auto repair projects with confidence.
6. Choosing the Right Replacement Glass
Selecting the correct replacement vehicle glass 2003 Mercedes E500 left rear small window is crucial for ensuring a proper fit, optimal performance, and adherence to safety standards.
- OEM vs. Aftermarket: Decide whether to use Original Equipment Manufacturer (OEM) glass or aftermarket glass. OEM glass is made by the same manufacturer as the original glass and is guaranteed to meet the vehicle’s specifications. Aftermarket glass is made by a different manufacturer and may be less expensive, but it may not meet the same quality standards.
- Quality and Certification: Look for glass that is certified by reputable organizations, such as the American National Standards Institute (ANSI) or the Society of Automotive Engineers (SAE). These certifications ensure that the glass meets certain safety and performance standards.
- Tint and Features: Choose glass with the appropriate tint and features for your vehicle. Some glass may have a built-in tint to reduce glare and heat, while others may have special coatings to repel water or reduce noise.
- Compatibility: Ensure that the replacement glass is compatible with your vehicle’s make, model, and year. Check the part number and specifications to ensure a proper fit.
6.1. OEM vs. Aftermarket Glass
When choosing replacement vehicle glass 2003 Mercedes E500 left rear small window, you’ll typically have two options: OEM (Original Equipment Manufacturer) glass and aftermarket glass. Here’s a comparison to help you decide:
| Feature | OEM Glass | Aftermarket Glass |
|---|---|---|
| Manufacturer | Made by the same manufacturer as the original glass. | Made by a different manufacturer. |
| Quality | Meets the vehicle’s original specifications and quality standards. | May or may not meet the same quality standards as OEM glass. |
| Fit | Guaranteed to fit perfectly. | Fit may vary; some aftermarket glass may not fit as precisely as OEM glass. |
| Price | Generally more expensive. | Generally less expensive. |
| Availability | May be more difficult to find and may require ordering from a dealership. | Typically readily available from auto parts stores and online retailers. |
| Branding | Typically includes the vehicle manufacturer’s logo. | Does not include the vehicle manufacturer’s logo. |
| Warranty | May be covered by the vehicle’s warranty if installed by an authorized dealer. | May have a limited warranty from the glass manufacturer or installer. |
| Safety Standards | Meets all applicable safety standards. | Should meet safety standards, but it’s essential to verify certification. |
6.2. Understanding Glass Certifications
To ensure you’re getting a safe and reliable replacement vehicle glass 2003 Mercedes E500 left rear small window, look for glass that is certified by reputable organizations. Some common certifications include:
- ANSI (American National Standards Institute): ANSI sets standards for safety and performance, including those for automotive glass. Glass that meets ANSI standards is marked with the “ANSI” logo.
- SAE (Society of Automotive Engineers): SAE develops technical standards for engineering, including those for automotive components like glass. Glass that meets SAE standards is marked with the “SAE” logo.
- DOT (Department of Transportation): The DOT regulates motor vehicle safety in the United States. All automotive glass sold in the US must meet DOT safety standards and be marked with a DOT code.
6.3. Where to Buy Replacement Glass
You can purchase replacement vehicle glass 2003 Mercedes E500 left rear small window from several sources:
- Dealerships: Dealerships typically offer OEM glass, ensuring a perfect fit and adherence to the vehicle’s original specifications. However, dealership glass may be more expensive than aftermarket options.
- Auto Parts Stores: Auto parts stores carry a variety of aftermarket glass options at different price points. Be sure to check the certifications and specifications to ensure you’re getting a quality product.
- Online Retailers: Online retailers offer a wide selection of replacement glass, often at competitive prices. However, it’s essential to choose a reputable retailer and carefully review the product specifications before making a purchase.
- Glass Replacement Specialists: Glass replacement specialists can provide expert advice and installation services, ensuring a proper fit and watertight seal.
7. The Importance of a Proper Seal
A proper seal is crucial for the vehicle glass 2003 Mercedes E500 left rear small window to prevent leaks, maintain structural integrity, and ensure passenger safety.
- Preventing Water Leaks: A watertight seal prevents water from entering the vehicle, protecting the interior from water damage, mold growth, and unpleasant odors.
- Maintaining Structural Integrity: The adhesive that bonds the glass to the vehicle frame also contributes to the vehicle’s structural integrity. A proper seal ensures that the glass is securely bonded to the frame, providing additional support and rigidity.
- Ensuring Passenger Safety: In the event of an accident, a properly sealed glass can help prevent passengers from being ejected from the vehicle. The glass also provides support for the roof in a rollover accident.
- Reducing Wind Noise: A tight seal reduces wind noise, creating a more comfortable and enjoyable driving experience.
7.1. Risks of a Poor Seal
A poor seal around the vehicle glass 2003 Mercedes E500 left rear small window can lead to a variety of problems:
- Water Leaks: Water can enter the vehicle, causing damage to the interior, electrical systems, and structural components.
- Mold and Mildew Growth: Water leaks can create a breeding ground for mold and mildew, which can cause health problems and unpleasant odors.
- Corrosion: Water can corrode metal components, leading to rust and structural damage.
- Wind Noise: A poor seal can increase wind noise, making it difficult to hear and communicate inside the vehicle.
- Compromised Safety: A poorly sealed glass can compromise the vehicle’s structural integrity and reduce passenger safety in the event of an accident.
7.2. How to Ensure a Proper Seal
To ensure a proper seal during vehicle glass replacement:
- Use Quality Adhesive: Use a high-quality urethane adhesive that is specifically designed for automotive glass.
- Prepare the Bonding Surface: Clean and prime the bonding surface on both the glass and the vehicle frame to ensure a strong bond.
- Apply the Correct Amount of Adhesive: Apply the correct amount of adhesive, as specified by the manufacturer.
- Position the Glass Carefully: Position the glass carefully in the frame, ensuring it is properly aligned and seated.
- Allow the Adhesive to Cure: Allow the adhesive to cure for the recommended time, typically 24 hours.
- Inspect the Seal: Inspect the seal around the perimeter of the glass for any gaps or voids. If necessary, apply additional adhesive to fill any gaps.
7.3. Identifying and Addressing Leaks
If you suspect a leak around your vehicle glass 2003 Mercedes E500 left rear small window, take these steps to identify and address the problem:
- Water Test: Perform a water test by spraying water around the perimeter of the glass with a garden hose. Check the interior of the vehicle for any signs of leaks.
- Visual Inspection: Inspect the seal around the perimeter of the glass for any gaps or voids.
- Seek Professional Help: If you’re unable to identify or address the leak yourself, consult a glass replacement specialist.
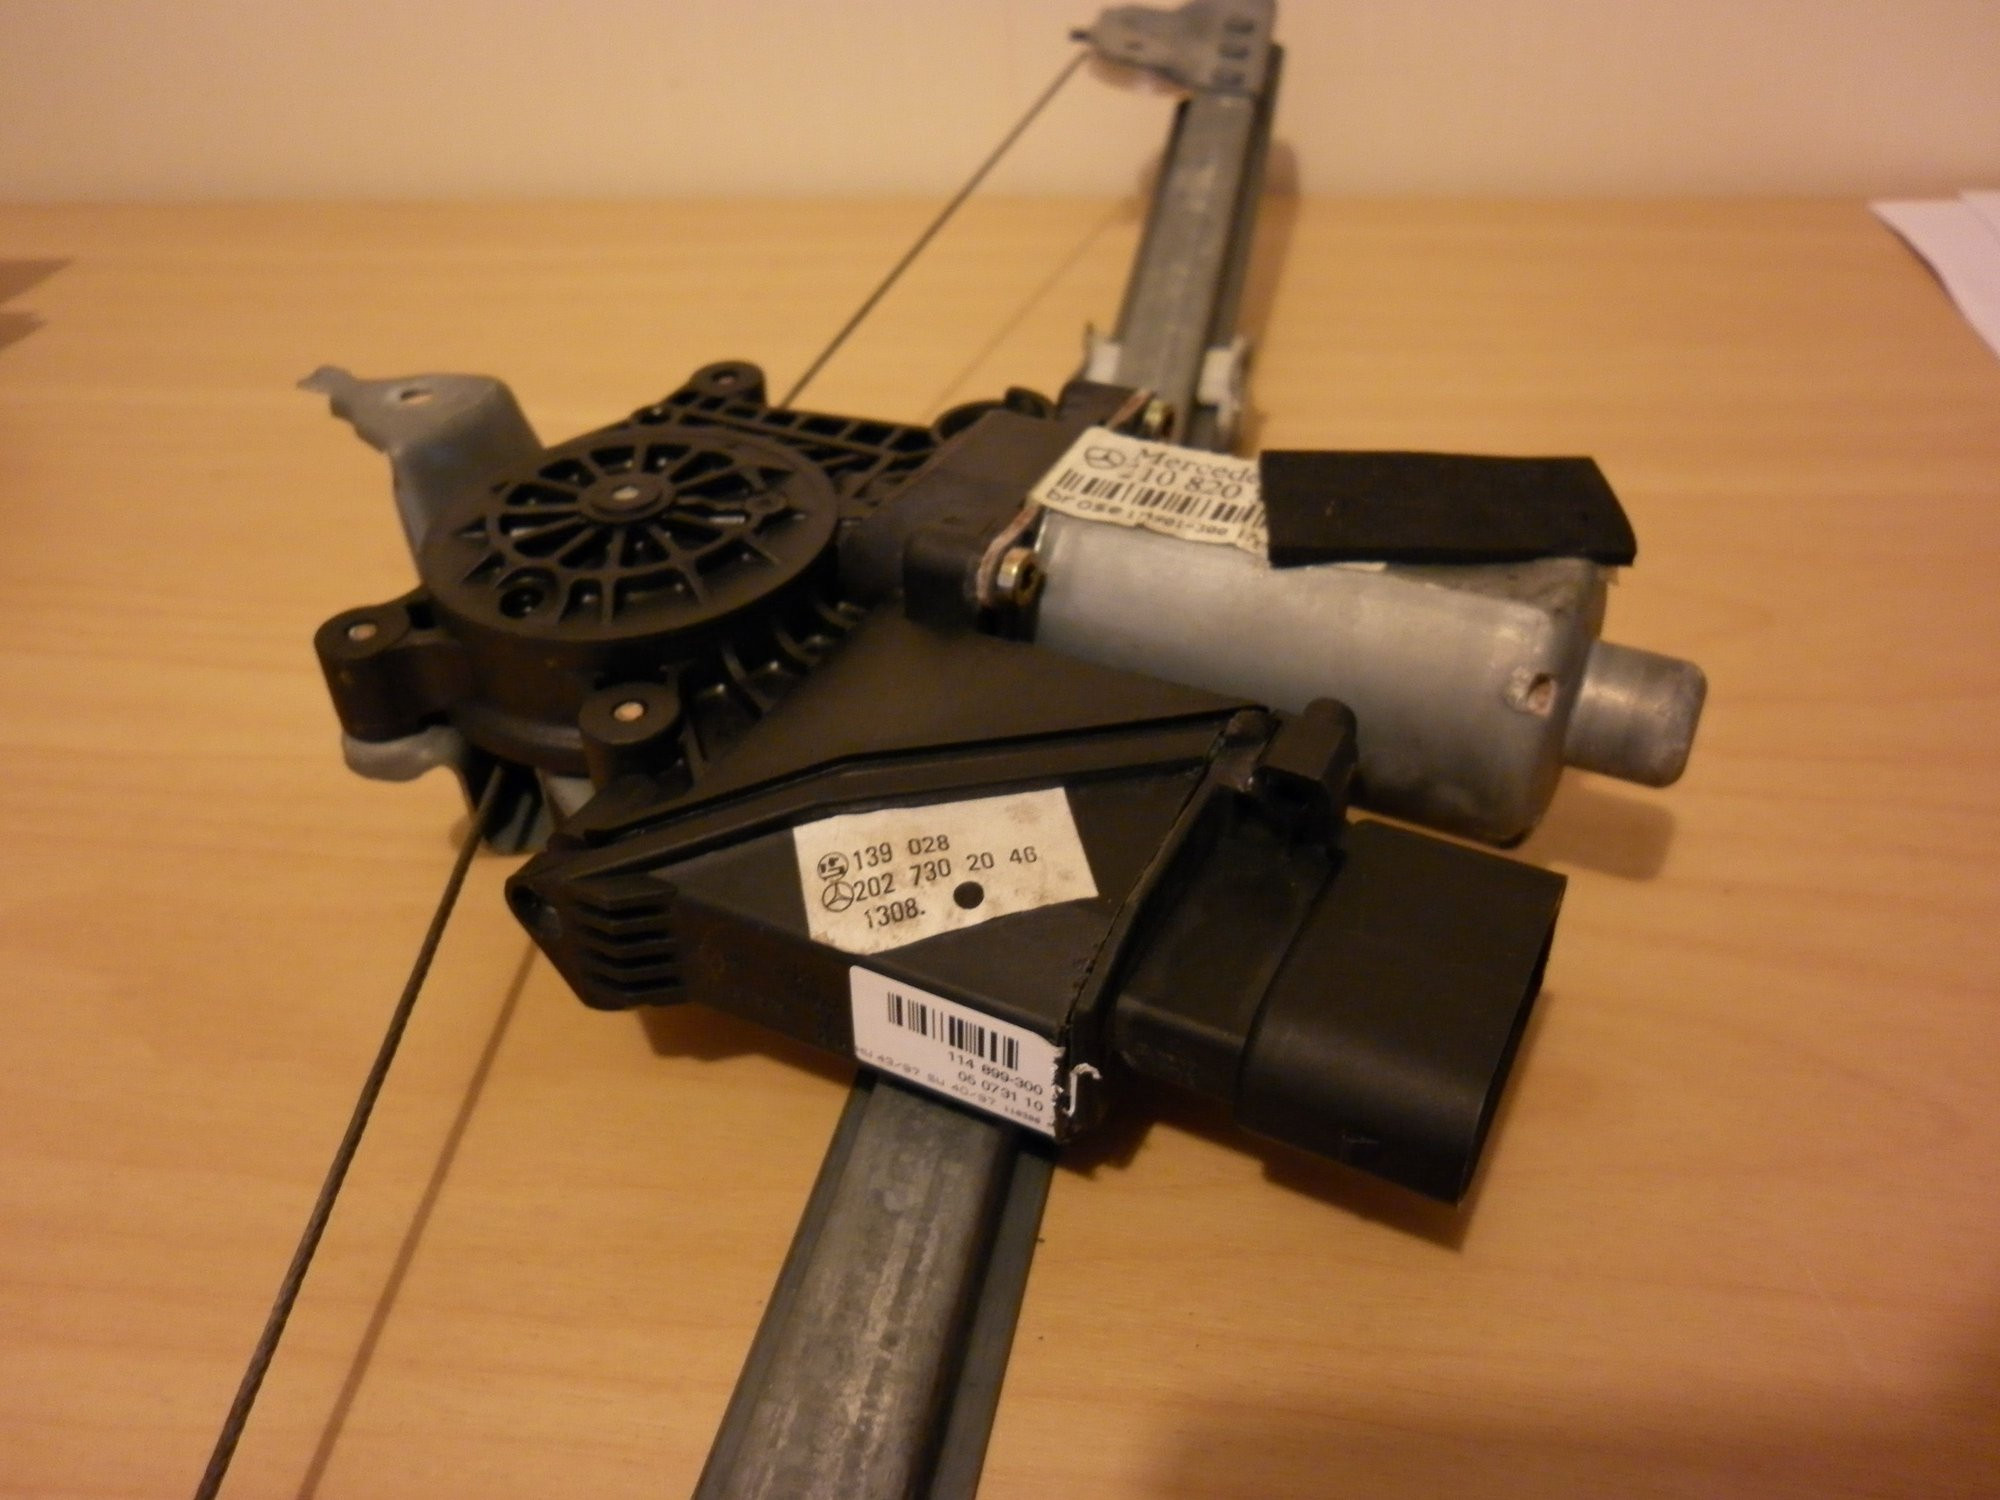
8. The Role of the Window Regulator
While replacing the vehicle glass 2003 Mercedes E500 left rear small window, it’s essential to understand the role of the window regulator, even though this particular window is fixed. In vehicles with operable windows, the regulator is the mechanical component that allows the window to move up and down.
- Function: The window regulator provides the mechanical force needed to raise and lower the window glass.
- Types: There are two main types of window regulators: manual and power. Manual regulators use a hand crank, while power regulators use an electric motor.
- Components: A typical window regulator consists of a motor (for power windows), a cable or gear system, and a track that guides the window glass.
- Maintenance: While the quarter glass is fixed, understanding the regulator’s function in other windows can help diagnose related issues, such as slow or erratic window movement.
8.1. Common Window Regulator Problems
Although the vehicle glass 2003 Mercedes E500 left rear small window is fixed, understanding potential issues with window regulators in other windows can be helpful:
- Motor Failure: The electric motor can fail, preventing the window from moving up or down.
- Cable or Gear Damage: The cable or gear system can break or become damaged, causing the window to move erratically or not at all.
- Track Issues: The track that guides the window glass can become bent or damaged, causing the window to bind or jam.
- Switch Problems: A faulty switch can prevent the window from operating correctly.
8.2. Replacing a Window Regulator
If you need to replace a window regulator, the process typically involves:
- Removing the Door Panel: Remove the interior door panel to access the window regulator.
- Disconnecting Electrical Connections: Disconnect any electrical connections to the window motor.
- Removing the Old Regulator: Remove the bolts or screws that hold the old regulator in place.
- Installing the New Regulator: Install the new regulator, making sure to align it properly.
- Reconnecting Electrical Connections: Reconnect any electrical connections to the window motor.
- Testing the Window: Test the window to make sure it operates correctly.
- Reinstalling the Door Panel: Reinstall the interior door panel.
8.3. Tools for Window Regulator Replacement
Replacing a window regulator requires specific tools:
- Socket Set: A socket set is needed to remove and install bolts and screws.
- Screwdrivers: Screwdrivers are needed to remove and install screws.
- Pliers: Pliers are needed to disconnect electrical connections.
- Trim Removal Tools: Trim removal tools are needed to remove the interior door panel without damaging it.
- Power Drill: A power drill may be needed to drill out rivets.
9. Cost Considerations for Vehicle Glass Replacement
The cost of replacing the vehicle glass 2003 Mercedes E500 left rear small window can vary depending on several factors:
- Type of Glass: OEM glass is typically more expensive than aftermarket glass.
- Labor Costs: Labor costs can vary depending on the shop and the complexity of the job.
- Additional Repairs: If there is any damage to the vehicle frame or other components, the cost of repairs will increase.
- Location: Prices can vary depending on your geographic location.
9.1. Factors Affecting Replacement Cost
Several factors can affect the cost of replacing the vehicle glass 2003 Mercedes E500 left rear small window:
| Factor | Description | Impact on Cost |
|---|---|---|
| Type of Glass | OEM (Original Equipment Manufacturer) glass is made by the same manufacturer as the original glass and is typically more expensive than aftermarket glass. | OEM glass is more expensive, while aftermarket glass is more affordable. |
| Labor Costs | Labor costs vary depending on the shop, the complexity of the job, and your geographic location. | Higher labor rates increase the overall cost. |
| Additional Repairs | If there is damage to the vehicle frame, window regulator, or other components, the cost of repairs will increase. | Additional repairs add to the total cost. |
| Location | Prices can vary depending on your geographic location due to differences in labor rates, cost of materials, and local taxes. | Prices can be higher in urban areas or regions with higher costs of living. |
| Insurance Coverage | If you have comprehensive insurance coverage, your insurance company may cover the cost of the glass replacement, minus your deductible. | Insurance coverage can significantly reduce your out-of-pocket expenses. |
| DIY vs. Professional | Doing the replacement yourself can save on labor costs, but it requires the right tools, skills, and knowledge. Professional installation ensures a proper fit and watertight seal. | DIY can be cheaper if you have the skills and tools, but professional installation offers peace of mind and guarantees a quality result. |
| Warranty | Some glass replacement services offer a warranty on their work, which can provide peace of mind in case of leaks or other issues. | A warranty can add value and protect against future expenses. |
| Time of Year | Demand for glass replacement may fluctuate depending on the time of year, with higher demand during seasons with more extreme weather conditions. | Prices may increase during peak demand periods. |
| Vehicle Model | The make and model of your vehicle can affect the cost of the replacement glass, as some models may have more complex window designs or require specialized glass. | Replacement glass for luxury or specialized vehicles may be more expensive. |
| Supplier | Different suppliers offer different prices for replacement glass. Shopping around can help you find the best deal. | Comparing prices from different suppliers can lead to significant savings. |
9.2. Saving Money on Glass Replacement
Here are some tips for saving money on vehicle glass replacement:
- Get Multiple Quotes: Get quotes from several different shops to compare prices.
- Consider Aftermarket Glass: Aftermarket glass is typically less expensive than OEM glass.
- Check Your Insurance: Check your insurance policy to see if glass replacement is covered.
- DIY Installation: If you have the skills and tools, you can save money by doing the installation yourself. However, be sure to follow the instructions carefully and take all necessary safety precautions.
9.3. Is it Worth Filing an Insurance Claim?
Deciding whether to file an insurance claim for vehicle glass replacement depends on your insurance policy and the cost of the repair. Consider these factors:
- Deductible: If your deductible is higher than the cost of the repair, it may not be worth filing a claim.
- Premium Increase: Filing a claim may cause your insurance premium to increase.
- Comprehensive Coverage: If you have comprehensive coverage, your insurance company may cover the cost of the glass replacement, minus your deductible.
10. CARDIAGTECH.NET: Your Partner in Auto Repair
CARDIAGTECH.NET is your trusted partner for all your auto repair needs. We offer a wide selection of high-quality tools, parts, and accessories at competitive prices.
- Extensive Inventory: We carry a comprehensive inventory of tools, parts, and accessories for a wide range of vehicles.
- Quality Products: We only offer products from reputable brands known for their quality and performance.
- Competitive Prices: We offer competitive prices on all our products.
- Expert Advice: Our team of experienced professionals can provide expert advice on selecting the right products for your needs.
- Excellent Customer Service: We are committed to providing excellent customer service and ensuring your satisfaction.
10.1. Why Choose CARDIAGTECH.NET?
There are many reasons to choose CARDIAGTECH.NET for your auto repair needs:
- Quality Products: We only offer high-quality products from reputable brands.
- Competitive Prices: We offer competitive prices on all our products.
- Expert Advice: Our team of experienced professionals can provide expert advice on selecting the right products for your needs.
- Excellent Customer Service: We are committed to providing excellent customer service and ensuring your satisfaction.
- Convenient Online Shopping: You can shop for tools, parts, and accessories from the comfort of your own home.
- Fast Shipping: We offer fast shipping on all orders.
- Easy Returns: We offer easy returns on all products.
- Secure Payment Options: We offer secure payment options to protect your personal and financial information.
10.2. Our Commitment to Quality and Service
At CARDIAGTECH.NET, we are committed to providing our customers with the highest quality products and services. We stand behind our products and are committed to ensuring your satisfaction.
- Quality Assurance: We carefully select our products from reputable brands known for their quality and performance.
- Expert Advice: Our team of experienced professionals can provide expert advice on selecting the right products for your needs.
- Customer Satisfaction: We are committed to ensuring your satisfaction with our products and services.
- Warranty: We offer a warranty on many of our products.
- Returns: We offer easy returns on all products.
10.3. Contact Us for Your Auto Repair Needs
Whether you’re a professional mechanic or a DIY enthusiast, CARDIAGTECH.NET is here to help you with all your auto repair needs. Contact us today to learn more about our products and services. You can reach us at:
- Address: 276 Reock St, City of Orange, NJ 07050, United States
- WhatsApp: +1 (641) 206-8880
- Website: CARDIAGTECH.NET
Don’t let a damaged vehicle glass 2003 Mercedes E500 left rear small window compromise your safety and comfort. Trust CARDIAGTECH.NET to provide you with the tools, parts, and expertise you need to get the job done right. Contact us today and let us help you get back on the road with confidence.
When faced with the task of replacing your vehicle glass, remember the challenges: the physical demands, the constant need for updated knowledge, and the pressure to deliver efficient, high-quality work. At CARDIAGTECH.NET, we understand these challenges and offer solutions to enhance your efficiency, accuracy, and safety. Don't let these obstacles hold you back. Contact us today for expert guidance and premium tools that make auto repairs smoother and more profitable. Reach out via WhatsApp at +1 (641) 206-8880 or visit CARDIAGTECH.NET to discover how we can support your success.Frequently Asked Questions (FAQ)
Here are some frequently asked questions about vehicle glass 2003 Mercedes E500 left rear small window replacement:
1. What is the purpose of the quarter glass in a car?
The quarter glass, or small rear window, enhances visibility, reduces blind spots, and adds structural support to the vehicle’s frame, improving overall safety and aesthetics.
2. Can I replace the quarter glass myself, or should I hire a professional?
While DIY replacement is possible with the right tools and knowledge, hiring a professional ensures proper installation, a watertight seal, and adherence to safety standards.
3. What tools are needed for replacing the vehicle glass 2003 Mercedes E500 left rear small window?
Essential tools include safety glasses, gloves, plastic trim removal tools, a glass removal tool, heat gun, clean rags, glass cleaner, primer, urethane adhesive, a caulking gun, suction cups, and masking tape.
4. How do I remove the old glass safely?
To remove the old glass safely, protect the surrounding area, heat the adhesive, use a glass removal tool to cut through the adhesive, and lift the glass with suction cups.
5. What type of adhesive should I use for installing the new glass?
Use a high-quality urethane adhesive specifically designed for bonding automotive glass to ensure a strong and watertight seal.
6. How do I ensure a proper seal when installing the new glass?
Ensure a proper seal by cleaning and priming the bonding surface, applying a continuous bead of urethane adhesive, positioning the glass carefully, and securing it with masking