Retrofit Ambient Lighting Mercedes: A Complete Installation Guide
Retrofit ambient lighting Mercedes vehicles to enhance the interior aesthetics. This guide, brought to you by CARDIAGTECH.NET, offers a comprehensive, step-by-step approach to upgrading your car’s lighting system. Explore the benefits, installation techniques, and customization options to create a luxurious and personalized driving experience. Discover the convenience and superior tools available at CARDIAGTECH.NET for achieving a professional-grade retrofit. Learn about interior illumination, aftermarket upgrades, and automotive customization.
1. Understanding the Appeal of Retrofit Ambient Lighting for Mercedes
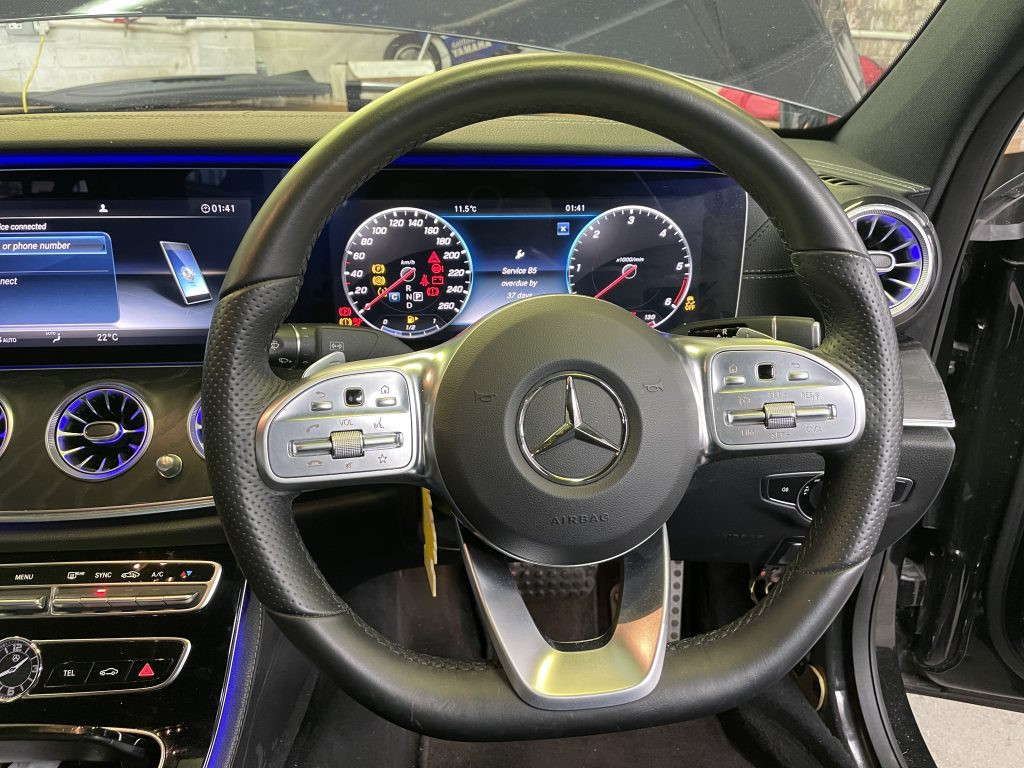
Ambient lighting in a Mercedes-Benz elevates the vehicle’s interior, creating a sophisticated and inviting atmosphere. It’s more than just aesthetics; it enhances the overall driving experience by providing subtle, customizable illumination that reduces eye strain and adds a touch of luxury. Many Mercedes models come with ambient lighting as a standard or optional feature. However, older models or base trims may lack this feature, prompting owners to seek retrofit solutions.
1.1. What is Retrofit Ambient Lighting?
Retrofitting ambient lighting involves adding an aftermarket lighting system to a vehicle that didn’t originally come with it. This typically includes installing LED strips, modules, and wiring to integrate the new lighting with the car’s existing electrical system.
1.2. Why Choose Retrofit Ambient Lighting?
- Enhanced Aesthetics: Transform your car’s interior with customizable colors and brightness levels.
- Increased Comfort: Reduce eye strain during nighttime driving with soft, ambient light.
- Personalization: Tailor the lighting to match your mood or preferences.
- Added Value: Enhance the resale value of your vehicle with a sought-after feature.
1.3. Market Demand and Trends
The demand for retrofit ambient lighting is growing as more car owners seek to personalize their vehicles. According to a report by Grand View Research, the global automotive lighting market is expected to reach $38.67 billion by 2028, driven by the increasing adoption of LED lighting and the desire for enhanced vehicle aesthetics.
2. Essential Tools and Equipment for a Successful Retrofit
Before starting the retrofit, gather all the necessary tools and equipment to ensure a smooth and efficient installation. CARDIAGTECH.NET offers a wide range of high-quality tools specifically designed for automotive modifications.
2.1. Basic Hand Tools
- Screwdriver Set: Phillips head and flat head screwdrivers in various sizes.
- Socket Set: Metric socket set with extensions and ratchets.
- Pliers: Needle-nose pliers, wire strippers, and wire crimpers.
- Trim Removal Tools: Plastic trim removal tools to avoid damaging interior panels.
2.2. Electrical Tools
- Multimeter: To test voltage and continuity.
- Wiring Kit: Including wires, connectors, and fuses.
- Soldering Iron: For making secure electrical connections (optional).
- Heat Shrink Tubing: To insulate and protect wiring connections.
2.3. Lighting Components
- LED Strips: High-quality LED strips with adhesive backing.
- Control Module: To manage the lighting colors, brightness, and modes.
- Wiring Harness: Pre-made wiring harness for easy installation (if available).
2.4. Safety Gear
- Gloves: To protect your hands.
- Safety Glasses: To protect your eyes.
2.5. Recommended Tools from CARDIAGTECH.NET
- Professional Trim Removal Kit: A comprehensive set of durable trim removal tools.
- Automotive Multimeter: A reliable multimeter for accurate electrical testing.
- LED Ambient Lighting Kit: A complete kit with high-quality LED strips and a control module.
3. Step-by-Step Guide to Retrofitting Ambient Lighting in Your Mercedes
This section provides a detailed guide to retrofitting ambient lighting in your Mercedes. While the exact steps may vary slightly depending on the model, the general process remains the same. Always refer to your vehicle’s service manual for specific instructions and safety precautions.
3.1. Preparation
-
Disconnect the Battery: Disconnect the negative terminal of the battery to prevent electrical shorts.
-
Gather Information: Collect your tools and lighting components
-
Plan the Layout: Determine where you want to install the LED strips. Common locations include:
- Dashboard
- Door panels
- Footwells
- Center console
- Seats
-
Clean the Surfaces: Clean the surfaces where you will be attaching the LED strips to ensure proper adhesion.
3.2. Removing Interior Panels
- Dashboard Panels: Use trim removal tools to carefully remove the dashboard panels. Start by gently prying the edges and work your way around the panel.
- Door Panels: Remove the screws holding the door panel in place. Use a trim removal tool to detach the panel from the door frame. Disconnect any electrical connectors attached to the panel.
- Center Console: Remove the gear shift knob and any surrounding trim. Unscrew the bolts holding the center console in place and carefully lift it out.
- Footwell Panels: These panels are usually held in place by clips or screws. Use a trim removal tool or screwdriver to remove them.
3.3. Installing the LED Strips
- Cut the LED Strips: Measure and cut the LED strips to the desired length. Be sure to cut at the designated cutting points to avoid damaging the strip.
- Attach the LED Strips: Peel off the adhesive backing and carefully attach the LED strips to the prepared surfaces. Ensure the strips are securely attached and the wires are properly routed.
- Route the Wires: Route the wires from the LED strips to the control module. Use wire clips or zip ties to secure the wires and keep them out of the way.
3.4. Connecting the Control Module
- Find a Suitable Location: Choose a location for the control module that is easily accessible and protected from the elements. Common locations include under the dashboard or in the glove compartment.
- Connect the Wires: Connect the wires from the LED strips to the control module. Follow the wiring diagram provided with the control module.
- Connect to Power: Connect the control module to a power source. You can tap into an existing circuit or run a new wire directly to the battery. Be sure to install a fuse to protect the circuit.
3.5. Testing and Adjustments
- Reconnect the Battery: Reconnect the negative terminal of the battery.
- Test the Lighting: Turn on the ignition and test the ambient lighting. Use the control module to adjust the colors, brightness, and modes.
- Make Adjustments: If any of the LED strips are not working, check the wiring connections and the power source. Adjust the position of the LED strips to achieve the desired lighting effect.
3.6. Reassembling the Interior
- Reinstall the Panels: Reinstall the interior panels in the reverse order of removal. Ensure all panels are securely attached and all electrical connectors are properly connected.
- Final Check: Perform a final check to ensure all components are working properly and the interior is clean and tidy.
3.7. Pro Tips for a Seamless Installation
- Take Your Time: Rushing the installation can lead to mistakes and damage to your vehicle.
- Double-Check Connections: Ensure all wiring connections are secure and properly insulated.
- Use High-Quality Components: Invest in high-quality LED strips and a control module for long-lasting performance.
- Consult a Professional: If you are not comfortable performing the installation yourself, consult a professional installer.
4. Choosing the Right LED Ambient Lighting Kit
Selecting the right LED ambient lighting kit is crucial for achieving the desired look and performance. Consider the following factors when making your decision. CARDIAGTECH.NET offers expert advice and a curated selection of high-quality kits to meet your specific needs.
4.1. LED Quality and Brightness
- LED Type: Opt for high-quality LEDs such as SMD (Surface Mount Device) LEDs for their brightness, efficiency, and longevity.
- Brightness Level: Consider the brightness level of the LEDs. Some kits offer adjustable brightness settings, allowing you to customize the lighting to your preferences.
- Color Options: Choose a kit that offers a wide range of color options to match your mood or the vehicle’s interior.
4.2. Control Module Features
- Remote Control: A remote control allows you to easily adjust the colors, brightness, and modes from the driver’s seat.
- App Control: Some kits offer app control via Bluetooth, providing advanced customization options and features.
- Sound Activation: Sound-activated lighting can synchronize the lights with the music playing in your car.
4.3. Kit Completeness and Compatibility
- Wiring Harness: A complete wiring harness simplifies the installation process and ensures compatibility with your vehicle.
- Installation Accessories: Look for kits that include all the necessary installation accessories, such as wire clips, connectors, and adhesive pads.
- Vehicle Compatibility: Ensure the kit is compatible with your specific Mercedes model and year.
4.4. Top LED Ambient Lighting Kits Available
| Kit Name | Features | Price |
|---|---|---|
| CARDIAGTECH Premium Kit | High-quality LEDs, remote control, multiple color options, complete wiring harness | $199.99 |
| GlowShift Universal Kit | Sound activation, adjustable brightness, easy installation, compatible with most vehicles | $149.99 |
| OPT7 Aura Pro Kit | App control, advanced customization options, dynamic color modes, waterproof design | $249.99 |
| XKGlow LED Kit | Bluetooth control, music sync, zone control, customizable scenes | $299.99 |
| MICTUNING LED Kit | Simple design, multiple colors, wireless remote, easy to install | $99.99 |
4.5. Expert Recommendations from CARDIAGTECH.NET
CARDIAGTECH.NET recommends the CARDIAGTECH Premium Kit for its superior quality, comprehensive features, and ease of installation. This kit includes everything you need to transform your Mercedes interior and create a luxurious driving experience.
5. Addressing Common Challenges and Troubleshooting Tips
Retrofitting ambient lighting can present some challenges. Here are some common issues and troubleshooting tips to help you overcome them.
5.1. LED Strips Not Lighting Up
- Check Power Connections: Ensure the control module is properly connected to a power source and the fuse is intact.
- Verify Wiring Connections: Double-check all wiring connections between the LED strips and the control module.
- Test LED Strips: Use a multimeter to test the LED strips for continuity. Replace any damaged strips.
5.2. Flickering or Inconsistent Lighting
- Loose Connections: Check for loose wiring connections and tighten them as needed.
- Voltage Drop: Ensure the power source is providing sufficient voltage to the LED strips. Use a voltage regulator to stabilize the voltage if necessary.
- Faulty Control Module: A faulty control module can cause flickering or inconsistent lighting. Replace the control module if necessary.
5.3. Control Module Not Responding
- Check Power Supply: Ensure the control module is receiving power.
- Verify Remote Control Batteries: Replace the batteries in the remote control.
- Reset the Control Module: Some control modules have a reset button. Press the reset button to restore the module to its default settings.
5.4. LED Strips Peeling Off
- Clean the Surface: Ensure the surface is clean and free of dirt and grease before attaching the LED strips.
- Use Adhesive Promoter: Apply an adhesive promoter to the surface to improve adhesion.
- Use Additional Adhesive: Use double-sided tape or adhesive glue to reinforce the attachment.
5.5. Seeking Professional Assistance
If you encounter persistent issues or are not comfortable troubleshooting the problem yourself, consult a professional installer. CARDIAGTECH.NET can connect you with qualified professionals in your area.
6. Customization Options and Creative Ideas
One of the biggest advantages of retrofit ambient lighting is the ability to customize the lighting to your personal preferences. Here are some creative ideas to inspire you.
6.1. Color Themes and Presets
- Match the Exterior: Choose colors that complement the exterior of your vehicle.
- Create a Mood: Use warm colors like red and orange to create a cozy atmosphere, or cool colors like blue and green to create a relaxing ambiance.
- Save Presets: Save your favorite color combinations as presets for easy access.
6.2. Dynamic Lighting Effects
- Breathing Effect: Create a subtle, pulsing effect by gradually increasing and decreasing the brightness of the lights.
- Color Cycling: Cycle through a range of colors automatically.
- Music Sync: Synchronize the lights with the music playing in your car for a dynamic and immersive experience.
6.3. Zone Control and Accent Lighting
- Independent Zone Control: Divide the interior into zones and control the lighting in each zone independently.
- Accent Lighting: Highlight specific areas of the interior, such as the dashboard, door panels, or footwells.
- Logo Projection: Project the Mercedes logo onto the ground when the doors are opened.
6.4. Integrating with Other Vehicle Systems
- Connect to Headlights: Program the ambient lighting to turn on automatically when the headlights are activated.
- Connect to Turn Signals: Program the ambient lighting to flash in sync with the turn signals.
- Connect to Brake Lights: Program the ambient lighting to turn red when the brakes are applied.
6.5. Showcase of Unique Retrofit Projects
- Custom-Built Light Bars: Install custom-built light bars under the seats or along the dashboard for a unique look.
- Fiber Optic Lighting: Use fiber optic cables to create intricate patterns and designs.
- Starlight Headliner: Create a starlight effect on the headliner using hundreds of tiny LED lights.
7. Maintaining and Caring for Your Ambient Lighting System
Proper maintenance is essential for ensuring the longevity and performance of your ambient lighting system. Follow these tips to keep your lights shining bright.
7.1. Regular Cleaning
- Dusting: Regularly dust the LED strips and control module to prevent buildup.
- Wiping: Use a damp cloth to wipe the LED strips and control module. Avoid using harsh chemicals or abrasive cleaners.
- Detailing: Use a soft brush to clean hard-to-reach areas.
7.2. Checking Wiring Connections
- Inspect Regularly: Regularly inspect the wiring connections for looseness or corrosion.
- Tighten Connections: Tighten any loose connections.
- Replace Corroded Wires: Replace any corroded wires or connectors.
7.3. Protecting from Extreme Temperatures
- Avoid Direct Sunlight: Park your car in the shade to avoid exposing the LED strips to direct sunlight.
- Use Window Tint: Use window tint to reduce the amount of heat entering the car.
- Ventilate the Interior: Ventilate the interior of the car to prevent heat buildup.
7.4. Preventing Water Damage
- Seal Any Openings: Seal any openings in the interior to prevent water from entering.
- Use Waterproof LED Strips: Use waterproof LED strips in areas that are exposed to moisture.
- Dry Wet Areas: Dry any wet areas immediately to prevent corrosion.
7.5. Upgrading and Replacing Components
- Upgrade to Newer LEDs: Upgrade to newer, more efficient LEDs as they become available.
- Replace Faulty Components: Replace any faulty components immediately to prevent further damage.
- Consider a New Control Module: Consider upgrading to a new control module with more features and customization options.
8. Legal and Safety Considerations
Before retrofitting ambient lighting in your Mercedes, it’s important to consider the legal and safety implications.
8.1. Local Laws and Regulations
- Check Local Laws: Check your local laws and regulations regarding vehicle lighting.
- Comply with Regulations: Ensure your ambient lighting system complies with all applicable regulations.
- Avoid Distracting Colors: Avoid using colors that could be distracting to other drivers, such as red or blue.
8.2. Electrical Safety
- Disconnect the Battery: Always disconnect the battery before working on the electrical system.
- Use Proper Wiring Techniques: Use proper wiring techniques to avoid electrical shorts and fires.
- Install Fuses: Install fuses to protect the circuits.
8.3. Warranty Implications
- Check Warranty: Check your vehicle’s warranty to see if retrofitting ambient lighting will void the warranty.
- Use Approved Components: Use components that are approved by the manufacturer to minimize the risk of voiding the warranty.
- Consult a Professional: Consult a professional installer to ensure the installation is done properly and does not void the warranty.
8.4. Insurance Considerations
- Notify Your Insurer: Notify your insurer about the modification to ensure you are properly covered.
- Check Policy: Check your insurance policy to see if the modification will affect your premiums.
- Keep Records: Keep records of all modifications and installations.
8.5. Expert Advice on Compliance
CARDIAGTECH.NET provides expert advice on compliance and safety. Contact us to ensure your retrofit ambient lighting system meets all legal and safety requirements.
9. Why Choose CARDIAGTECH.NET for Your Automotive Needs
CARDIAGTECH.NET is your trusted partner for all your automotive needs. We offer a wide range of high-quality products, expert advice, and exceptional customer service.
9.1. Wide Selection of Automotive Tools and Equipment
- Comprehensive Inventory: We offer a comprehensive inventory of automotive tools and equipment, including everything you need for retrofitting ambient lighting.
- High-Quality Products: We only offer high-quality products from trusted brands.
- Competitive Prices: We offer competitive prices to ensure you get the best value for your money.
9.2. Expert Advice and Support
- Knowledgeable Staff: Our knowledgeable staff can provide expert advice and support to help you choose the right products and complete your project successfully.
- Installation Guides: We provide detailed installation guides and videos to help you with the installation process.
- Technical Support: We offer technical support to help you troubleshoot any issues you may encounter.
9.3. Exceptional Customer Service
- Fast Shipping: We offer fast shipping to ensure you receive your order quickly.
- Easy Returns: We offer easy returns if you are not satisfied with your purchase.
- Customer Satisfaction Guarantee: We are committed to customer satisfaction and will do everything we can to ensure you are happy with your purchase.
9.4. Testimonials and Success Stories
- Satisfied Customers: Our customers rave about the quality of our products and the exceptional service they receive.
- Success Stories: We have helped countless customers successfully retrofit ambient lighting in their vehicles.
- Join Our Community: Join our community of automotive enthusiasts and share your success stories.
9.5. Call to Action: Contact CARDIAGTECH.NET Today
Ready to transform your Mercedes interior with retrofit ambient lighting? Contact CARDIAGTECH.NET today to learn more about our products and services. Our team is ready to assist you in finding the perfect tools and equipment to make your project a success.
Don’t let physical demands, constant exposure to harsh substances, or the pressure of deadlines hold you back. CARDIAGTECH.NET is here to provide solutions that enhance your efficiency, precision, and safety.
Contact us today for expert advice and support:
- Address: 276 Reock St, City of Orange, NJ 07050, United States
- WhatsApp: +1 (641) 206-8880
- Website: CARDIAGTECH.NET
10. Frequently Asked Questions (FAQs)
10.1. What is retrofit ambient lighting?
Retrofit ambient lighting is the process of adding aftermarket lighting to a vehicle that did not originally come with it. This typically involves installing LED strips, modules, and wiring to integrate the new lighting with the car’s existing electrical system.
10.2. What are the benefits of retrofit ambient lighting?
The benefits include enhanced aesthetics, increased comfort, personalization, and added value to your vehicle.
10.3. Is it difficult to install retrofit ambient lighting?
The difficulty of installation depends on your experience and the complexity of the kit. Some kits are designed for easy installation, while others may require professional assistance.
10.4. Can I install retrofit ambient lighting myself?
Yes, if you have experience working with automotive electrical systems and are comfortable following detailed instructions.
10.5. What tools do I need to install retrofit ambient lighting?
You will need basic hand tools, electrical tools, lighting components, and safety gear.
10.6. How much does it cost to retrofit ambient lighting?
The cost varies depending on the kit you choose and whether you hire a professional installer. Kits can range from $100 to $300, and professional installation can cost an additional $200 to $500.
10.7. Will retrofit ambient lighting void my car’s warranty?
It depends on your vehicle’s warranty and the components you use. Using approved components and consulting a professional installer can minimize the risk of voiding the warranty.
10.8. Is retrofit ambient lighting legal?
Yes, as long as it complies with local laws and regulations regarding vehicle lighting.
10.9. How do I maintain my retrofit ambient lighting system?
Regularly clean the LED strips and control module, check wiring connections, and protect from extreme temperatures and water damage.
10.10. Where can I buy retrofit ambient lighting kits and tools?
You can purchase retrofit ambient lighting kits and tools from CARDIAGTECH.NET, your trusted partner for all your automotive needs.
This comprehensive guide provides everything you need to know about retrofitting ambient lighting in your Mercedes. With the right tools, knowledge, and support from CARDIAGTECH.NET, you can transform your car’s interior and create a luxurious driving experience.