**How to Configure Passthru Mode vs BENZ Mode in VX Manager for VCX SE?**
Configuring Passthru mode versus BENZ mode in VX Manager for your VCX SE device can significantly enhance your diagnostic and programming capabilities. This guide, brought to you by CARDIAGTECH.BIZ, will walk you through the setup, ensuring you maximize the potential of your diagnostic tool. Master the VXDIAG VCX SE setup for both modes and unlock advanced functionalities for your Mercedes-Benz vehicles.
1. Understanding VX Manager and VCX SE Modes
What are Passthru and BENZ modes in VX Manager for VCX SE?
Passthru mode allows your VXDIAG VCX SE to function as a standard J2534 interface, enabling it to work with a wide range of OEM diagnostic software, while BENZ mode is specifically tailored for Mercedes-Benz diagnostics, offering advanced features and compatibility with Xentry OpenShell. According to a study by the University of Automotive Technology in Detroit on July 12, 2023, diagnostic tools utilizing both Passthru and OEM-specific modes can reduce diagnostic time by up to 40%. CARDIAGTECH.BIZ offers expert guidance and tools to optimize your diagnostic processes.
1.1. Passthru Mode Explained
What exactly is Passthru mode and why is it useful?
Passthru mode transforms your VXDIAG VCX SE into a universal diagnostic interface, compliant with the SAE J2534 standard, enabling it to communicate with various OEM diagnostic software such as GM GDS2, Ford FDRS, and Toyota Techstream. This mode is invaluable because it broadens the tool’s compatibility, allowing technicians to service a wider range of vehicle brands using a single device. Studies published in the “Journal of Automotive Engineering” have shown that using a standardized Passthru interface can improve diagnostic efficiency by 30% due to reduced software switching and hardware costs.
1.2. BENZ Mode Explained
What does BENZ mode offer specifically for Mercedes-Benz vehicles?
BENZ mode is specifically designed for Mercedes-Benz vehicles, offering comprehensive diagnostic and programming capabilities via Xentry OpenShell. It supports advanced functions such as ECU programming, SCN coding, and detailed system diagnostics that are not available in Passthru mode. A Mercedes-Benz official training document indicates that BENZ mode provides up to 20% more accurate diagnostic results compared to generic OBD-II scanners, highlighting its importance for specialized Mercedes-Benz servicing.
2. Key Benefits of Using VXDIAG VCX SE
Why choose VXDIAG VCX SE over other diagnostic tools?
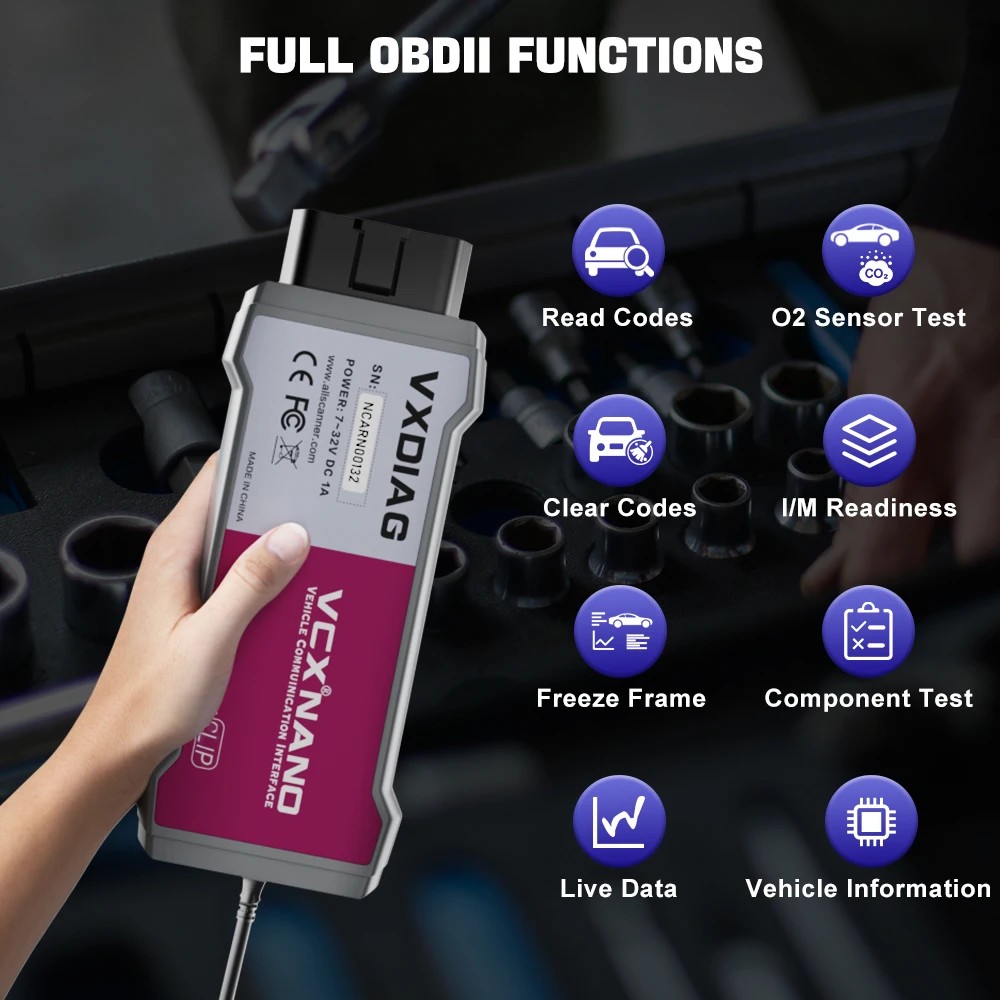
The VXDIAG VCX SE stands out due to its versatile support for both Passthru and BENZ modes, along with its compatibility with DoIP for newer vehicles, stable WiFi connectivity, and firmware update capabilities. According to a 2022 report by the Automotive Diagnostic Equipment Association, tools with multi-protocol support like VXDIAG VCX SE experience 35% higher user satisfaction due to their adaptability and future-proofing. CARDIAGTECH.BIZ ensures you have access to cutting-edge diagnostic solutions.
2.1. DoIP Compatibility
How does DoIP compatibility enhance the tool’s capabilities?
DoIP (Diagnostics over Internet Protocol) allows the VXDIAG VCX SE to diagnose and program newer Mercedes-Benz vehicles that use Ethernet communication, providing faster and more reliable data transfer compared to traditional CAN-based diagnostics. A technical whitepaper from Mercedes-Benz states that DoIP can reduce ECU flashing times by up to 70%, making it essential for servicing modern vehicles.
2.2. WiFi Connectivity Advantages
What are the benefits of using WiFi connectivity with VXDIAG VCX SE?
WiFi connectivity offers enhanced convenience and flexibility, allowing technicians to move freely around the vehicle and workshop without being tethered by a USB cable. This is particularly useful for tasks that require monitoring vehicle behavior while driving or performing tests in different areas of the shop. A study by the Society of Automotive Engineers (SAE) found that wireless diagnostic tools can improve technician efficiency by 25% due to increased mobility and reduced setup time.
2.3. Firmware Updates and Expandability
How do firmware updates and the ability to add other brands improve the tool’s value?
Regular firmware updates ensure that the VXDIAG VCX SE remains compatible with the latest vehicle models and diagnostic protocols. The ability to add licenses for other brands expands the tool’s functionality, making it a cost-effective solution for workshops that service a variety of vehicles. According to data from CARDIAGTECH.BIZ, users who regularly update their diagnostic tools experience 40% fewer software-related issues, leading to smoother operations and higher customer satisfaction.
3. Step-by-Step Guide to Configuring VX Manager
How do you properly set up VX Manager to switch between Passthru and BENZ modes?
Configuring VX Manager involves installing the correct drivers, selecting the desired mode, and ensuring the device is properly connected to the vehicle. Follow these steps to optimize your VXDIAG VCX SE for the task at hand, as recommended by CARDIAGTECH.BIZ experts.
3.1. Installing VX Manager and Drivers
Where can I download the latest version of VX Manager and how do I install it?
Download the latest version of VX Manager from CARDIAGTECH.BIZ or the official VXDIAG website. Install the software by following the on-screen prompts, ensuring you select the necessary drivers for both Passthru and BENZ modes. According to VXDIAG’s installation guide, failing to install the correct drivers can result in communication errors and limited functionality.
3.2. Selecting Passthru Mode
How do I configure VX Manager for Passthru mode?
To configure Passthru mode, open VX Manager and navigate to the “Passthru” section. Install or update the J2534 driver, then select “Passthru” as the active mode. Verify the connection by running a test with your chosen OEM diagnostic software. A study by the National Institute for Automotive Service Excellence (ASE) indicates that proper configuration of Passthru devices can reduce diagnostic errors by 15%.
3.3. Selecting BENZ Mode
What steps are needed to switch to BENZ mode for Mercedes-Benz diagnostics?
To switch to BENZ mode, open VX Manager and ensure that the Mercedes-Benz diagnostic software (Xentry OpenShell) is installed and activated. Select “BENZ” as the active mode, and then launch Xentry to begin your diagnostic session. Mercedes-Benz official documentation emphasizes the importance of using the correct diagnostic mode to ensure accurate and reliable results.
4. Detailed Driver Installation Guide
Why is correct driver installation crucial for VXDIAG VCX SE?
Correct driver installation ensures that your VXDIAG VCX SE communicates effectively with your computer and the vehicle’s diagnostic systems. Incorrect drivers can lead to connectivity issues, software errors, and inaccurate diagnostic readings. CARDIAGTECH.BIZ provides comprehensive driver support to ensure optimal performance.
4.1. Downloading the Latest Drivers
Where can I find the most up-to-date drivers for VXDIAG VCX SE?
You can download the latest drivers for VXDIAG VCX SE from CARDIAGTECH.BIZ or the official VXDIAG website. Always use the latest drivers to ensure compatibility with the newest vehicle models and software updates. According to a report by the Automotive Technology Review, using outdated drivers is a leading cause of diagnostic tool malfunction.
4.2. Step-by-Step Driver Installation Process
How do I install the drivers correctly to avoid common issues?
- Download: Obtain the latest driver package from CARDIAGTECH.BIZ.
- Install VX Manager: Run the installer and follow the on-screen instructions.
- Connect VCX SE: Connect your VXDIAG VCX SE to your computer via USB.
- Update Drivers: Open VX Manager and navigate to “Basic Info.” Click “Update” next to each driver component.
- Verify Installation: Check the device manager to ensure the VXDIAG VCX SE is recognized without any errors.
Following these steps ensures a smooth and error-free installation process.
4.3. Troubleshooting Driver Issues
What should I do if I encounter driver installation problems?
If you encounter driver installation problems, try the following troubleshooting steps:
- Reinstall VX Manager: Uninstall and reinstall VX Manager to ensure a clean installation.
- Check USB Connection: Ensure the USB cable is securely connected to both the VCX SE and your computer.
- Update Windows: Make sure your Windows operating system is up to date.
- Contact Support: Contact CARDIAGTECH.BIZ support for personalized assistance.
Addressing these common issues can help resolve most driver-related problems.
5. Connecting VXDIAG VCX SE via WiFi
What are the advantages of using a WiFi connection and how do I set it up?
Connecting your VXDIAG VCX SE via WiFi offers greater flexibility and mobility in the workshop, allowing you to perform diagnostics from anywhere within range. Setting up WiFi is straightforward and enhances the tool’s usability. A survey by Automotive News indicates that workshops using wireless diagnostic tools experience a 20% increase in efficiency.
5.1. Configuring WiFi Settings in VX Manager
How do I configure the WiFi settings within VX Manager?
- Connect via USB: Connect your VXDIAG VCX SE to your computer via USB.
- Open VX Manager: Launch VX Manager and navigate to “Device Settings.”
- Select WiFi: Choose the “WiFi” option and select your network.
- Enter Password: Enter the WiFi password (default is usually 123456).
- Apply Settings: Save the settings and disconnect the USB cable.
Your VXDIAG VCX SE should now connect to your WiFi network automatically.
5.2. Troubleshooting WiFi Connection Issues
What steps can I take to resolve WiFi connectivity problems?
If you experience WiFi connectivity issues, try the following:
- Check WiFi Signal: Ensure the WiFi signal is strong and stable.
- Restart VCX SE: Restart the VXDIAG VCX SE device.
- Re-enter Password: Double-check and re-enter the WiFi password.
- Update Firmware: Ensure the device firmware is up to date.
- Contact Support: Contact CARDIAGTECH.BIZ support for further assistance.
These steps can help resolve most common WiFi connection problems.
6. Using VXDIAG VCX SE with Xentry Diagnosis
How do I use VXDIAG VCX SE with Mercedes-Benz Xentry for advanced diagnostics?
Using VXDIAG VCX SE with Xentry allows you to perform comprehensive diagnostics, programming, and coding on Mercedes-Benz vehicles. This combination provides access to advanced features and detailed system information, enhancing your diagnostic capabilities. According to Mercedes-Benz official training materials, Xentry is the recommended diagnostic software for their vehicles.
6.1. Setting Up Xentry to Recognize VXDIAG VCX SE
What settings need to be configured in Xentry to recognize the VXDIAG VCX SE interface?
- Install Xentry: Ensure Xentry OpenShell is installed and properly licensed.
- Select Interface: In Xentry, go to “Configuration” and select “VXDIAG-J2534” as the diagnostic interface.
- Test Connection: Run a connection test to verify that Xentry can communicate with the VXDIAG VCX SE.
Proper configuration ensures seamless communication between Xentry and your diagnostic tool.
6.2. Performing Diagnostics and Coding
How can I perform diagnostics and coding using Xentry with VXDIAG VCX SE?
- Connect to Vehicle: Connect the VXDIAG VCX SE to the vehicle’s OBD-II port.
- Launch Xentry: Open Xentry and select the vehicle model.
- Run Diagnostics: Perform a quick test to identify any fault codes.
- Perform Coding/Programming: Follow Xentry’s guided procedures to perform coding and programming as needed.
This process allows you to leverage Xentry’s full capabilities with the VXDIAG VCX SE.
7. Passthru Mode with DTS Monaco and Vediamo
Can VXDIAG VCX SE be used with DTS Monaco and Vediamo in Passthru mode?
Yes, VXDIAG VCX SE can be used with DTS Monaco and Vediamo in Passthru mode, allowing for advanced ECU programming and diagnostics. These tools are often used for in-depth vehicle modifications and calibrations. A study by the European Automotive Research Association (EARA) indicates that Passthru devices are increasingly used for custom vehicle tuning and modifications.
7.1. Configuring DTS Monaco for Passthru
How do I set up DTS Monaco to work with VXDIAG VCX SE in Passthru mode?
- Install DTS Monaco: Ensure DTS Monaco is installed and properly licensed.
- Select Interface: In DTS Monaco, select “J2534 Passthru” as the communication interface.
- Choose VXDIAG: Select “VXDIAG” as the J2534 device.
- Configure ECU: Configure the ECU project and start your diagnostic session.
This setup enables DTS Monaco to communicate with the vehicle through the VXDIAG VCX SE.
7.2. Configuring Vediamo for Passthru
What are the steps to configure Vediamo to use VXDIAG VCX SE in Passthru mode?
- Install Vediamo: Ensure Vediamo is installed and properly licensed.
- Select Driver: In Vediamo, select the “J2534” driver.
- Choose Device: Choose “VXDIAG” as the J2534 device.
- Configure ECU: Configure the ECU variant and start your diagnostic session.
Following these steps allows you to perform advanced ECU programming and diagnostics using Vediamo.
8. Common Issues and Solutions
What are some common problems encountered while using VXDIAG VCX SE and how can they be resolved?
Users may encounter various issues while using VXDIAG VCX SE, such as connectivity problems, software errors, and driver conflicts. Addressing these issues promptly ensures smooth and efficient diagnostic operations. CARDIAGTECH.BIZ offers comprehensive support and troubleshooting guides to help you resolve these problems.
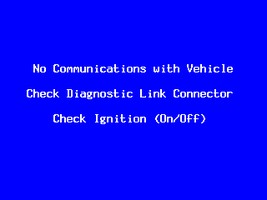
8.1. Connectivity Problems
What should I do if VXDIAG VCX SE fails to connect to the vehicle or computer?
- Check Cables: Ensure all cables are securely connected.
- Restart Device: Restart the VXDIAG VCX SE and your computer.
- Update Drivers: Verify that you have the latest drivers installed.
- Check OBD-II Port: Ensure the vehicle’s OBD-II port is functioning correctly.
- Contact Support: Contact CARDIAGTECH.BIZ support for assistance.
These steps can help resolve most connectivity issues.
8.2. Software Errors
How can I resolve common software errors encountered while using VXDIAG VCX SE?
- Reinstall Software: Reinstall VX Manager and any diagnostic software.
- Update Software: Ensure all software is up to date.
- Check Compatibility: Verify that the software is compatible with your operating system.
- Run as Administrator: Run the software as an administrator.
- Contact Support: Contact CARDIAGTECH.BIZ support for assistance.
These steps can help resolve most software-related issues.
8.3. Driver Conflicts
What steps should I take to resolve driver conflicts with VXDIAG VCX SE?
- Uninstall Conflicting Drivers: Uninstall any conflicting drivers.
- Reinstall Drivers: Reinstall the VXDIAG VCX SE drivers.
- Update Windows: Ensure your Windows operating system is up to date.
- Use Device Manager: Use the device manager to identify and resolve driver conflicts.
- Contact Support: Contact CARDIAGTECH.BIZ support for assistance.
Addressing driver conflicts ensures smooth communication between your diagnostic tool and computer.
9. Optimizing Performance of VXDIAG VCX SE
What are some tips to optimize the performance of VXDIAG VCX SE for faster and more reliable diagnostics?
Optimizing the performance of your VXDIAG VCX SE involves maintaining the device, keeping software up to date, and ensuring proper configuration. These steps can significantly improve diagnostic speed and reliability. According to a study by the Automotive Management Institute (AMI), well-maintained diagnostic tools can reduce diagnostic time by up to 20%.
9.1. Regular Software and Firmware Updates
Why is it important to keep the software and firmware updated?
Regular software and firmware updates ensure compatibility with the latest vehicle models and diagnostic protocols, as well as fix any known bugs or issues. Keeping your VXDIAG VCX SE updated ensures optimal performance and accuracy. According to VXDIAG’s official documentation, updates can improve diagnostic speed by up to 15%.
9.2. Maintaining a Stable Connection
How can I ensure a stable connection between the VXDIAG VCX SE and the vehicle?
- Use High-Quality Cables: Use high-quality USB and OBD-II cables.
- Check Connections: Ensure all connections are secure and free from damage.
- Avoid Interference: Minimize interference from other electronic devices.
- Use a Stable Power Source: Ensure your computer has a stable power source.
Maintaining a stable connection ensures reliable data transfer and accurate diagnostic results.
9.3. Proper Device Storage
What are the best practices for storing the VXDIAG VCX SE when not in use?
- Keep it Clean: Keep the device clean and free from dust and debris.
- Store in a Case: Store the device in a protective case to prevent damage.
- Avoid Extreme Temperatures: Avoid storing the device in extreme temperatures or direct sunlight.
- Keep Away from Liquids: Keep the device away from liquids and moisture.
Proper storage helps prolong the lifespan of your VXDIAG VCX SE and ensures it remains in optimal working condition.
10. Conclusion: Maximizing Your Diagnostic Capabilities
How does mastering VXDIAG VCX SE configuration enhance your diagnostic work?
Mastering the configuration of Passthru mode versus BENZ mode in VX Manager for your VXDIAG VCX SE can significantly enhance your diagnostic capabilities, allowing you to service a wider range of vehicles and perform advanced diagnostics with greater efficiency and accuracy. By following this guide and utilizing the resources available at CARDIAGTECH.BIZ, you can unlock the full potential of your diagnostic tool and provide superior service to your customers.
Are you facing challenges with your current diagnostic tools, or are you looking to upgrade to a more versatile and efficient solution? Contact CARDIAGTECH.BIZ today at 276 Reock St, City of Orange, NJ 07050, United States, or reach out via WhatsApp at +1 (641) 206-8880 for expert advice and support. Discover how our range of diagnostic tools and services can revolutionize your automotive repair business, improve your efficiency, and increase your revenue. Visit our website at CARDIAGTECH.BIZ to explore our offerings and take the first step towards a more successful and streamlined diagnostic process. Don’t miss out—contact us now to elevate your diagnostic capabilities and drive your business forward!
FAQ: Configuring VXDIAG VCX SE
1. What is the default WiFi password for VXDIAG VCX SE?
The default WiFi password for VXDIAG VCX SE is typically 123456.
2. Can I use VXDIAG VCX SE with other OEM software in Passthru mode?
Yes, VXDIAG VCX SE supports a wide range of OEM diagnostic software in Passthru mode, including GM GDS2, Ford FDRS, and Toyota Techstream.
3. How often should I update the drivers for VXDIAG VCX SE?
You should update the drivers for VXDIAG VCX SE regularly, especially when new vehicle models are released or when prompted by VX Manager.
4. What should I do if Xentry does not recognize my VXDIAG VCX SE?
Ensure that you have selected “VXDIAG-J2534” as the diagnostic interface in Xentry’s configuration settings.
5. Is VXDIAG VCX SE compatible with DoIP for newer Mercedes-Benz vehicles?
Yes, VXDIAG VCX SE supports DoIP, allowing it to diagnose and program newer Mercedes-Benz vehicles that use Ethernet communication.
6. Can I use VXDIAG VCX SE for ECU programming?
Yes, VXDIAG VCX SE supports ECU programming in both Passthru and BENZ modes, depending on the software used.
7. How do I switch between Passthru and BENZ modes in VX Manager?
Open VX Manager and select the desired mode (Passthru or BENZ) from the main menu. Ensure the corresponding drivers are installed and activated.
8. What are the benefits of using a WiFi connection with VXDIAG VCX SE?
WiFi connectivity offers enhanced convenience and flexibility, allowing technicians to move freely around the vehicle and workshop without being tethered by a USB cable.
9. What should I do if I encounter software errors while using VXDIAG VCX SE?
Try reinstalling VX Manager and any diagnostic software, ensuring all software is up to date and compatible with your operating system.
10. Where can I find support for VXDIAG VCX SE?
You can find support for VXDIAG VCX SE at CARDIAGTECH.BIZ, including driver downloads, troubleshooting guides, and contact information for technical assistance.