What is Xentry Developer Mode? A Comprehensive Guide
What is Xentry Developer Mode? Xentry Developer Mode is an advanced feature within the Mercedes-Benz Xentry diagnostic software that provides users with expanded access to vehicle control units (ECUs) for customization, coding, and advanced diagnostics. It’s a powerful tool that, when used responsibly, can unlock a vehicle’s hidden potential. Let’s dive deep into understanding what this mode entails, who it’s for, and how to use it safely and effectively to get the most out of your Mercedes-Benz diagnostics.
CARDIAGTECH.NET is your trusted partner for advanced automotive diagnostic solutions, and we’re here to guide you through the intricacies of Xentry Developer Mode. Unlock enhanced vehicle customization, advanced diagnostics, and in-depth control unit access today. Explore our range of diagnostic tools and resources to elevate your automotive expertise. With advanced features for vehicle coding and adaptation, Xentry developer mode is a must-have for automotive enthusiasts and professional technicians alike.
1. Understanding Xentry Developer Mode
Xentry Developer Mode, also known as “Engineering Mode” or “Vediamo,” provides an enhanced level of access to a vehicle’s electronic control units (ECUs). This allows advanced users to perform tasks beyond the capabilities of the standard Xentry/DAS (Diagnostic Assistance System) software. According to Mercedes-Benz official documentation, this mode is intended for engineers and developers to test and validate new features and software updates. This advanced feature allows technicians to perform complex procedures such as module programming, variant coding, and enabling or disabling specific vehicle functions. Understanding the capabilities and limitations of Xentry Developer Mode is crucial for anyone looking to utilize its advanced features safely and effectively.
1.1. Key Features and Capabilities
Xentry Developer Mode offers a wide array of features that are not available in the standard Xentry/DAS software. Some of the key capabilities include:
- Variant Coding: This allows modification of the vehicle’s configuration to enable or disable certain features, such as activating the TV/DVD in motion or adjusting seat belt reminders.
- ECU Programming: Enables the reprogramming of control units, which is essential for updating software, replacing modules, or retrofitting new components.
- Advanced Diagnostics: Provides access to unfiltered diagnostic trouble codes (DTCs), including those masked by the standard software, offering a more comprehensive view of the vehicle’s issues.
- Parameter Adjustments: Allows fine-tuning of various parameters within the ECUs to optimize performance or customize vehicle behavior.
- EEPROM Restoration: Aids in restoring damaged EEPROM contents for components like Comand/APS and other ECUs.
1.2. Differences Between Standard Xentry and Developer Mode
The primary difference between standard Xentry and Developer Mode lies in the level of access and control provided to the user. Standard Xentry is designed for routine diagnostics, maintenance, and basic repairs, with a user-friendly interface and guided procedures. In contrast, Developer Mode offers unrestricted access to the vehicle’s ECUs, allowing for advanced customization and programming but requiring a higher level of technical expertise.
Here’s a table summarizing the key differences:
| Feature | Standard Xentry/DAS | Xentry Developer Mode |
|---|---|---|
| Target User | Dealership technicians, general mechanics | Automotive engineers, experienced technicians, advanced DIY enthusiasts |
| Access Level | Limited, guided procedures | Unrestricted access to ECUs |
| Functionality | Routine diagnostics, maintenance, basic repairs | Variant coding, ECU programming, advanced diagnostics, parameter adjustments, EEPROM restoration |
| User Interface | User-friendly, menu-driven | Complex, requires in-depth knowledge of vehicle systems |
| Risk of Damage | Low, safety checks in place | High, potential for irreversible damage to vehicle components if used incorrectly |
| Legal Restrictions | Compliant with legal obligations | May violate local highway laws if modifications affect safety-critical systems (e.g., airbags, braking systems) |
| Software Updates | Automatic, through Mercedes-Benz servers | Manual, requires specific software versions and potentially custom configurations |
| SCN Coding | Required for certain functions | Often bypasses SCN coding requirements, allowing for more flexibility but also increasing the risk of improper configuration |
| Error Code Display | Filtered, shows common error codes | Unfiltered, shows all stored trouble codes, including masked ones, providing a more comprehensive diagnostic view |
| System Modifications | Limited to approved adaptations | Allows extensive modifications to vehicle systems, enabling customization of features and performance |
| Data Logging | Basic data logging capabilities | Advanced data logging and analysis tools for in-depth system evaluation |
| Security Measures | Robust security protocols | Fewer built-in safety checks, placing greater responsibility on the user to ensure modifications are safe and compliant with legal and safety standards |
1.3. Who Should Use Developer Mode?
Xentry Developer Mode is not intended for novice users or those without a thorough understanding of automotive systems and diagnostic procedures. It is best suited for:
- Experienced Automotive Technicians: Those with extensive knowledge of Mercedes-Benz vehicles and diagnostic tools.
- Automotive Engineers: Professionals involved in research, development, and testing of automotive systems.
- Advanced DIY Enthusiasts: Individuals with a strong technical background and a passion for customizing and optimizing their vehicles.
1.4. Risks and Precautions
Using Xentry Developer Mode involves significant risks, and it is crucial to take necessary precautions to avoid causing damage to the vehicle or compromising its safety. Some of the key risks include:
- Irreversible Damage to Components: Incorrect coding or programming can lead to malfunctions or complete failure of ECUs.
- Safety System Malfunctions: Modifying safety-critical systems like airbags or braking systems can render the vehicle unsafe.
- Legal Violations: Certain modifications, such as disabling emission controls or altering lighting systems, may violate local laws.
- Warranty Voidance: Unauthorized modifications can void the vehicle’s warranty.
To mitigate these risks, it is essential to:
- Obtain Proper Training: Undergo comprehensive training on Xentry Developer Mode and Mercedes-Benz vehicle systems.
- Use Original or High-Quality Tools: Utilize genuine Mercedes-Benz diagnostic tools or reputable clones like SDconnect C4 to ensure reliable performance. You can find reliable options at CARDIAGTECH.NET, offering high-quality diagnostic tools that meet the rigorous demands of automotive professionals.
- Follow Step-by-Step Instructions: Adhere to detailed, step-by-step guides and procedures to minimize the risk of errors.
- Back Up Data: Always create backups of ECU configurations before making any changes to allow for easy restoration if needed.
- Exercise Caution: Be extremely cautious when modifying safety-related systems and understand the potential consequences of your actions.
2. Necessary Tools and Software
To effectively utilize Xentry Developer Mode, you need the right tools and software. Here’s a comprehensive list:
2.1. Diagnostic Hardware
- Mercedes-Benz Diagnostic Tool: It is always preferable to use an official Mercedes-Benz diagnostic tool such as Super MB Star C3.
- SDconnect C4/C5: High-quality clones like the SDconnect C4 or C5 mux are viable alternatives if an original tool is not accessible. These tools are available at CARDIAGTECH.NET.
- OBD-II Connector: Ensure compatibility with your vehicle’s OBD-II port.
2.2. Diagnostic Software
- Xentry/DAS: You’ll need the Xentry/DAS software suite with a valid license.
- Developer Key: A special developer key is required to unlock Developer Mode within Xentry/DAS.
- Windows XP/7/10: A laptop running a compatible Windows operating system is necessary to install and run the diagnostic software. Windows XP is often recommended for older versions of DAS.
2.3. Additional Software and Resources
- WIS/ASRA: The Mercedes-Benz Workshop Information System (WIS) and Arbeitsrichtlinien (ASRA) provide detailed repair instructions, wiring diagrams, and technical information.
- Vediamo: This is a more advanced engineering software that offers even deeper access to vehicle ECUs.
- DTS Monaco: Another powerful diagnostic and engineering tool used for advanced ECU programming and diagnostics.
2.4. Where to Purchase Equipment
For reliable diagnostic tools and software, consider purchasing from reputable suppliers like CARDIAGTECH.NET. They offer a range of diagnostic solutions, including:
- Super MB Star C3: A robust and reliable diagnostic tool for Mercedes-Benz vehicles.
- SDconnect C4/C5: High-quality clones that provide excellent performance and functionality.
- Software Packages: Comprehensive software packages with Xentry/DAS, developer keys, and other essential tools.
Table: Recommended Diagnostic Tools
| Tool | Description | Key Features | Price Range | Vendor Recommendation (CARDIAGTECH.NET) |
|---|---|---|---|---|
| Super MB Star C3 | Original Mercedes-Benz diagnostic tool | Full diagnostic capabilities, reliable performance | $1,500-3,000 | Highly Recommended |
| SDconnect C4 | High-quality clone of Mercedes-Benz diagnostic tool | Cost-effective, supports Xentry/DAS, suitable for advanced diagnostics | $500-1,200 | Recommended |
| SDconnect C5 | Enhanced version of SDconnect C4 with faster processing | Faster diagnostics, improved compatibility with newer models | $700-1,500 | Recommended |
| Xentry/DAS Software | Mercedes-Benz diagnostic software suite | Comprehensive diagnostics, coding, and programming capabilities | Varies | Essential |
| Vediamo | Advanced engineering software for ECU programming and diagnostics | Deep access to ECUs, customization options | Varies | For Advanced Users |
| DTS Monaco | Powerful diagnostic and engineering tool for advanced ECU programming and diagnostics | Advanced diagnostics, ECU flashing, parameter adjustments | Varies | For Advanced Users |
| Developer Key | Special key required to unlock Developer Mode within Xentry/DAS | Enables advanced features and customization options | Varies | Essential for Developer Mode |
| WIS/ASRA | Mercedes-Benz Workshop Information System and Arbeidsrichtlinien | Detailed repair instructions, wiring diagrams, and technical information | Subscription | Highly Recommended |
| OBD-II Connector | Standard connector for interfacing with vehicle’s diagnostic port | Ensures compatibility with vehicle | $10-50 | Essential |
| Laptop | A laptop running a compatible Windows operating system (XP, 7, 10) | Needed to install and run the diagnostic software | Varies | Essential |
| Power Supply | Stabilized power supply unit to maintain consistent voltage during ECU programming | Prevents interruptions during critical operations | $100-300 | Recommended for ECU Programming |
| Multimeter | Digital multimeter for testing electrical circuits and components | Essential for diagnosing electrical issues | $50-200 | Recommended |
| Oscilloscope | Oscilloscope for analyzing electrical signals and waveforms | Useful for diagnosing complex electrical problems | $300-1,000 | For Advanced Diagnostics |
| CAN Bus Analyzer | Tool for monitoring and analyzing CAN bus communication | Essential for diagnosing communication issues between ECUs | $500-2,000 | For Advanced Diagnostics |
| EEPROM Programmer | Tool for reading and writing EEPROM chips | Required for restoring damaged EEPROM contents for components like Comand/APS and other ECUs | $100-500 | For Advanced Users |
| Soldering Station | Soldering station for repairing circuit boards and electronic components | Necessary for component-level repairs | $50-300 | Recommended for Component-Level Repairs |
3. Step-by-Step Guide to Using Developer Mode
Using Xentry Developer Mode requires meticulous attention to detail and a thorough understanding of each step. Here’s a detailed guide:
3.1. Preparing the Vehicle and Diagnostic Environment
- Vehicle Preparation:
- Ensure the vehicle is parked in a well-ventilated area.
- Connect the vehicle to a stable power supply to prevent voltage drops during programming. A stabilized power supply unit is crucial for maintaining consistent voltage during ECU programming. These units, available for $100-300, prevent interruptions during critical operations.
- Turn off all non-essential electrical consumers (e.g., lights, radio, air conditioning).
- Hardware Connection:
- Connect the SDconnect C4/C5 multiplexer to the vehicle’s OBD-II port.
- Connect the multiplexer to your laptop via a network cable or Wi-Fi.
- Software Setup:
- Install Xentry/DAS software on your laptop.
- Activate the software using a valid license.
- Install the developer key to unlock Developer Mode.
3.2. Accessing Developer Mode
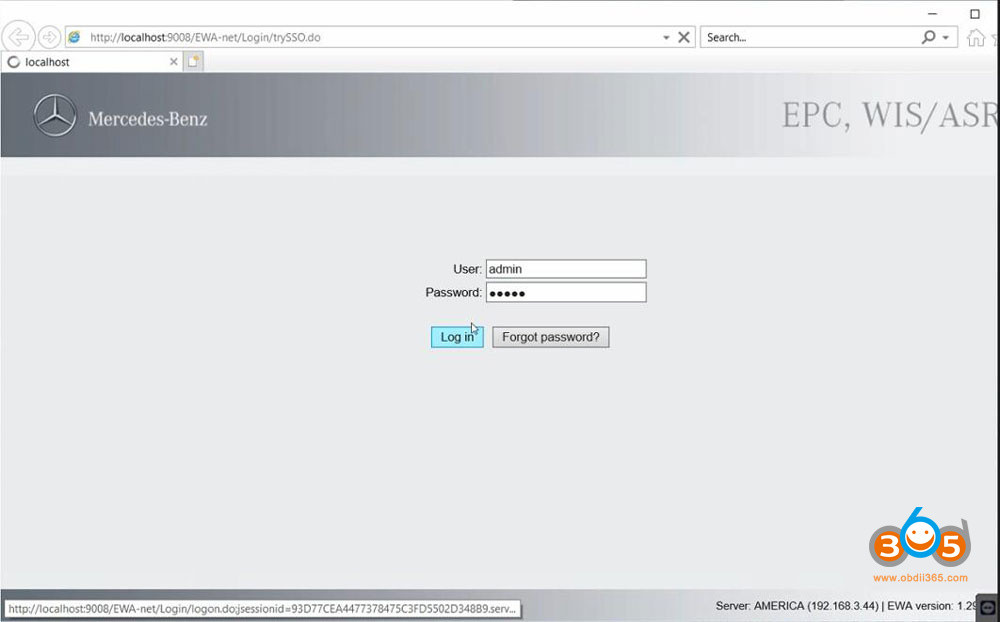
- Launch Xentry/DAS:
- Open the Xentry/DAS software on your laptop.
- Vehicle Selection:
- Select the correct vehicle model and year from the menu.
- Allow the software to automatically identify the vehicle’s VIN.
- Initial Diagnosis:
- Perform a quick test to identify any existing fault codes.
- Clear any non-relevant fault codes before proceeding.
- Entering Developer Mode:
- Navigate to the “Control Units” menu.
- Look for an option like “Development Data,” “Engineering Data,” or “Special Functions.” The exact wording may vary depending on the Xentry/DAS version.
- Select this option to enter Developer Mode. A warning screen will appear, emphasizing the risks involved. Read it carefully and proceed only if you understand the potential consequences.
3.3. Performing Common Tasks in Developer Mode
3.3.1. Variant Coding
Variant coding allows you to modify the vehicle’s configuration to enable or disable certain features. Here’s how:
- Access Variant Coding Menu:
- In Developer Mode, navigate to the control unit you want to modify (e.g., Central Gateway, Instrument Cluster).
- Select “Control Unit Adaptations” or “Variant Coding.”
- Modify Parameters:
- A list of configurable parameters will appear.
- Carefully review each parameter and its current setting.
- Change the desired settings (e.g., enable TV/DVD in motion, adjust seat belt reminders).
- Apply Changes:
- Once you have made the necessary changes, click “Save” or “Apply.”
- The software will prompt you to confirm the changes.
- Confirm the changes and wait for the coding process to complete.
- Verify Changes:
- After coding, cycle the ignition and recheck the modified parameters to ensure they have been applied correctly.
- Test the functionality of the modified feature to confirm it is working as expected.
3.3.2. ECU Programming
ECU programming involves updating or replacing the software in a control unit. This is necessary for software updates, module replacements, or retrofitting new components.
- Access Programming Menu:
- In Developer Mode, navigate to the control unit you want to program.
- Select “Programming” or “Software Update.”
- Select Software File:
- The software will prompt you to select the appropriate software file.
- Ensure you have the correct software file for your vehicle model and control unit.
- Initiate Programming:
- Click “Start” or “Program” to begin the programming process.
- Monitor the progress of the programming process.
- Do not interrupt the programming process, as this can cause irreversible damage to the control unit.
- Verify Programming:
- After programming, the software will prompt you to verify the programming.
- Follow the on-screen instructions to verify the programming.
- Cycle the ignition and recheck the control unit to ensure it is functioning correctly.
3.3.3. Reading and Clearing Diagnostic Trouble Codes (DTCs)
Developer Mode provides access to unfiltered diagnostic trouble codes, including those masked by the standard software.
- Access Fault Code Menu:
- In Developer Mode, navigate to the control unit you want to check.
- Select “Fault Codes” or “Diagnostic Trouble Codes.”
- Read Fault Codes:
- The software will display a list of all stored fault codes.
- Review each fault code and its description.
- Note any relevant fault codes for further diagnosis.
- Clear Fault Codes:
- Select the fault codes you want to clear.
- Click “Clear” or “Erase” to clear the fault codes.
- The software will prompt you to confirm the clearing of fault codes.
- Verify Clearing:
- After clearing, recheck the fault codes to ensure they have been cleared successfully.
- If any fault codes reappear, investigate the underlying issue and address it before proceeding.
3.3.4. Adjusting Parameters
Adjusting parameters involves fine-tuning various settings within the ECUs to optimize performance or customize vehicle behavior.
- Access Parameter Menu:
- In Developer Mode, navigate to the control unit you want to adjust.
- Select “Control Unit Adaptations” or “Parameter Adjustments.”
- Modify Parameters:
- A list of adjustable parameters will appear.
- Carefully review each parameter and its current setting.
- Change the desired settings (e.g., adjust throttle response, modify shift points).
- Apply Changes:
- Once you have made the necessary changes, click “Save” or “Apply.”
- The software will prompt you to confirm the changes.
- Confirm the changes and wait for the adjustment process to complete.
- Verify Changes:
- After adjustment, test the functionality of the modified parameter to confirm it is working as expected.
- Monitor the vehicle’s performance to ensure the adjustments have had the desired effect.
3.4. Best Practices for Safe Usage
To ensure safe usage of Xentry Developer Mode, follow these best practices:
- Always Back Up Data: Before making any changes, create a backup of the ECU configuration. This allows you to restore the original settings if something goes wrong.
- Follow Instructions Carefully: Adhere to detailed, step-by-step guides and procedures to minimize the risk of errors.
- Double-Check Settings: Before applying any changes, double-check the settings to ensure they are correct.
- Monitor Vehicle Performance: After making changes, monitor the vehicle’s performance to ensure the adjustments have had the desired effect and are not causing any issues.
- Seek Expert Advice: If you are unsure about any aspect of using Developer Mode, seek advice from experienced technicians or automotive engineers.
- Stay Informed: Keep up-to-date with the latest information and best practices for using Xentry Developer Mode.
4. Practical Examples of Using Developer Mode
Here are some practical examples of how Xentry Developer Mode can be used to customize and enhance Mercedes-Benz vehicles:
4.1. Enabling TV/DVD in Motion
This modification allows passengers to watch TV or DVDs while the vehicle is in motion. Note that this may be illegal in some jurisdictions.
- Access COMAND System:
- In Developer Mode, navigate to the COMAND system control unit.
- Enter Development Data:
- Select “Development Data” and then “Control Unit Adaptations.”
- Modify Variant Coding:
- Look for parameters related to “Driving Speed” or “TV/DVD in Motion.”
- Enable the option to allow TV/DVD playback at speeds above 0 km/h.
- Apply Changes:
- Save the changes and reset the COMAND system.
- Test Functionality:
- Test the TV/DVD playback while the vehicle is in motion to ensure it is working correctly.
4.2. Adjusting Speed Limiter
This modification allows you to increase or remove the speed limiter on your vehicle. Note that this may void the vehicle’s warranty and may be illegal in some jurisdictions.
- Access Engine Control Unit (ECU):
- In Developer Mode, navigate to the engine control unit (ME-SFI for gasoline engines, CDI for diesel engines).
- Enter Development Data:
- Select “Development Data” and then “Control Unit Adaptations.”
- Modify Speed Limiter Parameter:
- Look for parameters related to “Speed Limiter” or “Vmax.”
- Adjust the value to the desired speed or disable the limiter entirely.
- Apply Changes:
- Save the changes and reset the ECU.
- Test Functionality:
- Test the vehicle’s top speed to ensure the speed limiter has been adjusted as desired.
4.3. Activating Cornering Lights
This modification allows you to enable the fog lamps to function as cornering lights, improving visibility when turning.
- Access SAM Units:
- In Developer Mode, navigate to the Driver Side SAM (Signal Acquisition and Actuation Module) and Passenger Side SAM (if present).
- Enter Development Data:
- Select “Development Data” and then “Control Unit Adaptations.”
- Modify Variant Coding:
- Look for the parameter related to “Cornering Lights” or “Abbiegelicht.”
- Set the value to “ON” or “Ja” (Yes).
- Apply Changes:
- Save the changes and reset the SAM units.
- Recode CGW or EZS:
- Recode the Central Gateway (CGW) or Electronic Ignition Switch (EZS) to recognize the new function.
- Test Functionality:
- Test the cornering lights by turning the steering wheel to ensure they are working correctly.
4.4. Adding Rear Airbags
This modification allows you to add rear airbags to the airbag control module.
- Access Airbag Control Unit:
- In Developer Mode, navigate to the Airbag (AB) control unit.
- Enter Development Data:
- Select “Development Data” and then “Control Unit Adaptations.”
- Modify Variant Coding:
- Look for parameters related to “Airbag Hinten Rechts” (Rear Airbag Right) and “Airbag Hinten Links” (Rear Airbag Left).
- Set the values to “YES.”
- Apply Changes:
- Save the changes and reset the airbag control unit.
- Reset Fault Codes:
- Reset the fault codes, cycle the ignition, and reset the fault codes again.
- Verify Functionality:
- Ensure that the airbag system recognizes the newly added rear airbags.
4.5. Extending SBC Life
This modification allows you to extend the service life of the Sensotronic Brake Control (SBC) unit.
- Access SBC Control Unit:
- In Developer Mode, navigate to the Sensotronic Brake Control (SBC) control unit.
- Enter Development Data:
- Select “Entwickelingsdaten,” then “ansteueringen,” and finally “Gesamstliste aller Ansteuerungen.”
- Check Brake Counter:
- Look for the line that says “Bremsenzahler (DJ_GetBrLive)” to see how many times the brake has been pressed.
- Recalculate and Reset:
- Find and click “Bremsenzahler aktualisieren und Lebensdauerzahler F neu berechenen.”
- Set the parameter “uINBR” to “0” and click “F3.”
- Find and click “Bremsenzahler auf beliebigen Wert setzen (DJ_SetNBr).”
- Set the parameter “uINBR” to “0” and click “F3.”
- Scroll down until you see the lines “Lebensdauerzahler F neu berechenen (DJ_CalcLiveTime)” and “Lebensdauerzahler F neu berechenen und schreiben (DJ_BuildAndWriteF).”
- Set the parameter “uINBR” to “0” and click “F3” for both lines.
- Final Steps:
- Log out of the SBC control unit.
- Log out of the vehicle.
- Let the engine run for at least 10 minutes or drive for at least 10 minutes.
5. Troubleshooting Common Issues
Even with careful preparation, you may encounter issues when using Xentry Developer Mode. Here are some common problems and how to troubleshoot them:
5.1. Software Installation Problems
- Issue: Xentry/DAS software fails to install or activate.
- Solution:
- Ensure your laptop meets the minimum system requirements.
- Verify that you have a valid license and developer key.
- Temporarily disable antivirus software during installation.
- Run the installation program as an administrator.
5.2. Communication Errors
- Issue: The diagnostic tool cannot communicate with the vehicle.
- Solution:
- Check the OBD-II connection to ensure it is secure.
- Verify that the SDconnect C4/C5 multiplexer is properly connected to your laptop.
- Ensure the vehicle’s ignition is switched on.
- Check the diagnostic tool’s settings to ensure it is configured correctly for your vehicle model.
5.3. Coding Errors
- Issue: Coding changes are not applied correctly, or the vehicle malfunctions after coding.
- Solution:
- Double-check the coding parameters to ensure they are correct.
- Verify that you are using the correct software version for your vehicle model.
- Restore the original ECU configuration from your backup.
- Seek advice from experienced technicians or automotive engineers.
5.4. Software Crashes
- Issue: The Xentry/DAS software crashes or freezes during use.
- Solution:
- Close any unnecessary programs running on your laptop.
- Increase the amount of RAM allocated to the Xentry/DAS software.
- Reinstall the Xentry/DAS software.
- Update your laptop’s drivers and operating system.
5.5. Error Messages
- Issue: Receiving error messages during programming or coding processes.
- Solution:
- Carefully read the error message to understand the cause of the problem.
- Check the vehicle’s wiring and connections to ensure they are intact.
- Verify that you are using the correct software files and procedures.
- Consult the Mercedes-Benz Workshop Information System (WIS) for troubleshooting guidance.
6. Benefits of Using CARDIAGTECH.NET for Your Diagnostic Needs
When it comes to advanced automotive diagnostics, having the right tools and support is essential. CARDIAGTECH.NET stands out as a premier provider of diagnostic solutions, offering numerous benefits to automotive technicians, engineers, and enthusiasts. Here’s why you should choose CARDIAGTECH.NET for your diagnostic needs:
6.1. High-Quality Diagnostic Tools
CARDIAGTECH.NET offers a wide range of high-quality diagnostic tools, including Super MB Star C3 and SDconnect C4/C5, ensuring reliable performance and accurate results. These tools are essential for accessing and utilizing Xentry Developer Mode effectively.
6.2. Comprehensive Software Packages
CARDIAGTECH.NET provides comprehensive software packages that include Xentry/DAS, developer keys, and other essential tools. These packages are designed to streamline your diagnostic processes and provide you with everything you need in one place.
6.3. Expert Technical Support
CARDIAGTECH.NET offers expert technical support to assist you with any issues you may encounter while using their products. Their team of experienced technicians can provide guidance and troubleshooting assistance to help you get the most out of your diagnostic tools. For immediate assistance, contact them via WhatsApp at +1 (641) 206-8880.
6.4. Competitive Pricing
CARDIAGTECH.NET offers competitive pricing on their diagnostic tools and software packages, making advanced automotive diagnostics accessible to a wider range of users. This affordability ensures that you can equip yourself with the necessary tools without breaking the bank.
6.5. Reliable and Trustworthy Vendor
CARDIAGTECH.NET is a reliable and trustworthy vendor with a proven track record of providing high-quality products and excellent customer service. You can trust them to provide you with the tools and support you need to succeed in your diagnostic endeavors.
6.6. Convenient Location
Located at 276 Reock St, City of Orange, NJ 07050, United States, CARDIAGTECH.NET is easily accessible for customers in the area. Their physical presence adds to their credibility and provides an opportunity for in-person consultations and support.
7. Staying Updated with the Latest Information
The automotive industry is constantly evolving, with new technologies and software updates being released regularly. To stay updated with the latest information and best practices for using Xentry Developer Mode, consider the following:
- Official Mercedes-Benz Resources: Refer to official Mercedes-Benz documentation, training materials, and technical bulletins for the most accurate and up-to-date information.
- Online Forums and Communities: Participate in online forums and communities dedicated to Mercedes-Benz diagnostics and coding. These communities can provide valuable insights, tips, and troubleshooting advice.
- Industry Events and Conferences: Attend industry events and conferences to learn about the latest trends and technologies in automotive diagnostics.
- Training Courses: Enroll in training courses offered by reputable providers to enhance your knowledge and skills in using Xentry Developer Mode.
- Vendor Resources: Utilize the resources provided by diagnostic tool vendors like CARDIAGTECH.NET, including user manuals, software updates, and technical support.
8. Conclusion: Maximizing Your Vehicle’s Potential with Developer Mode
Xentry Developer Mode is a powerful tool that unlocks the full potential of Mercedes-Benz vehicles, allowing for advanced customization, diagnostics, and programming. By understanding its capabilities, risks, and proper usage techniques, you can harness its power to enhance your vehicle’s performance, functionality, and overall driving experience.
Remember to exercise caution, follow best practices, and stay informed to ensure safe and effective usage. With the right tools, knowledge, and support, you can maximize your vehicle’s potential and achieve the ultimate level of customization and control.
Ready to take your Mercedes-Benz diagnostics to the next level? Contact CARDIAGTECH.NET today at +1 (641) 206-8880 or visit our website at CARDIAGTECH.NET to explore our range of diagnostic tools and solutions. Our expert team is ready to assist you with any questions and help you find the perfect tools for your needs. Don’t wait, unlock the full potential of your Mercedes-Benz with CARDIAGTECH.NET!
SD Connect C4 WiFi Wireless Diagnostic Tool for Cars and Trucks After 2000 Up to 2024 is the latest diagnostic tool for Mercedes-Benz vehicles
9. Frequently Asked Questions (FAQs)
9.1. What is Xentry Developer Mode?
Xentry Developer Mode, also known as Engineering Mode or Vediamo, is an advanced feature within the Mercedes-Benz Xentry diagnostic software that provides users with expanded access to vehicle control units (ECUs) for customization, coding, and advanced diagnostics. This advanced feature allows technicians to perform complex procedures such as module programming, variant coding, and enabling or disabling specific vehicle functions.
9.2. Who Should Use Xentry Developer Mode?
Xentry Developer Mode is intended for experienced automotive technicians, automotive engineers, and advanced DIY enthusiasts with a strong technical background and a passion for customizing and optimizing their vehicles. It is not intended for novice users or those without a thorough understanding of automotive systems and diagnostic procedures.
9.3. What are the Risks of Using Xentry Developer Mode?
Using Xentry Developer Mode involves significant risks, including irreversible damage to components, safety system malfunctions, legal violations, and warranty voidance. It is crucial to take necessary precautions to avoid causing damage to the vehicle or compromising its safety.
9.4. What Tools and Software are Required to Use Xentry Developer Mode?
To effectively utilize Xentry Developer Mode, you need diagnostic hardware such as a Mercedes-Benz diagnostic tool or SDconnect C4/C5, Xentry/DAS software, a developer key, and a laptop running a compatible Windows operating system.
9.5. How Can I Access Xentry Developer Mode?
To access Xentry Developer Mode, launch the Xentry/DAS software, select the correct vehicle model and year, perform an initial diagnosis, and navigate to the “Control Units” menu. Look for an option like “Development Data,” “Engineering Data,” or “Special Functions” to enter Developer Mode.
9.6. What are Some Common Tasks that Can Be Performed in Xentry Developer Mode?
Common tasks that can be performed in Xentry Developer Mode include variant coding, ECU programming, reading and clearing diagnostic trouble codes (DTCs), and adjusting parameters.
9.7. How Can I Ensure Safe Usage of Xentry Developer Mode?
To ensure safe usage of Xentry Developer Mode, always back up data before making any changes, follow instructions carefully, double-check settings, monitor vehicle performance, seek expert advice if needed, and stay informed about the latest information and best practices.
9.8. What are the Benefits of Using CARDIAGTECH.NET for Diagnostic Needs?
CARDIAGTECH.NET offers high-quality diagnostic tools, comprehensive software packages, expert technical support, competitive pricing, and is a reliable and trustworthy vendor with a proven track record of providing excellent customer service.
9.9. How Can I Stay Updated with the Latest Information on Xentry Developer Mode?
To stay updated with the latest information on Xentry Developer Mode, refer to official Mercedes-Benz resources, participate in online forums and communities, attend industry events and conferences, enroll in training courses, and utilize the resources provided by diagnostic tool vendors like CARDIAGTECH.NET.
9.10. Where Can I Purchase Reliable Diagnostic Tools for Xentry Developer Mode?
You can purchase reliable diagnostic tools for Xentry Developer Mode from reputable suppliers like CARDIAGTECH.NET. They offer a range of diagnostic solutions, including Super MB Star C3 and SDconnect C4/C5, to meet your diagnostic needs.